
How to Recover Data from iPhone in DFU Mode: A Handy Guide
Dec 16, 2025 • Filed to: Phone Repair Solutions • Proven solutions
DFU mode is Device Firmware Update mode. It allows the deepest level of access a user can have and allows advanced iPhone repair tasks such as restoring iPhone firmware. Naturally, it comes with its challenges if one does not know what they are doing, the most common being iPhone stuck in DFU mode. If your iPhone is stuck in DFU mode, do not panic! Read below to find out how to fix DFU mode using Dr.Fone - System Repair (iOS), restore deleted files, and recover your data easily!

Part 1: How To Exit DFU Mode
In DFU mode, your device will be completely non-responsive to touch or button presses. You might think your device is bricked as it is non-responsive to both touch and button presses. The telltale sign that your device is in DFU mode is that when you connect it to your Mac or PC, you see this:

Keep reading and find out how to exit DFU mode and recover your data with a specialized data recovery tool such as Dr.Fone – Data Recovery (iOS).
Exit DFU Mode Using Dr.Fone – System Repair (iOS)
Wondershare Dr.Fone is the best way to fix all your smartphone problems, and then some. It is your one-stop solution for nearly everything you might want to do that involves your smartphone.
Here are some of the tools available in Dr.Fone:
- System Repair tool to fix all your software problems.
- Data Eraser tool to securely wipe your phone data.
- Screen Unlock tool to unlock your phone when you don’t remember the passcode or for any other reason.
- Phone Backup tool to easily and selectively backup and restore data.
- Data Recovery tool that allows you to restore data and recover deleted files even in DFU mode.
- and much more!
You can use Dr.Fone – System Repair (iOS) to fix DFU mode, iPhone Recovery Mode, or if your phone is stuck on the Apple logo, etc.
Steps To Exit DFU Mode Using Dr.Fone – System Repair (iOS)
Wondershare has always been about making complex technology accessible and easy to use. Follow these simple steps to exit DFU mode on iPhone using Wondershare Dr.Fone – System Repair (iOS):
Step 1: Select Toolbox Repair in Dr.Fone – System Repair (iOS).

Step 2: Click Exit DFU Mode.
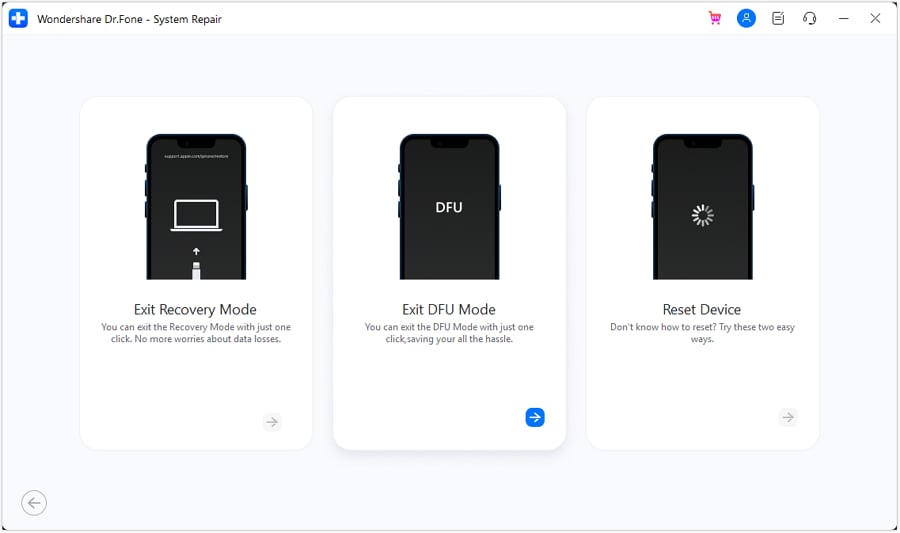
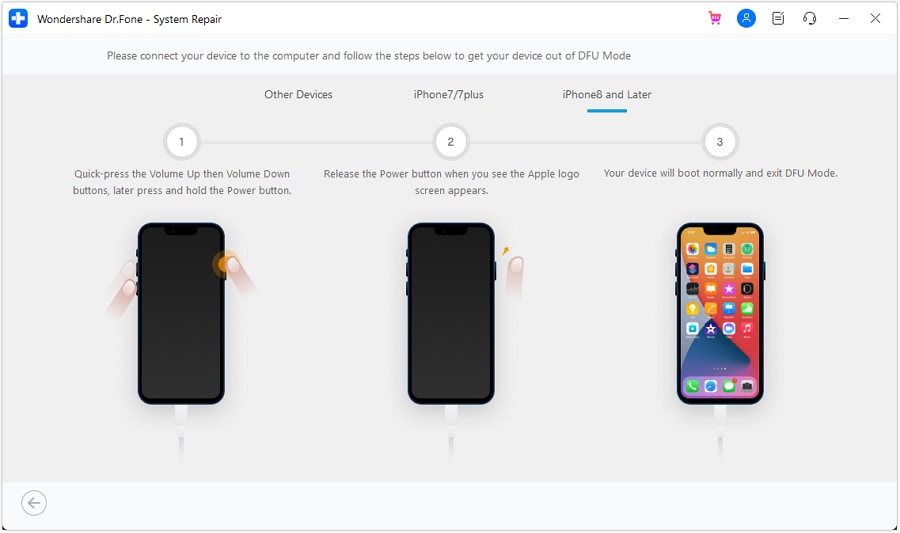
Step 3: Follow the onscreen instructions to exit DFU mode easily!
Reasons To Use Dr.Fone – System Repair
Dr.Fone is the best multiutility app you can get for your iOS devices. Here’s why:
- No technical expertise required.
- The simplest, most user-friendly interface ever.
- Compatibility with all iOS versions and all iPhone models.
- Can fix iOS software issues without data loss.
- Check out the latest beta features without a developer account.
- and so much more!
Dr.Fone - System Repair (iOS) is FREE to use to exit DFU mode, exit Recovery mode, and even enter Recovery and DFU mode if required, without going through complicated hoops that Apple makes you. Download Dr.Fone – System Repair (iOS) today and experience convenience and peace of mind when fixing all your iOS problems!
Part 2: Selectively Recover Data from Your iPhone in DFU Mode with Dr.Fone – Data Recovery (iOS)
Are you looking for the best-of-the-best, the crème de la crème of file recovery software to recover data in DFU mode from your iPhone? Look no further than Dr.Fone – Data Recovery (iOS), the best data recovery tool for iOS devices!
Salient Features
- Can recover data directly from a device in DFU mode.
- Can recover data from iTunes backups.
- Can recover data from iCloud backups.
- Can recover data selectively without needing to restore complete backup.
- and much more!
Let’s look at the scenarios where Dr.Fone – Data Recovery (iOS) can help you recover your data.
2.1: Scenario 1: Recover Data by Scanning Your iPhone
Dr.Fone – Data Recovery (iOS) can scan your iPhone even when the phone is inaccessible in other ways, and, therefore, is a much better way to recover data.

Dr.Fone - iPhone Data Recovery
World's 1st iPhone and iPad data recovery software
- Provide with three ways to recover iPhone data.
- Scan iOS devices to recover photos, video, contacts, messages, notes, etc.
- Extract and preview all content in iCloud/iTunes backup files.
- Selectively restore what you want from iCloud/iTunes backup to your device or computer.
- Compatible with latest iPhone models.
Here’s how to recover data directly from the iPhone in 3 steps:
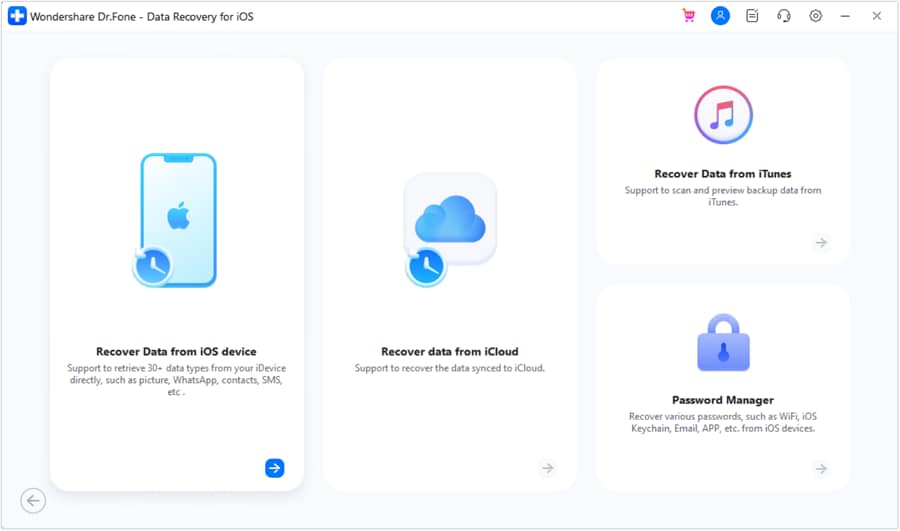
Step 1: Select Recover Data from iOS Device in Dr.Fone – Data Recovery (iOS).
Step 2: Dr.Fone will connect to your iPhone. You can choose what to scan for, and the software will start scanning data.
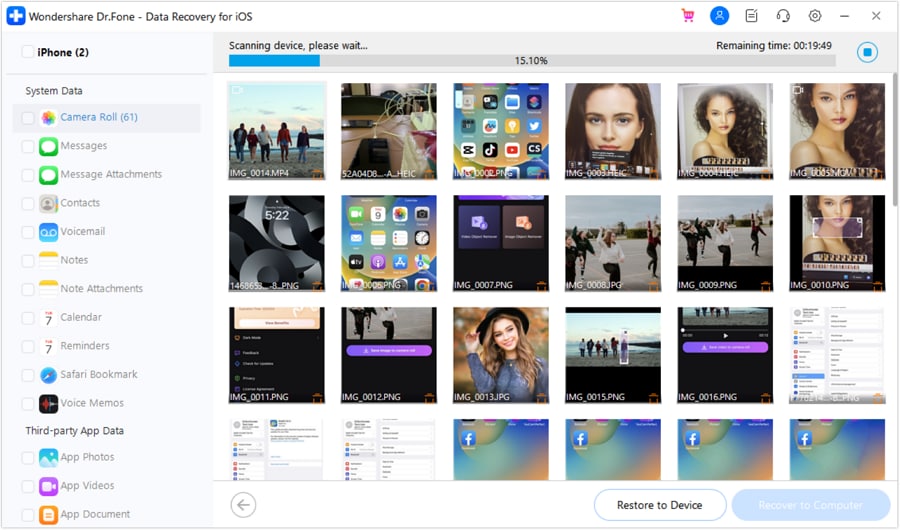
Step 3: Preview and recover data to the computer or restore to your device!
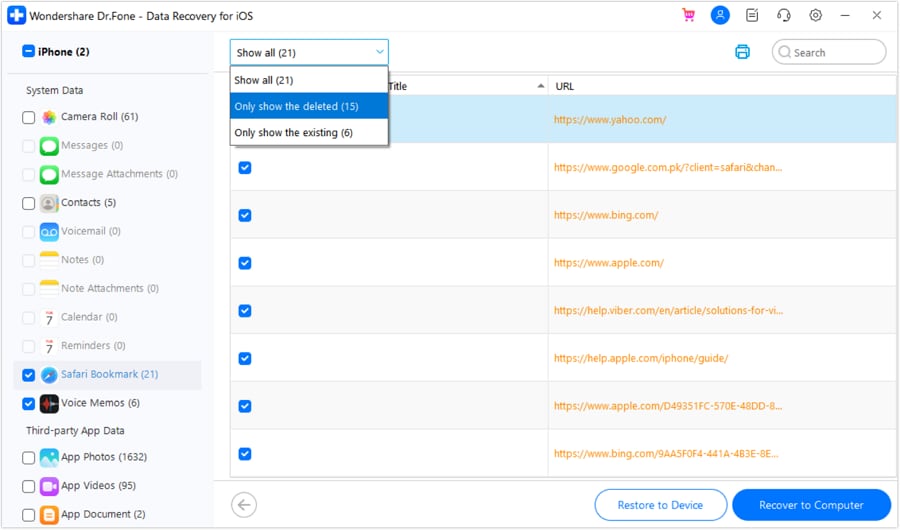
Now, why would you use this method? This method is especially useful when you have an iPhone that is unresponsive for any reason or stuck in Recovery or DFU mode, for example.
2.2: Scenario 2: Recover Data by Extracting iTunes Backup Files
You know the drill; you have an iTunes Backup, and you can use iTunes on Windows or macOS Finder on macOS to restore iTunes Backup to your device easily. What if you could choose what data you want to restore from iTunes Backup?
Apple does not offer users the ability to restore data selectively, but Wondershare Dr.Fone – Data Recovery (iOS) does!
Advantages of Selectively Restoring Data to iPhone
- No need to restore large backups that take a lot of time.
- Restore only what is needed.
- Does not overwrite data already present on the iPhone.
Steps To Follow
Step 1: Select Recover Data from iTunes in Dr.Fone – Data Recovery (iOS).
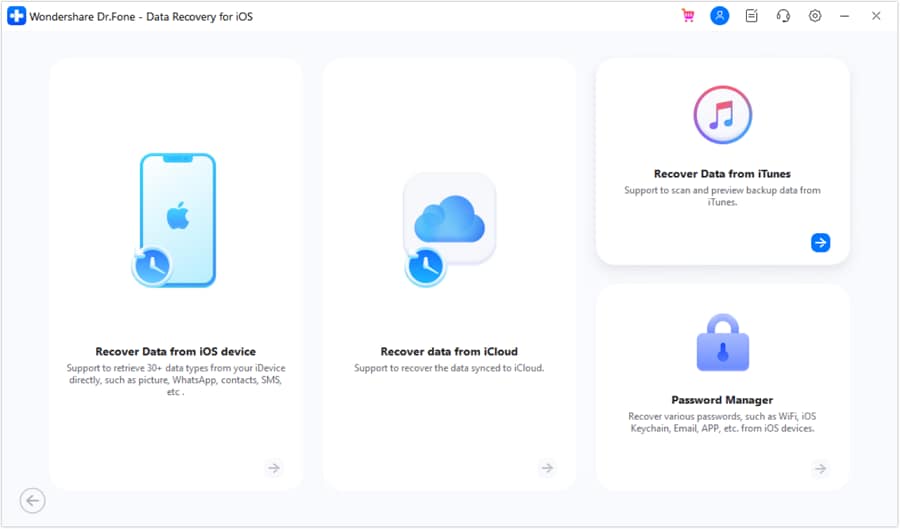
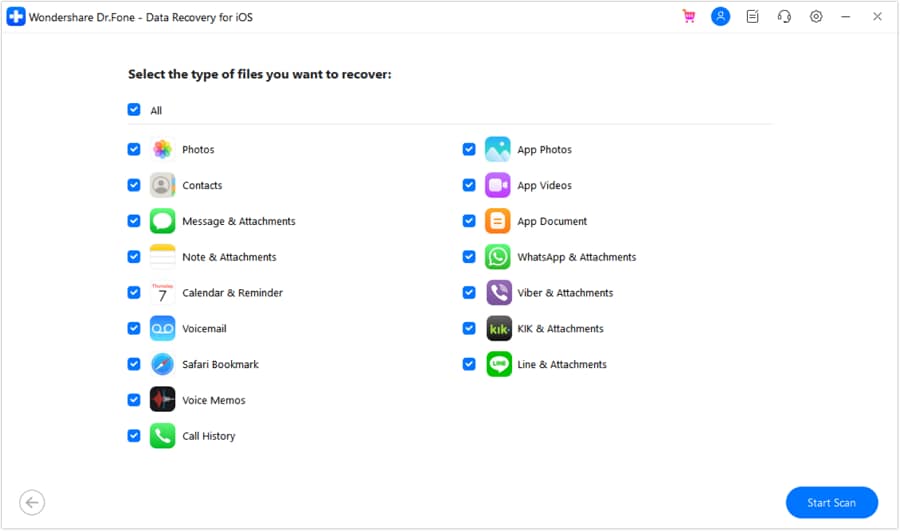
Step 2: Select your iTunes Backup file and select what data you want to recover.
Step 3: Click Restore to Device to recover data to the iPhone right away!

2.3: Scenario 3: Recover Data from iCloud Backup
Did you know you could also recover data from iCloud Backup using Dr.Fone – Data Recovery (iOS)? Dr.Fone – Data Recovery (iOS) allows users to recover deleted files and restore data from iCloud Backups without needing to download the entire backup to the phone. It lets you choose the data you want to restore and restore/ recover only that data. Here are the steps:
Step 1: Select Recover Data from iCloud in Dr.Fone – Data Recovery (iOS).
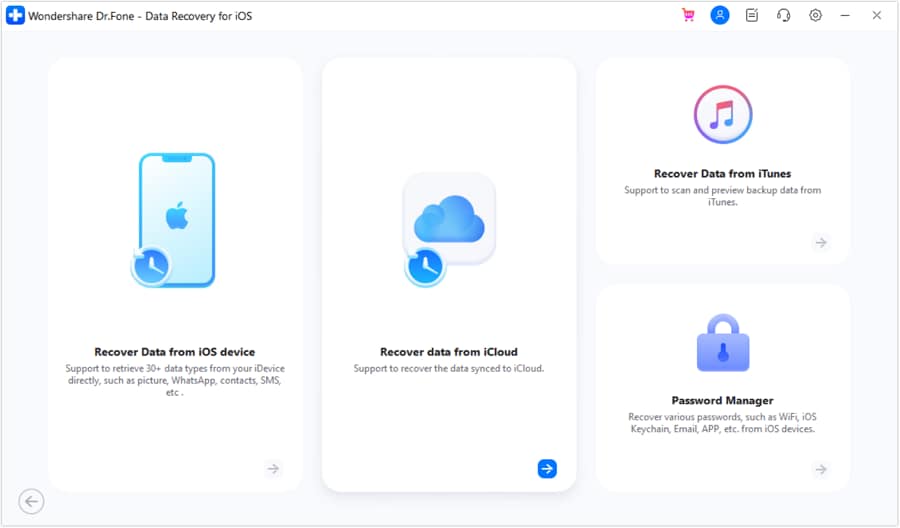
Step 2: Select the data you want to recover:
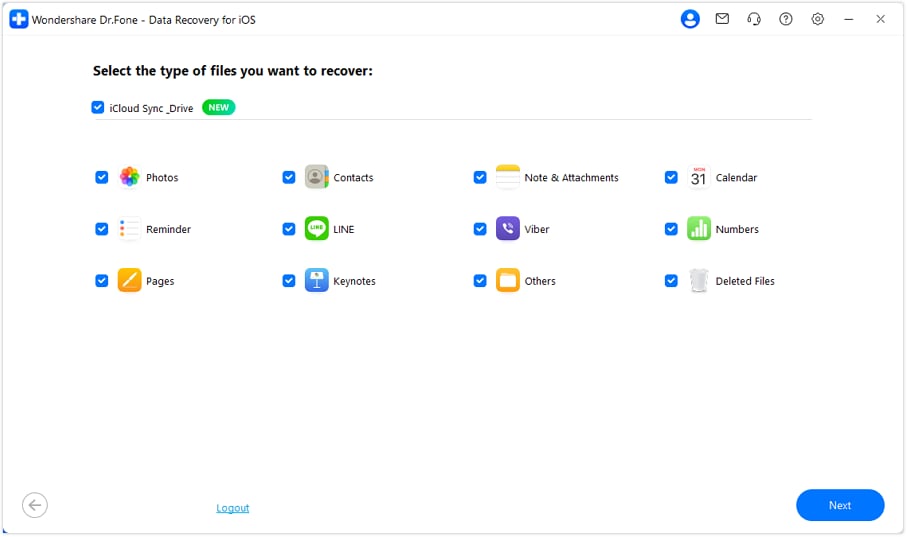
Step 3: Select Restore to Device, and the selected data will be restored to your iPhone!
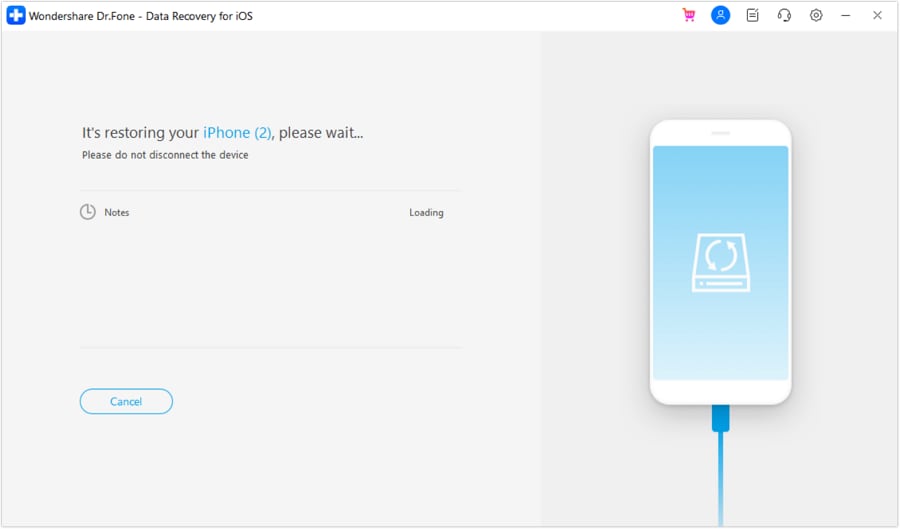
Privacy and Security Features
- Wondershare Dr.Fone – Data Recovery (iOS) is private by design.
- Wondershare does not store your iCloud credentials or any other user data.
Advantages of Dr.Fone – Data Recovery (iOS)
- Does not erase existing data on the iPhone.
- Users can choose what to restore from iCloud Backup.
Part 3: Restore Data from iTunes Backup Directly
You can recover data from iTunes Backup the usual way, with iTunes or macOS Finder.
Disadvantages
- All data is restored with no choice.
- All data gets overwritten.
- You can restore only the latest backup.
- Needs iTunes if you are on Windows PC.
Here’s how to restore iTunes Backup directly:
Step 1: Launch iTunes on PC and connect the iPhone. iTunes will detect it or you can select your iPhone under “Device”.
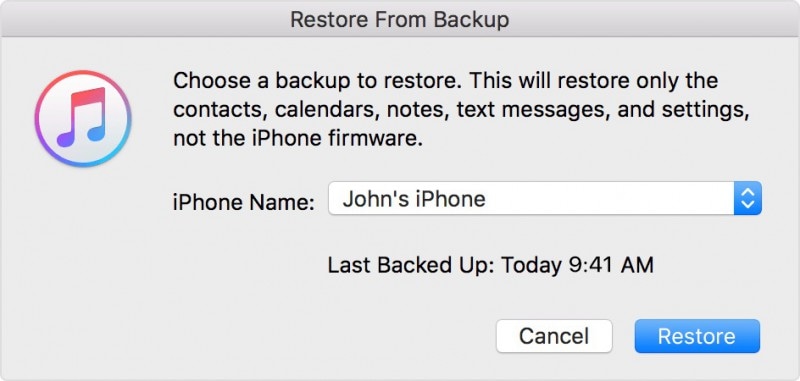
Now select “Restore backup” and chose the most recent backup file.
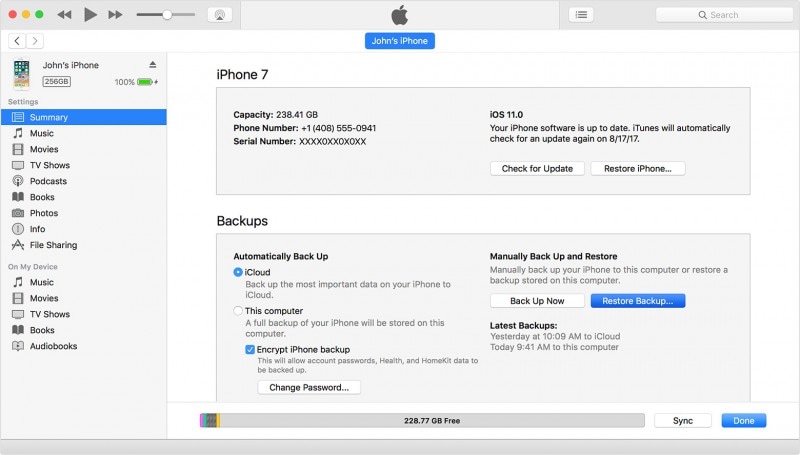
Step 2: Click on “Restore” and do not disconnect your iPhone till the entire iTunes backup file is restored to it, iPhone restarts and syncs with PC.
Part 4: Restore Data from iCloud Backup Directly
If you already have an iCloud backup file, you can restore data directly to your iPhone, but first you need to visit “Settings” > General” >“Reset” >“Erase all contents and data”. Then follow the steps given below:
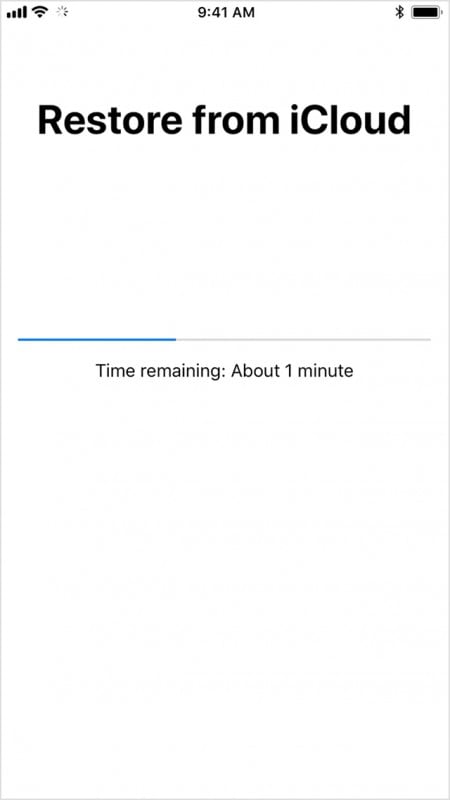
Step 1: Start setting up your iPhone and at the “App & Data Screen”, select “Restore from iCloud Backup”.
Step 2: Now log in with your credentials and choose a backup file. It will start restoring on your iPhone.
Final Words
Is your iPhone unresponsive? Is your iPhone stuck in DFU/ Recovery mode, and you do not know how to fix it? Worry not, as Dr.Fone – System Repair (iOS) will help you quickly fix DFU mode on your iPhone without data loss! What’s more, if you want to recover or restore data in DFU mode, Dr.Fone – Data Recovery (iOS) is just the tool you need! Don’t lose your precious data to mishaps and confusion! Download Dr.Fone – Data Recovery (iOS) today – it is the best iPhone file recovery tool to restore deleted files and recover data in DFU mode!
iPhone Recovery
- Deleted Data Recover
- 1. Recover HEIC Photos on iPhone
- 2. Recover Deleted Calendar Event
- 3. Retrieve iPhone Deleted Reminders
- 4. Retrieve iPhone Deleted Voicemail
- 5. Recover iPhone Deleted Photos
- 6. Recover iPhone Deleted Note
- 7. Recover Call History from iPhone
- 8. Recover iPhone Deleted Contacts
- 9. Recover iPhone Voice Memos
- 10. Recover Deleted iOS Files
- iPhone Passwords Recover
- 1. Retrieve iPhone Email Password
- 2. See iPhone Saved Password
- 3. Access iPhone Password
- 4. Get iPhone Password Back
- 5. iPhone Passcode Requriement Pops
- 6. Find iPhone Wi-Fi Password
- iPhone WhatsApp Recover
- 1. Recover WhatsApp Messages Apps
- 2. Recover Deleted WhatsApp Messages
- 3. Recover WhatsApp Messages Online
- 4. Retrieve Deleted WhatsApp
- Recover from Stolen iPhone
- Recover from Broken iPhone
- 1. Recover Data from Broken iPhone
- 2. Fix iPhone Fell in Water
- 3. Water Damaged iPhone Data Recovery
- 4. Recover Data from Dead iPhone
- 5. Recover Photos From Broken iPhone
- iPhone Recovery Tips
- 1. GT Recovery Undelete Restore
- 2. Recover Data from Memory Card
- 3. Recover iPhone Lost Data
- 4. SD Card Recovery for Mac
- 5. Clear Safari History
- 6. Recover from iPhone in DFU Mode
- 7. iTunes Data Recovery
- 8. Recover iPhone Data Without iTunes
- iPhone Recovery Tools
- ● Manage/transfer/recover data
- ● Unlock screen/activate/FRP lock
- ● Fix most iOS and Android issues
- Recover Now Recover Now Recover Now


Alice MJ
staff Editor
Generally rated4.5(105participated)