Recover photos, messages, WhatsApp, and more — no backup
needed.
Recover photos, messages, WhatsApp, and more — no backup
needed.

 100% Security Verified | No Subscription Required | No Malware

 :
: 
 ChatGPT
 Perplexity
 Gemini
 Claude
 Grok
Grok

I had a bunch of highly important official voicemails saved on my iPhone, but I accidentally deleted them while clearing space. Can someone please tell me how to recover iPhone voicemail easily?
Frustrated iOS User
If you have gone out of your way to download and save essential voicemails on your iPhone, losing them can feel like a disaster. From cherished messages left by loved ones to critical business instructions, voicemails hold massive value. Unfortunately, it is quite common to lose this data due to accidental deletion, system crashes, or iOS upgrades. Naturally, the first question that pops into your mind is how to retrieve deleted voicemails safely and reliably.
Typically, voicemails are handled by cellular network carriers and kept on their proprietary servers for a limited timeframe before being permanently purged. Once purged from the server, standard carrier recovery becomes impossible. However, with Visual Voicemail and premium manageable voicemail services in 2026, voice messages are actively downloaded and stored directly on your iPhone's local storage. This shift is a game-changer because it means that even if you accidentally swipe left and hit delete, you can absolutely recover voicemail iPhone data using the right techniques. This comprehensive guide will walk you through three highly effective strategies to get those lost audio files back.
In this article
Part 1. How to Retrieve Recently Deleted Voicemails on Your iPhone Directly
Before panicking and diving into complex recovery methods, you should always check if the deleted voicemail is still lingering in your iPhone's built-in trash bin. Apple includes a temporary holding folder specifically for this purpose. This built-in feature is the fastest way to recover iPhone voicemail, provided the message was deleted recently and hasn't surpassed the automated clearing threshold set by your network carrier (often 30 days).
-
Step 1 Access the Voicemail Tab
Unlock your iPhone, open the native Phone app, and tap on the Voicemail icon located in the bottom right corner of the screen.
-
Step 2 Locate Deleted Messages
Scroll all the way down to the bottom of your voicemail list. If you have recently deleted any messages, you will see an option labeled "Deleted Messages." Tap on it to open the recovery folder.
-
Step 3 Undelete the Voicemail
You can now navigate through the discarded audio files. Select the specific voicemail you want to retrieve and tap the "Undelete" button (represented by a trash can icon with a line through it) to restore it to your active inbox. Conversely, if you want to wipe them permanently to save storage, tap "Clear All".

While incredibly convenient, you must keep in mind that this native process only works for a short grace period. If you empty the "Deleted Messages" folder, or if the carrier's server sync automatically clears them out, they are considered permanently deleted. If you find yourself in this situation, continue to Part 2.
Part 2. 3 Methods to Recover iPhone Voicemail After Permanent Deletion
When the standard "Deleted Messages" folder is empty, you need a robust, professional-grade solution to delve deeper into your iPhone's database architecture. Dr.Fone - Data Recovery (iOS) is a premier software suite rolled out by Wondershare that has earned worldwide acclaim for its high success rates. Recognized by top tech publications, this software bypasses standard iOS limitations to provide you with a full gallery of all your current and permanently deleted voicemails. You can seamlessly preview and select the exact voice files you wish to restore, eliminating the hassle of blindly resetting your entire device.
 Recovers data after deletion, crashes, or device damage.
- Supports photos, messages, contacts, WhatsApp, and more.
- Supports all major iPhone, iPad, and iPod models.
- Preview and recover only what you need.

Method 1: Recover Deleted Voicemails Directly from the iPhone
This method is highly recommended if you completely forgot to back up your device to iCloud or iTunes before the voicemails were lost. The Dr.Fone recovery engine deeply scans your iOS device's local flash memory and reconstructs fragmented data, displaying all retrievable voicemails directly on your computer screen.
-
Step 1 Launch the Software and Connect Your iPhone
Download and open Dr.Fone on your computer. From the main interface, choose the "Data Recovery" module. Next, use a certified lightning or USB-C cable to connect your iPhone to the computer.

-
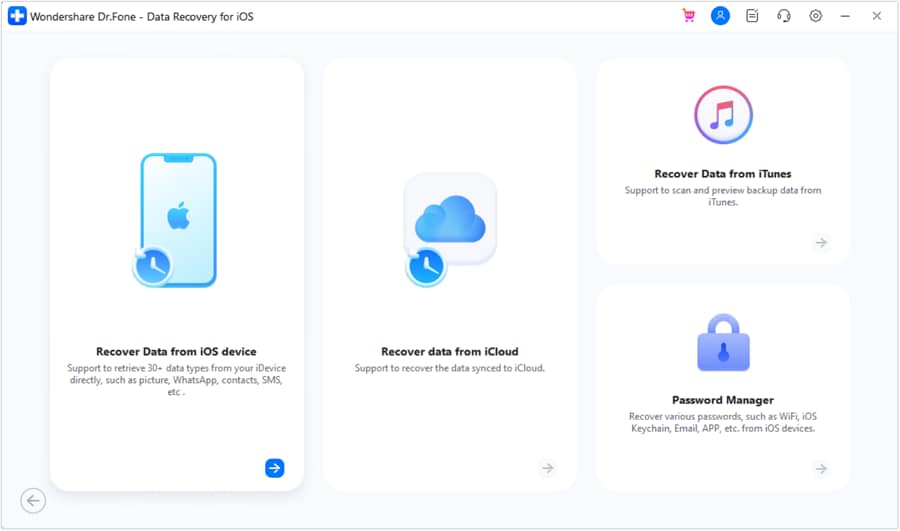
Step 2 Choose iOS Device Recovery
The program will detect your phone. You will find three distinct recovery paths on the left sidebar. Ensure you select 'Recover from iOS Device' to initiate a direct hardware scan.
-
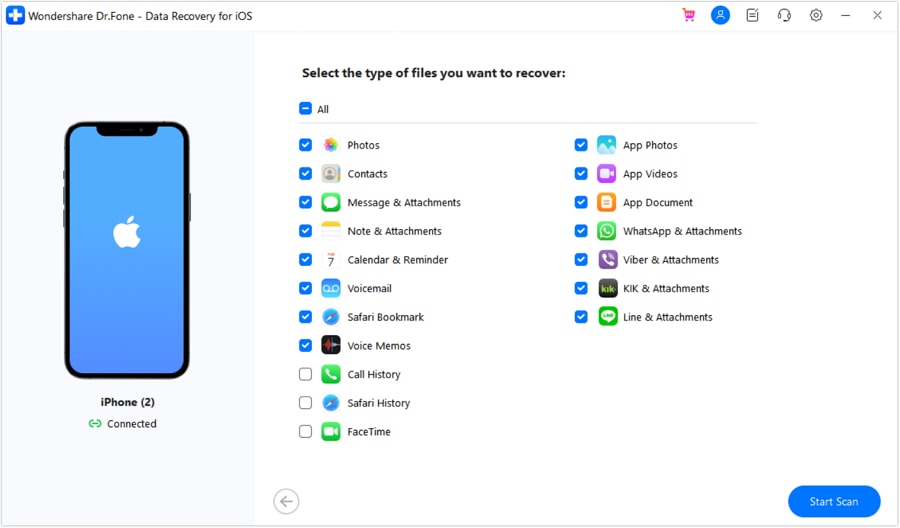
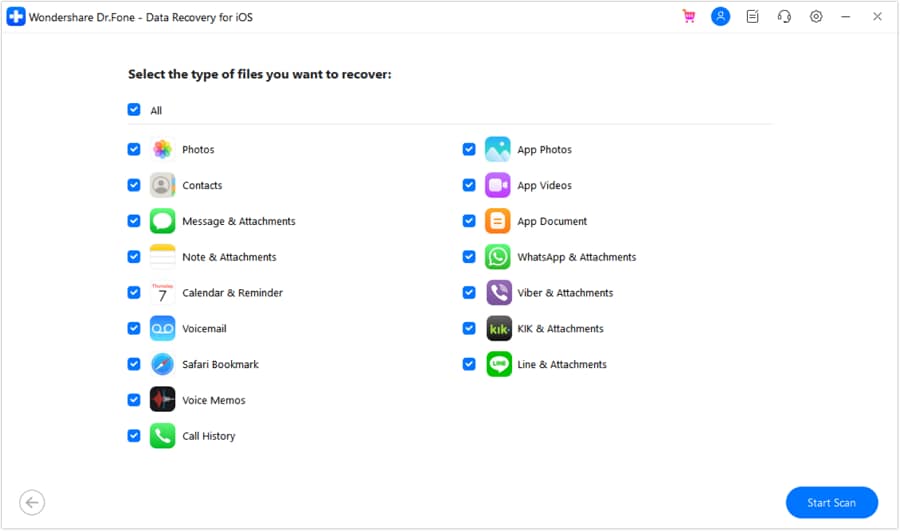
Step 3 Filter by File Type
You'll be presented with a comprehensive catalog of different file types you can target. To save scanning time, uncheck everything else, solely choose 'Voicemail' under the "Deleted Data from the Device" section, and click on 'Start Scan'.
-
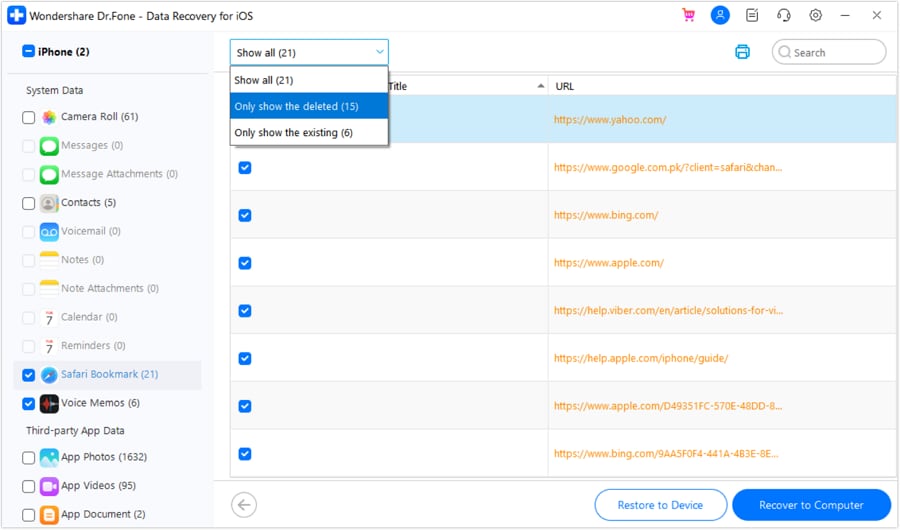
Step 4 Preview and Retrieve Voice Messages
Wait a few moments as the deep scan completes. You'll then be able to view and play all your deleted voicemails in an organized gallery format. Select the specific audio files you wish to restore, and then click either "Restore to Device" or "Recover to Computer" to secure them.




Method 2: Recover Deleted Voicemails via iCloud Backup
If you regularly back up your device to iCloud, your deleted voicemails are likely safely encrypted in the cloud. However, the official Apple iCloud restoration process requires you to erase your iPhone completely and perform a full factory reset. With Dr.Fone, you act as an iCloud extractor, giving you the power to download the backup, view the files individually, and restore only the voicemails without touching or jeopardizing your current photos, texts, or apps.
-
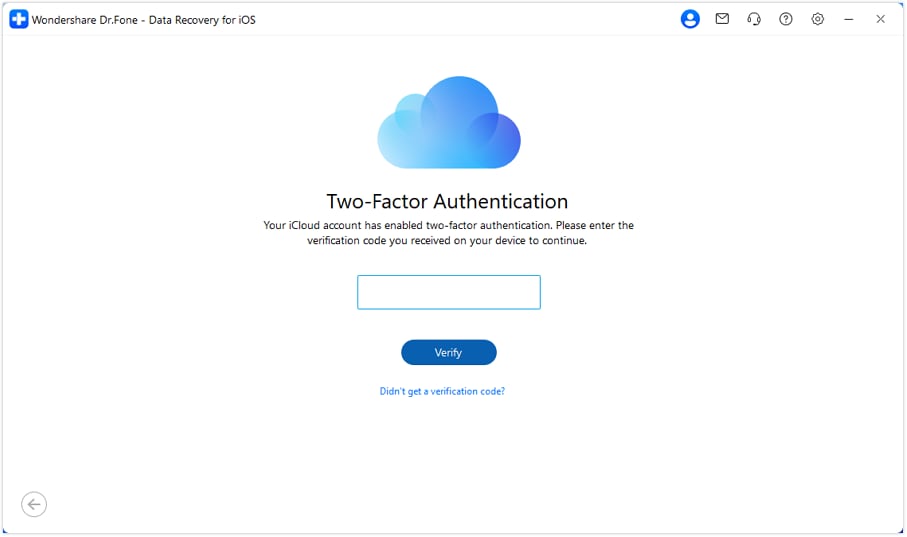
Step 1 Sign into Your iCloud Account
Open Dr.Fone's recovery interface and select "Recover Data from iCloud Backup File." You will be prompted to enter your Apple ID credentials to securely log into your iCloud environment.
-
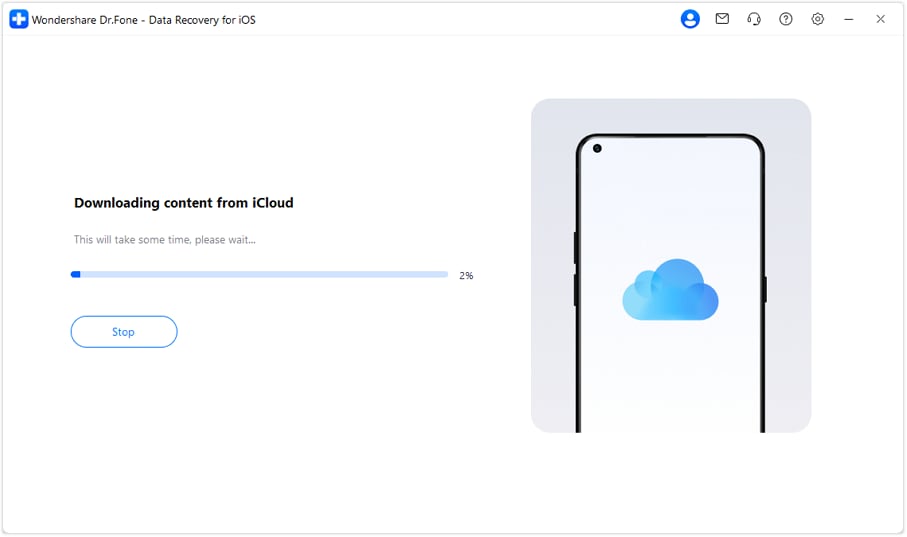
Step 2 Download the Relevant Backup
The program will display a list of all historical iCloud backups linked to your account. Identify the backup created right before you lost the voicemails, and click on 'Download.' This extraction may take a few moments depending on your network bandwidth. Once complete, hit 'Next'.
-
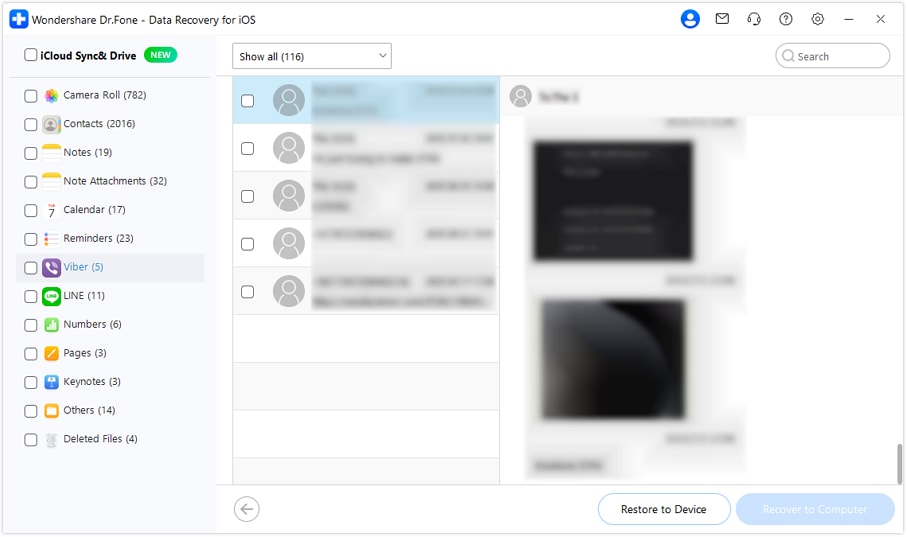
Step 3 Filter and Extract Voicemails
On the left-hand navigation panel, you will see a neatly categorized list of backup data. Click on 'Voicemail'. Browse through the available audio files, select exactly what you need, and proceed to click 'Restore to Device' or 'Recover to Computer'.
Method 3: Recover Deleted Voicemails via iTunes Backup
For users who prefer local computer backups over cloud storage, iTunes (or Finder on newer macOS versions) is a primary safeguard. Unfortunately, the flaw with standard iTunes restoration is identical to iCloud: it is a rigid, all-or-nothing process that overwrites your active phone data. By using Dr.Fone as an iTunes backup extractor, you effortlessly read the backup files on your PC or Mac and precisely restore solely the lost voicemail records.
-
Step 1 Select the iTunes Backup Module
Launch the recovery tool and this time, select "Recover Data from iTunes Backup File." The software will immediately scan your computer's local directories for any existing iTunes backup repositories.
-
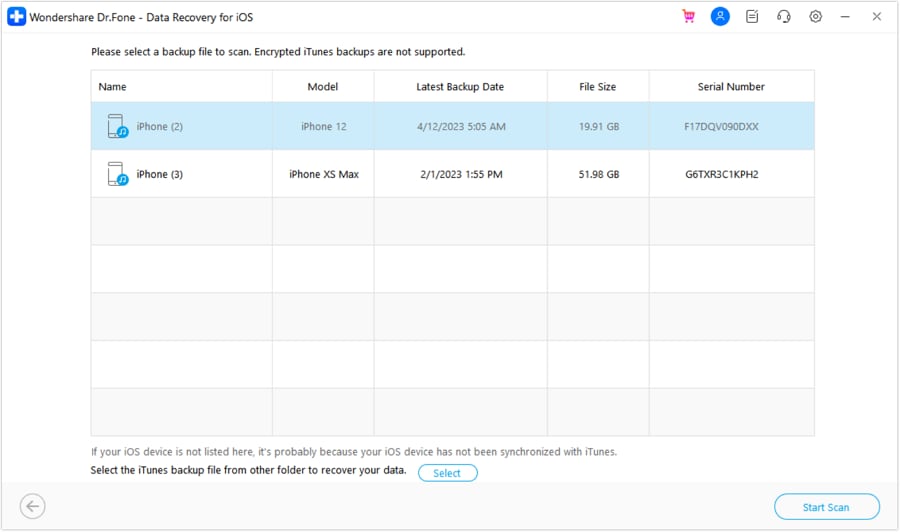
Step 2 Choose and Scan the Backup File
Evaluate the populated list of iTunes backup files. Check their file sizes and the 'latest backup date' timestamp to ensure you choose the iteration that contains the missing voicemails. Select the target file and hit 'Start Scan'.
-
Step 3 Save the Recovered Voicemails
Once the iTunes archive is unpacked, click the 'Voicemail' category. Browse the contents, listen to verify the files, and click "Restore to Device" or "Recover to Computer" to safely export the selected audio.

Conclusion
It is reassuring to know that accidental deletions don't have to be permanent when it comes to vital voice messages. As demonstrated, retrieving deleted voicemails on an iPhone is highly manageable when you follow the right workflows. Your first line of defense should always be checking the native 'Deleted Messages' folder on your iPhone for quick recovery. However, if the files have been entirely wiped from the system and carrier network, integrating a premium solution like Dr.Fone - Data Recovery (iOS) ensures you can forcefully extract and recover voicemail iPhone data smoothly. Whether you're pulling from direct storage, iCloud, or iTunes backups, securing your digital memories has never been simpler.
FAQ
-
1. Where do deleted voicemails go on an iPhone?
When you delete a voicemail on your iPhone, it initially goes into a "Deleted Messages" folder within the Phone app's Voicemail tab. It acts similarly to a computer's recycle bin, temporarily holding the audio file before your cellular network carrier permanently erases it off their servers. -
2. How long does a deleted voicemail stay in the iPhone recycle bin?
The exact duration varies depending on your cellular service provider (e.g., AT&T, Verizon, T-Mobile). Most major carriers will automatically permanently delete these messages after a 30-day window, though some might clear them faster depending on server synchronization limits. -
3. Can I recover a voicemail that was deleted years ago?
Recovering a voicemail deleted years ago directly from the device is practically impossible due to data overwriting on flash storage. The only feasible way to recover such an old voicemail is if it was safely captured inside an old iTunes or iCloud backup created during that specific timeframe. You can use extraction tools like Dr.Fone to scan those historical backups. -
4. Why can't I see the "Deleted Messages" folder in my Voicemail tab?
The "Deleted Messages" folder only appears if there are actually recoverable voicemails stored inside it. If the folder has been emptied, or if the carrier's automated system has already purged the deleted files from your account, the folder will automatically hide itself from the Voicemail interface.
 Add Wondershare Dr.Fone as a preferred source on Google