A Complete Guide of GT Recovery Undelete Restore

Jun 11, 2026 • Filed to: Data Recovery Solutions • Proven solutions
 TL;DR:
GT Recovery is a mobile application that restores deleted files directly from rooted Android devices, whereas Dr.Fone - Data Recovery (Android) provides a desktop-based alternative for retrieving data via USB without requiring root access.
● GT Recovery operates directly on the smartphone to retrieve messages, media, and passwords from FAT, EXT3, and EXT4 file systems, but strictly requires downloading the APK and granting superuser root permissions.
● Dr.Fone - Data Recovery (Android) necessitates a Windows or Mac computer with USB debugging enabled to extract files, making it the primary option for unrooted phones or damaged devices experiencing a reboot loop.
● The GT Recovery app allows users to pause the internal storage scan at any time and preview audio or video files to verify the content before saving the recovered data to a memory card.
Ask AI for a summary
 ChatGPT
 Perplexity
 Gemini
 Claude
 Grok
Grok
Accidental file deletion is common—especially when managing multiple spreadsheets, images, or logs daily. Whether it’s due to manual error or memory card reformatting, losing important data can be frustrating. GT Recovery APK offers a simple yet powerful solution to recover deleted files, images, videos, and more—right from your Android device.
For anyone seeking a reliable mobile data recovery tool, GT Recovery is a must-have app that brings peace of mind when accidental deletion strikes.
Part 1: What is GT Recovery?
GT Recovery is a powerful mobile app designed to recover lost or deleted data directly from your smartphone. It supports a wide range of data types, including photos, files, SMS, contacts, WhatsApp and Facebook messages, call logs, audio, video, and even passwords.

GT Recovery is designed for Android data recovery and works specifically on rooted devices. One of its key advantages is the ability to recover deleted files without needing a recent backup. By scanning your device’s internal storage, GT Recovery locates and organizes lost data efficiently, making it easy to retrieve exactly what you need.
GT Recovery offers a key advantage with its ability to preview audio and video files before recovery—helping users verify content before restoring. It also supports major file system formats like FAT, EXT3, and EXT4, ensuring broad compatibility.
While the app delivers powerful recovery features, it's important to note that most functions require a rooted Android device. Some operations may also request multiple permission levels. However, if data recovery is your top priority, GT Recovery is a reliable solution worth trying.
Part 2: How to Use GT Recovery with Rooted Android Phone?
The next question in mind is how to use GT Recovery with a rooted phone. The steps involved here are even more straightforward and less detailed. Let’s go through each of them.
Step 1: To start with, download the GT Recovery for android from the official website. It is always advisable to use the official website for download to guarantee reliability and safeguard your device from unwanted bugs.
Step 2: Click on “Install” and open the app. If your phone is not rooted, then the app will prompt you to root the device.

Note: If your phone is rooted, but you didn’t allow GT’s application for superuser rights, the smart app will not fail to remind you. See the prompt below:

Step 3: Next, the GT recovery app will organize the home view and select what you want to restore. Remember, this happens only when superuser rights are allowed.

Step 4: To recover deleted files, click ‘Recover File’. Next, select the type of data. GT recovery app will analyze your device phone.

Step 5: After the device is analyzed, click on the “Scan device” prompt to initiate the scanning process. The app will populate the files which can be restored.

The beauty of the process is you can stop the scanning anytime without waiting for it to complete. Indeed, it’s a cherry on top!

Step 6: Once the scanning is done, click the button on the top right-hand side corner (as shown below) to save the chosen files to the memory card:

Step 7: To check the saved files, click ‘View the result’ in the dialogue box to check the saved files.

With these easy and simple steps, you can go at length to salvage any data deletion. No matter what you lose, GT recovery data app enables you to restore data in the most straightforward manner.
Part 3: Can I Recover Data Without Rooting My Android Phone?
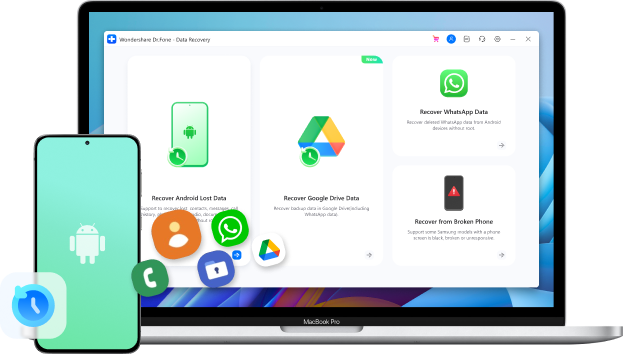
Unlike GT Recovery, which typically requires a rooted device, Dr.Fone - Data Recovery (Android) offers a user-friendly way to recover lost data without rooting your phone. As the first Android data recovery software, Dr.Fone supports restoring contacts, messages, photos, videos, documents, and more—directly from your smartphone or tablet.

Dr.Fone - Data Recovery (Android)
World's 1st data retrieval software for broken Android devices.
- It can also be used to recover data from broken devices or devices that are damaged in any other way such as those stuck in a reboot loop.
- Highest retrieval rate in the industry.
- Recover photos, videos, contacts, messages, call logs, and more.
- Compatible with Samsung Galaxy devices.


Let’s understand how Dr.Fone - Data Recovery directly recovers data for Android devices:
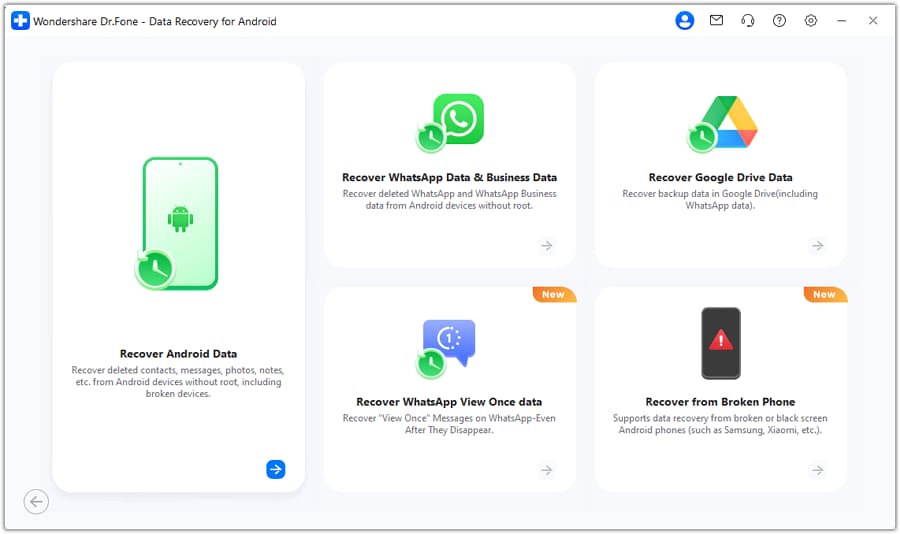
Step 1: Launch the Tool
First thing first, Download Dr.Fone - Data Recovery (Android) and then launch the program on your computer once you have installed it. Choose the same option that you did in the iOS steps, i.e., choose “Data Recovery”.

Step 2: Connect Android Device
Now, connect your Android device to your PC via USB cord. Enable USB debugging on the android phone. Refer to the image below to see how a screen looks like once the device is detected:
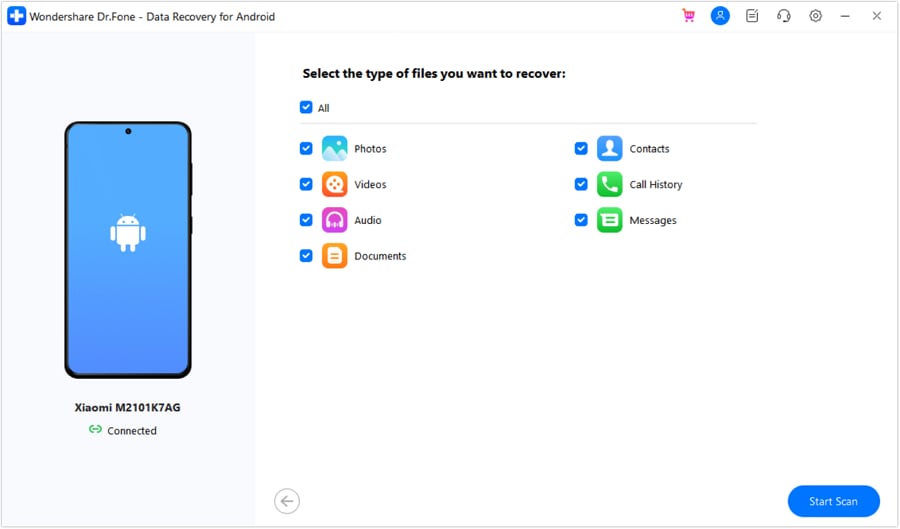
Step 3: Scan the Files
Dr.Fone will show all the data types it can recover. As a default function, it will select the file/s. Select the data you plan to recover. Subsequently, click the “Start Scan” button for the program to scan and analyze your device. The recovery scan will take a couple of times; a few more may be depending on the size and type of data you want to rescue. Hang on tight till that happens, for good things take some extra time to arrive.
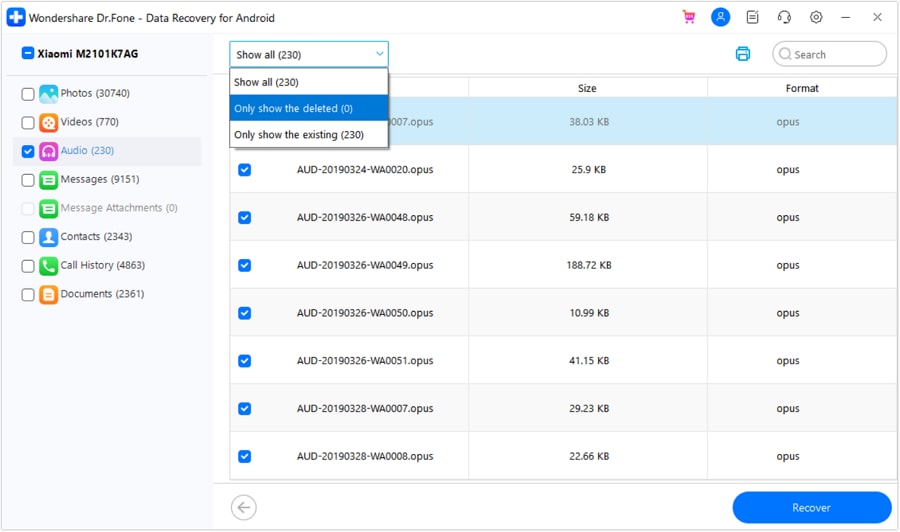
Step 4: Preview and Recover
Next, you can preview the data once the scan is completed. Carefully go through each one of them to locate your choice. Once selected, click “Recover” to save the data on your device.
Conclusion
Data loss isn’t the end—thanks to tools like GT Recovery and Dr.Fone - Data Recovery (Android). While GT Recovery is ideal for recovering deleted files on rooted Android devices, Dr.Fone offers a flexible solution for both Android and iOS users, even without root access.


iPhone Recovery
- Deleted Data Recover
- 1. Recover HEIC Photos on iPhone
- 2. Recover Deleted Calendar Event
- 3. Retrieve iPhone Deleted Reminders
- 4. Retrieve iPhone Deleted Voicemail
- 5. Recover iPhone Deleted Photos
- 6. Recover iPhone Deleted Note
- 7. Recover Call History from iPhone
- 8. Recover iPhone Deleted Contacts
- 9. Play GamePigeon 8 Ball on iMessage
- 10. Recover Deleted iOS Files
- iPhone Passwords Recover
- 1. Retrieve iPhone Email Password
- 2. See iPhone Saved Password
- 3. Access iPhone Password
- 4. Get iPhone Password Back
- 5. iPhone Passcode Requriement Pops
- 6. Find iPhone Wi-Fi Password
- iPhone WhatsApp Recover
- 1. Recover WhatsApp Messages Apps
- 2. Recover Deleted WhatsApp Messages
- 3. Recover WhatsApp Messages Online
- 4. Retrieve Deleted WhatsApp
- Recover from Stolen iPhone
- Recover from Broken iPhone
- 1. Recover Data from Broken iPhone
- 2. Fix iPhone Fell in Water
- 3. Water Damaged iPhone Data Recovery
- 4. Recover Data from Dead iPhone
- 5. Recover Photos From Broken iPhone
- iPhone Recovery Tips
- 1. GT Recovery Undelete Restore
- 2. Recover Data from Memory Card
- 3. Recover iPhone Lost Data
- 4. SD Card Recovery for Mac
- 5. Clear Safari History
- 6. Recover from iPhone in DFU Mode
- 7. iTunes Data Recovery
- 8. Recover iPhone Data Without iTunes
- iPhone Recovery Tools
- ● Manage/transfer/recover data
- ● Unlock screen/activate/FRP lock
- ● Fix most iOS and Android issues
- Free Download Free Download Free Download

Alice MJ
staff Editor