100% Security Verified | No Subscription Required | No Malware

 :
: 
 ChatGPT
 Perplexity
 Gemini
 Claude
 Grok
Grok

I accidentally deleted a really important note from my iPhone, and it's not in the 'Recently Deleted' folder anymore. Is there any way I can get it back? It contains crucial work information!
A concerned iPhone user
Losing an important note from your iPhone can be a stressful experience. Whether it's a grocery list, a brilliant idea, or sensitive login details, the sudden absence of vital information can cause a real panic. Many users believe that once a note is deleted, it's gone forever, especially if it's no longer in the "Recently Deleted" folder.
The good news is that there are several effective methods to recover deleted notes, even those you thought were permanently lost. This guide will walk you through four distinct approaches, from simple built-in features to advanced recovery software. We will explore each option step-by-step so you can choose the one that best suits your situation and retrieve your valuable notes.
In this article
- Part 1. Check the "Recently Deleted" Folder: The First Step
- Part 2. How to Recover Deleted Notes on iPhone via iCloud Backup
- Part 3. How to Restore Deleted Notes on iPhone with iTunes/Finder
- Part 4. Recover Permanently Deleted Notes on iPhone Without Backup [Highest Success Rate]
- Part 5. Comparison of the Four Note Recovery Methods
Part 1. Check the "Recently Deleted" Folder: The First Step
Before trying more complex methods, always start with the simplest solution. The Notes app on your iPhone has a built-in safety net called the "Recently Deleted" folder. It automatically stores deleted notes for up to 30 days before they are permanently erased. If you deleted your note within this timeframe, you can recover it in just a few taps.
-
Step 1 Open the Notes App
On your iPhone, find and tap the Notes app icon to open it.
-
Step 2 Access the Folders List
If you're inside a specific note, tap the back arrow in the top-left corner to return to your notes list. Tap it again to go back to the main "Folders" view.
-
Step 3 Find and Select the Note
Scroll down and tap on the "Recently Deleted" folder. Here, you'll see a list of notes you've deleted in the last 30 days. Find the note you want to recover.

-
Step 4 Move the Note Back
Tap "Edit" in the top-right corner. Select the note(s) you wish to restore by tapping the circle next to them. Then, tap "Move" at the bottom-left and choose the folder you want to move the note back to, such as "Notes" or another folder of your choice.
Part 2. How to Recover Deleted Notes on iPhone via iCloud Backup
If your note is not in the "Recently Deleted" folder, your next best option is to restore your iPhone from an iCloud backup. This method is effective if you have been regularly backing up your device to iCloud. However, be warned: restoring from an iCloud backup will erase all current data on your iPhone and replace it with the data from the backup.
-
Step 1 Check for an iCloud Backup
Go to "Settings" > [Your Name] > "iCloud" > "iCloud Backup." Check the date of the last successful backup to ensure it was made before you deleted the note.
-
Step 2 Erase Your iPhone
To restore from a backup, you must first erase your device. Go to "Settings" > "General" > "Transfer or Reset iPhone" > "Erase All Content and Settings." Confirm your choice to proceed.

-
Step 3 Restore from iCloud
After your iPhone restarts, follow the on-screen setup instructions until you reach the "Apps & Data" screen. Select "Restore from iCloud Backup" and sign in with your Apple ID. Choose the backup that contains your deleted notes, and the restore process will begin.

Part 3. How to Restore Deleted Notes on iPhone with iTunes/Finder
Similar to using iCloud, you can recover deleted notes by restoring your iPhone from a backup made on your computer using iTunes (on older macOS versions and Windows) or Finder (on macOS Catalina and newer). This method also overwrites all current data on your device with the backup's content.
-
Step 1 Connect Your iPhone to a Computer
Use a USB cable to connect your iPhone to the Mac or PC where you stored your backups.
-
Step 2 Open iTunes or Finder
Launch Finder on your Mac (macOS Catalina or later) or iTunes on your PC or older Mac. Select your iPhone from the sidebar or the top-left corner of the window.

-
Step 3 Restore the Backup
In the "General" tab (Finder) or "Summary" tab (iTunes), click "Restore Backup." A pop-up will appear, allowing you to choose a specific backup. Select the one dated before the notes were deleted and click "Restore." Keep your device connected until the process is complete.
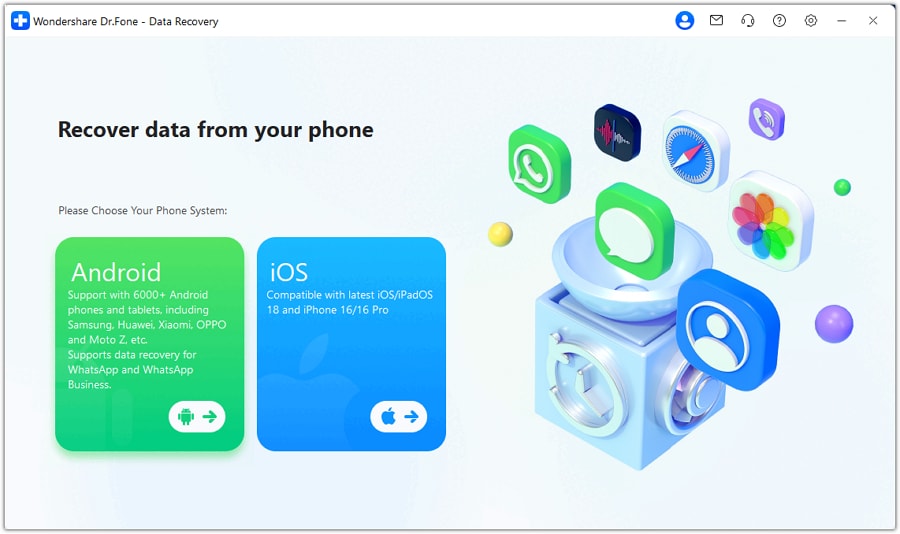
Part 4. Recover Permanently Deleted Notes on iPhone Without Backup [Highest Success Rate]
What if your note is permanently deleted and you don't have a recent backup, or you don't want to overwrite your current data? This is where a professional data recovery tool like Dr.Fone - Data Recovery (iOS) becomes invaluable. It is designed to scan your iPhone's internal storage for deleted data and allows you to recover it selectively without affecting your existing files.
Key advantages of using Dr.Fone:
- No Data Overwriting: It recovers your notes without erasing any current data on your device.
- Selective Recovery: You can preview the found notes and recover only the ones you need.
- Recovers Without Backup: It can often find and restore data directly from your iPhone, even if you never made a backup.
- High Success Rate: It uses advanced scanning technology to find traces of deleted files that are otherwise inaccessible.
-
Step 1 Download and Launch Dr.Fone
Install Dr.Fone on your computer. Launch the program and select "Data Recovery" from the main toolkit.

-
Step 2 Connect Your iPhone
Connect your iPhone to the computer with a USB cable. The software will automatically detect your device. From the left panel, choose "Recover from iOS Device."
-
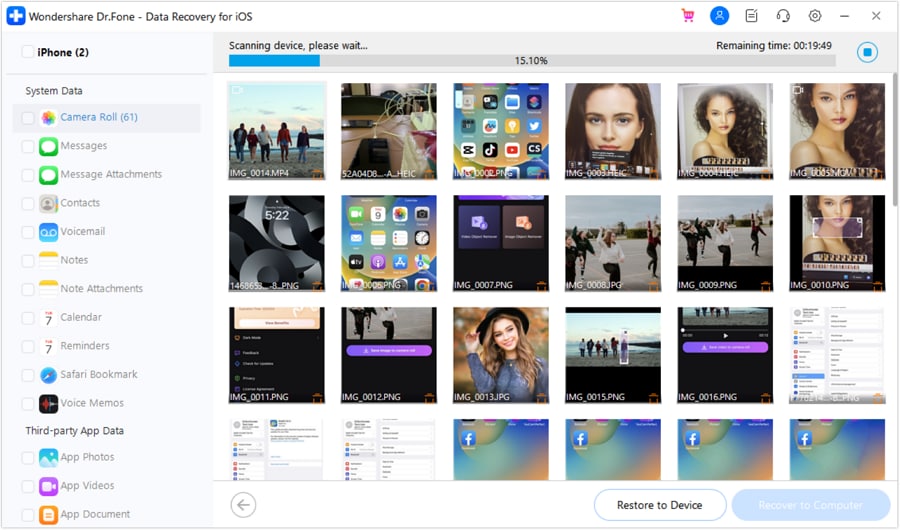
Step 3 Scan for Deleted Notes
You will see a list of file types that can be recovered. To save time, deselect all and choose only "Notes & Attachments." Click the "Start Scan" button to begin the process.
-
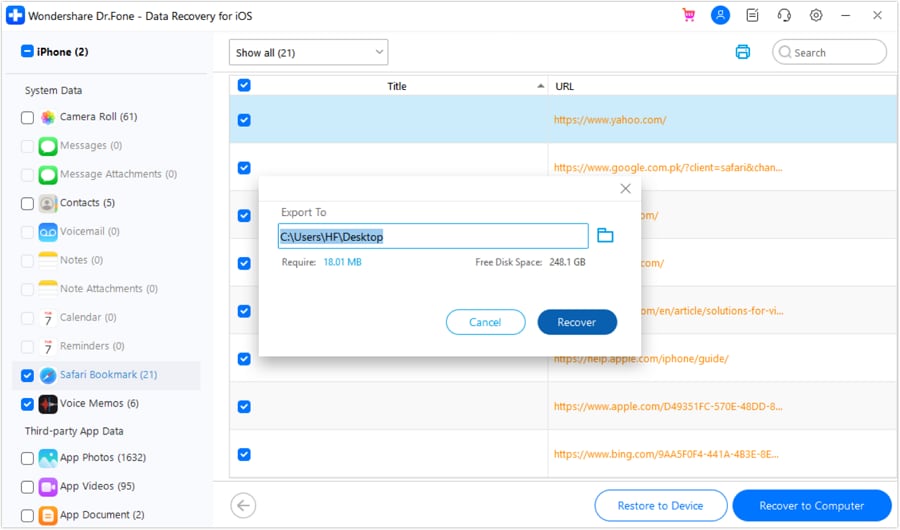
Step 4 Preview and Recover Your Notes
Once the scan is complete, all found notes (both existing and deleted) will be displayed. You can filter to show only the deleted items. Preview them to find the one you need, select it, and click "Restore to Device" or "Recover to Computer."
 Recovers data after deletion, crashes, or device damage.
- Supports photos, messages, contacts, WhatsApp, and more.
- Supports all major iPhone, iPad, and iPod models.
- Preview and recover only what you need.

Part 5. Comparison of the Four Note Recovery Methods
To help you quickly decide which method is best for you, here is a clear comparison of the four options we've discussed.
| Method | Backup Required? | Overwrites Data? | Ease of Use | Best For |
|---|---|---|---|---|
| Recently Deleted Folder | No | No | Very Easy | Recovering notes deleted within the last 30 days. |
| Dr.Fone - Data Recovery | No | No | Easy | Permanently deleted notes, selective recovery, no data loss. |
| iCloud Backup Restore | Yes | Yes | Moderate | When you have a recent backup and don't mind resetting your device. |
| iTunes/Finder Restore | Yes | Yes | Moderate | Users who back up locally and are willing to reset their device. |
Conclusion
Losing important notes on your iPhone doesn't have to be a permanent problem. We've covered four reliable methods to help you get them back. Always start by checking the "Recently Deleted" folder for the quickest fix. If that doesn't work, restoring from an iCloud or iTunes backup is a viable option, provided you're aware that it will overwrite your current data. For the most flexible, powerful, and safe solution, Dr.Fone - Data Recovery (iOS) stands out, allowing you to recover permanently deleted notes selectively without touching your existing files. Choose the method that fits your needs and recover your notes with confidence.
FAQ
-
1. How long do deleted notes stay on an iPhone?
When you delete a note, it is moved to the "Recently Deleted" folder where it stays for up to 30 days. After this period, it is scheduled for permanent deletion from your device. The actual time it remains on the device's memory before being overwritten can vary. -
2. Can I recover a permanently deleted note without a backup?
Yes, it is often possible. When a note is "permanently" deleted, the space it occupies is marked as available for new data. Until new data overwrites it, the old note's data still exists. A professional tool like Dr.Fone - Data Recovery can scan for this recoverable data and restore it directly from your iPhone's storage. -
3. Why can't I find the "Recently Deleted" folder in my Notes app?
The "Recently Deleted" folder only appears if you have deleted a note within the last 30 days. If you haven't deleted any notes recently, or if it has been more than 30 days, the folder will not be visible in your folders list. -
4. Does syncing Notes with iCloud help with recovery?
Syncing Notes with iCloud is an excellent way to keep them consistent across your Apple devices. However, if you delete a note on one device, iCloud sync will also delete it from all other connected devices. For recovery, iCloud Backups are more useful, as they are a snapshot in time, whereas iCloud sync is live.
 Add Wondershare Dr.Fone as a preferred source on Google