100% Security Verified | No Subscription Required | No Malware
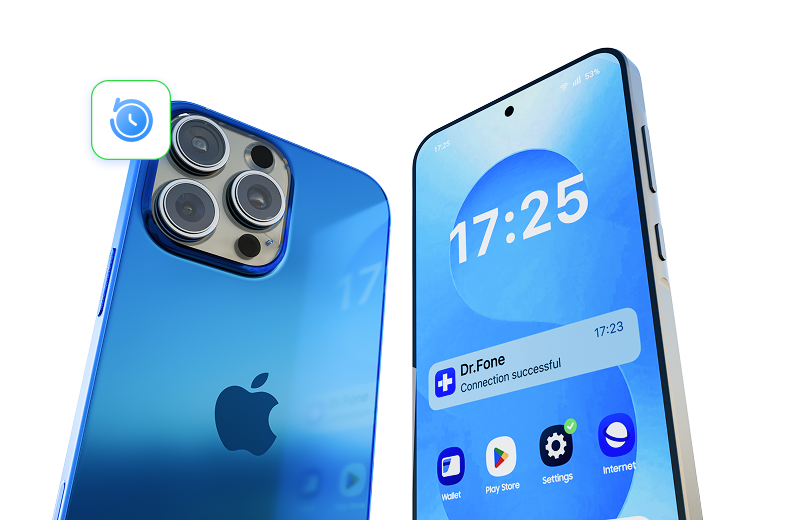

 :
: 
 ChatGPT
 Perplexity
 Gemini
 Claude
 Grok
Grok
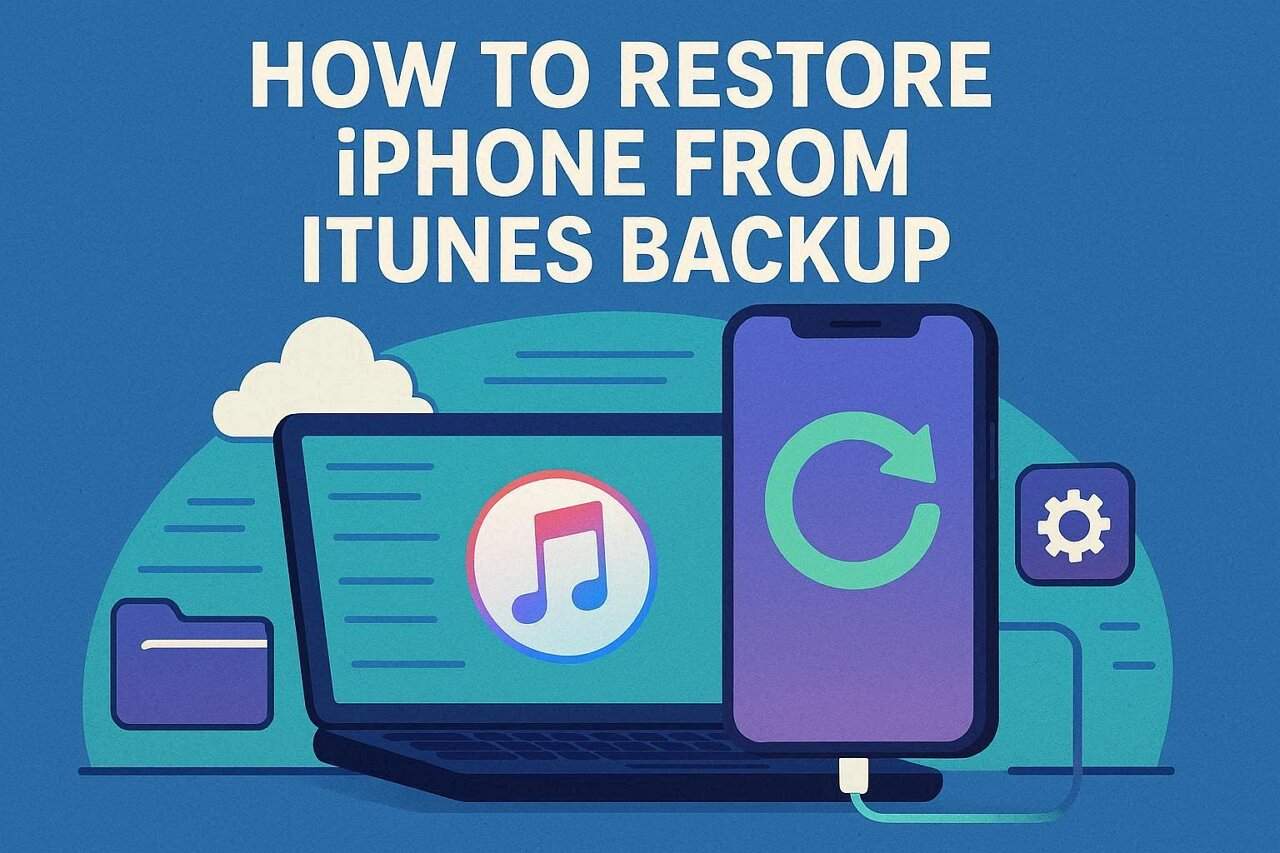
Losing critical data from your iPhone can be a stressful experience, but an iTunes backup can be your safety net. The problem? A standard iTunes restore overwrites everything currently on your device. Fortunately, powerful iTunes data recovery software exists to extract and recover specific files from your backup without affecting your current data.
Dr.Fone - Data Recovery (iOS) is a premier iTunes data recovery software that allows you to selectively retrieve your iPhone's data. It can extract information from iTunes backups, scan your iOS device directly for lost files, and even access iCloud backups, offering a comprehensive solution for any data loss scenario.
In this article
Part 1: How to Perform iTunes Data Recovery by Extracting a Backup File
Dr.Fone - Data Recovery (iOS) provides three distinct recovery modes to handle various data loss situations: recovering directly from an iOS device, performing iTunes backup recovery, and retrieving files from an iCloud backup. This tool is compatible with all modern iPhone models, from the iPhone 4 to the latest releases, as well as all iPad and iPod touch versions. Whether you've lost data due to accidental deletion, a system crash, or physical damage, Dr.Fone helps you restore vital information like photos, messages, contacts, and more.
Follow these steps to selectively recover your iPhone's data from an iTunes backup using this powerful tool.
-
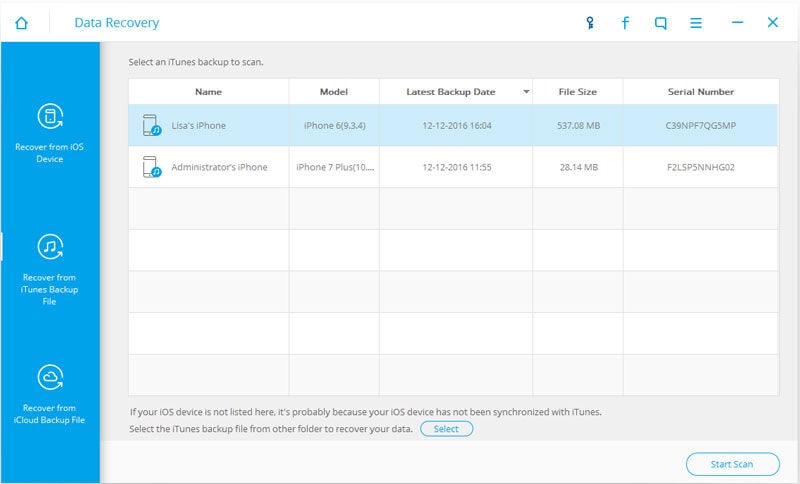
Step 1 Select the iTunes Backup File to Scan
Launch Dr.Fone on your computer and select the "Data Recovery" tool. From the sidebar, choose the "Recover from iTunes Backup" mode. The software will automatically detect and list all iTunes backup files on your computer. Select the backup that contains your lost data and click the "Start Scan" button to begin the extraction process.
-
Step 2 Preview and Recover Data from iTunes Backup
Unlike a standard iTunes restore, this data recovery for iTunes allows you to preview all recoverable content. Once the scan is complete, you can browse through categories like photos, contacts, messages, and call logs. Select the specific items you wish to retrieve and click the "Recover to Computer" button to save them directly to your PC or Mac.

 Recovers data after deletion, crashes, or device damage.
- Supports photos, messages, contacts, WhatsApp, and more.
- Supports all major iPhone, iPad, and iPod models.
- Preview and recover only what you need.
Part 2: How to Recover Data by Scanning Your iPhone/iPad Directly
What if you don't have a recent iTunes backup? Dr.Fone provides a feature to recover lost data directly from your iPhone, iPad, or iPod touch. This method scans the device's internal memory for traces of deleted files.

-
Step 1 Connect Your iPhone to the Computer
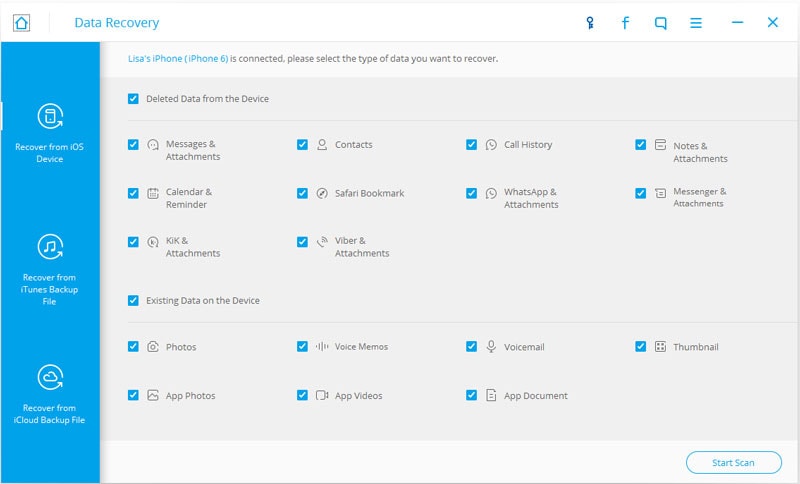
After launching Dr.Fone, select "Data Recovery" and then choose the "Recover from iOS Device" mode. Connect your iPhone to your computer using a USB cable. The software will detect your device and prepare it for scanning.
-
Step 2 Scan Your iPhone for Deleted Data
Once your device is recognized, you will see a list of data types you can scan for. Select the types of files you want to recover, or simply check all, and click the "Start Scan" button to initiate the process. Dr.Fone will perform a deep scan of your iPhone's storage.
-
Step 3 Preview and Recover the Found Data
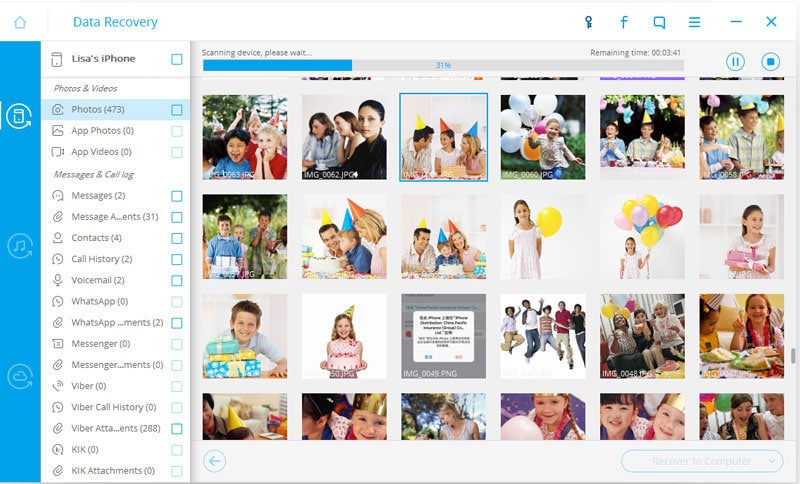
The scan may take some time depending on the amount of data on your device. After it's finished, all found data, including existing and deleted items, will be displayed in organized categories. You can filter to show only deleted items, preview them, and select what you need to recover to your computer.
Part 3: How to Retrieve Lost Data from an iCloud Backup File
If you back up your iPhone to iCloud, Dr.Fone can also access and extract data from your iCloud backups. This is another excellent alternative if you don't have an iTunes backup available on your computer. The process is secure and only requires your Apple ID credentials.
-
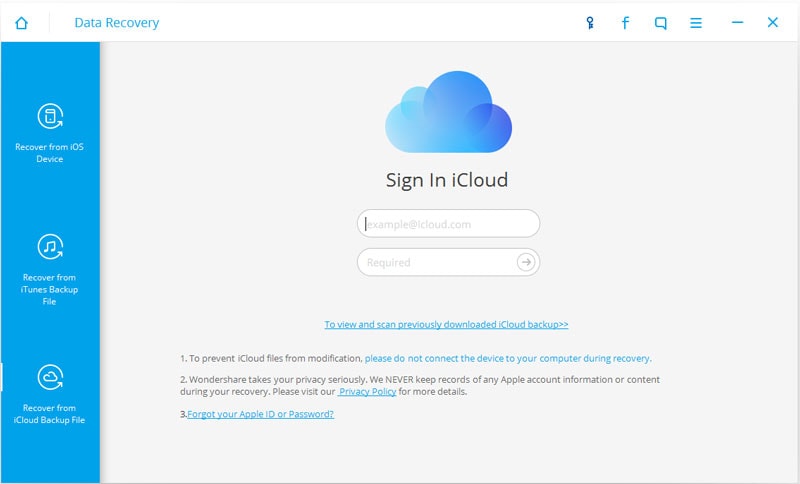
Step 1 Sign In to Your iCloud Account
Open Dr.Fone, go to the "Data Recovery" module, and select "Recover from iCloud Backup" from the left panel. You will be prompted to enter your Apple ID and password to sign in. Dr.Fone ensures your privacy and security throughout this process.
-
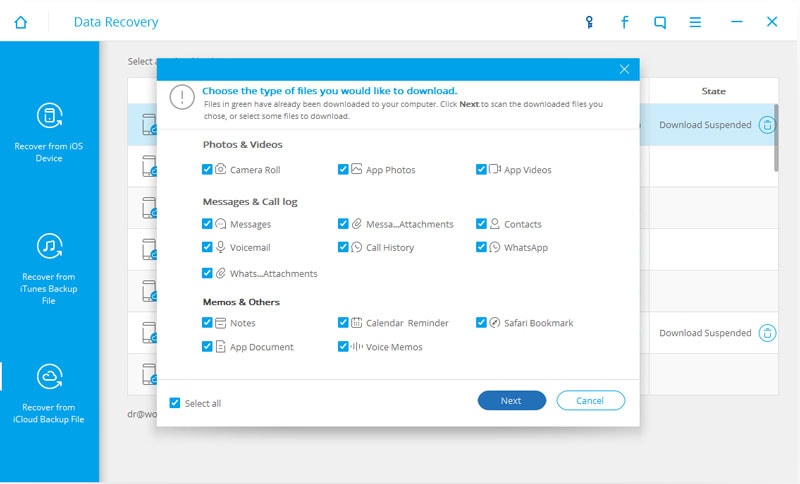
Step 2 Choose the iCloud Backup and File Types
Once logged in, the program will list all iCloud backup files associated with your account. Choose the most relevant backup and click "Download." A pop-up will appear, allowing you to select the specific file types you want to recover, which speeds up the scanning process. Click "Scan" to proceed.
-
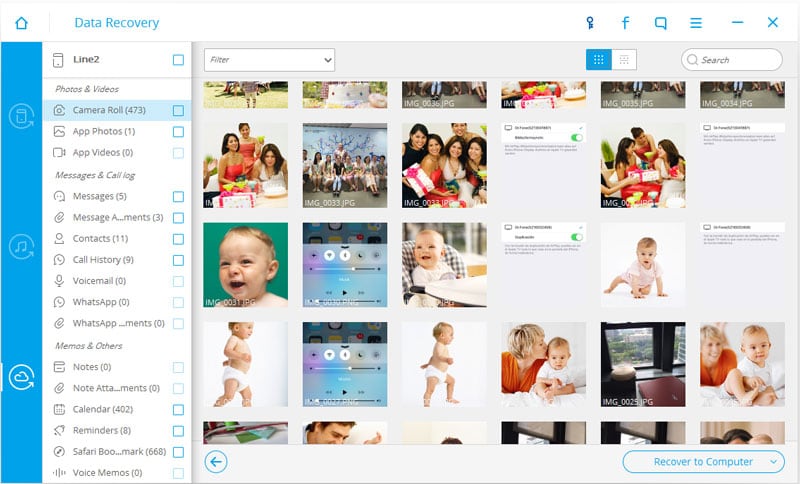
Step 3 Preview and Selectively Recover iCloud Data
After the scan, you can preview all the extracted data from the iCloud backup. Browse through the different categories, select the files you want to restore, and click the "Recover to Computer" button to save them to a local folder on your PC or Mac.


Conclusion
In conclusion, Dr.Fone - Data Recovery (iOS) stands out as a comprehensive and user-friendly iTunes data recovery solution. It empowers you to go beyond the limitations of Apple's native restore function by offering selective recovery from iTunes and iCloud backups, as well as direct device scanning. Whether you need to recover cherished photos, important messages, or essential contacts, Dr.Fone provides the flexibility and control to get your data back safely and efficiently, without risking the current data on your device.
FAQ
-
1. Can I perform data recovery for iTunes for free?
Many tools, including Dr.Fone - Data Recovery (iOS), offer a free trial version. This version typically allows you to scan your iTunes backup and preview all the recoverable files at no cost. This way, you can verify if your lost data is present and recoverable before purchasing the full version to save the files. -
2. Will iTunes data recovery overwrite the existing data on my iPhone?
No. When you use a third-party tool like Dr.Fone for iTunes data recovery, it extracts the data from the backup file and saves it to your computer. This process does not affect or overwrite any of the current data on your iPhone. This is a major advantage over using the official iTunes restore method, which erases your device. -
3. What types of data can I recover from an iTunes backup file?
You can recover a wide range of data types, including Photos, Videos, Contacts, Messages (SMS, iMessage, MMS), Call History, Voicemail, Notes, Reminders, Calendars, Safari Bookmarks, and data from third-party apps like WhatsApp, WeChat, and Kik. The selective recovery feature lets you choose exactly which of these items you want to restore. -
4. Does Dr.Fone support encrypted iTunes backups?
Yes, Dr.Fone fully supports the recovery of data from encrypted iTunes backups. When you select an encrypted backup file to scan, the software will prompt you to enter the password you set for it. As long as you know the correct password, it can decrypt the backup and allow you to preview and recover the contents just like a regular backup.
 Add Wondershare Dr.Fone as a preferred source on Google