How to Transfer MP3 to iPad with/without iTunes Sync

May 18, 2026 • Filed to: Device Data Management • Proven solutions
 TL;DR:
You can bypass iTunes syncing restrictions and directly transfer MP3 files to your iPad using Dr.Fone - Phone Manager (iOS) or Media Monkey, or utilize iTunes to manage and sync the entire music library manually.
● Dr.Fone - Phone Manager (iOS) allows direct file transfers across Windows and Mac without syncing the entire iPad library, and automatically prompts you to convert incompatible music formats during the process.
● Transferring via iTunes requires importing files into the library, manually converting incompatible formats via Import Settings, and syncing the entire device, which is time-consuming but useful for finding and deleting duplicate songs.
● Media Monkey transfers local MP3 files along with their ID3 information, but requires you to uncheck the Auto Sync option beforehand to prevent unwanted automatic syncing to your iPad.
Ask AI for a summary
 ChatGPT
 Perplexity
 Gemini
 Claude
 Grok
Grok
Dr.Fone Basic:
Better Control for Your Phone
Manage, transfer, back up, restore, and mirror your device

I am a singer and purchased an iPad to organize music for gigs. At times I'd like to play an MP3 file for practice so I can improvise harmony, descant, etc. The only songs that I can reliaably add to my iPad are the 3 that I purchased from iTunes. The 300 or so other files in my iTunes Library on my PC always display a message indicating that the file can't be transferred because it cannot be found. Of course the files are on the PC's HD in the same folder where they have always been, and where they were when added to the iTunes Library. It would appear that iTunes can't reliably transfer MP3 files to my iPad. Is there some other way to to do this task?
There are several advantages of using iTunes to sync music and other media files among multiple iOS devices, however, it has obvious disadvantages. For exmaple, when the users transfer MP3 to iPad, they'll have to sync the whole music library with iTunes, and the process is a little complicated. What's worse, iTunes only supports limited kinds of music formats, so when the users want to enjoy the songs on their iOS devices, they need to convert the songs to iTunes-compatible format at first. Here we'll introduce top 3 ways to transfer MP3 to iPad easily.
Part 1. Best Way to Transfer MP3 to iPad without iTunes
Dr.Fone - Phone Manager (iOS)
Transfer Music from Computer to iPod/iPhone/iPad without iTunes
- Transfer, manage, export/import your music, photos, videos, contacts, SMS, Apps etc.
- Backup your music, photos, videos, contacts, SMS, Apps etc. to computer and restore them easily.
- Transfer music, photos, videos, contacts, messages, etc from one smartphone to another.
- Transfer media files between iOS devices and iTunes.
- Support all iPhone, iPad, and iPod touch models with any iOS versions.


Steps to Transfer MP3 to iPad without iTunes
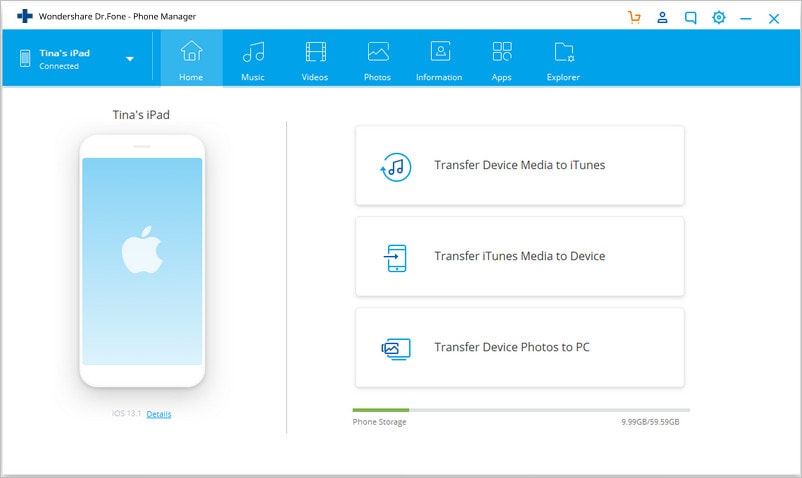
Step 1. Download and install Dr.Fone - Phone Manager (iOS) on your computer at first. Then you should connect iPad to computer with the USB cable for transferring MP3 to iPad. The program will automatically detect the iPad. Then choose the "Phone Manager" funtion.
Step 2. Click "Music" on the top to view all the music files in their iPad. Click "Add" > "Add file" or "Add folder". Select MP3 files that you would like to transfer to iPad and click "Open" to let the iPad Transfer software to transfer MP3 files.
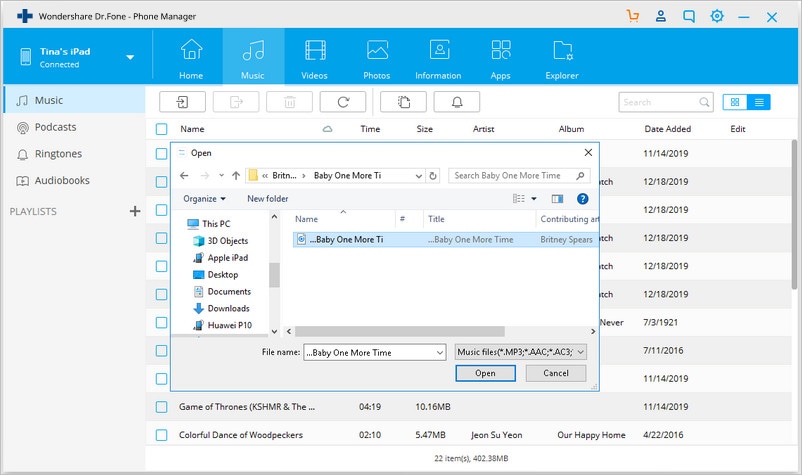
The software will also detect the selected music files which aren't compatible with iPad, and notice you to convert them.
Part 2. Transfer MP3 to iPad with iTunes
If you want to transfer MP3 to iPad using iTunes, you can check the following tutorial out.
Step 1. Start iTunes and click File at the upper left corner, then choose Add File to Library/Add Folder to Library.

Step 2. Find the music folder on your computer to add the songs to iTunes.

Step 3. When users finished adding MP3 files to iTunes Library, they can find them in iTunes Music Library.

Step 4. Click Playlist in iTunes Music Library, and then choose Recently Added.

Step 5. Users can right-click the songs to get their music info.

Step 6. Users can edit the music info if they need.

Step 7. If users want to import MP3 files to iTunes Library, they can click Edit > Preferences > General, anc click Import Settings.

Step 8. The pop-up dialog enables users to choose the file format they need.

Step 9. If a song isn't an MP3 file, users can right-click it and create the MP3 version.

Step 10. Now delete the incompatible music files in iTunes Music Library by right-clicking them and choose Delete.

Step 11. Sync iPad with iTunes to let iTunes transfer MP3 to iPad. After that, users can enjoy the songs on their devices.

Pros and Cons of Using iTunes
- Once the songs are imported to iTunes, they can be synced to any iOS device.
- The process is long and full of hassle for a new user.
- Users can use iTunes to find the duplicate songs and delete them easily.
Part 3. Transfer MP3 to iPad with Media Monkey
Media Monkey enables users to transfer MP3 to iPad easily. The following tutorial will show users to how to add MP3 to iPad with Media Monkey.
Step 1. Connect iPad to computer with the USB cable, and then start Media Monkey.

Step 2. Select All Music so that the program can search for the local MP3 files.

Step 3. Uncheck Auto Sync to avoid the device being synced automatically.

Step 4. Check the following options in Media Monkey.

Step 5. Click the iPad icon and sync it with Media Monkey.

Pros and Cons
- The program transfers the music files and its ID 3 info.
- The support center of this program is not good.
- The program recently added the auto DJ function.
Dr.Fone Basic:
Better Control for Your Phone
Manage, transfer, back up, restore, and mirror your device


iTunes Transfer
- iTunes Transfer - iOS
- 1. Transfer MP3 to iPad with/without iTunes Sync
- 2. Transfer Playlists from iTunes to iPhone
- 3. Transfer Music from iPod to iTunes
- 4. Non-purchased Music from iPod to iTunes
- 5. Transfer Apps Between iPhone and iTunes
- 6. Music from iPad to iTunes
- 7. Transfer Music from iTunes to iPhone X
- iTunes Transfer - Android
- 1. Transfer Music from iTunes to Android
- 2. Transfer Music from Android to iTunes
- 5. Sync iTunes Music to Google Play
- iTunes Transfer Tips


Alice MJ
staff Editor