What Is iPad Recovery Mode: Everything You Need to Know

Jul 12, 2024 • Filed to: Data Recovery Solutions • Proven solutions
Among Apple's renowned products, the iPad serves as a symbol of technological advancement and design. Nonetheless, even the most cutting-edge devices can remain susceptible to problems. This is precisely when the iPad Recovery Mode becomes crucial. It serves as a powerful tool to resolve complex issues that may arise during the device's usage. Understanding the details of the iPad Recovery Mode is crucial for any iPad user.
From restoring a device to updating the OS, the Recovery Mode is a valuable feature. This comprehensive guide provides a detailed overview of the iPad Recovery Mode. It offers step-by-step instructions, tips, and insights that can aid users in using this feature. It will also provide solutions for how to resolve the iPad stuck in the Recovery Mode issue.
Part 1: What Is Recovery Mode for iPad and Its Use Cases
Before learning how to put an iPad in Recovery Mode, let’s discuss what Recovery Mode is. The Recovery Mode for the iPad is a powerful built-in troubleshooting feature. Its purpose is to assist users in tackling intricate software challenges that might surface on their devices. Essentially, it acts as a safeguard, granting users the ability to execute vital tasks. These include restoring the device, updating the OS, or resolving software malfunctions.
When an iPad is in Recovery Mode, it enables users to reinstall the software on the device. You need a computer and the latest version of iTunes/Finder to do that. Its common use cases include resolving persistent software glitches and rectifying update-related issues. Moreover, you can also use it to recover a device stuck on the Apple logo or in a continuous restart loop.

Part 2: How To Put All iPad Models in Recovery Mode
Putting an iPad into Recovery Mode is a standardized process. The procedure might differ slightly based on the particular model. Below is a detailed walkthrough illustrating how to put iPad in Recovery Mode for different iPad models:
For iPads With Face ID
Instructions: To begin, link your iPad to a computer, then swiftly press and release the "Volume Up" button. Next, replicate this action using the "Volume Down" button. At last, press and hold the "Top" button until you see the Recovery Mode screen on your device.
For iPads With a Home Button
Instructions: Here, after connecting the iPad to the computer, you will need to press and hold both the "Home" and "Top” buttons. Continue to hold down these buttons until the Recovery Mode screen becomes visible.

Part 3: How to Fix the iPad Stuck in Recovery Mode
If your iPad is stuck in Recovery Mode, there are several methods you can employ to resolve the issue. Here are some effective solutions to restore your Recovery Mode iPad normal functionality:
Fix 1: Force Restart iPad
Force restarting an iPad can effectively tackle various software glitches. It can also include those that might cause the device to be stuck in Recovery Mode. This straightforward troubleshooting technique helps to reboot the device quickly. As a result, it might assist in restoring the iPad to its regular operating state. Here's how to force restart different iPad models:
For iPads With Face ID
Instructions: First, quickly tap and release the "Volume Up" button. Follow it by pressing and quickly letting go of the "Volume Down" button. For the final steps, press and hold the "Top" button until you see the Apple logo.

For iPads With a Home Button
Instructions: To begin, swiftly press and hold the "Home" and "Top" buttons simultaneously. Let go of these buttons as soon as the Apple logo materializes on the screen.

Fix 2: Restore the iPad With iTunes/Finder
Restoring your iPad using iTunes/Finder is a robust method for resolving persistent software issues. It also includes those related to the device being stuck in Recovery Mode. Make sure your computer has the most recent iteration of iTunes/Finder installed. Link your iPad to your computer using an MFi-Certified USB cable. Below is a detailed manual on how to restore your iPad using iTunes or Finder:
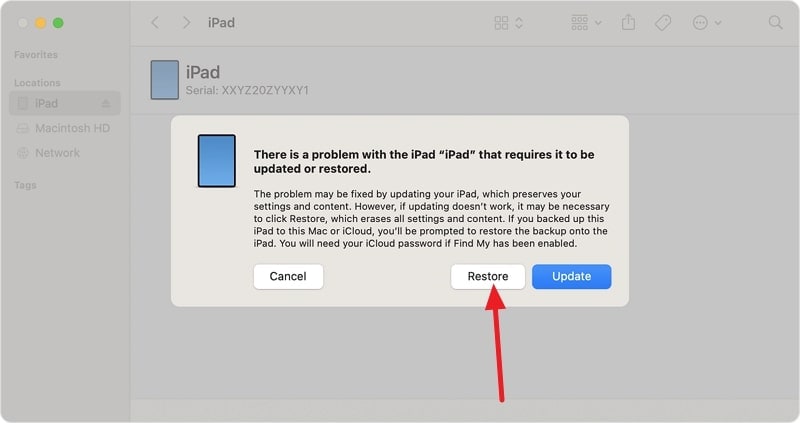
- Step 1: As soon as you connect your iPad stuck in Recovery Mode to a computer with iTunes/Finder running, a prompt will appear. It will inform you that iTunes/Finder has detected a device in Recovery Mode.
- Step 2: To manage your device, use iTunes/Finder to either "Update" or "Restore" it. Opt for "Restore" to initiate the download of the latest iPadOS version. Keep in mind that this action will reset your iPad to its original factory settings.
Fix 3: Try Using the Advanced iPad Repair Tool To Exit Recovery Mode
When standard troubleshooting methods fail to resolve issues related to iPad Recovery Mode. It is time for a specialized tool. Wondershare Dr.Fone is one such example that allows you to exit Recovery Mode using one click. Following are steps to exit the iPad in Recovery Mode via Dr.Fone:
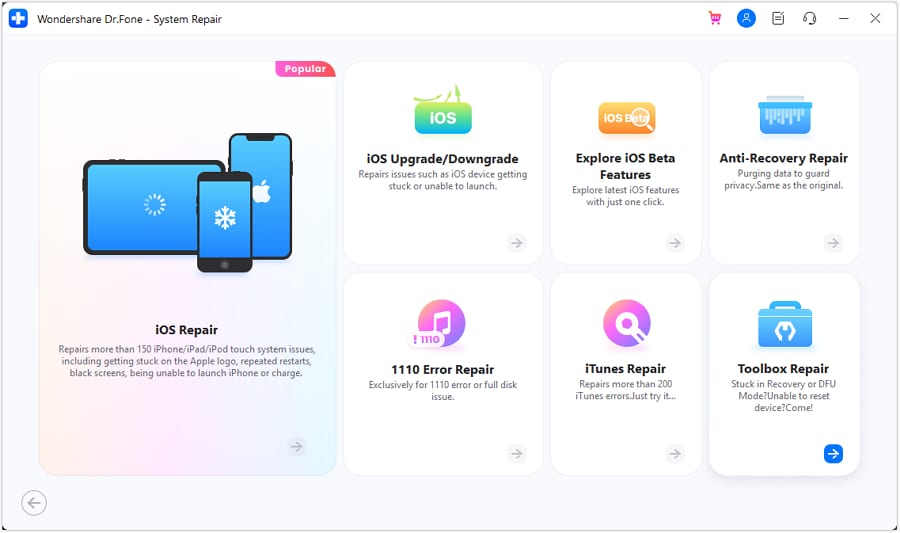
- Step 1: Navigate to Toolbox Repair in Wondershare Dr.Fone
Open Wondershare Dr.Fone on your computer, then navigate to the "Toolbox" section in the left panel. Access the "System Repair" tool to begin the necessary procedure. Define your device as "iOS," and on the following screen, tap "Toolbox Repair.”
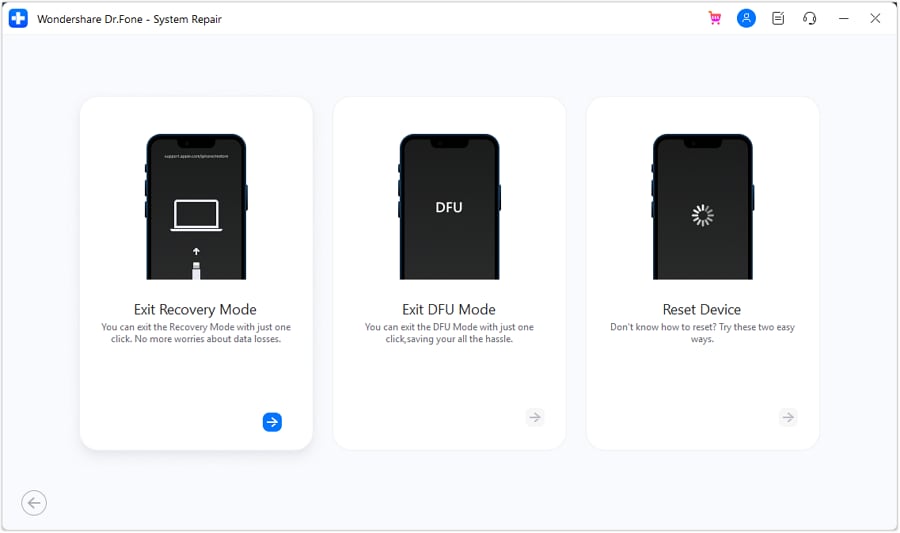
- Step 2: Exit the Recovery Mode on Your iPad
Now is the time to connect your iPad stuck in Recovery Mode to the computer. On the screen, select the "Exit Recovery Mode" feature, and on the next screen, click "Exit Recovery Mode." It will get your iPad out of Recovery Mode and restore its functionality.
Part 4: The Best Alternative to iPad Recovery Mode for Fixing iPadOS Issues – Wondershare Dr.Fone
The iPad Recovery Mode serves as the basic tool for resolving software issues. Yet, certain persistent problems might require more comprehensive solutions. In such cases, Wondershare Dr.Fone emerges as a comprehensive and powerful alternative. It addresses the intricate iPadOS issues with relative ease. This software not only facilitates the exit from Recovery Mode but also offers a wide array of advanced functionalities.
Wondershare Dr.Fone stands out as a robust and user-friendly toolkit. It has the capability to address more than 150 iPadOS system issues while ensuring that no data is lost. Moreover, it works for all iPadOS versions, including the latest iPadOS 17.
Key Features of Wondershare Dr.Fone
- If you have system issues like boot loop or Apple logo, then using Wondershare Dr.Fone, you can easily repair this issue.
- Standard Mode allows you to fix your iOS device issues in a quick and effective way without the need for any technical skills.
- You don't need to jailbreak your iPhone/iPad for downgrading or updating while using the Wondershare Dr.Fone toolkit.
Step-by-Step Guide To Resolve iPadOS System Issues via Wondershare Dr.Fone
To assist you in resolving your iPadOS system issues, we have described the simple steps to use Wondershare Dr.Fone below:
- Step 1: Begin the iPad System Repair Process
After launching Wondershare Dr.Fone on your device, move your cursor toward the left-side panel and tap on the "Toolbox" option at the top. Many options will appear in the main window; click the "System Repair" tab to start.

- Step 2: Initiate Recovery Mode to Proceed
After the devices are linked and detected, select “iPhone” on the system repair window and choose the “iOS Repair” tool. Next, choose the “Standard Repair” mode to fix all iPad issues without data loss. Once the device and repair selection are made, activate “Recovery Mode” on your iPad by applying the recommended steps.

- Step 3: Start Repair to Fix iPad Issues
In the subsequent window, you'll see the iPadOS firmware options; click "Download" to download the one you want. After this download completes, click the "Repair Now" button, and the repair will start. To finalize the whole process, click "Done" to complete the whole procedure.

Conclusion
Navigating the details of iPad Recovery Mode and understanding its role in resolving issues is crucial for all iPad users. However, when conventional methods fall short, an advanced tool like Wondershare Dr.Fone emerges as the go-to solution. It offers comprehensive functionalities to tackle an array of issues beyond the scope of Recovery Mode.
Wondershare Dr.Fone proves to be an invaluable asset for users seeking an all-in-one approach. It can resolve system crashes and unresponsive screens. Moreover, it also facilitates data recovery and comprehensive system repair. Dr.Fone also offers an effective means to ensure the smooth functionality of your iPad.


iPhone Recovery
- Deleted Data Recover
- 1. Recover HEIC Photos on iPhone
- 2. Recover Deleted Calendar Event
- 3. Retrieve iPhone Deleted Reminders
- 4. Retrieve iPhone Deleted Voicemail
- 5. Recover iPhone Deleted Photos
- 6. Recover iPhone Deleted Note
- 7. Recover Call History from iPhone
- 8. Recover iPhone Deleted Contacts
- 9. Recover iPhone Voice Memos
- 10. Recover Deleted iOS Files
- iPhone Passwords Recover
- 1. Retrieve iPhone Email Password
- 2. See iPhone Saved Password
- 3. Access iPhone Password
- 4. Get iPhone Password Back
- 5. iPhone Passcode Requriement Pops
- 6. Find iPhone Wi-Fi Password
- iPhone WhatsApp Recover
- 1. Recover WhatsApp Messages Apps
- 2. Recover Deleted WhatsApp Messages
- 3. Recover WhatsApp Messages Online
- 4. Retrieve Deleted WhatsApp
- Recover from Stolen iPhone
- Recover from Broken iPhone
- 1. Recover Data from Broken iPhone
- 2. Water Damaged iPhone Data Recovery
- 3. Recover Data from Dead iPhone
- iPhone Recovery Tips
- 1. GT Recovery Undelete Restore
- 2. Recover Data from Memory Card
- 3. Recover iPhone Lost Data
- 4. Recycle Bin on iPhone
- 5. Recover Data on iPhone in Recover Mode
- 6. Recover Data from iPhone in DFU Mode
- 7. iTunes Data Recovery
- 8. Recover iPhone Data Without iTunes
- iPhone Recovery Tools
- ● Manage/transfer/recover data
- ● Unlock screen/activate/FRP lock
- ● Fix most iOS and Android issues
- Recover Now Recover Now Recover Now
Daisy Raines
staff Editor