100% Security Verified | No Subscription Required | No Malware

 :
: 
 ChatGPT
 Perplexity
 Gemini
 Claude
 Grok
Grok

I just accidentally deleted some important documents from my iPad and I can't find a recycle bin anywhere to get them back. How can I recover these lost iPad files?
- A Concerned iPad User
Many iPad users have faced the panic of accidental deletion. You store countless valuable files, from precious photos and videos to critical work documents, on your device. When something important disappears, the first instinct is to look for a recycle bin or trash can, a familiar safety net on desktop computers.
However, iPads operate differently. There isn't a single, system-wide recycle bin. This guide will clarify where deleted files go on your iPad, show you how to recover them from built-in features, and provide a powerful method to recover files on your iPad that seem to be permanently gone.
In this article
Part 1. The "Recycle Bin" on iPad: Understanding 'Recently Deleted' Folders
While your iPad lacks a traditional trash can, many native Apple apps include a 'Recently Deleted' folder. This feature acts as a temporary holding area for items you've removed, giving you a chance to restore them. Typically, files remain here for about 30 days before being permanently erased.
1-1. Recovering Deleted Photos and Videos
The Photos app is one of the most common places for accidental deletions. If you've deleted a photo or video, it's likely moved to the 'Recently Deleted' album.
- Open the Photos app on your iPad.
- Tap on the Albums tab at the bottom of the screen.
- Scroll down to the 'Other Albums' section and tap on Recently Deleted. You may need to use Face ID or Touch ID to open it.
- Here, you'll see all photos and videos deleted within the last 30 days. Tap Select in the top-right corner, choose the files you want to get back, and tap Recover.
1-2. Restoring Deleted Items in the Files App
The Files app centralizes your documents from various sources, including iCloud Drive and On My iPad. It also has a recovery feature for deleted items.
- Launch the Files app on your iPad.
- In the sidebar on the left, tap on Recently Deleted under 'Locations'.
- Press and hold on the file or folder you wish to restore.
- From the context menu that appears, tap Recover. The file will be returned to its original location.
Part 2. What to Do if You Permanently Delete Something?
If you can't find your files in any 'Recently Deleted' folder, or if more than 30 days have passed, the data has been permanently erased from the user-accessible parts of the system. However, this doesn't mean it's gone forever. The data often remains on the device's storage until it's overwritten by new information.
If you've accidentally deleted a critical file permanently, it is crucial that you stop using your iPad immediately. Every action you take—installing an app, taking a photo, or even browsing the web—can create new data that might overwrite your lost files, making them unrecoverable. The best course of action is to turn to a professional data recovery tool as quickly as possible to maximize your chances of success.
Part 3. How to Recover Permanently Deleted Files on iPad
When native methods fail, the most reliable way to recover lost iPad files is by using a dedicated software solution. Dr.Fone - Data Recovery (iOS) is a professional-grade tool designed specifically to retrieve various types of lost or deleted files from iOS devices, including iPads. It offers a high success rate by deeply scanning your device's storage, and it can also extract data from existing iTunes and iCloud backups without overwriting your current data.
 Recovers data after deletion, crashes, or device damage.
- Supports photos, messages, contacts, WhatsApp, and more.
- Supports all major iPhone, iPad, and iPod models.
- Preview and recover only what you need.
Dr.Fone provides three distinct methods to recover your lost files. Let's explore each one in detail.
Method 1: Recover Lost Files Directly from Your iPad
This method is ideal if you haven't backed up your iPad before the data was deleted. It scans your device's internal memory for recoverable file traces.
-
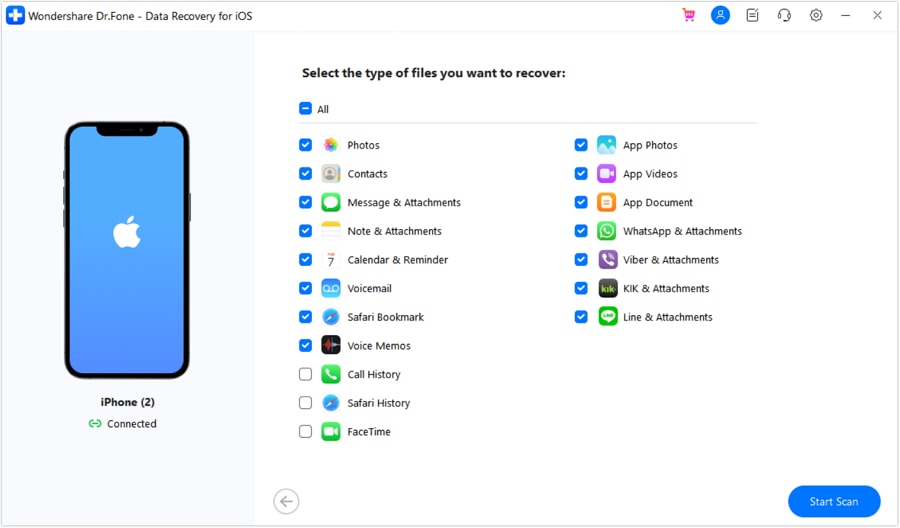
Step 1 Connect Your iPad and Launch Dr.Fone
Download and install Dr.Fone (Try It Free / Try It Free) on your computer. Open the program and select 'Data Recovery' from the main toolkit. Connect your iPad to the computer using a USB cable. Once your device is detected, the software will automatically select the 'Recover Data from iOS device' mode.

-
Step 2 Scan Your iPad for Lost Data
Click the Start Scan button to begin the process. Dr.Fone will perform a thorough scan of your iPad's storage. This may take several minutes, depending on the amount of data stored on your device. Be patient and ensure the iPad remains connected throughout the scan.
-
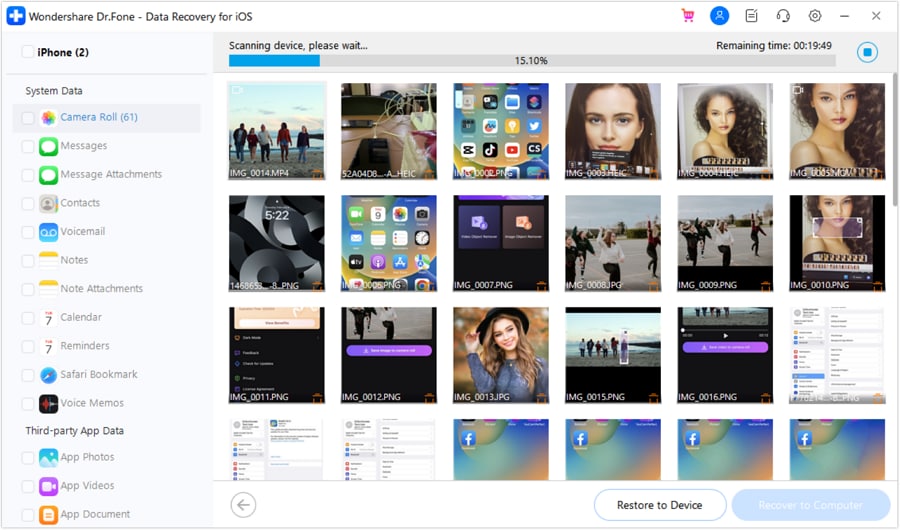
Step 3 Preview and Recover Your Files
After the scan is complete, Dr.Fone will display all found data, categorized by file type. This includes both existing and deleted items. You can filter to show only the deleted files. Preview the items you want to recover, select them, and click either Recover to Computer or Recover to Device to save your files.
Method 2: Restore Lost iPad Files from an iTunes Backup
If you regularly back up your iPad to a computer using iTunes (or Finder on macOS Catalina and later), you can use Dr.Fone to selectively extract files from that backup without restoring the entire device.
-
Step 1 Select the iTunes Backup Recovery Mode
Launch Dr.Fone (Try It Free / Try It Free) and navigate to the Data Recovery module. In the left sidebar, choose Recover Data from iTunes. The software will automatically detect and list all iTunes backup files present on your computer.
-
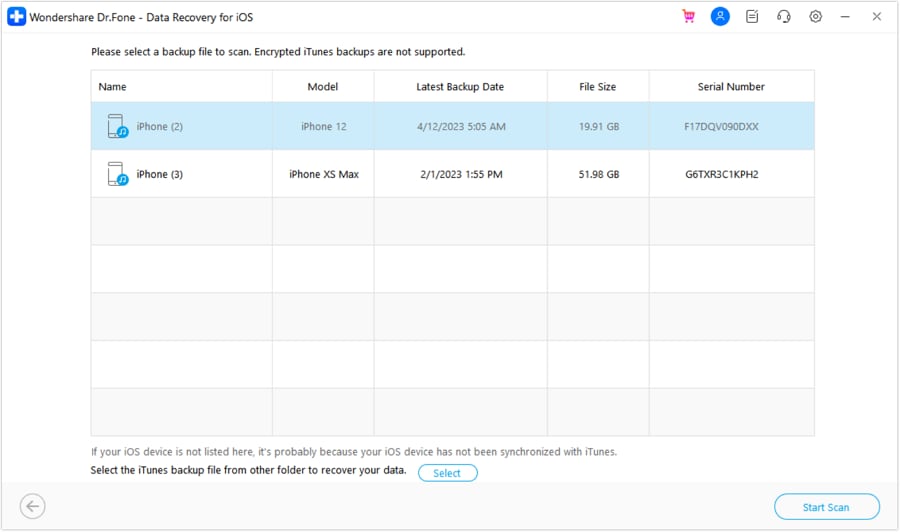
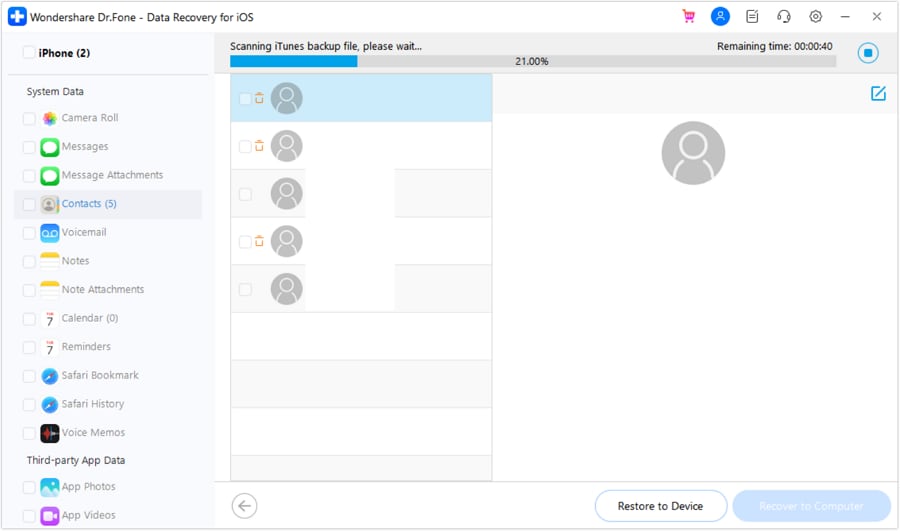
Step 2 Scan the iTunes Backup File
Select the backup file that most likely contains your lost data (check the date) and click Start Scan. Dr.Fone will begin extracting all the data from the backup file. Once the scan is finished, you can preview all the contents, including photos, messages, contacts, and more. Check the files you need and click Recover to Device or Recover to Computer.
Method 3: Retrieve Deleted Data from an iCloud Backup
This method is useful if you use iCloud to back up your iPad. Dr.Fone lets you download and view the contents of your iCloud backup, then recover specific files.
-
Step 1 Sign in to Your iCloud Account
Open the Dr.Fone (Try It Free / Try It Free) software and select the Recover Data from iCloud option. You will be prompted to enter your Apple ID and password to sign in. Your privacy is protected, as Dr.Fone does not store any of your account information.

-
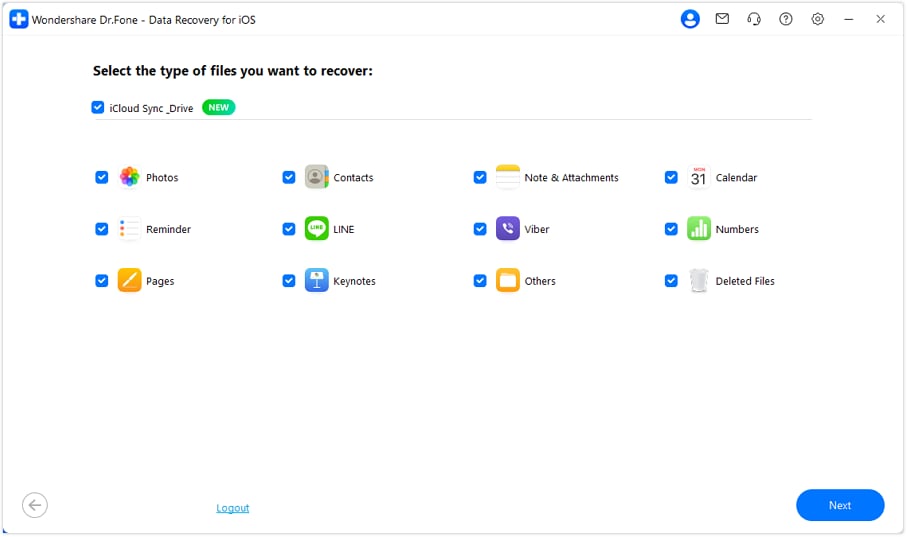
Step 2 Download and Scan the iCloud Backup
Once logged in, Dr.Fone will list all available iCloud backup files associated with your account. Choose the backup that contains the data you want to recover and click Download.
-
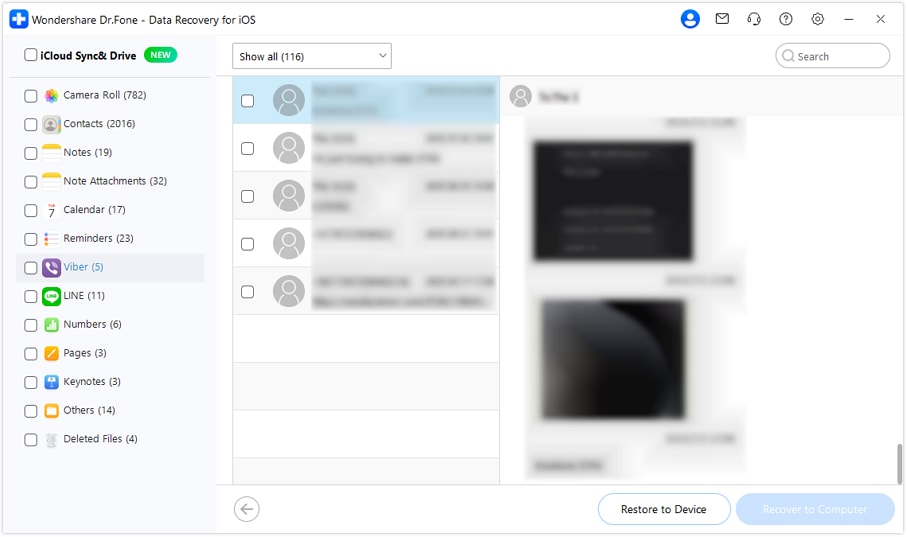
Step 3 Preview and Restore Lost Data
After the scan is complete, you can browse through all the data from the iCloud backup. Select the specific files you want to retrieve and click Recover to Device or Recover to Computer to save them safely.
Part 4. Tips to Prevent Future Data Loss on Your iPad
While recovery tools are effective, prevention is always the best strategy. Here are a few tips to safeguard your valuable data:
- Enable iCloud Backup: Go to Settings > [Your Name] > iCloud > iCloud Backup and make sure it's turned on. Your iPad will automatically back up when connected to power, Wi-Fi, and locked.
- Perform Regular iTunes/Finder Backups: Periodically connect your iPad to your computer and create a local backup. This provides an additional layer of security.
- Use Cloud Storage Services: For important documents, consider using services like iCloud Drive, Google Drive, or Dropbox. This syncs your files across devices and provides another recovery option.
- Double-Check Before Deleting: Cultivate a habit of confirming which files you are about to delete, especially when clearing storage space.
Conclusion
Losing important files from your iPad can be stressful, but it's often not a permanent disaster. The first step is always to check the app-specific 'Recently Deleted' folders. For data that has been permanently erased, a reliable tool is essential. Dr.Fone - Data Recovery (iOS) offers a comprehensive and user-friendly solution to recover lost iPad files, whether from the device itself or from iTunes and iCloud backups. By following the methods outlined in this guide, you can confidently tackle data loss and protect your important information.
FAQ
-
1. Does the iPad have a universal recycle bin like Windows?
No, the iPad does not have a single, system-wide recycle bin. Instead, individual applications like Photos, Notes, and Files manage their own 'Recently Deleted' folders. Items in these folders are typically held for around 30 days before they are permanently removed. -
2. Can I recover files on my iPad if I don't have a backup?
Yes, it is possible. Using a tool like Dr.Fone - Data Recovery (iOS), you can perform a direct scan of your iPad's internal storage. This method can find and recover deleted files that have not yet been overwritten by new data, even without an existing backup. -
3. How can I increase my chances of recovering deleted files?
The most important step is to stop using your iPad immediately after you notice the data loss. Continued use can write new data over the deleted files, making them permanently unrecoverable. The sooner you run a recovery scan, the higher your chances of success. -
4. Is it safe to use third-party software to recover my iPad data?
It is safe as long as you use a reputable and trusted software provider. Dr.Fone is a well-established solution that prioritizes user privacy and data security. It reads your device data without storing or uploading your personal information, ensuring a secure recovery process. Always download software from the official website to avoid security risks.
 Add Wondershare Dr.Fone as a preferred source on Google