Top 43 iOS 14.6 Update Problems & Fixes

Part 1. iOS 14.6 Update Problems: Update Failed

The most common iOS 14.6 problems are related to its update. While the public update is compatible with all the leading iOS devices, users are still facing issues with it. Here are some of the common iOS 14.6 update failed problems and how you can fix them.

1.1 iOS 14.6 Software Update Failed
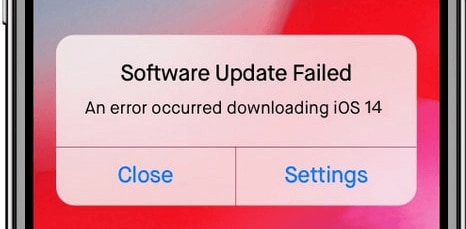
There are times when while updating their device to iOS 14.6, users get the software update failed, an error occurred downloading iOS 14.6 prompt on their screen. From a bad network connection to an update conflict, there could be numerous reasons behind it. Needless to say, it bugs the iPhone users, especially when their device keeps asking them to update it and yet gives the same prompt.
iOS 14.6 problem - software update fails
Quick Fixes:
Check Cellular Data: Make sure that you have a stable internet connection. If you are not using a Wi-Fi network, go to your device settings and enable the Cellular Data option. Check the cellular coverage to ensure you have a reliable network.
Toggle Wi-Fi: Switch your Wi-Fi network off from the Control Center and turn it back on again. Also, ensure that the router is working properly to get a fast-speed connection.
Restart iPhone: Restart your phone by long-pressing the Power button. Slide the Power option and wait for your phone to be turned off. After a while, turn it on again and try updating it.
Check System Status: Go to the Apple System Status page and make sure that the software update is available. You can also check the status of other services from here.
Update iPhone using iTunes: Instead of over-the-air, you can also try to update your device by using iTunes. Just connect the device, go to its Summary page, and click on ā€œCheck for Updateā€.

In addition to that, you can also read this extensive post on solving the ā€œSoftware Update Failedā€ issue while updating to iOS 14.6.

1.2 Stuck on Verifying iOS 14.6 Update

Even after completely downloading the iOS 14.6 update, chances are that your iPhone can simply get stuck on the iOS 14.6 update verifying prompt. This issue can arise due to a corrupt or incomplete software download, a problem with your Apple ID, or any other software-related issue. There are also times the problem can be fixed automatically.
I haven't updated the software on my iPhone in a very long time, and now that I'm finally trying to do so, it's just stuck on verifying update. You remind me EVERYDAY to update and now you can't verify it. Come on!
Feedback from Twitter
TIPSļ¼š
Restart the update: The best way to fix this problem is by restarting the update. Firstly, turn off your device by pressing the Power button. Afterward, turn it on again and go to its Settings > General > Software Update to restart the updating process.
Reset Apple ID: Reset your Apple ID to fix the verifying error related to your account. Just go to your phone settings and tap on your Apple ID. Sign out from it, wait for a while, and sign back in to resolve the issue.
Force restart iDevice: If you still face the same error, then try to forcefully restart your device. This would break its present power cycle and might fix the verification error. To do this, press the Power + Home/Volume Down button on your device at the same time for at least 10 seconds.
Reset all settings: If there is a problem with your phoneā€™s settings, then you can choose to reset them as well. To do this, go to its Settings > General > Reset and tap on ā€œReset All Settingsā€. Confirm your choice by providing the passcode of your device. Your phone would be restarted with the default settings. Afterward, try to do the iOS 14.6 update once again.

Apart from these solutions, you can read this guide to fix your iPhone stuck on the verifying update prompt.

1.3 Insufficient Space for iOS 14.6 Download

The lack of free space on your iOS device can also halt the update in between. You should then remove unnecessary photos, videos, music, and apps in this case. Before you update your device to iOS 14.6, make sure that it has at least 5 GB free space to complete iOS 14.6 update.
Quick Fixes:
Obtain space from 3rd-party apps: When you get the lack of space prompt on your device, tap on ā€œAllow App Deletionā€. This will let you get rid of unwanted storage from third-party apps and would automatically make more space for the upgrade to be completed.
Manage iPhone storage: You can also manage the storage on your iPhone. Go to your iPhoneā€™s General Settings > Storage > Manage Storage. Here, you can view how much space is consumed by various apps and data. From here, you can get rid of unwanted content and make more space on your iPhone. Afterward, try to update your device to iOS 14.6 again.

Besides that, you can follow more smart tips to free up more space on your iPhone.

1.4 Stuck on Slide to Upgrade Screen

Getting an iPhone stuck on the slide after an update is probably one of the worst situations for any iOS user. It mostly happens due to a software glitch or when the iOS 14.6 update has tampered.
Stuck on "slide to upgrade"... geez apple, you are as crap as Microsoft ever was.
FEEDBACK FROM TWITTER
Quick Fixes:
Force restart iPhone: If you are lucky, then you would be able to resolve this issue by forcefully restarting your iPhone. Keep pressing the Home + Power or the Volume Down + Power key (depending on your device model) to forcefully restart your device.
Fix in recovery mode: Another way to fix this issue is by putting your device in the recovery mode. Firstly, you need to know the correct key combinations to put your iPhone in recovery mode. Taking iPhone 6 as an example, launch iTunes on your computer, and connect your iPhone to it while pressing the Home/Volume Down button. Later, iTunes will automatically detect the issue with your phone and ask you to restore it. Though, this will delete the existing data on your device.
Note:

Restoring iPhone in Recovery mode will delete the existing data on your device. So please make sure you've already backed up all data on your iPhone beforehand. You can either use iTunes/iCloud to backup iPhone data or Dr.Fone - Backup & Restore to backup your iPhone flexibly and selectively.

1.5 iOS 14.6 Software Update Server Could Not Be Contacted
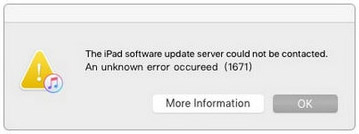
If you are trying to update your phone via iTunes, then you might get a prompt The iPhone software update server could not be contacted. It is also known as Error 1671 due to its code. It happens when iTunes or your computer has network connectivity issues, or the Apple servers are overloaded. Here are some quick ways to fix this iOS 14.6 installation problem.
iOS 14.6 problem - server not contacting
Quick Fixes:
Restart PC system: One of the major reasons why iTunes canā€™t communicate to Appleā€™s Server is because of Windowā€™s Firewall or a third-party anti-virus that could have blocked the respective port. Therefore, you should disable the anti-virus and turn off Windowā€™s Firewall. Restart your system and try to install the iOS 14.6 update once again.
Update iTunes: If you are using an older version of iTunes, then you might also get this prompt. To fix this, just launch iTunes, go to its settings, and check for updates. This will let you automatically update the version of iTunes you are using. Try to update your iPhone to iOS 14.6 afterward.
Try OTA update: Sometimes, users find it hard to update their iPhones to iOS 14.6 using iTunes, no matter how many times they try. As an alternative approach, just connect your iPhone to a Wi-Fi network and go to its settings to start the OTA (over-the-air) iOS 14.6 update.

In order to learn more about fixing the iPhone/iPad Software Update Server Could Not Be Contacted problem, you can read this comprehensive guide.

1.6 iOS 14.6 Update Not Appearing in Settings

As surprising as it might sound, sometimes the iOS 14.6 update might not appear in your iPhone or iPad settings. Or you may receive messages saying "Unable to Check for Update" or "An error occurred while checking for a software update". In some of the cases, the problem is fixed by simply waiting for a while. Nevertheless, if you still get this iOS 14.6 update issue, then check the following quick fixes.
iOS update option not appearing during iOS 14.6 upgrade? You can always try these tips: https://bit.ly/2BCHiuj @drfone_toolkit
Quick Fixes:
Check compatibility: Firstly, you need to check whether your device is compatible with iOS 14.6 or not. For instance, if you have an iPhone 4s, then you wonā€™t be able to upgrade it to iOS 14.6 and the option wonā€™t appear in its settings as well. Ideally, iPhone 5s and newer models can be updated to iOS 14.6. Also, wait for the public release of iOS 14.6 in order to find it in your iPhone settings.
Restart device: Sometimes, the easiest way to fix this problem is by restarting your iPhone. Once your iPhone is restarted, it will connect to Appleā€™s server again and might display the iOS 14.6 software update option.
Manual update: If nothing else would work, then you can consider updating your iPhone to iOS 14.6 manually. Firstly, download the IPSW file of a stable iOS 14.6 version on your computer and connect your iPhone to it. Go to its ā€œSummaryā€ tab and hold ā€œShiftā€ (for Windows) or ā€œOptionā€ (for Mac) while clicking on the ā€œRestoreā€ button. This will load a browser window from where you can load the saved IPSW file and upgrade your phone manually.

1.7 An error occurred installing iOS 14.6

Too often, an unexpected error can occur while installing an iOS update. To be frank, there is no definite reason behind this: update verification failure, update check error, or even iOS 14.6 installation error, etc. Dreadful? But you have to try a few solutions to fix it.
iOS 14.6 problem - error installing iOS 14.6
Quick Fixes:
Turn the network off and on: The easiest way to resolve this issue is by retrying. When you get the prompt, tap on the ā€œRetryā€ button and see if it works. Furthermore, you can turn the network connection off and on again and try to install iOS 14.6 from scratch.
Reset network settings: In most of the cases, the problem occurs due to a conflict in network settings. Therefore, we recommend visiting your iPhoneā€™s Settings > General > Reset and Reset Network Settings from here.
Restore device: The last resort to fix this problem is by restoring your device. You should know that this will erase all the stored content and saved settings on your iPhone or iPad. To restore your device, go to its Settings > General > Reset and tap on ā€œErase All Content and Settingsā€. Confirm your choice and let your phone be restarted with default settings. Later, you can try to update iPhone/iPad to iOS 14.6 once more.
Use a 3rd tool to fix: If you want to fix this iOS 14.6 update issue without losing iPhone/iPad data, then you can use a third-party tool. For instance, Dr.Fone - System Repair (iOS) can fix all the major iOS related issues and that too without any data loss. Just connect your phone to the system, launch Dr.Fone - System Repair, and follow the simple on-screen instructions for an easy fix.

1.8 iOS 14.6 download stuck

Since the file size of the iOS 14.6 update is huge, it can get stuck while downloading as well.
You may find that the iOS 14.6 update progress is halted for over an hour after you touched "Download and Install". It is a common issue that people face while downloading the iOS 14.6 update file or using an unreliable internet connection. Though, there could be an issue with your iPhone as well behind this problem.
Quick Fixes:
Enough preparation: First of all, make sure that you have a stable internet connection. Also, there should be enough free space on your device. If not, then you might get iOS 14.6 download & update halted repeatedly.
Wait for stable iOS 14.6 version: It has been observed that users often experience this problem while downloading the version of an iOS 14.6 update. Donā€™t make this common mistake and wait for the stable public version of iOS 14.6 to be released.
Delete old iOS profile: There could be a clash with the existing iOS 14.6 profile as well. That is if you tried to download iOS 14.6 before and it was not successful, then it can result in an unexpected clash. To fix this, go to your phoneā€™s Settings > General > Profile, select the previous iOS 14.6 profile, and manually delete it.

Part 2. iOS 14.6 Problems: Software Problems after Update

Not only while updating their devices to iOS 14.6, but users may also face unexpected issues after the iOS 14.6 update has been rolled out. For instance, there could be a problem with some of the apps or the system functioning of the iPhone. We have distinguished the post-update problems in different categories for your convenience.

2.1 iOS 14.6 Activation Failed

Lately, a lot of people have been complaining about the iPhone or iPad Activation Failed problem after updating to iOS 14.6. Error messages that pop up may be "Could Not Activate iPhone", "Activation Error", or "we are unable to continue with your activation at this time". Mostly, it happens when your device is not able to contact the Apple Server. There could be a software-related issue that might be obstructing the activation of your iOS 14.6 device.
Quick Fixes:
Avoid busy time of Apple server: Simply wait for a few minutes. If Appleā€™s servers are busy, then you can wait and retry to activate your phone. If you are lucky, you wonā€™t get this error after a while.
Restart iPhone: Restarting your phone is another option that might work. This will make your phone contact Appleā€™s servers again and can resolve the activation error.
Reboot Wi-Fi network: If there is a network-related issue, then you need to reboot the Wi-Fi network. Make sure that your SIM is inserted properly as well. Take the SIM ejector pin and remove the SIM tray. Clean it and insert it back again. In the end, you can check if it works or not.

Apart from that, you can also this in-depth tutorial: Guide to fixing the iPhone/ iPad Activation Failed error .

2.2 iOS 14.6 Reboot Loop Problem

Your iPhone has just completed the iOS 14.6 update, but instead of starting in the usual way, it keeps restarting. Well, it means that your device has been stuck in the reboot loop. A software glitch, an iOS 14.6 update gone wrong, malfunctioning battery, etc. could be some of its major reasons. You should take some needed measures as soon as possible to fix it as it can harm your device.
My iPhone 7 Plus is stuck in a never-ending reboot loop. Tried restoring it like 50 times. No luck. And no genius bars in Thailand to fix it.
FEEDBACK FROM TWITTER
Quick Fixes:
Force restart device: One of the best ways to fix the iPhone stuck in the reboot loop is by forcefully restarting your iPhone. Just long-press the Power + Home button for iPhone 6 and older versions or Power + Volume Down for iPhone 7 and newer versions. This will forcefully restart your device and might fix the issue.
Downgrade iDevice: If there is anything wrong with the iOS 14.6 update, then you can try to downgrade your phone to a previous stable version. Also, you can connect it to iTunes and check if a stable iOS version is available (in case you have updated your phone to an unstable version).
Put iPhone in recovery mode: If nothing else would seem to work out, then you can also put your device in recovery mode. While pressing the Home button, connect it to the system, and launch iTunes. It will automatically put your iPhone in recovery mode and will ask you to restore it.

Furthermore, you can read this detailed guide: How to fix iPhone stuck in reboot loop.

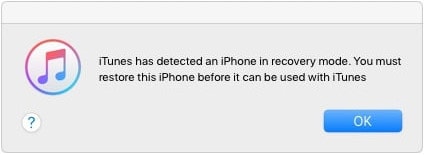
2.3 Various iTunes Errors for iOS 14.6

After connecting your iOS 14.6 updated device to iTunes, chances are that you might get some unwanted iTunes errors as well. Some common errors are iTunes error 21, 3004, 13, and so on. On the basis of an iTunes error, there could be different approaches to fix them.
iOS 14.6 - itunes errors
Quick Fixes:
Understand iTunes errors: First of all, you need to identify the type of iTunes error you are getting with your iOS 14.6. Just note down the code of the iTunes error to further explore it. Apple has come up with a list of iTunes errors that you also view. In this way, you can educate yourself about its common causes and prospective solutions.
Ensure iTunes is up to date: If you are trying to connect iOS 14.6 device with an outdated version of iTunes, then you might face unexpected issues. Before you connect your device to your computer, make sure iTunes is up to date. You can go to its menu and check for updates. Most of the time, iTunes automatically reminds users to update it as well.
Disable anti-virus and firewall: A lot of times, a third-party anti-virus can also tamper with the functioning of iTunes and block the relevant ports. Simply disable the anti-virus and firewall, restart the system and check if you still get the iTunes error or not.
Check the lightning cable: Make sure that the lightning cable that you are using to connect the iOS 14.6 iPhone to the system is reliable and functioning. You can try any other cable or use a different socket as well. Furthermore, clean the socket on your iPhone too, and try connecting it again.
Disconnect external devices: If your computer is connected to many external devices, then there could be a clash in commands. Remove all the other devices and connect your iPhone once again to see if you still get the iTunes error.

2.4 iOS 14.6 Device Wonā€™t Turn On

Right after completing the iOS 14.6 update, the iPhone might not turn on at all. In this case, your iPhone might just show only the spinning wheel, freeze on a black screen with the Apple logo, or simply turns black-screened permanently. As frustrating as it might sound, this iOS 14.6 issue is more common than you can think. There could be a problem with its software or even its battery.
iOS 14.6 problems - iphone cannot turn on
Quick Fixes:
Check hardware damage: Firstly, you need to inspect your iOS 14.6 device for any hardware damage. Check the lightning cable you are using, the charging socket, and if there is any damage with the device or not.
Charge device: During the iOS 14.6 update process, the device requires a lot of charges. Therefore, your iPhone could be switched off due to low battery. Charge it for a while and try to start your device once again.
Force restart your device: Another way to fix this problem is by force restarting your device. You might already know the key combinations for iPhone 6s and older generations (Home + Power) as well as iPhone 7/7s (Power + Volume Down). If you have an iPhone X, then first quickly press the Volume Up button. After that, quickly press the Volume Down button. Once you release it, hold and press the Power button.

2.5 iOS 14.6 Cannot Make or Receive Calls
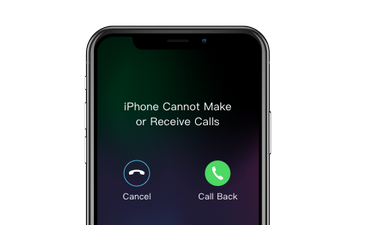
Quite a few people are not able to make or receive calls just after the iOS 14.6 update. They just see "call ended" or "call failed" prompts when initiating a phone call, or cannot receive calls from others. Then you should be alarmed if encountering the same. While the problem can be linked to your network, chances are that there could be a software-related issue with it as well. Here are some easy ways to fix it.
iOS 14.6 problems - iphone call failure
Quick Fixes:
Ensure proper network coverage: To start with, check if your iOS 14.6 device is in proper network coverage or not. Check the signals located on the top left corner of the screen. If you are in a basement or out in the woods, then you might not be getting enough network coverage on your iPhone/iPad. Needless to say, without the network signal, you canā€™t make or receive calls.
Turn on and off Airplane mode: One of the easiest ways to fix this is by toggling on and off the Airplane mode on your iOS 14.6. You can do this either by visiting the Control Center on your phone or its Settings. Turn on the Airplane mode, wait for a while, and turn it off again. Most likely, the trick will let you regain the network on your phone.
Re-insert the SIM: If you think there is a problem with your SIM, then you can reinsert it in your iOS 14.6 updated iPhone as well. To do this, you need to take the assistance of the SIM ejector tool.
Check carrier updates: While the carrier updates are often pushed automatically, sometimes we need to do it by ourselves. Go to your phoneā€™s General Settings > About > Carrier. Tap on it and check if a new iOS 14.6 update is available. Once you have downloaded the iOS 14.6 update, restart your phone, and check if the problem is solved or not.
Reset network settings: Lastly, you can simply reset the network settings on iOS 14.6. To do this, go to its Settings > General > Reset and tap on ā€œReset Network Settingsā€. Afterward, your phone would be restarted with the default network settings.

For further help, refer to this comprehensive guide to fix iPhone calling issues after an iOS 14.6 update.

2.6 Recovery Mode, Apple Logo, iPhone Bricking Problems on iOS 14.6
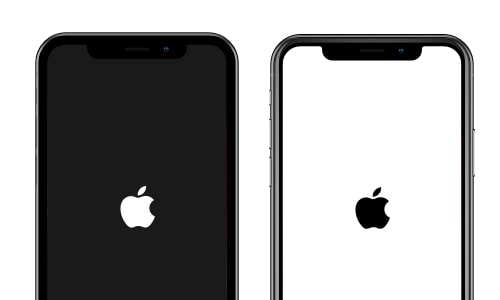
Getting an iPhone stuck at the Apple logo, having an unresponsive device, or being stuck at the recovery mode are some of the most unwanted situations for any iOS 14.6 user. Sadly, after the iOS 14.6 update, chances are that your phone can get bricked. It mostly happens when an update goes wrong and tampers with the functioning of the device.
iOS 14.6 problem - iphone bricking
Quick Fixes:
Force restart your iPhone: First of all, try to force restart your iPhone by applying the correct key combinations. If you are lucky, then it will fix your new iOS 14.6 and would restart it in the normal mode.
Restore device: If you have already taken a backup of your data before updating your iPhone to iOS 14.6, then you can restore the device as well. To do this, just connect it to your computer and launch iTunes. Go to its ā€œSummaryā€ tab and click on the ā€œRestore iPhoneā€ button. Follow the on-screen instructions to reset your iPhone.
Fix in recovery mode: You can also put your iPhone in the recovery mode, connect it to iTunes, and restore the iOS 14.6 system entirely as well.
Fix in DFU mode: If feasible, then try to put your iPhone in the DFU (Device Firmware Update) mode. The key combination is different for various devices. Once you know how to put your iPhone in DFU mode, you can connect it to iTunes. It will automatically detect that your phone is in DFU mode and would restore it entirely. While it will get rid of its data and saved settings, it might unbrick your iOS device.
Fix with an iOS 14.6 repair tool: If you donā€™t want to lose your data in order to fix a bricked iPhone, then you can use a reliable third-party solution like Dr.Fone - System Repair (iOS) as well.

2.7 iOS 14.6 Slowing Down/Laggy/Freezing
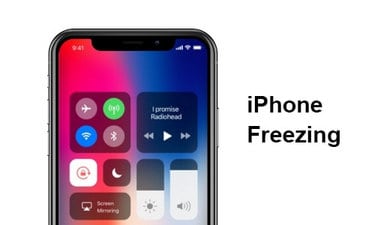
While iOS 14.6 is supposed to make your phone faster, chances are that it might backfire. Some users have reported that their iOS 14.6 devices freeze for a few minutes, work again after a while, but then again become unresponsive. There could be numerous reasons for this problem. If your iPhone or iPad is lagging or freezing after the iOS 14.6 update, then we recommend some quick fixes below.
iOS 14.6 iphone freezing
Quick Fixes:
Remove unwanted data: If the iOS 14.6 is running on low storage, then chances are it might turn slow automatically. Therefore, you can get rid of any app that is no longer in use. Also, you can remove photos, videos, and other data files from your device that you donā€™t need anymore.
Close apps: Another reason for a lagging iOS 14.6 could be the processing of too many apps. For devices other than iPhone X/XS (Max)/XR, you can visit the App Switcher by double-tapping the Home button. Later, you can swipe up the apps you wish to close. If you have an iPhone X/XS (Max)/XR, then go to the Home screen, swipe up, and wait. Now, swipe up the app you wish to close.
Turn off Background App Refresh: Certain apps are also allowed to be refreshed automatically in the background. To save the processing on iOS 14.6, you need to turn this option off. Just go to your device settings and switch off the Background App Refresh feature.
Disable services: Besides that, you can also turn off other services on your iOS 14.6 device like location, Bluetooth, AirDrop, Wi-Fi, and so on.
Restart device: Also, restart your iOS and check if it changes its processing speed or not.

2.8 iOS 14.6 Screen Recording Not Working
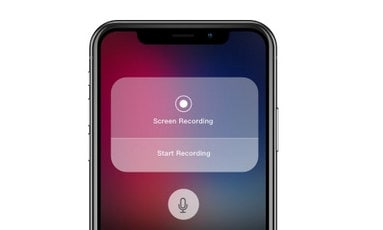
With the release of iOS 11, Apple included the feature of screen recording, which was largely appreciated by its users. The feature has also been included in iOS 14.6, but some users are not able to make the most of it. They suffer a lot when the iOS 14.6 screen recording won't work at all, recorded videos cannot be saved or have no sounds, or the recording files are corrupted. Here are some tricks to fix the screen recording not working issue.
iOS 14.6 update error - screen recording failed
Quick Fixes:
Turn on Screen Recording again: Make sure that you have turned on the Screen Recording feature on iOS 14.6. You can find it in your iPhoneā€™s Control Center. If you want, you can go to the Control Center Settings and add its shortcut there as well. Once the screen recording has been started, you will be notified.
Turn on the microphone: Sometimes, the screen recording simply includes the visuals with no audio. This happens when the microphone has been disabled by the user. When the recording is taking place, just tap on the microphone icon and make sure it is not set to the "mute" mode.
Reset device settings: There could be a problem with your iOS 14.6 settings as well that could have caused this issue. To fix this, go to its Settings > General > Reset, and Reset All Settings on your iPhone or iPad.
Use a 3rd-party screen recorder: If you are still not able to fix this iOS 14.6 issue, then you can consider using a third-party screen recorder as well. There are numerous options for iPhone screen recorders that you can use.

2.9 iOS 14.6 Device Could Not Be Restored
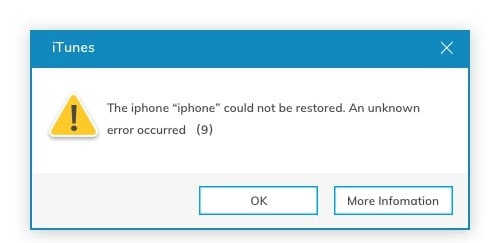
A lot of times, users wish to restore their iOS devices to fix various problems related to iOS 14.6update. Though, if there is an evident problem with your iPhone, then you might not be able to restore it. As a symptom, messages like "iPhone could not be restored", "The device cannot be found", or "An unknown error occurred" pop up. The good news is that there are a few solutions that can help you fix this iOS 14.6 problem.
iOS 14.6 error - idevice cannot restore
Quick Fixes:
Use iTunes: If you canā€™t restore iOS 14.6 the usual way, then take the assistance of iTunes. That is, connect your phone to the system, launch iTunes, and go to its Summary tab. From here, you will get an option to Restore your iPhone or iTunes.
Update iTunes: If you are still getting an error while restoring iOS 14.6 via iTunes, then you should consider updating the version of iTunes you are using.
Restore in recovery mode: Another way to restore iOS 14.6 is by putting your iPhone in the recovery mode. Launch iTunes on the system and connect your phone to it while pressing the Home or Volume Down button. If it is iPhone X/XS (Max)/XR, then you first need to quickly press the Volume Up button and then Volume Down button. In the end, keep pressing the side button till you see the iTunes symbol on the screen.
Boot device in DFU mode: If nothing else would seem to work, then consider putting your phone in the DFU mode. There are different key combinations for this, which would majorly depend on the kind of device you have. While it might delete the existing data on the iOS 14.6 device, the results are mostly positive. Alternatively, try to boot iOS 14.6 in DFU mode without losing data.

2.10 Data Lost after iOS 14.6 Update

There could be different reasons for losing your data after iOS 14.6 update. Too often, when the update is halted, users experience an unexpected data loss.
Chances are that your data would still be there on your iOS device, but you are not able to access it. You can always restore a previous backup to your iPhone or use a dedicated data recovery tool as well.
data lost after iOS 14.6 update
Quick Fixes:
Restart your device: If the data is inaccessible, then you can fix it by simply restarting the phone. Though, you should not do it multiple times as it can make iOS 14.6 data recovery harder. Just restart your device once and see if the deleted content appears or not.
Restore iTunes backup: It is always recommended to take a backup of our data before updating to iOS 14.6. If you have already taken a backup of your device via iTunes, then use iTunes to restore it. Just launch iTunes on your system and connect your phone to it. Go to its Summary tab and click on ā€œRestore Backupā€. From here, you can select the backup file you wish to restore on your iOS device.
Restore iCloud backup: Besides taking a backup on the local computer, some users also backup their phone on iCloud as well. In order to restore data from an iCloud backup, you need to set up iOS 14.6 first. Perform a factory setting so that you would get this option. Now, choose to ā€œRestore from iCloud backupā€ and log-in to your iCloud account. Select the relevant iCloud backup and wait for a while as your phone would load it.
Use a recovery tool: In case you have not taken a backup of your device beforehand, then you would need to use a data recovery tool. Out of all the data recovery software, we recommend Dr.Fone - Data Recovery (iPhone Data Recovery). Being one of the first data recovery tools for iOS devices, it will let you retrieve the lost and deleted content from your phone without any trouble.

Part 3. iOS 14.6 Problems: App Problems after Update

Besides the overall functioning of your iOS device after the iOS 14.6 update, there could be a problem with some of its features as well. An app or a core feature of your device might seem to malfunction out of the blue. Here are some common iOS 14.6 app issues and how you can solve them.

3.1 iOS 14.6 Safari Breaking Down

Safari is the native browser of iOS devices and helps us to access the internet. Though, after an iOS 14.6 update, you might face some problems with it, such as Safari crashes, and web page freezing, loading failure, or not responding. Thankfully, there are some easy fixes for this iOS 14.6 issue.
Can't search for why Safari keeps crashing because Safari keeps crashing. Stuck in a vortex of mild inconvenience. Will get over it.
Feedback from Twitter
Quick Fixes:
Turn off Safari Suggestions: One of the major reasons for the Safari app to crash is the feature of ā€œSafari Suggestionsā€, which suggests the user about news, weather, and so on. You can go to Settings > Safari on iOS 14.6 and turn off the ā€œSafari Suggestionsā€ feature. Afterward, try to load the app again on your iOS 14.6.
Clear historical data: If there is a lot of cache and website data on Safari, then it can tamper with its processing. To resolve this, go to Safari settings on iOS 14.6 and tap on ā€œClear History and Website Dataā€. Confirm your choice to clear all the cache data from your iPhone.
Close and launch the app: Sometimes, a simple solution can fix a major problem with an app. Before taking any drastic step, try to close the app permanently. Go to the app switcher on iOS 14.6 and swipe up the app to close it. Wait for a while and launch it again.
Turn off Safari restrictions: Furthermore, if you have implemented any restriction on the Safari app, then it might not work on your iOS 14.6 device. Go to Settings > General > Restrictions and type the passcode for the restrictions. After entering its settings, you need to manually turn off any restriction on the iOS 14.6 Safari app.

Here are some other ways to fix the constant crashing of the Safari app after iOS 14.6 update.

3.2 Apple Music Problems on iOS 14.6
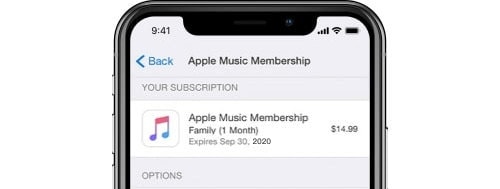
You are all happy with the iOS 14.6 update, but all of a sudden, you realize that you canā€™t log in, sync, download, or play music on your iPhone, or even encounter "unexpected error code 4010". Donā€™t worry ā€“ you are not the only one as the problem is quite common. Here are some easy ways to fix this.
music problem in iOS 14.6 update
Quick Fixes:
Restart the app: First of all, try to restart the app. To do this, just launch App Switcher on your iOS 14.6 device and swipe up the Music app to close it. Once it is done, launch the app again.
Sign in again with your Apple ID: There could be some problem with your Apple ID as well. Go to Settings from iOS 14.6, view your Apple ID, and sign out. Wait for a while and sign back to it.
Quit the silent mode: Check if you have put your iOS 14.6 device in the silent mode or not. You can also go to the quick settings and unmute your iPhone. It can also be done from the mute/unmute button.
Turn off iCloud Music Library: If there is a problem with your music library, then go to Settings > Music on your iOS 14.6 device to turn off the option of ā€œiCloud Music Libraryā€. After waiting for a while, turn it back again and try playing the songs from your music library.
Check for subscription expiry: Most importantly, go to your Apple Music settings and make sure that your subscription has not been expired. You can upgrade your plan from here and check its validity.

3.3 iOS 14.6 Mail Problems
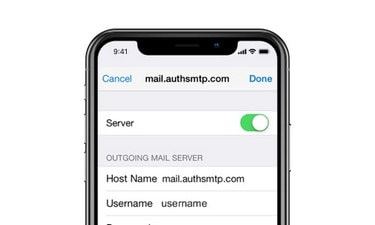
We all use our iPhones to access emails on the go. Problems with the Mail app on the iPhone can directly impact our work. For example, emails cannot be sent or received, the email passcode is reported incorrectly, and a blank page appears after the Mail app is launched. If you are also facing similar mail problems after iOS 14.6 update, then consider the fixing suggestions below.
mail problems of iOS 14.6 update
Quick Fixes:
Reset account: The best way to fix this problem is by resetting your iOS 14.6 Mail account. To do this, go to the Mail settings on your iPhone and select the account you wish to reset. Delete the account and wait for a while. Afterward, add the account again. You can learn how to reset iCloud mail as well.
Check mail settings: When you add a new mailing account to your iOS 14.6 device, make sure that you have entered the server port number and other credentials correctly. Also, enable the SSL protocol to add an extra layer of security to your mail.
Check the restrictions on Cellular data: If you are accessing the Mail app via your cellular data (not Wi-Fi), then go to Cellular settings from your iOS 14.6 device and make sure you have enabled the Mail app to access it. Sometimes, iOS devices donā€™t let the Mail app access the cellular data to save its usage.
Enable the "Push" service: As you know, the mailing services either work on Push or Pull protocol. Most of the modern services implement the ā€œPushā€ protocol for automatic notification. You can go to Mail settings > Fetch new Data on iOS 14.6 and make sure the default service is ā€œPushā€ and not ā€œPullā€.
Allow Mail app to refresh: Another way to make sure the Mail app would refresh itself is by visiting Settings > General > Background App Refresh on iOS 14.6. Turn it on and make sure the iOS 14.6 Mail app is able to refresh in the background automatically too.

3.4 iOS 14.6 Facebook Messenger Problems

Facebook Messenger is used by millions of people as it helps us to communicate with our friends pretty easily. Though, after an iOS 14.6 update, you might face some issues: it won't display, deliver, or receive message threads. Or the whole Facebook Messenger app just crashes and cannot open anymore. Just chill out. Try the easy solutions below to fix these iOS 14.6 problems.
facebook messenger problem of iOS 14.6 update
Quick Fixes:
Close and launch Facebook Messenger: Firstly, try to close the app permanently on iOS 14.6. Visit the app switcher and swipe up the app to close it.
Tweak app settings: If there is a problem with the app itself (like notification sounds), then visit the app settings on your iOS 14.6 device. From here you can enable the notification sound and tweak other settings as well.
Update Facebook Messenger: If you havenā€™t updated the app in a while, then it might malfunction with the iOS 14.6 update. To do this, visit the App Store and view all the installed app. Tap on the ā€œUpdateā€ button adjacent to the Messenger app.
Re-install Facebook Messenger: You can also reinstall the app on iOS 14.6 as well. Firstly, delete the app from your iPhone and wait for a while. After that, go to App Store, look for Facebook Messenger, and install it once again on iOS 14.6.

3.5 App Needs to Be Updated Issue on iOS 14.6
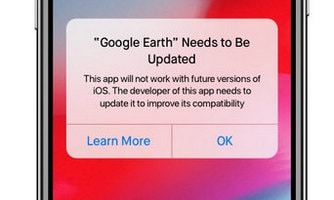
If you have updated your iPhone to iOS 14.6 pretty soon, then you can get this issue. This frequently happens when the developer of the app hasnā€™t released a new version for iOS 14.6, but the user has upgraded their iPhone to iOS 14.6 beforehand. In this case, you might get a prompt like this.
app update error of iOS 14.6
Quick Fixes:
Wait for a new version: The best way to overcome this problem is to wait. Most likely, the developer of the app would release a new update, supporting iOS 14.6. Just go to the App Store and check if the new update is available. In this way, you can update the app and check if it supports iOS 14.6 or not. The best approach is to visit the App Store and update all the apps at once.
Install the app again: You can also manually delete the app that is not functioning ideally on iOS 14.6. Go to App Store and install the app again. Launch the newly installed app and log-in with your account details.
Check App Compatibility: Go to App Settings on iOS 14.6 and visit the ā€œApp Compatibilityā€ section. Your iPhone will list all the apps with no updates available. There could be some 32-bit based apps here as well. You can look for alternatives for these apps or contact the app developer to release their new update.

3.6 iOS 14.6 iMessage Not Working
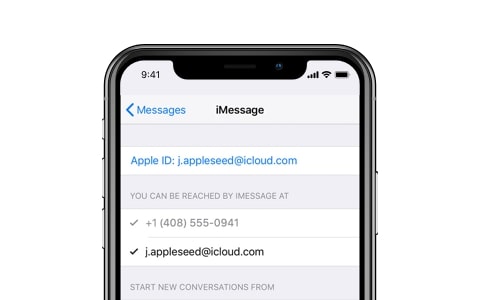
iOS 14.6 update may be a nightmare for some iMessage users. They find texts not sent or delivered, emoji not working, contact names missing, or conversation deletion prompts popping up. Needless to say, when iMessage malfunctions, almost every iOS user finds it hard to communicate. The good news is that too often the iMessage not working issue after the iOS 14.6 update can be fixed pretty easily.
iOS 14.6 problem - imessage problem
Quick Fixes:
Reset iMessage: The easiest way to fix any problem with iOS 14.6 iMessage is by resetting it. Just go to your Settings > Messages and turn off the option for ā€œiMessageā€. After a while, switch it back again and check if it resolves the issue.
Ensure correct iMessage settings: If there is any problem with the details you have provided in iMessage, then it can malfunction. Just go to the iMessage settings on the iOS 14.6 device and check your phone number and email ID. You can edit these details from here as well.
Add another email ID: If you think there is a problem with the previous details, then you can add another email ID on iOS 14.6. To do this, go to Settings > Messages > Send & Receive. Tap on ā€œAdd Another Emailā€ and manually enter the details of a new email ID.
Switch off "Reduce Motion": Too many times, the effects of iMessage donā€™t seem to work. In this case, go to Settings > General > Accessibility on iOS 14.6. Make sure that the option for ā€œReduce Motionā€ is switched off.
Avoid time clash: There could be a clash with the date and time on your iOS 14.6 as well. This problem can easily be resolved by visiting your iPhoneā€™s Settings > General > Date & Time. Now, turn on the ā€œSet Automaticallyā€ option and make sure the time zone entered here is correct.

3.7 iOS 14.6 App Store is Down

Besides the other iOS 14.6 issues, a lot of users often get popups "can't connect to App Store", find the App Store screen blank, or fail to view apps in it. Hereā€™s what you can do if you come across App Store problems on your iPhone/iPad.
iOS 14.6 problem - app store problem
Quick Fixes:
Check App Store status: Before you take any drastic step, make sure that App Store is working or not on iOS 14.6. Go to the Apple System Status page and check if the App Store has been down or is scheduled for any maintenance.
Check the data access: Check whether the problem is there with only the cellular data or if you can access App Store only when you are connected to a Wi-Fi network. To resolve this, go to Settings > Cellular on iOS 14.6 and enable the data access for App Store.
Reset Apple account: You can also reset your Apple account on iOS 14.6. Just go to your Apple ID and sign out of it. Afterward, sign back into your account and try to launch App Store again.
Set automatic time: In addition to that, go to Date & Time settings on the iOS 14.6 device and turn on the option for ā€œSet Automaticallyā€.
Reset network settings: Visit Settings > General > Reset on iOS 14.6 and select Reset Network Settings.

You can explore some other options here to fix the App Store not working issue after an iOS 14.6 update.

3.8 iOS 14.6 App Issues

Apart from popular apps like iMessage or Music, there could be an issue with numerous other apps on your device as well. We recommend following the solutions below to fix unwanted app issues after iOS 14.6 update.
app issue of iOS 14.6
Quick Fixes:
Check compatibility list: Go to the App info and check the compatibility list to know whether the app has an issue with iOS 14.6.
Update the app: Go to App Store on iOS 14.6 and update the app that seems to malfunction.
Re-install the app: Uninstall the app, go to App Store, and install it once again.
Switch off the app: Launch the App Switcher on the iOS 14.6 device and close the app by swiping it up.
Turn off iCloud sync: If the app is linked to iCloud, then you can go to the iCloud settings on iOS 14.6 and turn off the sync option for the app. After that, you can check if the app works and turn on the sync again.

3.9 iOS 14.6 Siri Not Available

While iOS 14.6 has come up with some new and advanced options for Siri, not all of them seem to work properly. There could be an automatic change in Siriā€™s settings that could have resulted in its malfunction. Though, there could be a deep-rooted software issue behind this iOS 14.6 problem as well.
Is it just me or is the ability to add new Siri Shortcuts not working for anyone in this beta (4)?
FEEDBACK FROM TWITTER
Quick Fixes:
Reset Siri: Before you take any drastic step, try to reset Siri on iOS 14.6. Go to Settings > Siri and turn it off. After waiting for a while, toggle the option on again and see if it works.
Reset network settings: If you think there is a network issue with your iPhone that is causing this problem with Siri, then you can reset iOS 14.6 network settings. To do this, go to your phoneā€™s Settings > General > Reset and tap on ā€œReset Network Settingsā€.
Enable the ā€œHey Siri!ā€ prompt: By default, Siri responds to the ā€œHey Siri!ā€ prompt. If it is turned off, then you might assume that iOS 14.6 Siri is not available. Go to Siriā€™s settings and enable the ā€œHey Siri!ā€ prompt from here.
Allow Siri to use cellular data: Make sure you have a stable internet connection on iOS 14.6. Also, go to your Cellular data option and permit Siri permission to access it.
Turn off Dictation option: It has been observed that the ā€œDictationā€ feature on iOS 14.6 can sometimes tamper with the overall functioning of Siri. To fix this, go to your deviceā€™s Settings > General > Keyboards and turn off the ā€œEnable Dictationā€ option.

To further understand and solve this problem, you can read this extensive guide of fixing Siri Not Working.

3.10 Notifications Appearing Incorrectly on iOS 14.6

This is one of the most common iOS bugs that have been around for the last few updates. Also, many users reflected that their iOS notifications were not showing or did not appear in a common way after iOS 14.6 update. Try to implement some suggestions below to fix this iOS 14.6 problem.
Notifications do not appear correctly after iOS 14.6 update? Then you can always try these tips: https://bit.ly/2BCHiuj @drfone_toolkit
Quick Fixes:
Avoid notification cluttering: The cluttering of too many notifications can cause this iOS 14.6 problem. Just go to the notification tab on your iPhone and clear all notifications in one go. Most likely, this will make the notifications appear correctly afterward.
Turn off DND mode: If you are not getting any notification on your iOS 14.6 iPhone, then chances are that your iPhone could be on the DND (Do Not Disturb) mode. Simply turn it off from the Control Center or by visiting your deviceā€™s Settings.
Adjust notification preview settings: You could have changed the way you receive the preview of notifications on your iOS 14.6 as well. Go to its Settings > Notifications > Show Previews and select "Alwaysā€ instead of ā€œWhen Unlockedā€ or any other option.
Allow notifications for specific apps: From here, you can also check if you have disabled notifications for a certain app as well. Under the Notification settings of your iOS 14.6 device, you can see a list of all the apps. Just tap on an app and enable the ā€œAllow Notificationsā€ option. You can also turn on/off the notification sound for that app and its preview.
Reset all settings: Go to Settings > General > Reset and choose to reset all the saved settings on your iOS 14.6.

Part 4. iOS 14.6 Problems: Other Problems after Update

Not just apps, the other features on your iPhone can also malfunction after an iOS 14.6 update. There could be an issue with its Wi-Fi, Bluetooth, battery, and so on. We have covered some of the major iOS 14.6 issues with their quick fixes.

4.1 iOS 14.6 Battery Fast Draining
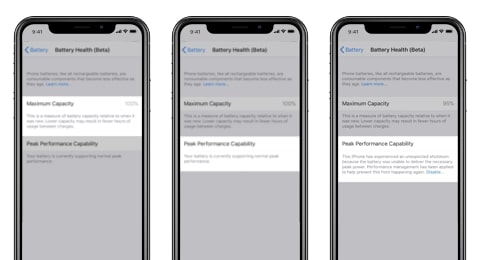
This is something that almost all the iPhone users complain about. Too often, after upgrading a device to iOS 14.6, its battery seems to drain way too fast. Some users reported that the iPhone battery could not even last 2 hours. While your iPhone battery could be damaged, there can be a software bug causing this problem as well.
iOS 14.6 problem - battery draining
Quick Fixes:
Check battery performance: Check the battery of your iPhone and make sure it is charged enough. The new iOS 14.6 comes with a Battery Health feature that can be checked from its Settings > Battery. This will let you check the peak performance and the overall capacity of the iOS 14.6 battery.
Identify battery-draining apps: Go to the Battery usage and identify the apps that have been draining your iPhoneā€™s battery the most. You can update or uninstall these apps afterward.
Avoid running too many apps: Try to optimize the iOS 14.6 performance by closing unnecessary apps. You can also switch off iOS 14.6 services like GPS that can drain your iPhoneā€™s battery. Also, go to its Settings and turn off the Background App Refresh option.
Turn off Fitness Tracking: If you have enabled the Fitness Tracking option on iOS 14.6, then it can consume a lot of battery as well. Go to its Motion & Fitness settings and turn this option off.
Wait for the formal iOS 14.6 version: The unwanted iOS 14.6 battery problems are usually seen in the beta or earlier versions. Wait for a more stable iOS 14.6 version and update your device whenever a public version is released to fix this problem.

4.2 iOS 14.6 Charging Issue

Even if your iOS 14.6 battery is functioning properly, chances are that there could be an issue with its charging as well. You may experience tough moments when using a 3rd-party iOS charger, the iOS 14.6 device may stop charging when the battery power reaches 80% or 90%, or the charging may be intolerably slow after iOS 14.6 update.
The following suggestions will certainly come handy to you while resolving any charging issue after the iOS 14.6 update.
Quick Fixes:
Exclude physical damage: Check for any physical damage on your iOS 14.6 device. Make sure that the charging socket is working and that you are using an authentic lightning cable. Try to charge your iPhone through different power sockets to diagnose this problem.
Restart device: Restart your iPhone. Sometimes, all it takes to fix a charging issue with iOS 14.6 is a simple reset of its power cycle.
Clean charging socket: Take a cotton bud (not wet) and clean the charging socket on your iOS 14.6 device. It could be malfunctioning due to dirt or damage.
Adopt a more stable iOS 14.6 version: Wait for a more stable iOS 14.6 release and donā€™t update your device to a beta or initial version. If you are using iOS 14.6 beta and canā€™t upgrade it, then consider downgrading it to a stable iOS 14.6 version.

Here are some other solutions to fix the common iPhone charging issues.

4.3 iOS 14.6 Device Overheating Issue
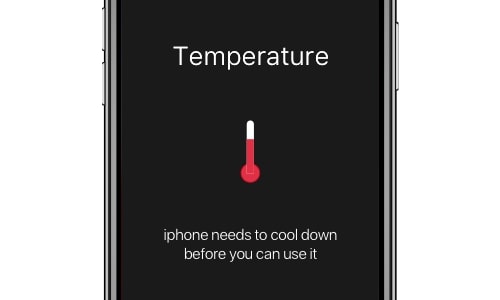
If your iPhone seems to overheat a lot whenever you use it, then you should be alarmed. There could be a serious issue with the iOS and it should be fixed immediately. In most of the cases, a corrupt iOS 14.6 update or a software issue triggers the iPhone overheating problem.
iOS 14.6 problem - iphone overheating
Quick Fixes:
Switch off intensive features: Simply turn off the internet, location, AirDrop, and other intensive features on iOS 14.6 and let it rest. You can also switch it off and turn it on again once the iPhone is cooled down.
Remove the heavy case: If your iPhone is covered with a heavy case, then get rid of it. It is observed that a leather case can lead to the overheating of the iPhone at times.
Avoid beta releases: Downgrade, or update your iPhone to a more stable version of iOS 14.6 (avoid beta and earlier releases).
Stop using some apps: Go to your iPhoneā€™s battery usage and data usage settings. This will let you identify the iOS 14.6 apps that are heavy on the processing so that you can stop using them.
Avoid high-temperature environment: Donā€™t use your iPhone too much in the sunlight or leave it in your car. Also, avoid placing it on electronic items (like your laptop) that can further heat it.
Reset iPhone settings: If you think there is an issue with iOS 14.6 settings, then go to its Reset options and Reset All Settings.

4.4 iOS 14.6 Cellular Data Issues

A lot of users are complaining about problems with their cellular data after the iOS 14.6 update. The most common complaints are:
  • Some apps fail to connect to cellular networks.
  • Some apps consume far more cellular data after iOS 14.6 update.
  • iOS 14.6 cellular data cannot be turned on or stops working sometimes.
Quick Fixes:
Check network coverage: Firstly, check if you are getting enough coverage on your network or not. Without any network coverage, the cellular data on iOS 14.6 would not work.
Turn on cellular data: Also, make sure that the cellular data option is turned on. Go to your iPhoneā€™s Settings > Cellular Data and turn it on.
Turn on Data Roaming: If you are roaming (away from your home network), then the ā€œData Roamingā€ option under Cellular Data settings should be turned on.
Reset network settings: Go to Settings > General > Reset and choose to ā€œReset Network Settingsā€ on iOS 14.6 to fix any network-related issue.
Install carrier's updates: Under your iPhoneā€™s Cellular Settings, you can check if your carrier has pushed any update. If you find any new settings, then update your iPhone.

4.5 iOS 14.6 Wi-Fi Problems

Attempting to use iOS 14.6 devices to full potential by iOS 14.6 update, some users just found the unexpected Wi-Fi problems ruin the whole iOS 14.6 experience. According to their reports, Wi-Fi networks could not be connected to, "wrong Wi-Fi passcode" prompt popped up, the Wi-Fi option became gray in settings, or Wi-Fi speed turned sluggish. We have come up with some ways to fix the iOS 14.6 Wi-Fi issues here.
@AppleSupport My iPhone X is not getting connected to known Wi-Fi automatically. Time and again I have to get it connected.
My other iPhone 6Splus is working fine without any such problem. Pls help and advice what to do.
FEEDBACK FROM TWITTER
Quick Fixes:
Reset Wi-Fi: Try to reset your Wi-Fi on iOS 14.6. You can switch it off from the Control Center option or by visiting your deviceā€™s Wifi settings to do it. Wait for a while and turn it on once again.
Exclude Wi-Fi router errors: Check the Wi-Fi router and your connection to make sure there is no error. You can also get in touch with the network provider to know if there is any glitch in their server.
Re-connect to Wi-Fi: If there is a problem with a particular connection, then you can reset it as well. Go to your Wi-Fi Settings on iOS 14.6 and tap on the ā€œiā€ icon adjacent to a network. From here, you can tap on the ā€œForget this Networkā€ option. Later, you can turn Wi-Fi off and on again, discover the same network, and try reconnecting it.
Manually add a network: Sometimes, it is better to manually add a network as well on iOS 14.6. If your iPhone is not able to detect the Wi-Fi network, then you can follow this approach. Choose to set up a new network manually and provide its details in order to connect to it.
Remove previous profile: If you have tried updating your iPhone previously, then there could be a clash with its existing profile as well. Go to its Software Update settings and get rid of the existing profile. After that, you can try to update your iPhone to a stable iOS 14.6 version.

4.6 iOS 14.6 Bluetooth Problems

Bluetooth problems are one of the major disappointments about iOS 14.6 update. Users' complaints about iOS 14.6 Bluetooth mainly include: Bluetooth connection failure, Bluetooth being easily disconnected, Bluetooth cannot be turned off, and Bluetooth icon disappeared in iOS 14.6. If your iPhone/iPad is also facing Bluetooth issues after the iOS 14.6 update, then the following suggestions are recommended.
Note: Actually, the iOS 14.6 Bluetooth icon missing is not a real problem. This is a new interface design of Apple in iOS 14.6.
Quick Fixes:
Turn on Bluetooth: Make sure the Bluetooth feature is turned on in iOS 14.6. You can go to its option on Control Center or visit your deviceā€™s Settings > Bluetooth. From here, you need to make sure that the Bluetooth option is enabled.
Turn off Airplane mode: Also, make sure that the Airplane mode on iOS 14.6 is not turned on. If your iPhone is running in Airplane mode, then Bluetooth, Wi-Fi, cellular data, etc. would be disabled. Go to Control Center or Settings on iOS 14.6 to turn off the Airplane mode.
Restart the iOS device: Sometimes, the issue can be fixed by simply restarting the iOS 14.6 device.
Connect to Bluetooth again: If you are not able to connect to a specific device, then go to the iOS 14.6 Bluetooth settings, tap on the ā€œiā€ icon adjacent to the device, and forget it. Later, you can try to connect to it again.

Follow this detailed guide to know how to solve Bluetooth problems in some other ways.

4.7 iOS 14.6 Wallpaper Problem
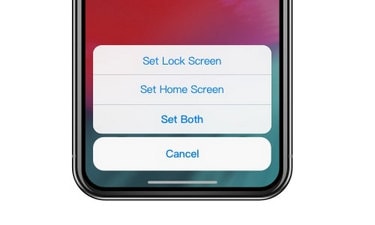
Yes ā€“ you have read it right. Sometimes, users face unexpected issues with iOS 14.6 wallpaper as well. For instance, at times iPhone automatically zooms in an image while setting it as wallpaper, wallpapers cannot be resized, and live wallpaper does not work anymore. No matter what the issue is, it can probably be fixed by following the below solutions.
iOS 14.6 problem - wallpaper
Quick Fixes:
Turn off Reduce Motion: If the iOS 14.6 device automatically stretches the image while setting it as wallpaper, then there would be a conflict with its parallax settings. To avoid this, go to its Settings > General > Accessibility > Reduce Motion and turn the option for ā€œReduce Motionā€ off.
Turn off the Low Power mode: There could be an issue with Live Wallpapers as well. Firstly, check if your iOS 14.6 is in Low Power mode or not. The Low Power mode automatically neglects the Live Wallpapers to save the battery. Charge your phone or turn off the Low Power mode manually.
Change to a customized wallpaper: Go to your Settings > Wallpaper on iOS 14.6 and set the default wallpaper on your iPhone for a while. After that, try changing it to any other customized wallpaper and see if it fixes the issue.
Turn on 3D Touch: You might not know this, but live wallpapers use the 3D Touch in order to activate. Just go to General Settings > 3D Touch on your iOS 14.6 and make sure it is turned on.

4.8 AirPods Wonā€™t Connect on iOS 14.6

One of the best things about iOS devices is AirPods as they let us listen to music without the hassle of wires. Though, sometimes AirPods donā€™t seem to connect to an iOS device updated to iOS 14.6. The issue can be a bit tedious as users first need to identify a reason behind it.
iOS 14.6 problem - AirPods connection problem
Quick Fixes:
Reset your AirPods: Try to reset your AirPods with your iPhone. To do this, go to Bluetooth settings on iOS 14.6 and tap on the ā€œiā€ icon adjacent to your AirPods. From here, you need to disconnect your iPhone. Wait for a while and connect again.
Re-connect to AirPods: Besides disconnecting, you can choose to forget the iPhone altogether as well. Later, you can connect the iPhone from scratch to fix this iOS 14.6 issue.
Exclude physical issues: Make sure that your AirPods are charged and that they are not physically damaged.
Turn Bluetooth off and on: Simply turn off Bluetooth on your iOS 14.6 device, wait for a while, and turn it on again.
Check communication range: Be sure that your AirPods are paired to the right iOS 14.6 device in an ideal range.
Put AirPods in pairing mode: Put your AirPods in the Bluetooth pairing mode. To do this, keep your AirPods in their charging case with its lid open. Hold the setup button at the back of the case and wait as the status light would start flashing in white color.

4.9 iOS 14.6 Sound Problems
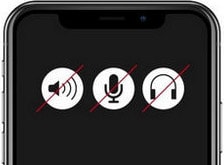
You could be using your iOS 14.6 device to listen to your favorite music, play games, ring, or use FaceTime. Though, an unexpected sound problem (no or disordered sounds) can cause unwanted setbacks to your iPhone experience. You may even to overcome these iOS 14.6 sound issues, we suggest the following fixes.
iOS 14.6 sound problem
Quick Fixes:
Exclude physical damage: Make sure that there is no physical damage to your iPhoneā€™s speakers. Also, there could be some dirt or dust in it. Take a fine brush and clean it gently.
Check the Headphone mode: Also, check whether your iPhone is stuck in the Headphone mode or not. You can view a headphone sign on the screen with no sound. In most of the cases, it can be fixed by simply restarting your iPhone.
Enable Sound in settings: If you are not getting sounds for notifications, then go to Notification Settings on iOS 14.6 and enable ā€œSoundā€.
Turn off DND mode: Go to Settings > Do Not Disturb on iOS 14.6, and make sure your iPhone/iPad is not in the DND mode.

4.10 iOS 14.6 Ringtone not Working

Not just your iPhoneā€™s sound, sometimes iOS 14.6 update may result in ringtone malfunctioning, for example, customized ringtones no longer effect, or not any sound played for incoming calls, texts, app notifications. Thankfully, the iOS 14.6 problem can be fixed by following the below solutions.
Ringtone feature does not work after iOS 14.6 update? try these tips to have a quick fix: https://bit.ly/2BCHiuj @drfone_toolkit
Quick Fixes:
Quit silent mode: Firstly, make sure that your iPhone is not in the silent mode. From the side switch, you can view the same. If you can view the orange strip, it means the iOS 14.6 device is in the silent mode. Just push it towards the device to unmute it.
Check ringtone volume: In addition to that, check the ringtone volume on iOS 14.6. Unlock your iPhone and press the Volume Up button a few times in order to increase the ringerā€™s volume.
Change ringtone: You can also try to change your iPhoneā€™s ringtone as well. To do this, go to Settings > Sounds > Ringtone on iOS 14.6 and select any other option from the list.
Turn on Vibrate on Ring: If your iPhone is not vibrating while ringing, then you can go to Sounds option on iOS 14.6 and turn on the ā€œVibrate on Ringā€ feature.

4.11 iOS 14.6 Touchscreen Problems

iPhone touchscreen problems are not new in iOS 14.6. Just after updating their iDevices to a new iOS 14.6 version, a lot of users face such issues as touch screen not responding to touches, or touch screen freezing when calls come in. There could be a clash in iOS settings, physical damage, or a software glitch behind this.
iPhone touchscreen not working. Fixable?
FEEDBACK FROM TWITTER
Quick Fixes:
Exclude physical factors: To start with, make sure that there is no physical damage to your iPhoneā€™s touch screen. Look for any crack or spill on the screen to make sure it is not a hardware problem.
Calibrate brightness: Sometimes, users face a glitch in the iPhone touchscreen due to the brightness level as well. To fix this, you need to calibrate your iOS brightness. Go to Settings > Display & Brightness on iOS 14.6. Swipe the level to the left end, wait for a while, and swipe it again to the right end. Do this 2-3 times till the brightness is well calibrated.
Force restart iPhone: If your iPhoneā€™s screen isnā€™t responding at all, then try to force restart it by applying the right key combinations. Once the iPhone is restarted, chances are that its touchscreen would also start working.
Gently press the screen: The logic board in an iOS device mostly connects the display with the rest of the deviceā€™s hardware. If there is a loose cable, then you can fix it by pressing the screen above the logic board. In most of the cases, it is located at the top right corner or the middle. Though, make sure that you are gentle and donā€™t press the screen too hard.

Also, check one more in-depth guide that can help you fix iPhone touch screen problems after an iOS 14.6 update.

4.12 Touch ID Not Working on iOS 14.6

Problems brought by iOS 14.6 update are various and, of course, include Touch ID problems. Some users found iPhone Touch ID not responsive or even not working at all. If you are among them, then here are some tips that can help fix this iOS 14.6 issue.
is anyone elseā€™s touch id not working? typing in my password is getting old hahah
FEEDBACK FROM TWITTER
Quick Fixes:
Clean the Touch ID part: Make sure that the Touch ID is working properly on your iPhone. Wipe it gently and clean it off from dirt or water. Also, position your finger in the correct manner so that the Touch ID can scan it entirely.
Add new fingerprint: It is recommended to delete your fingerprint and add a new one every few months. This will improve the accuracy of the scan. To do this, go to Settings > Touch ID & Passcode on iOS 14.6 and delete the existing fingerprints. Now, tap on ā€œAdd a Fingerprintā€ and scan your finger again.
Reset Touch ID: Another quick solution to fix this issue is by resetting the iOS 14.6 Touch ID feature. Go to the Touch ID settings and under the ā€œUsed forā€ option, you can view how the Touch ID is associated with other features. Toggle them off and lock your device. Unlock it with a passcode, go to these settings and turn them on again.
Reset all settings: If nothing else seems to work, then simply go to Settings > General > Reset and reset all settings on the iOS 14.6 device. After that, the iOS would be restarted and you need to add a new fingerprint.

Read a new post to know more suggestions for fixing a malfunctioning Touch ID on an iOS device.

Part 5. iOS 14.6 Problems about Downgrade

A lot of times, users donā€™t like the iOS 14.6 update due to numerous reasons and would like to downgrade to a previous stable version. This mostly happens when they update their iPhone/iPad to a beta or initial version of iOS 14.6. Since downgrading from iOS 14.6 can be a bit complex on its own, users often face unwanted obstacles while doing the same. We have listed some common iOS 14.6 downgrading issues with simple fixes.

5.1 iOS 14.6 downgrade stuck in recovery mode/DFU mode/Apple logo

iOS 14.6 downgrading may not proceed smoothly as your iPhone can be stuck in recovery mode, DFU mode, black screen, or white Apple logo screen. Before you take any drastic step, just wait for a few minutes. In this way, you can be sure whether iOS 14.6 downgrading is actually stuck or is simply taking a while to process.
iOS 14.6 downgrade problem - process stuck
Quick Fixes:
Force restart iPhone: The best way to fix this problem is by force restarting your iPhone. In order to force restart your iPhone, you need to press the correct key combinations (Power + Home/Volume Down buttons). It will break the ongoing power cycle and would restart your device.
Clear historical data: If there is a lot of cache and website data on Safari, then it can tamper with its processing. To resolve this, go to Safari settings on iOS 14.6 and tap on ā€œClear History and Website Dataā€. Confirm your choice to clear all the cache data from your iPhone.
Connect to iTunes: You can also launch an updated version of iTunes on your system and connect your iPhone to it. If your iPhone is already in the DFU or recovery mode, then iTunes will detect it, and ask you to restore it. Follow the on-screen instructions to restore your iPhone entirely.
Use a repair tool: If you donā€™t want to cause any evident harm to your iPhone, then use an expert third-party tool. For instance, Dr.Fone - System Repair (iOS) can fix all the prominent iOS 14.6 issues. It will repair your iPhone to a stable iOS 14.6 version without losing any data at all.

5.2 Data loss after iOS 14.6 downgrade

Losing our important files is certainly a situation that no user likes during iOS 14.6 downgrade. But it did happen. Lots of users said they could not find their photos, music, contacts, videos, etc. after iOS 14.6 downgrade. To overcome this issue, we recommend the below solutions.
Found some data lost after iOS 14.6 downgrade? Try these tips to recover data without hassle: https://bit.ly/2BCHiuj @drfone_toolkit
Quick Fixes:
Restore a previous backup: The first approach is to restore a previous backup on your iOS. If you have already taken a backup using iTunes, then launch it and connect your device to the system. Go to its Summary tab and click on ā€œRestore Backupā€. From here, you can select a previous iTunes backup to restore. In the same way, you can also restore a backup from iCloud as well.
Use a data recovery tool: If you havenā€™t taken a backup of your iOS data before, then we recommend using a data recovery tool like Dr.Fone - Data Recovery (iPhone Data Recovery). It can recover the lost and deleted data on your iPhone under different situations. You can get a preview of the recovered data and restore it back to your iOS device in a selective manner.

5.3 iCloud/iTunes backup can't be restored to iPhone after iOS 14.6 downgrade

It has been observed that after downgrading from iOS 14.6, we often end up losing the saved data on our iPhone/iPad. To overcome this, we try to restore an existing backup from iCloud or iTunes. Though, if the iOS version is different, then you might get an error stating that the backup canā€™t be restored. To fix this, you can implement the following suggestions.
Quick Fixes:
Manage phone storage: The problem can happen when there is a lack of free space on your iPhone. Go to Settings > Storage and tap on ā€œManage Storageā€. From here, you can check if you have enough free space for the backup to be restored or not.
Update iTunes: If you are using an outdated version of iTunes that is no longer compatible with your iOS version, then this problem can occur. To resolve this, go to your iTunes menu and check for the available updates.
Delete corrupted backup files: Another reason behind this issue is the clash between different backup files. Just go to the Device Preferences on iTunes and view the existing backups. Get rid of the previous corrupted backup files and retry the restoring process.

iOS 14.6 Tips & Tricks

ios 12 issue feature

Photos Disappeared after iOS 14.6 Update

This post explores all possibilities of losing photos after iOS 14.6 update and collects 5 fundamental solutions to find photos back on your iOS 14.6. In-depth tutorials provided.

ios 12 issue tips

iOS 14.6 Encyclopedia

What actually is iOS 14.6? Features of iOS 14.6. Pros and cons of iOS 14.6 updates. Compatibility list of iOS 14.6 update. All necessary knowledge about iOS 14.6 is here.

ios 12 issue bricks

iOS 14.6 Update Bricked iPhone

What problem is most likely to run across in iOS 14.6 update? Yes, iPhone bricking. This post selects 3 workable ways to help you fix it easily. Check now and do not miss it.

ios 12 issue down

Downgrade iOS 14.6

Annoyed at the iOS 14.6 and looking to downgrade iOS 14.6 to a stable iOS 13? Find in this article 2 essential guides to downgrade iOS 14.6 without hassle.

ios 14
ios 12 issue data recovery

iOS 14.6 Data Recovery

Important data missed after iOS 14.6 update? This post collects 3 easy-to-follow solutions to recover data on iOS 14.6 without a backup, from iTunes, and from iTunes.

ios 12 issue stuck

iOS 14.6 Stuck on Apple Logo

iPhone or iPad can easily be stuck on the Apple logo after iOS 14.6 update. Being such a victim? Now you have landed in the right place where 4 quick fixes are here to help you out.

ios 12 issue installing

WhatsApp Problems with iOS 14.6

WhatsApp problems are the last thing people want to see after iOS 14.6 update. Here are 7 proven solutions to fix all WhatsApp problems on your iOS 14.6.

ios 12 issue downgrade stuck

Worst nightmare when iOS 14.6 downgrade is stuck at recovery mode, DFU mode, or apple logo. Just follow the battle-tested instructions to get out of such situations.