Troubleshooting Tips to Fix Touch ID Not Working Issues
Feb 11, 2026 • Filed to: Phone Repair Solutions • Proven solutions
Touch ID is a recognition feature fingerprint, designed and launched by Apple Inc., and is currently standard on iPhone since iPhone 5S and iPad since iPad Air 2 and MacBook Pro. In 2015, Apple introduced a second-generation ID faster, starting with iPhone 6S and later MacBook Pro 2016.
Are you having trouble because your iPhone Touch ID not working? Whether trying to unlock your phone with your Fingerprint or make a purchase, Touch ID is a convenient way to access your device securely. When it's not working, it can be a frustrating experience.
This article will explore what to do when iPhone Touch ID fails to work and provide helpful tips to get your device back in action. No matter what the issue is, read on to learn more about what to do when your Fingerprint not working.
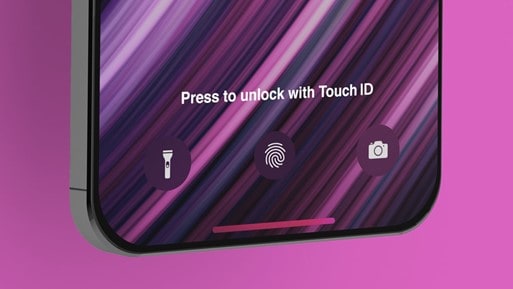
Part 1: Why Is My Touch ID Not Woking? 5 Common Reasons!
Before we provide you with any solution to your Touch ID problem, imagine what makes your Touch ID fail or when Touch ID fails to work.
Not Enrolled: The most common reason Touch ID might not work is that you still need to enroll your Fingerprint with your device. To do this, go to your device's settings and select Touch ID & Passcode. Then, follow the instructions to enroll in your Fingerprint.
Dirty or Damaged Home Button: If your home button is dirty or damaged, it may not be able to detect your Fingerprint correctly. Clean your home button or replace it if necessary.
Software Issues: Sometimes, software issues can cause Touch ID to stop working. Try restarting your device and see if this resolves the issue.
Poor Placement: When you place your finger on the Touch ID sensor, ensure that you place it correctly. If you are not placing your finger correctly, the sensor may not be able to detect it.
Interference of screen protector: If you use a screen protector, it may interfere with the Touch ID sensor. Try removing the screen protector and see if this resolves the issue.
Part 2: How to Fix Fingerprint Not Working?
Tip 1. Clean and dry the Touch ID sensor
Maybe there is some dirt on your Touch ID sensor, which will disturb the sensibility of the sensor. So, you can try to clean it first.
- Start by turning off your device and disconnect any cables or accessories.
- Use a lint-free cloth to wipe the Touch ID sensor clean. Ensure you are only wiping the sensor and not the surrounding area.
- If any debris remains, try using a soft-bristled toothbrush to remove any remaining debris from the Touch ID sensor gently.
- Use a clean, dry cloth to dry the sensor. Make sure that you don't leave any moisture behind.
- Turn on your device and test the Touch ID sensor to see if it works properly.
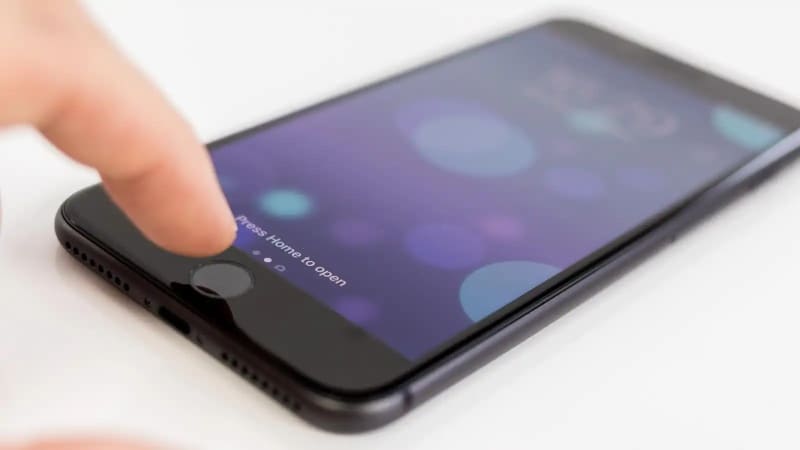
Tip 2. Update the iOS version
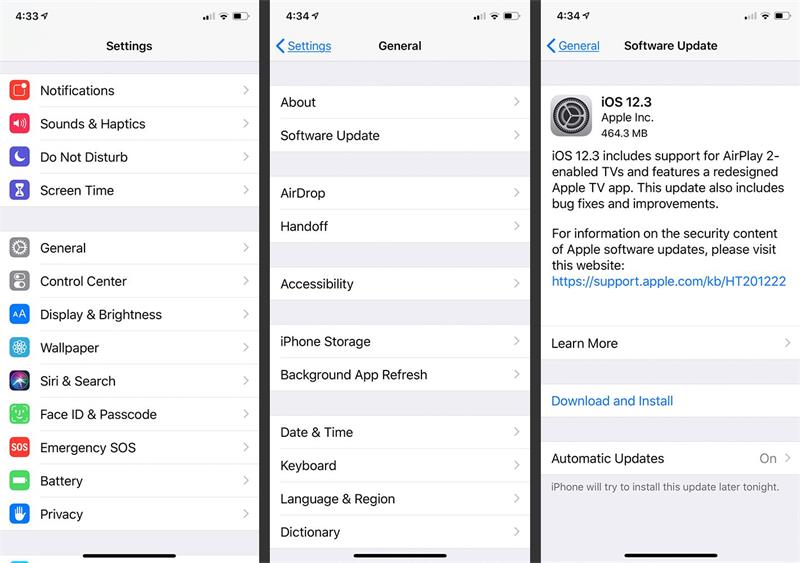
If the above method doesn't fix the Touch ID issue, you'll need to update to the latest version of iOS. And Apple will give you an official solution with a security guarantee for software problems. To do this:
- Connect your iPhone to a power source and ensure it is connected to a Wi-Fi network.
- Open the Settings app and tap General.
- Tap Software Update.
- A message will appear if an update is available, prompting you to update.
- Tap Download and Install.
- Enter your passcode if prompted.
- Agree to the Terms and Conditions.
- Tap Install Now.
- Wait for the update to download and install.
- When the update is finished, your iPhone will restart, and you can start using the new version.
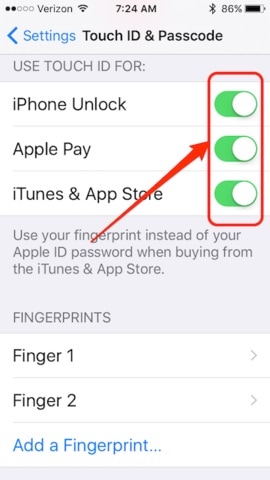
Tip 3: Re-enable the "iPhone Unlock" and "iTunes and App Store" features
To perform this action, Go to the "Settings" App > tap on "Touch ID & Passcode" > Type in your passcode > Toggle off "iPhone Unlock" and "iTunes & App Store". Then after a few seconds, turn the two features ON again.
Tip 4: Restart your iPhone
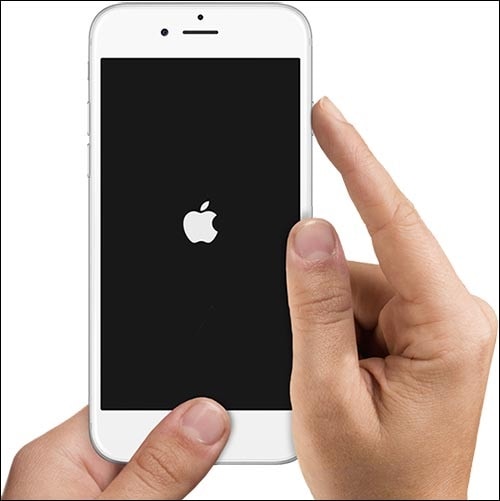
Sometimes, a simple restart can resolve temporary software glitches. Restart your device and then try using Touch ID again.
To restart your iPhone, press and hold the Sleep/Wake button > When you see the slider, drag it to turn off your iPhone > Press and hold the Sleep/Wake button again.
Tip 5. Reset Settings
If you want to reset the settings on your iPhone to fix the iPhone fingerprint not working, there are a couple of ways to do so. First, you can reset the settings to their factory defaults.
Alternatively, you can reset your settings to a previous state if you need to restore some of the changes you made to the iPhone. In either case, the process is relatively straightforward and can be done in just a few steps.
- Go to the Settings app on your iPhone.
- Select General, and then scroll down and select reset.
- Tap on the Reset option you want to use. You can reset all settings, erase all content and settings, reset network settings, reset the keyboard dictionary, or reset the Home Screen layout.
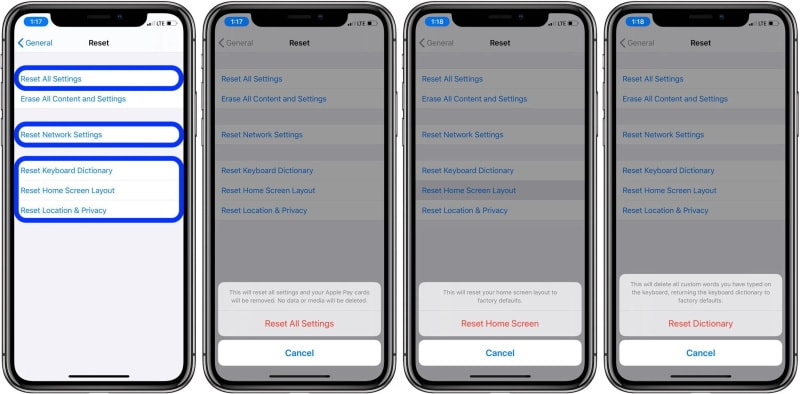
- Enter your passcode if you are asked to do so.
- Confirm the reset by tapping on the option to confirm the reset.
- Wait for the reset process to complete. You may need to restart your iPhone after the reset is complete.
Tip 6. Erase Touch ID
Perhaps, your Touch ID settings encounter some unknown issues. Try erasing the Touch ID. And this feature won't bother you. Let's see if it fixes the issue:
- Open the Settings app on your iPhone.
- Tap Touch ID & Passcode.
- Enter your passcode if prompted.
- Tap "Fingerprints" and then select the Fingerprint you want to delete.
- Tap the red circle to the left of the Fingerprint you want to delete.
- Tap Delete Fingerprint when prompted.
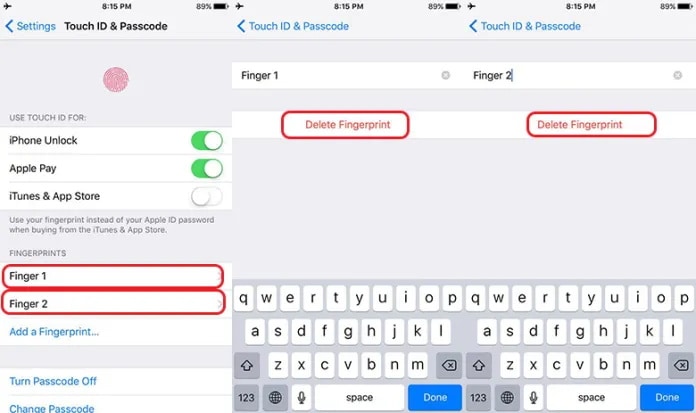
- Repeat the steps for any other fingerprints you want to delete.
- When you're done, tap Done in the top right corner.
- Restart your iPhone by pressing and holding the power button until you see the "slide to power off" option.
- Slide the power off slider to the right.
- Once your iPhone has powered off, press the power button until you see the Apple logo.
- When your device has restarted, open the Settings app again and tap Touch ID & Passcode.
- Add a Fingerprint and follow the on-screen instructions to add a new fingerprint.
- When you have added the new Fingerprint, try to use it to unlock your device.
Tip 7. Scan your Fingerprint Properly
Please make sure to scan your finger correctly. To work rightly, you should put your scanned finger on the sensor as per our instructions. The following tips may be helpful while doing so:
- Make sure your finger is clean and dry before trying to scan it.
- Place your finger on the fingerprint scanner until it is inside.
- Press your finger against the scanner until the scanner can read your Fingerprint.
- Ensure the scanner is correctly aligned with the finger so the entire Fingerprint can be read.
- Hold your finger steady until the scan is complete.
- Once the scan is complete, the scanner will provide feedback to indicate whether the Fingerprint was successfully read.
- If the Fingerprint was not successfully read, try again from the beginning.
- If the problem persists, contact a technician for help.
Tip 8: Apple Support
If none of the previous steps work, there might be a hardware problem with the Touch ID sensor. In such cases, you can get support from the Apple team or visit an authorized service center for further assistance.
Part 3: Ultimate Way to Fix Touch ID Not Working
Dr.Fone-System Repair
Dr.Fone-System Repair is a mobile phone repair software from Wondershare. It offers a range of features for users suffering from problems such as a frozen screen, a crashed system, a black screen, or a white screen.

Dr.Fone - System Repair (iOS)
Repair iOS System Errors to Fix Touch ID Not Working Without Data Loss!
- Only fix your iOS to normal, no data loss at all.
- Fix various iOS system issues stuck in recovery mode, white Apple logo, black screen, looping on start, etc.
- Downgrade iOS without iTunes at all.
- Works for all models of iPhone, iPad, and iPod touch.
- Fully compatible with the latest iOS version.

Dr.Fone-System Repair can also unlock Touch ID if the iPhone fingerprint not working. If the Touch ID is malfunctioning or not working correctly, Dr.Fone can help to unlock it by restoring the device to its original settings. Here's how:
Step 1: Launch Dr.Fone and select the "System Repair" option from the home page.

Step 2: Select "iPhone" to repair the system issues on the iPhone.
Step 3: Click "iOS Repair" to proceed with the repair.

Step 4: Select "Standard Repair" to repair the iOS device while keeping data secure.

Step 5: Connect the device to the computer via USB and enter the lock screen password. Tap on the "Trust" option when it appears and clicks "Enter Recovery Mode" to proceed.

Step 6: Follow the on-screen instructions depending on your model, to put the device into Recovery Mode.
Step 7: Once the device is in Recovery Mode, the platform will automatically detect it.
Step 8: The following window will show a list of different iOS firmware available for installation on the device. Click on "Download" to start the process.

Step 9: The iOS firmware will start downloading and be displayed on the progress bar.
Step 10: Once downloaded, the platform will verify the firmware before installation to avoid any problems.
Step 11: Click "Repair Now" to initiate the iOS system recovery process after verification.

Step 12: The progress of the repair will be displayed on the progress bar. Once finished, a prompt window will show the successful completion of the process. Click "Done" to complete the execution.
The Bottom Line
When Touch ID is not working, the device experience becomes inconvenient. Fortunately, you can take a few simple troubleshooting steps to get your Touch ID back up and running. To fix it, try cleaning and drying the Touch ID sensor, updating the iOS version, resetting the settings, or erasing the Touch ID.
You can also use the Dr.Fone-System Repair from Wondershare to safely unlock the Touch ID on your iPhone. With these troubleshooting tips, you should be able to get your Touch ID working again in no time.
iPhone Problems
- iPhone Hardware Problems
- 1. iPhone Keyboard Problems
- 2. iPhone Flashing Not Working
- 3. iPhone Not Detecting Sim Card
- 4. iPhone Sim Not Supported
- 5. Touch ID Not Working
- 6. iPhone Unable to Activate Touch ID
- 7. Fix iPhone Flashlight Greyed Out
- 8. iPhone Ear Speaker Test
- 9. iPhone Ear Speaker Not Working
- 10. iPhone Backlight
- 11. iPhone Proximity Sensor by Yourself
- 12. Replace iPhone Digitizer
- 13. Accessory May Not Be Supported
- iPhone Battery Problems
- 1. iPhone Battery Percentage Not Show
- 2. Replace iPhone Battery
- 3. iPhone Battery Problems
- 4. iPhone's Battery Drains Fast
- 5. iPhone Shuts Off with Battery Left
- 6. iPhone Overheating
- iPhone Button Problems
- 1. iPhone Home Button Not Working
- 2. iPhone Volume Buttons Not Working
- 3. iPhone Silent Switch Not Working
- 4. iPhone Power Button Stuck
- 5. iPhone Volume Button Stuck
- 6. iPhone Back Tap Not Working
- iPhone Charging Problems
- 1. iPhone Charging Port Not Working
- 2. iPhone Charging Slowly
- 3. iPhone Stops Charging
- 4. Wireless Charging Not Working
- 5. iPhone Not Charging
- 6. iPhone Stuck on Charging Screen
- iPhone Headphone Problems
- Apple Pencil and Watch Issues
- 1. Apple Pencil Double Tap Not Working
- 2. Apple Pencil Keeps Disconnecting
- 3. Apple Pencil Not Charging
- 4. Apple Pencil Not Connecting/Pairing
- 5. Apple Pencil Not Working
- 6. Apple Watch Not Pairing with iPhone
- 7. Apple Watch Stuck on Apple Logo
- Other iPhone Problems
- ● Manage/transfer/recover data
- ● Unlock screen/activate/FRP lock
- ● Fix most iOS and Android issues
- Repair Now Repair Now Repair Now


James Davis
staff Editor
Generally rated4.5(105participated)