Known iPhone 13 Issues & How to Deal With Them
Jul 12, 2024 • Filed to: Mobile Repair Solutions • Proven solutions
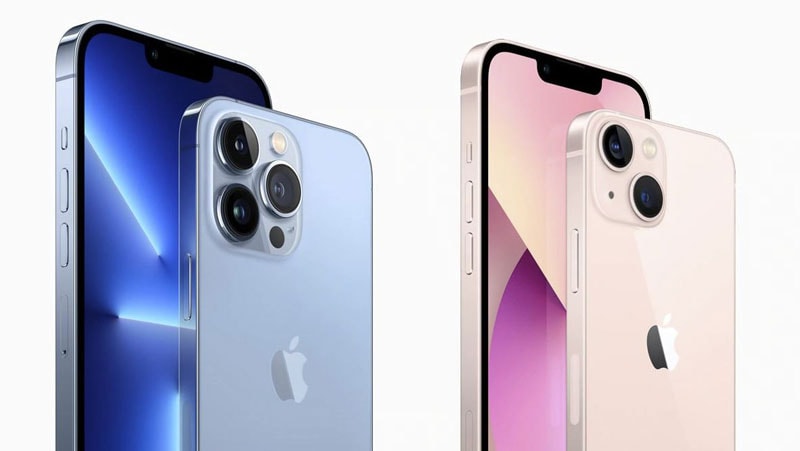
If you’re a massive fan of Apple, you’ve noticed the company releases new iPhone devices every year. Such is the case with iPhone 13. The latest edition significantly improved performance, battery life, processor, camera, etc.
However, it also brought new iPhone 13 issues and bugs that tend to put many iOS users into a state of unrest. While you can fix most common problems with comprehensive updates, some issues persist no matter what you do.
With that in mind, this guide will help you identify some of the most common iPhone 13 issues and offer the most effective methods to deal with them.
Part 1. Common iPhone 13 Issues and Fixes
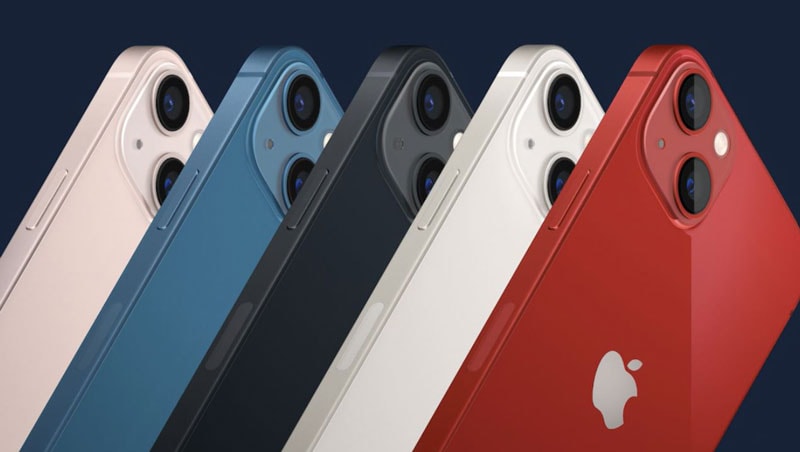
The iPhone is the most popular mobile device on the planet. Many mobile users prefer iOS over Android due to advanced performance, Apple ecosystem advantages, sleek design, extremely powerful camera capabilities, and extended battery life.
However, iPhone mobile phones are prone to common issues that plague all mobile devices, regardless of the OS they operate on. Here’s a comprehensive list of the common iPhone 13 issues and the best ways to fix them for good.
Universal Fix: Repair Your Ios System
Sometimes, you need to repair your iOS system to eliminate issues and bugs that might prevent you from enjoying your new iPhone 13 devices. Since this isn’t an easy task, you need a user-friendly iOS system repair solution to help you fix any problem that may arise during your everyday use.
If you need to repair iOS system issues, Dr.Fone System Repair (iOS) is your best option. Dr.Fone is an effective solution for system repair for iPod, iPad, and iPhone users. It can identify and fix any system problem, regardless of its nature.
More importantly, Dr.Fone allows you to fix common iPhone 13 issues without data loss. Whether your iPhone 13 shows a black screen, keeps restarting, freezes, or can’t come back from recovery mode, you can easily fix these issues and more with Dr.Fone.
You have two modes of iOS system repair: standard repair (without data loss) and advanced repair (reset to factory settings and erase your data). Here are the steps for fixing your iOS system using both modes.
Standard mode repair:
- Step 1:Download and launch Dr.Fone

Download and install Dr.Fone on your PC/Mac computer. Launch the app and navigate to Toolbox>SystemRepair.
- Step 2:Select iPhone

Connect your iOS device to your computer with a USB cable and select iPhone device type.
- Step 3:Select iOS Repair

The System Repair window will offer you multiple options, such as iOS Repair, iTunes Repair, iOS Upgrade/Downgrade, and Toolbox Repair. Select iOS Repair to proceed to the next step.
- Step 4:Choose Standard Repair

Select Standard Repair to repair your iOS system and retain your data.
- Step 5:Click Enter Recovery Mode

Dr.Fone System Repair will prompt you to put your iPhone in Recovery Mode. Follow the on-screen instructions and hit Enter Recovery Mode when you’re done.
- Step 6:Download and install iOS firmware

Once your device enters the Recovery Mode, Dr.Fone will automatically detect the matching iOS firmware that requires installation. Select the iOS firmware you wish to install and click Download. The download process should start automatically. Dr.Fone will complete the download process and verify the firmware before installing it.
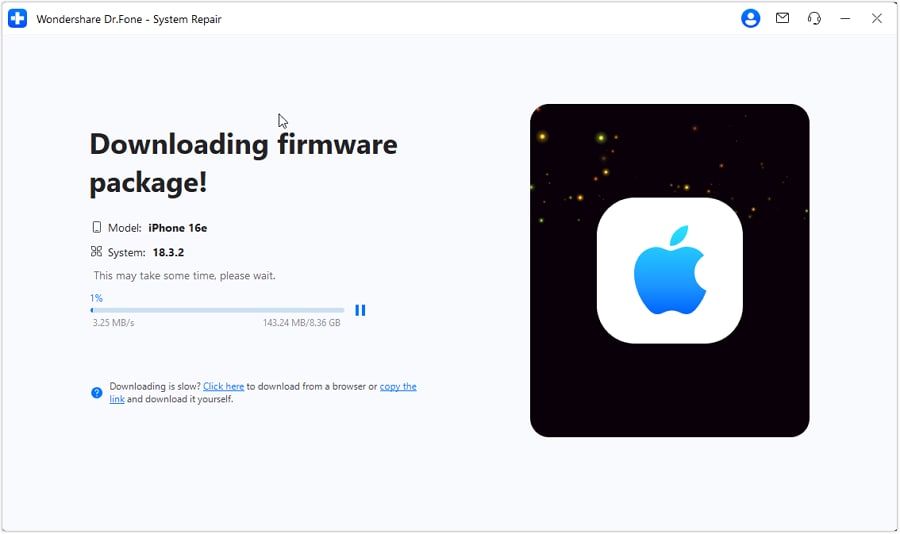
- Step 7:Repair your iOS device

Once the firmware is downloaded and installed, click Repair Now to start repairing your iOS system.
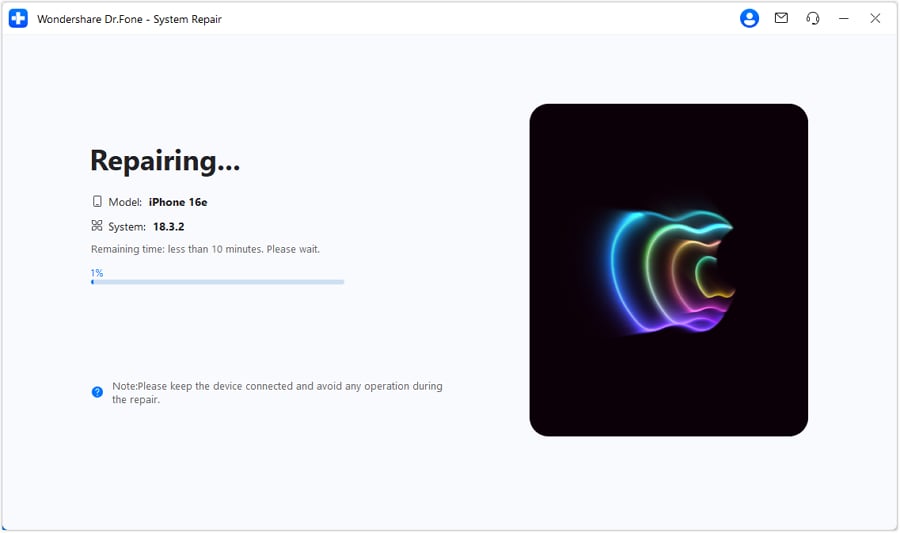

Once Dr.Fone completes the system repair, click Done to confirm the process.
iOS advanced repair:
- Step 1:Select Advanced Repair
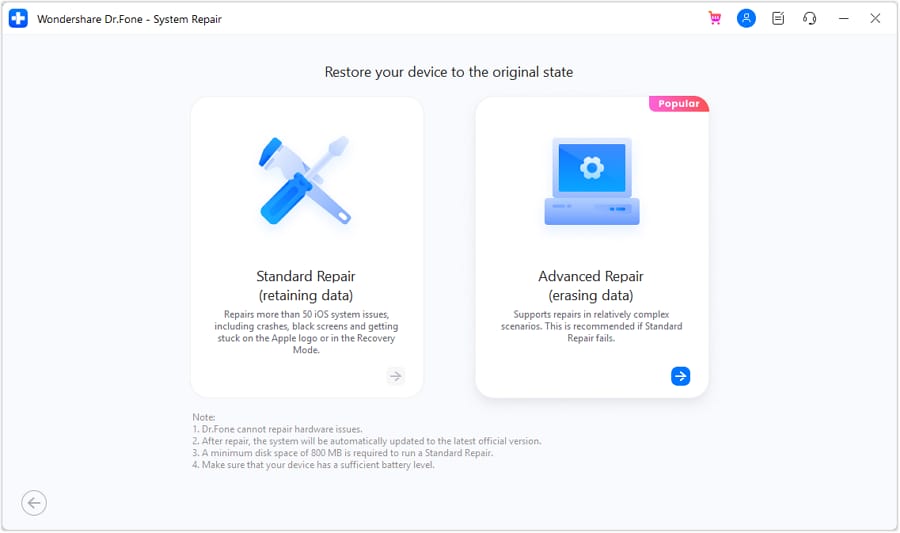
Download, install, and launch Dr.Fone on your PC/Mac. Open the app and navigate to Toolbox>System Repair>iPhone>iOS Repair>Advanced Repair (erasing data).
- Step 2:Enter Recovery Mode

Use a USB cable to connect your iPhone to your computer and unlock the screen by entering your password. Tap Trust on your phone and click Enter Recovery Mode.
- Step 3:Download and install the necessary firmware

Select the matching firmware and click Download to install it on your device. Proceed to the next step.

- Step 4:Repair your iOS system

Once Dr.Fone completes the download process, click Repair Now to repair your iOS system. Click Done when Dr.Fone finishes the repair.


iPhone 13 Battery Life Issues
Though Apple promises extended battery life to iPhone 13 users, some devices’ battery life starts draining faster than normal. Whether due to 5G connectivity, iOS 16 software updates, or abnormal battery drain, you want to eliminate any issues to ensure the battery can support your everyday smartphone needs.
Here are some fixes to help you deal with this issue:
- Restart your phone – the simplest way to fix any bugs quickly.
- Check for important updates – some updates exist to fix bugs and issues and might help you extend your battery life.
- Enable Auto-Brightness – since keeping your screen on maximum brightness setting can drain your battery, enabling Auto-Brightness can fix this problem. Navigate to Settings>Accessibility>Display & Text Size>Auto-Brightness.
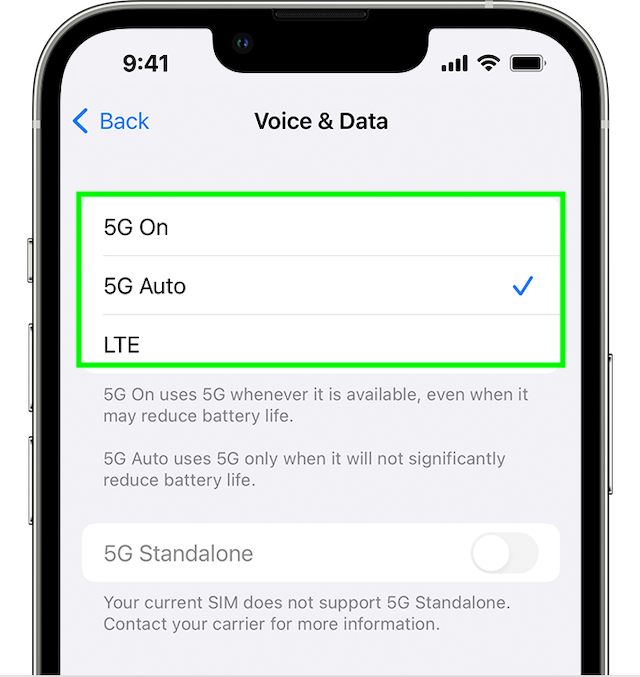
- Turn off 5G – 5G connectivity tends to drain your battery life much faster. You can turn it off by navigating to Settings>Cellular>Cellular Data Options>Voice & Data>5G Off.
- Check the Battery Usage tool – this tool allows you to disable apps that may drain your phone’s battery life. Head to Settings>Battery>Battery Usage Tool. Disable the apps that use most of the battery resources.
- Rest all settings – if the problem persists, navigate to Settings>General>Reset iPhone>Reset>Reset All Settings.That should extend battery life.
- Tap on Low Power Mode – you can preserve your battery by disabling all unnecessary services. Navigate to Settings>Control Center>Customize Controls>Low Power Mode.
- Disable Background App Refresh – you can also prolong your phone’s battery life by turning on the Background App Refresh option. Navigate to Settings>General>Background App Refresh.
iPhone 13 Missing 5G Bug
There are many different reasons why 5G might be bugging on your iPhone 13:
- Poor device compatibility;
- Poor 5G network availability in your area;
- Lack of carrier support;
- Carrier-related technical issues;
- Wrong network configuration;
- Temporary bug;
- Outdated carrier setting;
- Software issue.
Thankfully, you have several ways to fix this issue, such as:
- Ensure your phone is 5G-ready (iPhone 13 mini, Pro, and Pro Max are 5G-compatible);
- Check 5G network availability in your region;
- Ensure your carrier supports 5G;
- Enable 5G on your phone (Settings>Cellular>Cellular Data Options>Voice & Data>5G On or 5G Auto);
- Disable Low Power Mode (Settings>Battery>Low Power Mode);
- Ensure your mobile usage plan includes 5G connectivity;
- Disable Low Data Mode (Settings>Cellular>Cellular Data Options>Data Mode>Allow More Data on 5G);
- Hard reset your phone as it’s an effective way to fix common issues;
- Reset network settings to fix network-related issues (Settings>General>Transfer or Reset iPhone>Reset>Reset Network Settings).
iPhone 13 Black Screen Issues
Have you been wondering why your iPhone 13 keeps showing a black screen? The black screen issue can happen for various reasons:
- Software bug;
- Hardware issues;
- System crash;
- The phone has become unresponsive;
- The device might be malfunctioning.
Here’s how to fix this problem:
- Force restart your phone by pressing and releasing the Volume up button and then holding the Volume down button for a couple of seconds before releasing it. Finally, press the side button until you see the Apple logo, and then release it.
- Delete a suspicious or outdated application by long-pressing it and tapping on Delete Appin the pop-up menu.
- Charge your phone and reboot the system.
- Contact your vendor if the problem persists, or use a third-party tool like Dr.Fone System Repair to repair your iOS system.
iPhone 13 Bluetooth Issues
iPhone 13 Bluetooth issues commonly occur after updating your iOS. The most common issues include:
- Failing to discover third-party Bluetooth devices;
- The device can’t see available Bluetooth devices;
- The connection process takes forever and eventually fails;
- The device can connect, but there are Bluetooth issues like strange noises on the speaker or headset or the connection tends to stutter;
- The connection breaks frequently;
- The Bluetooth connection settings screen becomes unresponsive or stuck;
- Bluetooth can’t automatically connect to the devices it has paired with previously.
Here are a couple of ways to fix Bluetooth issues on your iPhone 13.
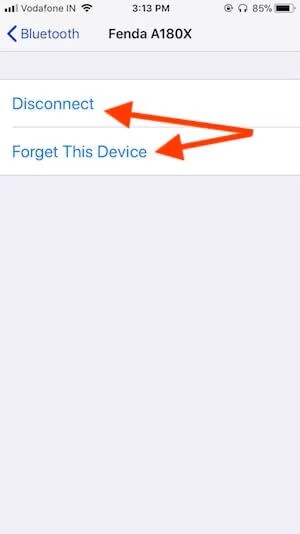
Forget all previously paired devices and try to re-pair
You can fix most iPhone 13 Bluetooth issues by resetting Bluetooth connectivity, forgetting previously paired devices, and re-pairing. Navigate to Settings>Bluetooth>My Device List>I>Forget This Device. Once finished, simply select a new device and pair it.
Turn on Bluetooth on your iPhone
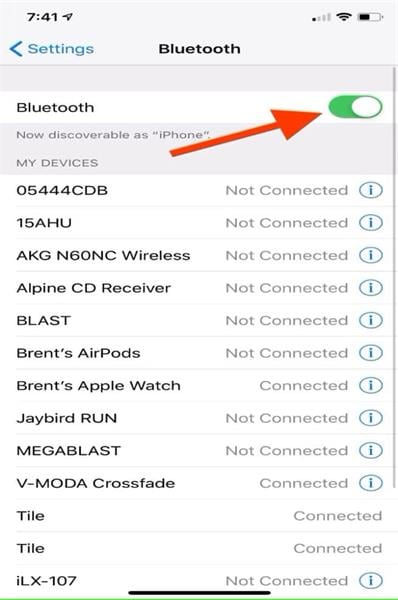
In some cases, turning Bluetooth off and on again can be enough to restart the Bluetooth connection. Just navigate to Settings>Bluetooth and tap the switch off and then back on again and scan your device for new compatible devices.
Disconnect and reconnect
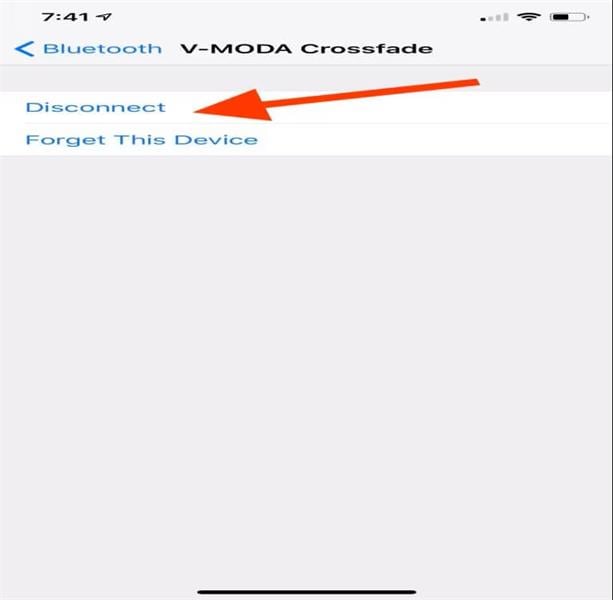
Disconnecting and reconnecting problematic Bluetooth devices might help you fix faulty Bluetooth connections on iPhone 13. Follow these steps to disconnect and reconnect: Settings>Bluetooth>My Device List>I>Disconnect. Give it a few minutes, and try connecting to the selected device again.
Check your network settings

If none of the aforementioned methods give desired results, you can reset your network settings to fix the issue. However, doing this will delete all Bluetooth data on your device, including VPN configurations, Wi-Fi networks, and other network settings.
Navigate to Settings>General>Reset>Reset Network Settings. Confirm your actions by entering your password and letting your iPhone reboot. When it reboots, try pairing and connecting to the selected devices again. If you still experience Bluetooth issues, restart your device or contact your vendor.
iPhone 13 WiFi Issues
Though you can fix most iPhone 13 WiFi issues by simply turning WiFi on and off, some bugs require a bit more of your attention and time.
The most WiFi issues include:
- The connection comes and goes or keeps dropping;
- It doesn’t work;
- It’s on, but the connection is incredibly slow;
- Your device can’t recognize the WiFi network;
- It turns on and off on its own;
- Your device doesn’t recognize the WiFi password;
- Connection issues due to a recent update;
- It’s greyed out.
Here’s what to do to fix these issues:
- Turn your WiFi off and on – if your iPhone 13 refuses to connect to the selected WiFi network or you experience connection issues, turn it on and off by navigating to Settings>WiFiand toggling the WiFi switch. Give it a few minutes and turn it back on.
- Ensure Airplane mode is off – Airplane mode blocks the WiFi network and will prevent you from establishing a connection. You can turn it off by navigating to Settings>Airplane modeand then turning the mode off by toggling the switch.
- Use the WiFi assist feature – this option helps you establish and maintain a stable WiFi/internet connection. If a connection keeps dropping or is too slow, this feature will turn on cellular data on your phone automatically. Head toSettings>WiFi and turn WiFi assist on. If this doesn’t solve your problem, restart your phone or contact your vendor.
iPhone 13 Activation Bug
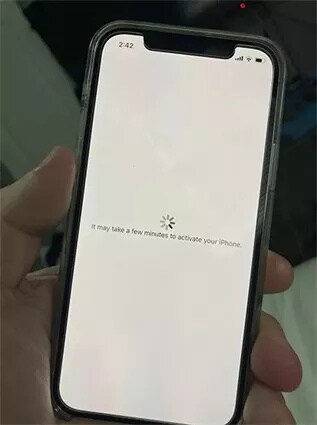
There might be several reasons why you can’t activate your iPhone 13:
- A faulty or disabled Activation lock;
- The activation server is unresponsive or currently unavailable;
- Your phone can’t connect to the internet;
- You didn’t insert the SIM card properly, or your device doesn’t support the inserted SIM;
- Mobile service carrier locked your device.
If you keep seeing that annoying “Could not activate iPhone message, don’t worry; all is not lost. Here are some ways to fix this bug.
Check system status
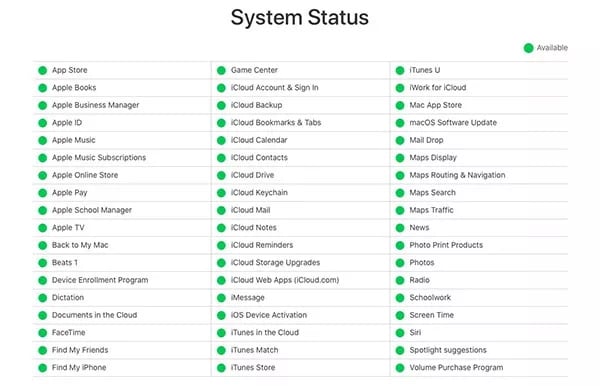
You check your system status in real-time by visiting Apple’s support page. Head to the Apple System Status page and check if there are issues with your phone’s system. If the status page shows all options in green, there are no problems with your iPhone system.
Force restart your device
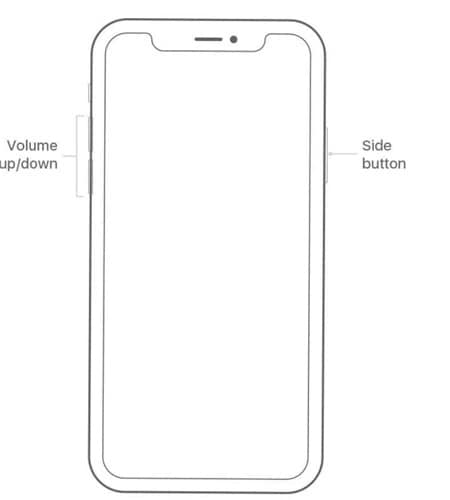
Press the Volume up/down and Side buttons and hold them until the power off slider appears on your screen. Drag the power off slider to turn off your phone and let it rest for half an hour. Press and hold the Side button until your phone turns back on.
Check your network connection
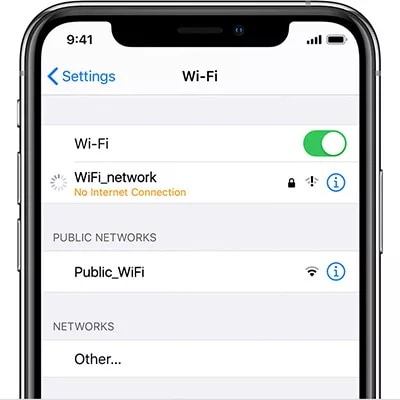
You need a network connection to activate your iPhone 13. If your connection is slow, you’ll experience activation problems. Check your network settings to make sure everything is in order.
Use iTunes
You can also fix activation issues by installing the latest iTunes version on the computer and then connecting your iPhone using the original Apple USB cable. Your desktop device should detect and activate your phone automatically. If you see messages like “Set up as New” or “Restore from Backup”, your iPhone 13 is activated.
iPhone 13 Charging Issues
If your iPhone 13 won’t charge, you may be dealing with a faulty charger, damaged iPhone device, wet charging port, defective power adapter, or broken USB cable.
First, check that you have the iPhone charger for your device. If it still won’t charge, inspect your phone for signs of physical damage like scratches, dents, and cracks.
If the problem persists, do the following:
- Check the power outlet – plug any appliance other than your phone into the outlet to see if it works properly. If it does, move to the next step.
- Use a functional power adapter – check the charger and make sure you’re using the original cable that comes with your iOS device. If your charger has a USB-C port, proceed to the next step.
- Check the cable – if a cable is broken, you won’t be able to charge your iPhone. Inspect the cable end-to-end and check the connectors for dirt or any signs of physical damage.
- Inspect your phone’s charging port – in most cases, your iPhone won’t charge due to debris in the charging port. Remove the debris using the SIM ejector tool and try connecting your device to the charger.
iPhone 13 Face ID Problems
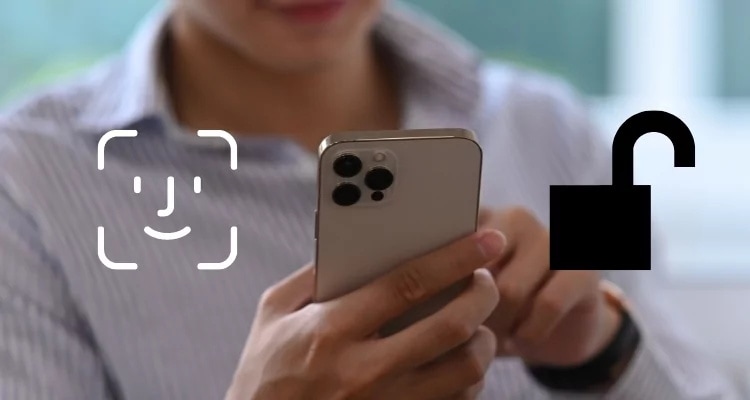
Face ID on your iPhone 13 might stop working due to several factors, such as:
- You’re wearing a face mask;
- You haven’t used Face ID on your phone in the last four hours;
- You haven’t unlocked your phone in the last 48 hours;
- You failed Face ID five consecutive times;
- A remote lock command is on;
- You didn’t use your passcode to unlock your phone in the 6.5 days;
- You used the Emergency SOS, or your device is powered off/restarted.
Here are a few quick fixes to help you deal with these problems.
Check your Face ID settings
Go to Settings>Face ID & Passcode and enable toggles for Face ID-related apps like iPhone Unlock, iTunes & App Store, Apple Pay, and Password AutoFill. Face ID needs these apps to work properly, so make sure you turn them all on.
Switch to portrait mode
The Face ID feature on iPhone 13 requires you to use your phone in portrait mode to work.
Keep your face in the ideal range of Face ID
Face ID won’t work if you keep your phone further than 10-20 inches away from your face.
Make sure nothing blocks the TrueDepth camera
If there’s dirt around the front camera, Face ID won’t work. Ensure that the TrueDepth camera isn’t blocked by the phone case or the screen protector.
Check for software updates and reset Face ID
Sometimes, a simple update can make all iPhone 13 problems go away. Navigate to Settings>General>Software Update to check if there are any updates available. If there are, tap Download and Install. If the problem persists, reset Face ID by navigating to Settings>Face ID & Passcode>Reset Face ID (enter your passcode if prompted).
Part 2. How To Avoid Future Issues With Your iPhone 13
Here are a few useful tips to avoid future issues with your iPhone 13:
- Only use authorized apps for your iPhone devices (apps downloaded from App Store);
- Make sure your iPhone apps are always up-to-date;
- Never install outdated or shady software on your phone;
- Avoid using your phone while charging, as the device might heat up and damage the hardware;
- It would be best if you could charge your phone before the battery goes below 20%;
- Always charge your phone up to 99% to ensure maximum performance.
In addition, use third-party tools like Dr.Fone to repair your iOS system and fix issues like your continuous restarting, boot loop, black screen, etc.
Conclusion
Though the iPhone remains one of the leading mobile devices on the market, it isn’t without its downsides. Thankfully, you can fix most of the iPhone 13 issues mentioned here with a few simple tricks to ensure an enjoyable experience with every use.
You can also ensure your device functions properly by performing a few tweaks upon activation. Use Dr.Fone System Repair and other associated tools like Phone Transfer, Data Recovery, and Phone Manager to deal with any bugs and ensure your device works at optimal levels.
iPhone 13 Series
- iPhone 13 News
- 1. Change Default iPhone 13 Ringtone
- 2. Use Siri on iPhone 13
- 3. iPhone 13 Tips and Tricks
- 4. Turn iPhone 13 Off
- 5. iPhone 13 Wallpaper
- 6. iPhone 13 Camera Tricks
- 7. iPhone 13 Problems
- 8. iPhone 13 Pro Max Introduction
- iPhone 13 Alternatives
- iPhone 13 Backup
- 1. Back up iPhone/iPad to Computer
- 2. iPhone Backup Software
- 3. iPhone Backup Extractor
- 4. Back up iPhone/iPad in DFU Mode
- 5. Back up iPhone in Recovery Mode
- 6. Back up Messages on iPhone
- iPhone 13 Erase
- iPhone 13 Issues
- 1. iPhone 13 Apps Keep Crashing
- 2. iPhone 13 Battery Draining Fast
- 3. iPhone 11/12/13 that Won't Turn On
- 4. iPhone 13 Stuck on White Screen
- 5. iPhone 13 Camera Not Working
- iPhone 13 Recover
- 1. Recover iPhone 13 Photos
- 2. Recover iPhone Contacts
- 3. Recover Data without iTunes
- 4. Recover iPhone 13 Data
- 5. Recover iPhone 13 Messages
- iPhone 13 Transfer
- 1. Contacts from Android to iPhone 13
- 2. Files from Android to iPhone 13
- 3. Data from iPhone to iPhone 13
- 4. Manage iPhone 13 on PC
- iPhone 13 Unlock


James Davis
staff Editor
Generally rated4.5(105participated)