100% Security Verified | No Subscription Required | No Malware
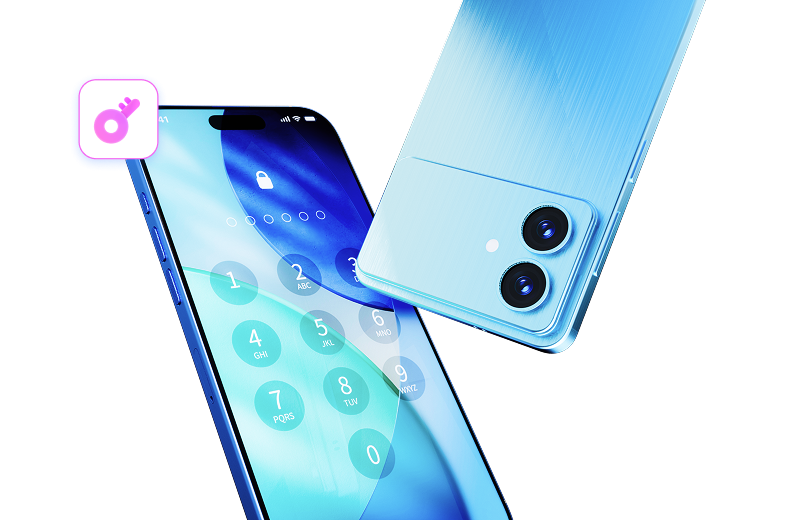

 :
: 
 ChatGPT
 Perplexity
 Gemini
 Claude
 Grok
Grok
Seeing the "iPhone is disabled" message on your iPhone 13 can be alarming. This security feature activates after too many incorrect passcode attempts, locking you out completely. The rise of features like Face ID has made us less reliant on passcodes, making them easier to forget.
If you're facing the 'iPhone 13 is disabled, connect to iTunes' screen, don't worry. This guide provides several proven methods to regain access to your device. It's important to understand that all successful unlocking methods will erase the data on your iPhone, restoring it to factory settings. Let's explore how to unlock your disabled iPhone 13.
In this article
- Part 1. Easiest Method: Unlock Disabled iPhone 13 with Dr.Fone - Screen Unlock
- Part 2. Standard Method: Use iTunes or Finder to Unlock Your iPhone 13
- Part 3. Remote Method: Unlock iPhone 13 via the iCloud Website
- Part 4. Alternative Remote Method: Use the Find My App
- Part 5. How to Prevent Your iPhone From Being Disabled Again
Part 1. Easiest Method: Unlock Disabled iPhone 13 with Dr.Fone - Screen Unlock
If you're looking for a straightforward, hassle-free solution that doesn't involve complex steps or confusing error codes, a dedicated tool is your best option. Dealing with technical troubleshooting can be frustrating, especially when you're already stressed about being locked out of your phone.
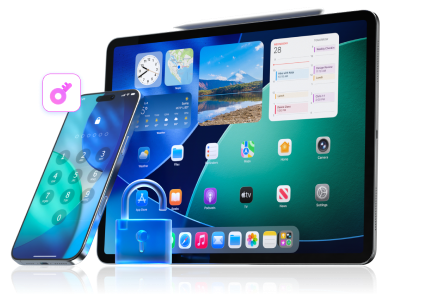
Dr.Fone - Screen Unlock is specifically designed to solve this problem with a simple, click-through process. It guides you through every step of unlocking your disabled iPhone 13 without needing iTunes, iCloud, or any advanced technical knowledge. The software handles the technical complexities behind the scenes, ensuring a high success rate. Please remember this process will erase all data on the device.
 Unlock iPhone/iPad passcode in minutes.
- Remove Face ID, Touch ID, and screen lock.
- Bypass iCloud Activation Lock easily.
- Support all iOS versions and devices.
- Simple steps, no technical skills needed.
Follow these steps to unlock your disabled iPhone 13:
-
Step 1 Launch Dr.Fone and Select Screen Unlock
Download and install Wondershare Dr.Fone on your computer. Open the program and select the "Screen Unlock" module from the main dashboard.
-
Step 2 Choose Unlock iOS Screen
On the next screen, choose "iOS" and then click "Unlock iOS Screen" to begin the process for your iPhone 13.

-
Step 3 Enter Recovery Mode
Follow the on-screen instructions to boot your disabled iPhone 13 into Recovery Mode. If you have trouble, the software also provides a link with instructions for entering DFU mode.

-
Step 4 Confirm Device Details and Download Firmware
Once your iPhone is in Recovery Mode, Dr.Fone will automatically detect your device model. Verify that the information is correct and click "Start" to download the appropriate iOS firmware. This file is essential for resetting your device.

-
Step 5 Unlock Your iPhone 13
After the firmware download is complete, click the "Unlock Now" button. Dr.Fone will proceed to remove the passcode and unlock your iPhone. Once finished, your iPhone 13 will restart as a new device, free from the disabled screen.

When your iPhone 13 reboots, you can set it up from scratch. If you have an iCloud or computer backup, you can restore your data during the setup process.


Part 2. Standard Method: Use iTunes or Finder to Unlock Your iPhone 13
Apple's official method to restore a disabled iPhone involves using iTunes (on Windows or older Macs) or Finder (on macOS Catalina and newer). This method is effective but can sometimes be less intuitive for users unfamiliar with Recovery Mode or who encounter numerical error codes.
-
Step 1 Connect Your iPhone to a Computer
Plug your iPhone 13 into your computer using a USB cable. Open iTunes on a Windows PC or a Mac running macOS Mojave or earlier. For Macs running macOS Catalina or later, open a Finder window.
-
Step 2 Enter Recovery Mode
You need to manually put your iPhone 13 into Recovery Mode. This requires a specific button sequence. Don't release the final button until you see the Recovery Mode screen on your iPhone (it shows a computer icon and a cable).
1. Press and quickly release the Volume Up button.
2. Press and quickly release the Volume Down button.
3. Press and hold the Side button (on the right) until the Recovery Mode screen appears. -
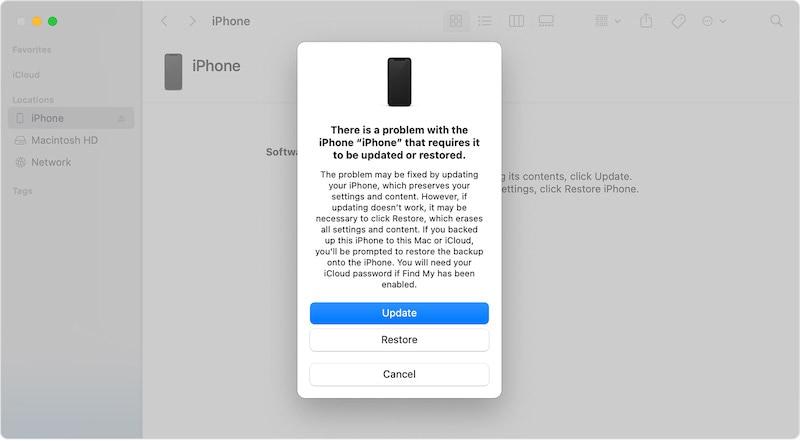
Step 3 Restore Your iPhone
iTunes or Finder will detect your iPhone in Recovery Mode and display a pop-up window. Choose the "Restore" option. This will download the latest iOS software and install it on your device, erasing all data and settings, including the passcode.
After the restore process is complete, your iPhone 13 will restart. You can then set it up as a new device or restore from a previous backup.
Part 3. Remote Method: Unlock iPhone 13 via the iCloud Website
If you don't have access to your computer but can use another device with a web browser, iCloud offers a way to remotely erase and unlock your iPhone. This method only works if you have previously enabled the "Find My" feature on your disabled iPhone 13.
-
Step 1 Log into iCloud
On any computer, tablet, or smartphone, open a web browser and go to https://icloud.com. Sign in with the Apple ID and password that are linked to your disabled iPhone 13.
-
Step 2 Access Find My
Once logged in, click on the "Find My" icon. You may need to re-enter your password.
-
Step 3 Select and Erase Your iPhone
Click on "All Devices" at the top of the screen to see a map with your Apple devices. Select your iPhone 13 from the list. A menu will appear. Click "Erase iPhone" and follow the prompts to confirm your decision.
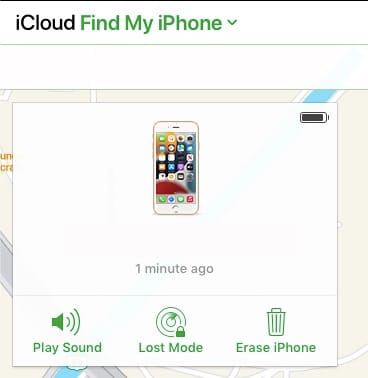
This action will remotely trigger the erase process on your iPhone. Once connected to the internet, it will reset to factory settings, allowing you to set it up again.
Part 4. Alternative Remote Method: Use the Find My App
If you own another Apple device, such as an iPad, iPod touch, or another iPhone, you can use the built-in Find My app to unlock your disabled iPhone 13. This is incredibly convenient if you're away from home. Like the iCloud website method, this requires "Find My" to be active on the locked device.
-
Step 1 Open the Find My App
On your other Apple device (e.g., your iPad), open the "Find My" app.
-
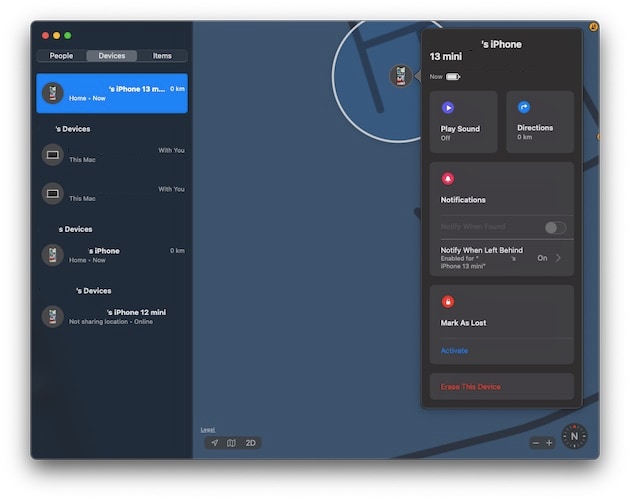
Step 2 Locate Your iPhone 13
Tap on the "Devices" tab at the bottom. You will see a list of all devices linked to your Apple ID. Select your disabled iPhone 13 from the list.
-
Step 3 Erase the Device
Scroll down in the options panel for your iPhone 13 and tap "Erase This Device." Confirm your choice to initiate the remote wipe. Your iPhone 13 will be reset to its factory state, and you can begin the setup process anew.
Part 5. How to Prevent Your iPhone From Being Disabled Again
After successfully unlocking your iPhone, the last thing you want is to go through this process again. It might be tempting to remove the passcode entirely, but that would leave your personal data vulnerable. Instead, follow these tips to secure your device wisely.
Tip 1: Choose a Strong, Memorable Passcode
- Set a passcode that is easy for you to recall but difficult for others to guess. Avoid common patterns or simple sequences.
- Never use easily identifiable numbers like your birthdate, anniversary, address, or vehicle number.
- Avoid repeating digits (like 111111) or simple numerical sequences (like 123456).
- Use a different passcode from your ATM PIN or other sensitive accounts. Consider a combination that has personal significance only to you.
Tip 2: Leverage Face ID
Your iPhone 13's Face ID is a powerful and convenient security tool. Setting it up will significantly reduce the number of times you need to manually enter your passcode, lowering the risk of incorrect attempts. However, don't rely on it so much that you forget your passcode. Regularly test your memory of the passcode to keep it fresh in your mind.
Conclusion
Forgetting a passcode and disabling your iPhone 13 can happen to anyone. Fortunately, there are multiple reliable solutions available. For ultimate simplicity and a guided experience, tools like Dr.Fone - Screen Unlock (iOS) offer a stress-free path. Alternatively, Apple's built-in methods using iTunes/Finder or iCloud/Find My are effective if you're comfortable with the steps and meet the prerequisites.
The most important takeaway is that unlocking a disabled iPhone will always result in data loss. This highlights the critical importance of maintaining regular backups of your device, either through iCloud or to a computer. By doing so, you can quickly restore your valuable information after regaining access to your iPhone.
FAQ
-
1. What does the message "iPhone 13 is disabled connect to iTunes" mean?
This message appears after you have entered the wrong passcode too many times. It's a security measure to protect your data from unauthorized access. To unlock it, you must connect the device to a computer and restore it using iTunes or Finder, which erases all its content and settings. -
2. Will unlocking my disabled iPhone 13 erase my data?
Yes, absolutely. All methods for unlocking a disabled iPhone—whether using Dr.Fone, iTunes, Finder, or iCloud—will restore the device to its factory settings. This process erases everything on the iPhone, including your passcode, photos, messages, and apps. This is why having a recent backup is crucial. -
3. Can I unlock a disabled iPhone 13 if I never enabled "Find My"?
If "Find My" was not enabled on your iPhone, you cannot use the iCloud website or the Find My app to unlock it remotely. In this case, your only options are to use a computer-based method, such as putting the device into Recovery Mode and restoring it with iTunes/Finder, or using a third-party tool like Dr.Fone - Screen Unlock. -
4. Is it possible to unlock a disabled iPhone without a computer at all?
Yes, but with a condition. You can unlock it without a computer if you have another Apple device (like an iPad or another iPhone) with the Find My app installed. You can use that app to remotely erase your disabled iPhone. If you don't have another Apple device, you will need to use a computer (yours or a borrowed one) to perform the restore.
 Add Wondershare Dr.Fone as a preferred source on Google