Manage Photos on Samsung Galaxy S8: How to Transfer Photos to Galaxy S8
Oct 24, 2025 • Filed to: Device Data Management • Proven solutions
Dr.Fone Basic:
Better Control for Your Phone
Manage, transfer, back up, restore, and mirror your device
This article focuses on techniques through which you can manage your photos on Samsung Galaxy S8.
About Photo Management on Samsung Galaxy S8 and S8 Plus
Samsung released their latest models Galaxy S8 and S8 Plus, as compared to the previous models s6 and s7 the new Samsung devices Samsung S8 and S8 Plus has faster processing more and more storage. Samsung Galaxy S8 has been launched with Android version 7.0.
Samsung Galaxy S8 and S8 plus are packed with massive 6GB of ram and two storage models 64g/128g b along with storage expansion up to 256gb. For camera Samsung has done it again with their primary 30MP camera and 9MP front camera and additional features such as optical image stabilization, facial recognition, HDR, auto laser focus. Samsung Galaxy S8 and S8 plus is available in four colors Black, Blue, Gold, and White. Along with other enhancements the S8 and S8 plus also features enhanced finger print scanner, retina eye scanner. Galaxy S8 is packed with 3300mAh and S8 plus has larger battery up to 4200mAh and both of the handsets have USB type C port for rapid charging. Certainly S8 is one of the best phones ever released in 2017.

Why Photos are important well there are several reasons on of which is human brain we have so many memories that it is certainly not easy to remember every detail about an event, there where photos come in and make us remember the smallest details by triggering a specific memory. Photos invoke emotions, sometimes photos are important to remember details for example “what did I wore on my last Christmas?”.
We can deduce that photos freeze a memory in time. Now a days Photography is an art and every photographer is striving to capture a picture like no other, similarly most of the people hire photographers to take the pictures of their important events like weddings, gatherings, birthdays etc. You can only understand the importance of photos once they are no longer available. It is most of those times where a person might become very frustrated because remembering that specific memory without photos would not be easy.
If you own a Samsung Galaxy S8 then you need to have Wondershare Dr.Fone all times. Dr.Fone Android Manager outstands most of the other software out there. Wondershare Dr.Fone is the easiest tools to use with no complications for photo management at all! You can certainly Transfer and manage all types of Android devices using Dr.Fone. The interface is very easy to use if you have no knowledge of data transfer you don’t need to worry when using Dr.Fone. You can easily transfer your data including music, videos, photos, contacts and much more from and to your Galaxy S8 devices using Dr.Fone. Transferring photos on Galaxy S8 to PC is just a piece of cake.
How to Transfer Photos between Samsung Galaxy S8 and PC
Dr.Fone Samsung Galaxy S8 Manager could help you transfer photos from PC to Samausng Galaxy S8 and get Galaxy S8 photos to computer fast.

Dr.Fone - Phone Manager (Android)
One Stop Solution to Transfer Photos to Samsung Galaxy S8 from PC or the Other Way Around
- Transfer files between Samsung Galaxy S8 and computer, including contacts, photos, music, SMS, and more.
- Manage, export/import your music, photos, videos, contacts, SMS, Apps etc.
- Transfer iTunes to Android (vice versa).
- Manage your Android device on computer.
- Fully compatible with Android 13.
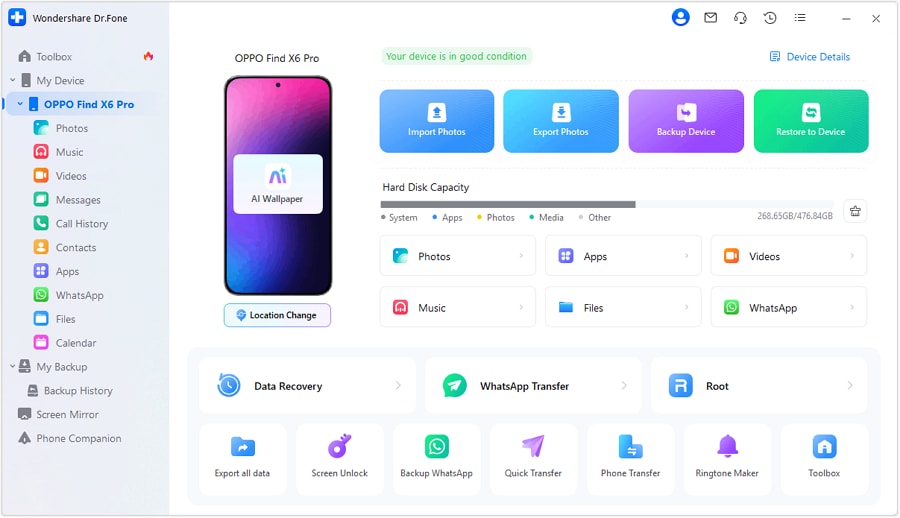
Step 1: You can transfer your photos from your pc to your Samsung Galaxy S8 device. First of all, you need to launch Dr.Fone, after the software have launched, connect your Galaxy S8 device to your computer with the USB cable. Your Samsung device will be recognized automatically by the Dr.Fone - Phone Manager software.

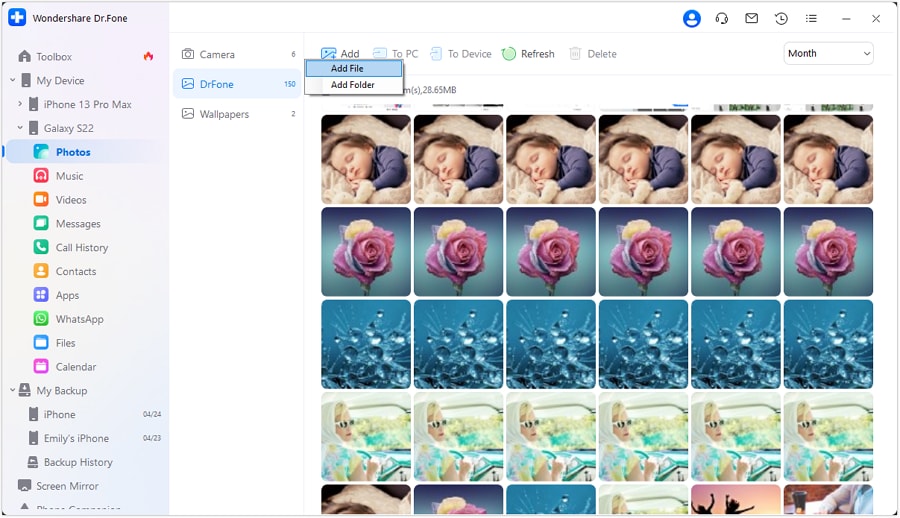
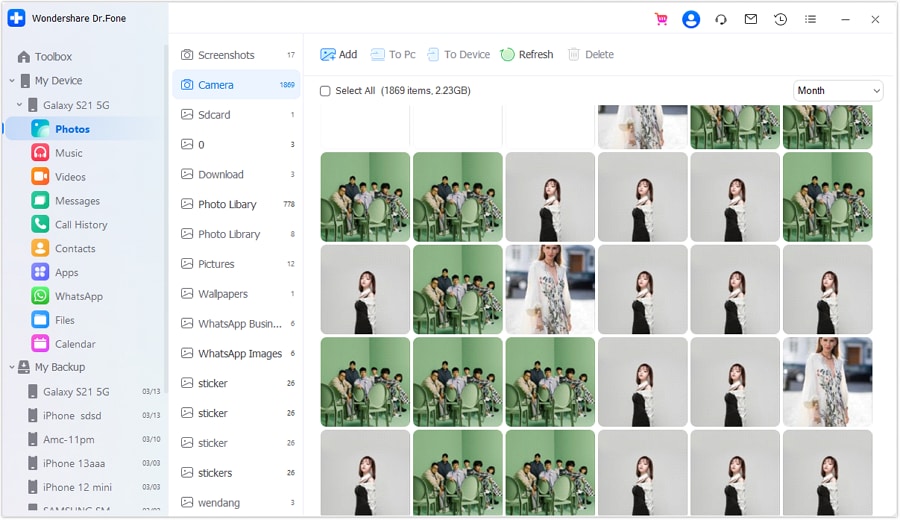
Step 2: After the device has been connected and recognized by Dr.Fone, click the Photos tab on the top of the main software interface, this will take you to photos window, where you will click the Add icon. If you want to select only few photos, then add options is effective. You can create new albums and add photos to it and if you want to transfer photos in one folder then select the add folder option.

Similarly, you can export your photos from your Galaxy S8 device to your PC.
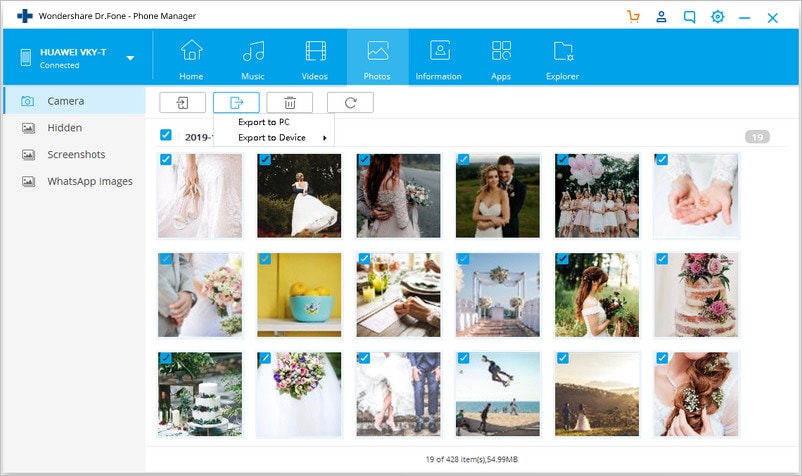
Step 3: After your Galaxy S8 device has been recognized by Dr.Fone click Photos tab on the top of the main software interface, this will take you to photos window, where you will click Export > Export to PC. When clicked you will see a file browser window just select the save path to store your photos from Galaxy S8 device and you are done.

You can also transfer the whole photo album from Samsung Galaxy S8 to PC.
Video Tutorial: How to Transfer Photos from PC to Samsung Galaxy S8
How to Transfer Photos from old Phone to Samsung Galaxy S8 and S8 Plus
This section of the article has steps for transferring the photos from and old phone to new Samsung Galaxy S8 and S8 plus.

Dr.Fone - Phone Transfer
Best Solution to Transfer Photos from old Phone to Samsung Galaxy S8 and S8 Plus
- Easily transfer every type of data from old phone to Samsung Galaxy S8 and S8 Plus including apps, music, videos, photos, contacts, messages, apps data, call logs etc.
- Works directly and transfer data between two cross operating system devices in real time.
- Works perfectly with Apple, Samsung, HTC, LG, Sony, Google, HUAWEI, Motorola, ZTE, Nokia and more smartphones and tablets.
- Fully compatible with major providers like AT&T, Verizon, Sprint and T-Mobile.
- Fully compatible with iOS 17 and Android 13
- Fully compatible with Windows 10 and Mac 14.
Step 1: To transfer photos from old phone to new Samsung Galaxy S8, after you have installed the Wondershare Dr.Fone, connect both of your old phone and your new S8 device to your computer. Then the Dr.Fone software will automatically detect the connected handsets.
Step 2: With the both devices connected, select the source device from where you want to transfer photos and pictures to the other device, which in this case would be your old phone. And simply click "Phone Transfer" after you have selected the source device.

Step 3: After you have selected the "Phone Transfer" feature, you need to specify which device to work as the source and which one to work as the destination.

Step 4: After selecting your source and destination devices, you will be asked to specify the content to transfer from your old phone to your new Galaxy S8 device, by default all the content is checked but you can uncheck the content you don’t need to transfer. Simply click Start Transfer and make sure your devices are connected throughout the process.

Dr.Fone is highly recommended because of the extensive device support it offers along with the flexibility to manage your devices in the easiest way possible. There are not many tools that are effective for management techniques such as backup Galaxy S8, restore, transfer and much more but Wondershare masters all of it. All of the Samsung Galaxy S8 owners are highly recommended to give Dr.Fone a try because of the management tools and features it has to offer. You can delete photos from your S8 device using this tool. Dr.Fone has been tested specifically for S8 and shows that it is very effective tool for Samsung Galaxy S8 data transfer, backup and restore, including photos, contacts, messages, pictures, videos and other files.
Why not download it have a try? If this guide helps, don't forget to share it with your friends.
Dr.Fone Basic:
Better Control for Your Phone
Manage, transfer, back up, restore, and mirror your device
Samsung Manage
- Samsung Data Manage
- 1. Best Samsung Manager
- 2. Manage Contacts on S9/S8
- 3. Manage Music on Samsung
- 4. Manage Music on Samsung S8
- 5. Transfer Photos to Samsung S8
- 6. Manage Photos on Samsung S9
- 7. Best Galaxy S9 Manager
- 8. Samsung Gear Manager
- 9. Samsung Task Manager
- 10. Remove Samsung Bloatware
- Samsung Erase
- 1. Tips for Selling Old Samsung
- 2. Wipe A Samsung Phone
- 3. Tips to Erase Data
- 4. Remove Samsung Apps
- 5. Uninstall Apps on Samsung
- Samsung Mirror
- 1. Share the Phone Screen
- 2. Screen mirror to Samsung TV
- 3. Use Allshare Cast To Mirror
- 4. Samsung Mirror Screen to PC
- Samsung Record
- 1. Screen Record on Samsung A50
- 2. Screen Record on Samsung S10
- 3. Screen Record on Samsung s9
- 4. Samsung S8 Screen Record
- 5. Top Samsung Screen Recorder
- Samsung Root
- 1. Root Samsung Galaxy S7
- 2. Jailbreak Samsung Phones
- 3. Root Samsung Galaxy S3
- 4. Root Samsung Galaxy S4
- 5. Root Samsung Galaxy S5
- 6. Root Samsung Galaxy J5
- 7. Samsung Root Apps Without PC
- 8. Top 6 Samsung Root Software
- 9. Used Apps to Root Samsung Note
- 10. Root Samsung Galaxy S3 mini
- 11. Root Galaxy Tab 2 7.0
- 12. Unroot Android Devices
- Samsung to Mac
- 1. Transfer Photos to Mac
- 2. Samsung File Transfer for Mac
- 3. Transfer Photos from Samsung
- 4. Transfer Pictures to Mac
- 5. Transfer Pictures from Samsung
- 6. Transfer Files to Macbook
- Samsung to PC
- 1. Transfer Contact from Samsung
- 2. Transfer Photos to PC
- 3. Transfer Photos to Laptop
- 4. Transfer Photos from Samsung
- 5. Transfer Files to PC
- 6. Transfer Photos From Note 8 to PC
- USB Debugging
- Samsung Tips
- ● Manage/transfer/recover data
- ● Unlock screen/activate/FRP lock
- ● Fix most iOS and Android issues
- Manage Now Manage Now Manage Now


Daisy Raines
staff Editor