How to Transfer Music from Computer to Samsung S9/S20?
Oct 24, 2025 • Filed to: Device Data Management • Proven solutions
Dr.Fone Basic:
Better Control for Your Phone
Manage, transfer, back up, restore, and mirror your device
Music is such an essential part of our everyday lives, and it’s common knowledge that a seemingly infinite amount of music is now available at our fingertips. However, since purchasing your brand-new Samsung Galaxy S9/S20, all your music is stuck on your old phone or your computer.
Today, we’re going to explore the three key methods you need to know on how to transfer music from computer to Galaxy S9/S20, allowing you to enjoy your favourite songs and artists, regardless of where you are or what you’re doing.
Method 1. Transfer music from PC/Mac to S9/S20 using Dr.Fone - Phone Manager (Android)
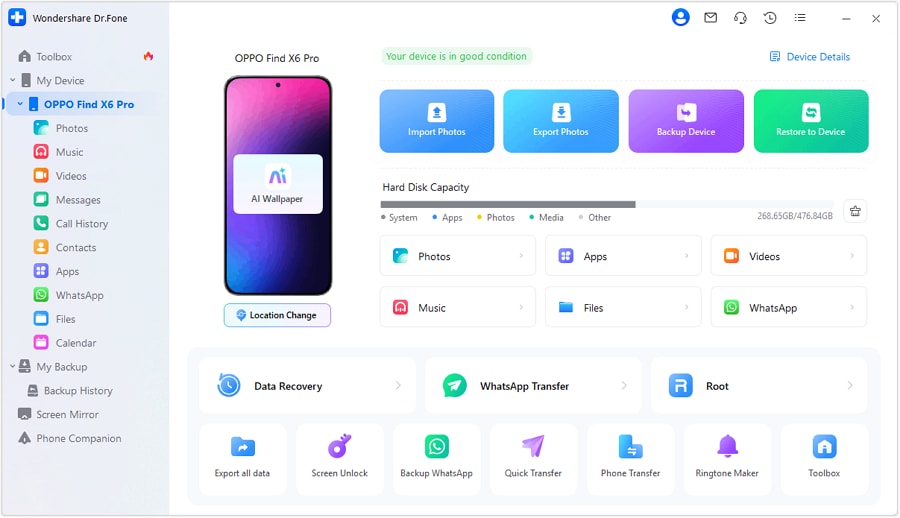
Firstly, we’ll start with the easiest way to transfer your music. Using third-party software known as Dr.Fone - Phone Manager (Android), you can effortlessly plug in and transfer all your music files, as well as your contacts, videos, photos, SMS and instant messages and more, all in just a few clicks on your screen.
The software is compatible with both Windows and Mac computers as well as Android and iOS devices, meaning you never have to worry about learning or using another method ever again, regardless of what device you own. There’s even a free trial period to get you started.

Dr.Fone - Phone Manager (Android)
Transfer Music from Computer to S9/S20 in 1 Click
- Transfer files between Android and computer, including contacts, photos, music, SMS, and more.
- Manage, export/import your music, photos, videos, contacts, SMS, Apps etc.
- Transfer iTunes to Android (vice versa).
- Manage your Android device on computer.
- Fully compatible with Android 8.0.
Here’s how to transfer music from computer to galaxy S9/S20?
Step 1. Head over to the Dr.Fone - Phone Manager (Android) website. Download and install Dr.Fone on your computer.
Step 2. Connect your S9/S20 device to your computer using a USB cable and launch Dr.Fone.
Step 3. On the main menu, click the "Phone Manager" option.

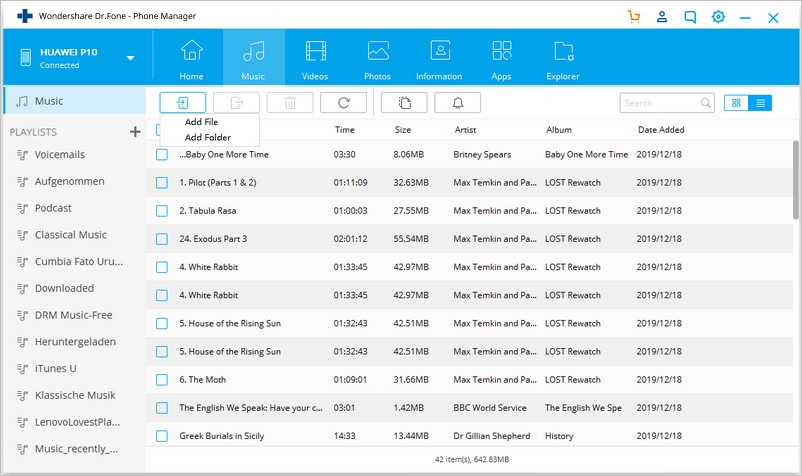
Step 4. At the top, click the Music option and you’ll see the software start to compile all the music folders on your device.
Step 5. Click the Add button to add a file or folder with music into your software. You’ll need to navigate your computer in order to find the music you want to transfer.

Step 6. When you click OK, this will add all those music files you selected to your device, and you’ll be ready to listen to them anywhere you want!
Method 2. Copy Music to Galaxy S9/S20 Edge from PC
If you’re using a Windows computer, you can use the built-in File Explorer to copy and transfer your music without software, making for a relatively easy Samsung galaxy S9/S20 music transfer process.
However, this will mean being able to navigate through the system folders of your phone, something we wouldn’t recommend doing unless you’re happy you know what you’re doing, just in case you delete or move something important!
Here’s what you need to do to transfer music from computer to Galaxy S9/S20;
Step 1. Connect your Samsung S9/S20 to your computer using a USB cable.
Step 2. Either open File Explorer or click Browse Files and Folders on the Auto-Play menu.
Step 3. Navigate through your phone folders to this location;
This PC > Your Device Name > Phone Storage (or SD Card) > Music
Step 4. Open a new File Explorer window and locate the music you wish to transfer to your device.
Step 5. Highlight and select all the music tracks you wish to copy. Copy or Cut them.
Step 6. In the music folder on your device, right-click and click Paste. This will move all your music files over to your device, so they are ready to be played and listened to.
Method 3. Transfer Music to Galaxy S9/S20 Edge from Mac
If you’re using a Mac computer, you don’t have the File Explorer option, so how are you going to transfer your music from your computer, onto your device? If you’re using iTunes on your Mac, you can use the Dr.Fone - Phone Manager (Android) software to help.
Here’s how to transfer music from computer to galaxy S9/S20;
Step 1. Download and install the Dr.Fone - Phone Manager (Android) software from the website.
Step 2. Connect your Samsung S9/S20 to your Mac and open the Dr.Fone. Transfer (Android) software.

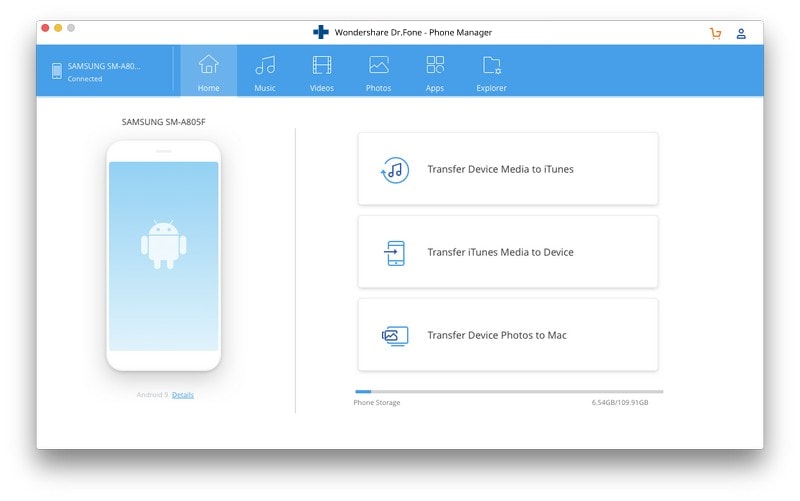
Step 3. Click the "Phone Manager" option on the main menu.
Step 4. Next, click the Transfer iTunes Media to Device option.
Step 5. This will compile your iTunes media and present you with options, so you can choose what kind of media you wish to transfer, in this case, your music files.
Step 6. Click Transfer and your Samsung galaxy S9/S20 music transfer process will be complete and ready to play at a moment’s notice.
As you can see, the Samsung galaxy S9/S20 music transfer process isn’t as daunting or as complicated as you may first have thought. Using the Dr.Fone - Phone Manager (Android) software is by far the most comprehensive and easiest option since you can transfer all your music in just a few clicks, making it the best solution for both Mac and Windows systems.
With a high compatible with all kinds of Android and iOS devices, this powerful software is the only transfer option you’re ever going to need, whether you’re using it for yourself, or with your family and friends. With a free trial period to get you started, there’s no reason to go anywhere else!
Dr.Fone Basic:
Better Control for Your Phone
Manage, transfer, back up, restore, and mirror your device
Samsung Manage
- Samsung Data Manage
- 1. Best Samsung Manager
- 2. Manage Contacts on S9/S8
- 3. Manage Music on Samsung
- 4. Manage Music on Samsung S8
- 5. Transfer Photos to Samsung S8
- 6. Manage Photos on Samsung S9
- 7. Best Galaxy S9 Manager
- 8. Samsung Gear Manager
- 9. Samsung Task Manager
- 10. Remove Samsung Bloatware
- Samsung Erase
- 1. Tips for Selling Old Samsung
- 2. Wipe A Samsung Phone
- 3. Tips to Erase Data
- 4. Remove Samsung Apps
- 5. Uninstall Apps on Samsung
- Samsung Mirror
- 1. Share the Phone Screen
- 2. Screen mirror to Samsung TV
- 3. Use Allshare Cast To Mirror
- 4. Samsung Mirror Screen to PC
- Samsung Record
- 1. Screen Record on Samsung A50
- 2. Screen Record on Samsung S10
- 3. Screen Record on Samsung s9
- 4. Samsung S8 Screen Record
- 5. Top Samsung Screen Recorder
- Samsung Root
- 1. Root Samsung Galaxy S7
- 2. Jailbreak Samsung Phones
- 3. Root Samsung Galaxy S3
- 4. Root Samsung Galaxy S4
- 5. Root Samsung Galaxy S5
- 6. Root Samsung Galaxy J5
- 7. Samsung Root Apps Without PC
- 8. Top 6 Samsung Root Software
- 9. Used Apps to Root Samsung Note
- 10. Root Samsung Galaxy S3 mini
- 11. Root Galaxy Tab 2 7.0
- 12. Unroot Android Devices
- Samsung to Mac
- 1. Transfer Photos to Mac
- 2. Samsung File Transfer for Mac
- 3. Transfer Photos from Samsung
- 4. Transfer Pictures to Mac
- 5. Transfer Pictures from Samsung
- 6. Transfer Files to Macbook
- Samsung to PC
- 1. Transfer Contact from Samsung
- 2. Transfer Photos to PC
- 3. Transfer Photos to Laptop
- 4. Transfer Photos from Samsung
- 5. Transfer Files to PC
- 6. Transfer Photos From Note 8 to PC
- USB Debugging
- Samsung Tips
- ● Manage/transfer/recover data
- ● Unlock screen/activate/FRP lock
- ● Fix most iOS and Android issues
- Manage Now Manage Now Manage Now


Bhavya Kaushik
contributor Editor