How to Transfer Contacts From Android to New Samsung Phone?
Aug 27, 2025 • Filed to: Data Transfer Solutions • Proven solutions
Transferring contacts on Android phones isn’t always as easy as you might think. If you approach the task manually, for instance, you risk making errors, overlooking important contacts, and losing essential data. If you choose the wrong apps for it, you risk exposing your sensitive data and even putting your entire contacts list in danger.
Therefore, if you want to stay on the safe side and go through this process as seamlessly as possible, you need to learn how to transfer contacts from Android to Samsung the right way. Check out the top tips and tricks below.
- Why Transfer Android Contacts to Your New Samsung
- How to Transfer Contacts From Android to Samsung - All Methods

Why Transfer Android Contacts to Your New Samsung
Though they certainly have a lot of features for synching devices, Androids aren’t known for their interconnectedness like iPhones are, for instance. Therefore, whenever you need to switch your phones, you must transfer data between them.
You must perform a full Android transfer to a new Samsung if you buy a new phone. Otherwise, all your data, including contacts, apps, pictures, videos, and more, won’t be available to you on the new device.
If you have two Android phones, let’s say one for personal reasons and another for business, they’ll have completely different data on them. If you need access to personal contacts on your business phone, or vice versa, you’ll have to transfer contacts from Android to Android.
Moreover, if you lose your phone or break it and haven’t backed it up or transferred your data to a different device on time, you’ll lose access to it all.
Transferring data is crucial for Android owners who want continued access to their data across different devices.
How to Transfer Contacts From Android to Samsung - All Methods
As mentioned, you need to know how to transfer contacts from Android to Android properly to avoid losing or exposing your sensitive data to unreliable third parties. That’s why you must approach data transfer carefully and be highly selective of which apps you use.
The following are your most reliable options for Android data transfers that will keep your information safe and sound.
1. Transfer Android Contacts to Samsung Using Smart Switch
Smart Switch is a Samsung-developed app designed for seamless data transfers between your smartphones. Even though it was developed by Samsung, it can be used by any Android device, as long as it has Android OS 4.3 or later, regardless of the specific manufacturer (whether it’s Google Pixel, for instance, OnePlus, or anything in between).
It’s also compatible with iOS 5.0 and later versions, as well as Windows 10 and later and Mac OS X 10.9 or later.
However, if you’re transferring to devices other than Samsung Galaxy, there are limitations on the type of data you can transfer using Smart Switch. For example, you won’t be able to transfer your Home layout or Alarm data unless you’re transferring data between two Galaxy phones, like Samsung Galaxy S23 and Samsung Galaxy Z Flip5.
To use Smart Switch, you just have to follow a few steps:
- Download Smart Switch on both devices directly from Samsung;
- Select your mode of transfer – USB cable or Wireless;
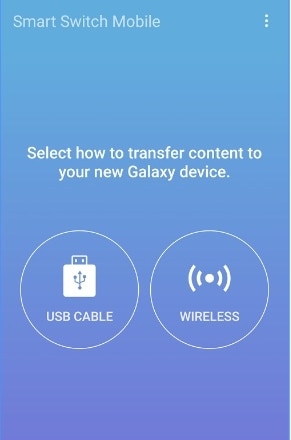
- Select the device from which you’re transferring data;
- Select the receiving device and tap Connect;
- Verify the connection using the PINyou receive;
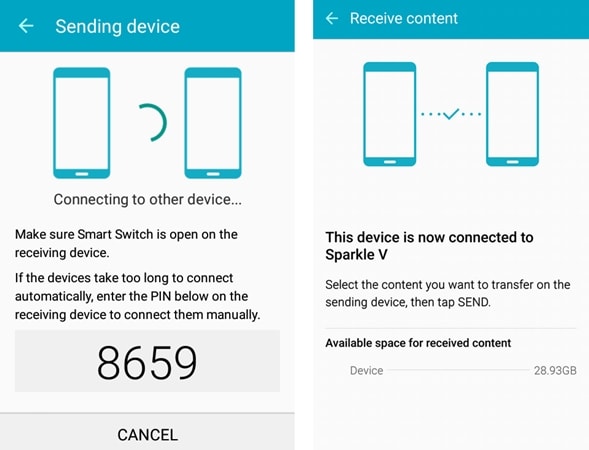
- Select the types of data you want to transfer and tap Finish.
You’ll receive a notification telling you that the data transfer is complete. You can then exit the app and double-check if all the data has successfully been transferred to your new device.
2. Transfer Contacts From Android to Samsung With Wondershare Dr.Fone Phone Transfer
Considering that data transfer with Smart Switch can be somewhat limiting – being most effective for Samsung Galaxy devices in particular – you might want to use a more versatile app if you’re using a different brand of Android smartphones.
Wondershare Dr.Fone is an all-encompassing smartphone management app. It handles everything from data recovery to system repair and, of course, data transfers. It works with both Android and iOS devices, regardless of their make and model, and enables seamless data exchanges between them all. However, you have to use your PC when using Wondershare Dr.Fone.
To transfer contacts from Android to Android using Wondershare Dr.Fone, you’ll have to follow the next few steps:
- Download and launch Wondershare Dr.Fone on your computer;
- Connect the two phones you’ll be using to your computer;
- Go to Toolbox > Phone Transfer;

- Set the Sourceand Destination phones;
- You can switch between devices by clicking on Flip;
- Select the type of data you want to transfer;
- Click Start Transfer;
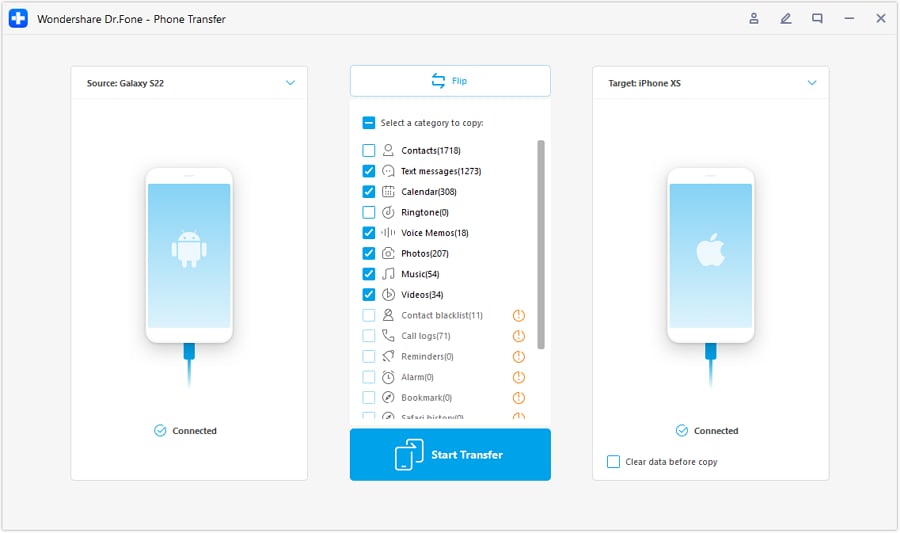
- You’ll see a progress bar indicating the Transfer Process;
- When the process is complete, click OK.
It shouldn’t take long for all your data to be transferred from one phone to the other. Double-check that everything is there on your destination phone and enjoy access to all your data on it.
3. Transfer Contacts From Android to Android Using Google Account Sync
If you’d prefer not to use any apps, you can always transfer contacts from your Android to another smartphone using your Google account. Even if you don’t already have a Google account, creating one is easy, and synching your phones to it is even easier.
All you have to do is back up your data to Google Cloud and upload your contacts. Then, you just have to sign in to your Google account using your new phone. The entire process doesn’t take more than a couple of minutes.
Here’s how to transfer contacts from Android to Android using your Google account:
- On your source device, go to Settings > Accounts and backup;
- Under Google Drive, tap on Back up data;
- Scroll down and go to Google Account Data,and make sure that Contacts is toggled On;
- On your new device, log into the Google account you used for backup.
Your contacts will be immediately transferred to your new device, and you’ll have access to all their information.
4. Transfer Contacts From Android to Samsung Using a SIM card
Perhaps the easiest way to transfer contacts from one Android to another is by using your SIM card – provided you have a removable one. As a general rule of thumb, most SIM cards have between 128 and 256 kilobytes of storage space, which is enough for about 250 contacts.
However, it only has space for the contact information, not for contact pictures, for example, or other media – that’s typically kept in your phone’s internal/external storage or on the cloud.
To transfer your contacts from Android to Android using a removable SIM card, you’ll have to follow these steps:
- Go to Contactsand tap on the Menu;
- Go to Manage contacts > Export contacts;
- Select your SIMcard as the destination for exporting your contacts;
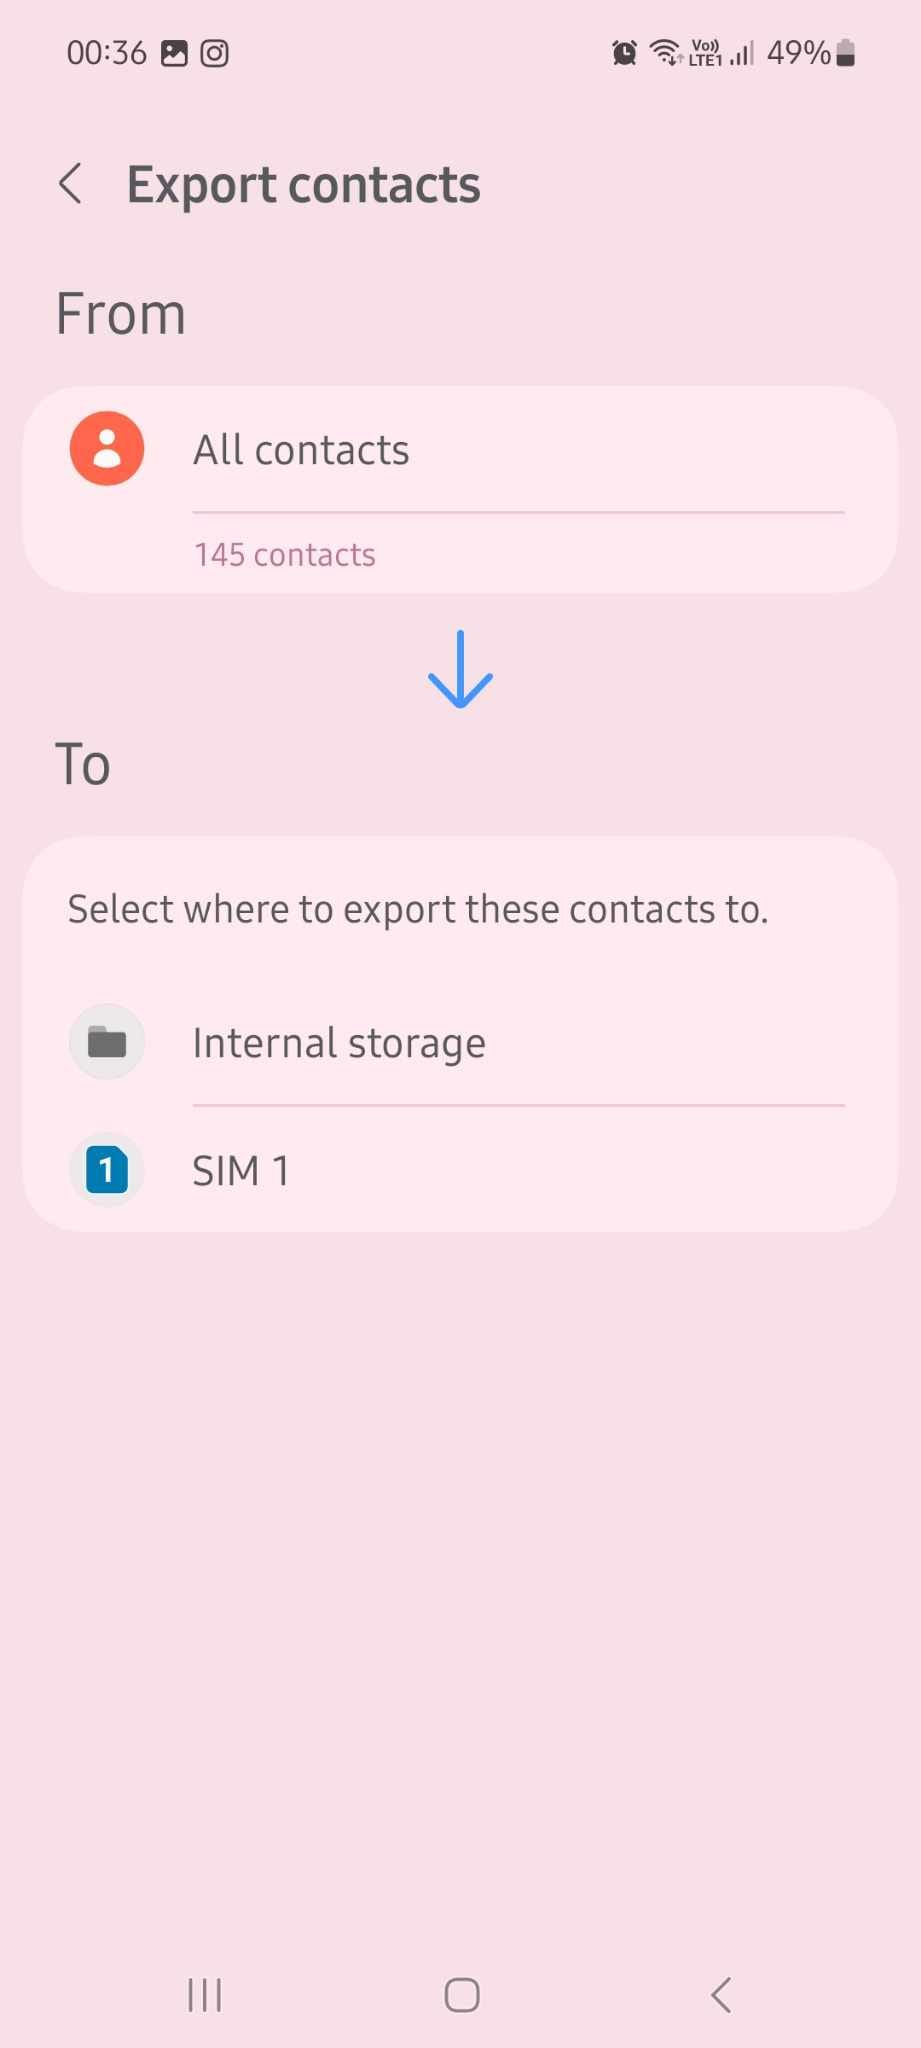
- After you’ve exported contacts to your SIM card, remove it from your phone;
- Insert the SIM card into your new Android;
- On the new device, go to Contacts > Menu > Manage contacts;
- Go to Import contactsand select Input from SIM card.
It might take your device a couple of seconds to complete the process. Remember, only the names and contact information will be transferred. Pictures and other media you might be using with your contacts will need to be created again.
5. Transfer Android Contacts to a New Samsung Using VCF Files
The method above only works if you have a removable SIM card. If you have a non-removable SIM card, you must take a different route – creating VCF files. Also known as Virtual Contact Files or vCard files, they can store all your contact information in a simple file you can share as an attachment via email or other messaging apps.
Creating and sharing a VCF is nice and easy – you just have to follow a few steps:
- On your source device, go to Contacts;
- Tap and hold any contact you have, then select All;
- Tap the Share icon;
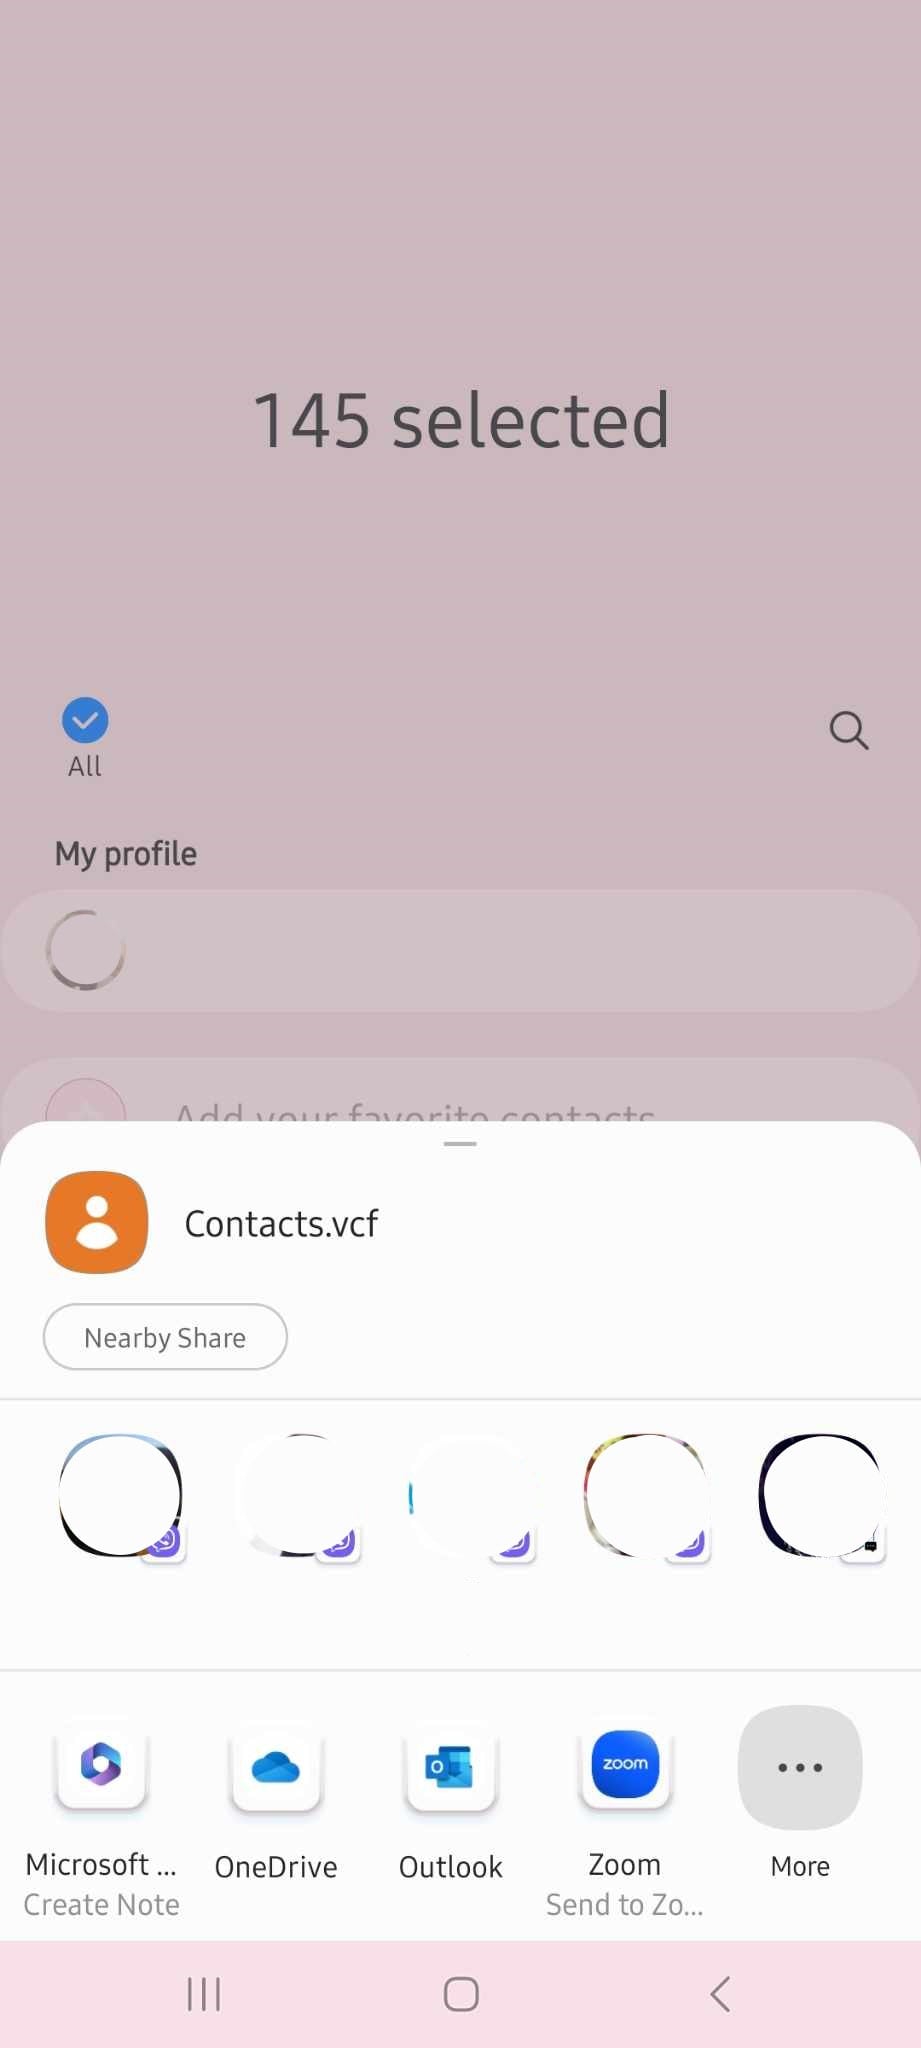
- Your contacts will immediately be saved as VCF with the default name vcf;
- Choose where to share the file;
- Sending the file to your own email address is generally the best option;
- On your new device, open the email you sent yourself and download the vcfattachment;
- Open the downloaded file and tap Yesto import contacts from vCard.
It shouldn’t take long for your contacts to be imported and accessible through your new device.
6. Transfer Contacts Using Nearby Share
Finally, if both of your devices have Android 6 OS or newer, you can use the Nearby Share option to transfer your contacts with the utmost ease. The feature is available on all newer Androids, so you won’t need to download any additional apps or transfer your contacts via your PC. The whole process is nice and easy.
Here’s how to transfer contacts from Android to Android using Nearby Share:
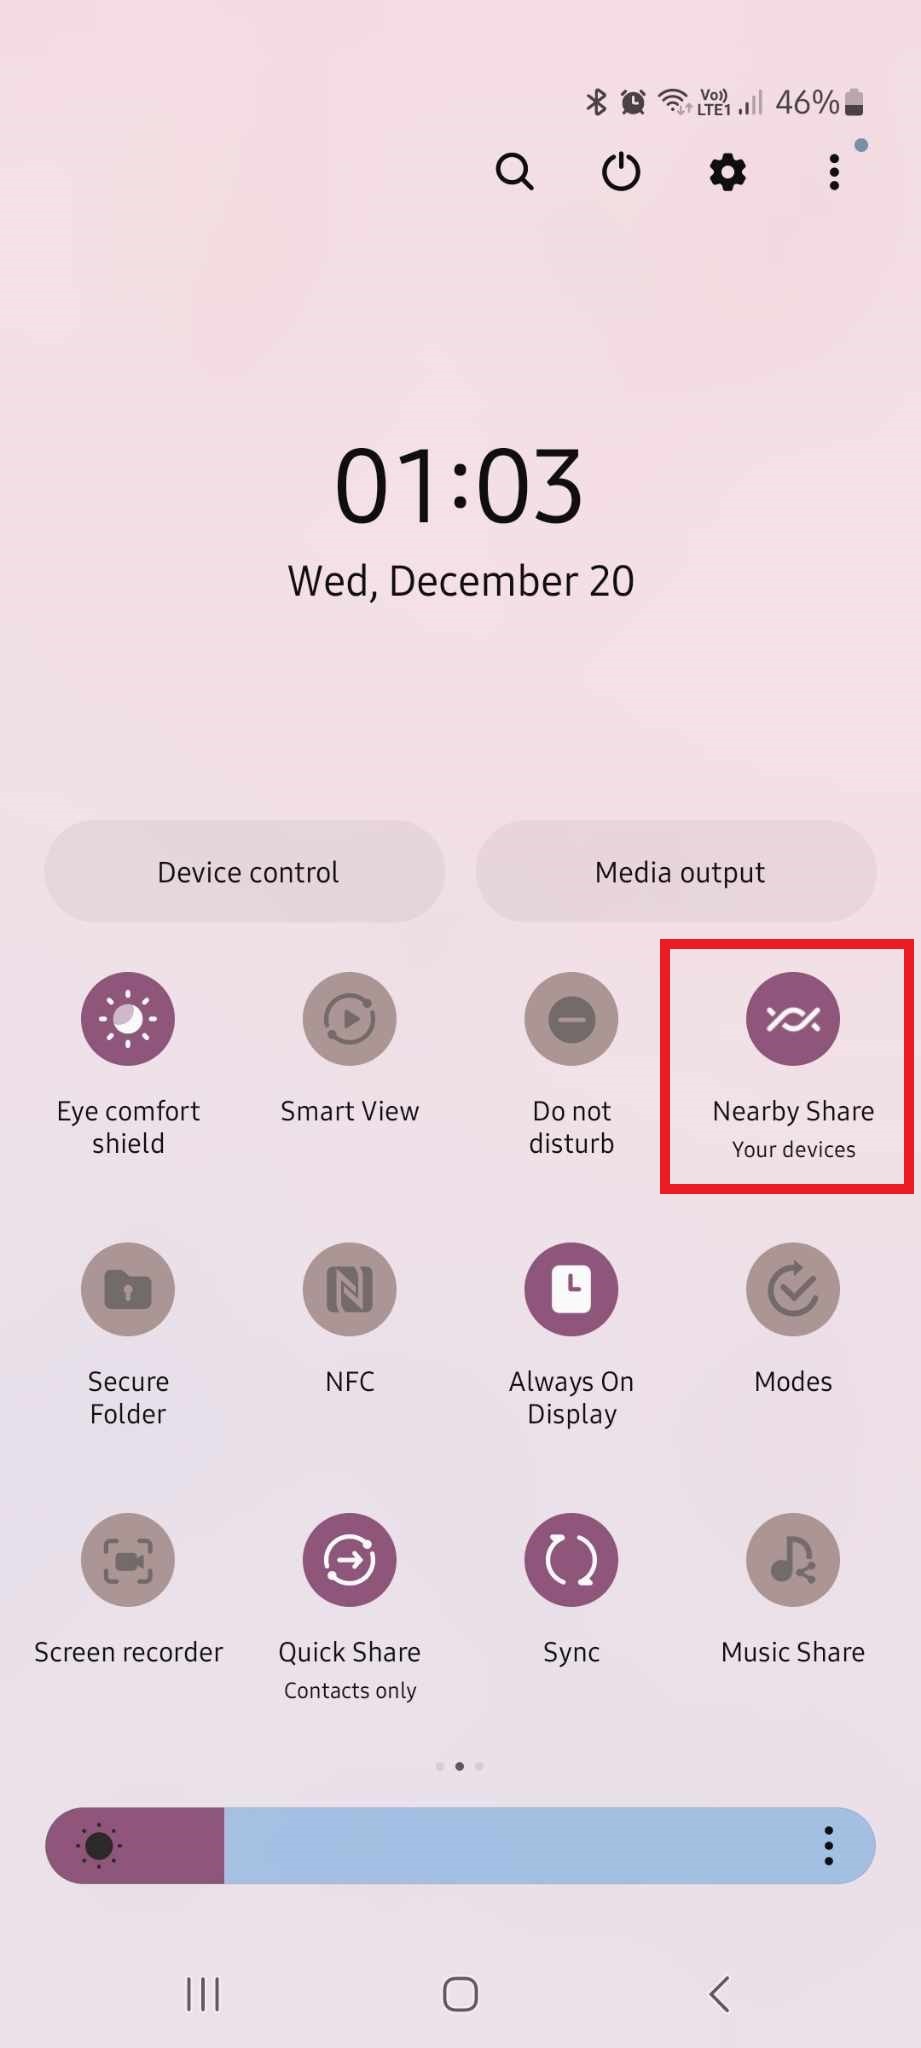
- Open the Quick Settingsmenu by dragging your finger down your screen;
- Tap on the Nearby Shareicon to turn it on (on both of your devices);
- Turn on your Bluetooth;
- Go to your Contactsand press and hold any contact from your list;
- Select Alland tap Share;
- Select Nearby Shareand select your new device;
- On your new device, accept the file share.
After the process is complete, you’ll have access to all your contacts on your new Android.
Conclusion
As you can tell, transferring contacts between your Androids can become somewhat tricky. Fortunately, you can use plenty of different methods to move data safely and efficiently.
Whether you use apps like Wondershare Dr.Fone, built-in features like Nearby Share, or options like your Google account, always double-check everything and see if all your contacts have transferred properly.
Samsung Transfer
- Android to Samsung
- 1. Transfer Content To Galaxy
- 2. Transfer Data from Android
- 3. Transfer Huawei to Samsung
- 4. Transfer Data from LG
- 5. Transfer from Xiaomi to Samsung
- 7. Transfer Data from Pixel
- 8. Transfer Google Nexus to Samsung
- 9. Transfer Data from Motorola
- 10. Transfer Data from Sony
- iCloud to Samsung
- iOS to Samsung
- 1. Transfer Photos from iPad
- 2. Transfer Music from iPod
- 3. Switch from iPhone to Samsung
- 4. Switch from iPhone to Samsung S
- 5. Transfer from iPhone to Samsung
- 6. Transfer WhatsApp from iPhone
- 7. Transfer WhatsApp to Samsung S10
- Samsung Switch
- 1. Samsung Smart Switch Backup
- 2. Smart Switch
- 3. Samsung Switch Alternative
- 4. Samsung Smart Switch Solution
- Samsung to Android
- 1. Transfer Photo to Samsung
- 2. Transfer Everything to Samsung S8
- 3. Transfer Data from Samsung
- 4. Transfer Music to Samsung
- Samsung to iOS
- 1. Transfer Data to iPad
- 2. Transfer Photos to iPhone
- 3. Samsung to iPhone Transfer
- 4. Transfer Contacts to iPhone
- Samsung Tips
- 1. Fix Samsung Brick
- 2. Play Flash on Samsung
- 3. PC Suites for Samsung
- 4. Track Samsung Lost Phone
- 5. Top 10 Samsung Music Players
- 6. Take Screenshots on Samsung J5
- 7. Top 6 Video Calling Apps
- 8. Remove Google Account Bypass
- 9. Bypass Lock Screen Pattern
- 10. Uninstall an App from Samsung
- 11. Import Contacts to Samsung
- 12. Transfer Photos to Chromebook?
- 13. Transfer Data to Another Phone
- 14. Transfer Photos to Samsung
- ● Manage/transfer/recover data
- ● Unlock screen/activate/FRP lock
- ● Fix most iOS and Android issues
- Transfer Now Transfer Now



Alice MJ
staff Editor