How to Transfer Photos From Samsung Phone to Chromebook
Oct 24, 2025 • Filed to: Device Data Management • Proven solutions
Dr.Fone Basic:
Better Control for Your Phone
Manage, transfer, back up, restore, and mirror your device
Are you wondering how to transfer photos from Samsung phone to Chromebook? If yes, then this article is for you. The photo transferring methods from phone to Chromebook is pretty flexible.

You can view your valuable photos on Chromebook for a more prominent display and create a backup too. So, keep reading to know how to transfer Samsung Android phones to Chromebook images. Also, there are some bonus tips discussed later in this article.
Let's have a look!
Part 1: Transfer Photos From Samsung Phone to Chromebook with a USB Cable
This is one of the most common and easy methods for sharing your photos from one device to another. Similar to Windows and MAC, Chromebook also supports USB data transfer. Transfer your pictures from a Samsung phone to a Chromebook by following these simple steps.

- Unlock your Samsung phone.
- Now, you can view the Home Screen.
- With the help of a USB cable, connect your Samsung phone to Chromebook.
- You can see Charging this device via USB notification at the top of your screen.
- Now, tap on that notification.
- select, File Transfer via USB
- Now, the Files app will open on your Samsung phone.
- You can drag the files, copy or move them to your Chromebook.
- After successful completion, unplug the USB.
For a successful transfer of pictures, you need a compatible USB cable. The process is speedy and straightforward to understand. The move option will delete the original files on your Samsung phone and paste them to your Chromebook.
Whereas you can copy and paste them for having access on both the devices. The moving option is a lot faster. On the other hand, the copy and paste are a little slower than moving. So, according to your choices you can choose the option which fits best.
Part 2: How To Transfer Photos From Samsung Phone to Chromebook with SnapDrop
It's a Progressive Web App (PWA), meaning it's more of a web-based platform that any browser can access. You can open SnapDrop on any device via any browser. You don't have to install it; it's safe and straightforward to use.

However, you have to open SnapDrop on both devices. It's a third-party application that is open source and has P2P file transfer. You have to open the SnapShot on both devices. Then, select Chrome's name from your Samsung phone so that the transfer can take place from phone to Chromebook.
To share photos from your Android Samsung phone to Chromebook, you can:

- Open SnapDrop on both devices through the app or browser.
- SnapDrop will give both devices a specific user name. For example, Chocolate Dingo
- It will search for any device which is running Snapdragon.
- There will be an option, Click Send files from your Samsung phone.
- Your files on Samsung phones will appear.
- Select the photos you want to share.
- Now tap on Open.
- The files will be sent to your Chromebook over wifi without using the data.

MAC Airdrop inspires SnapDRop. If you've used it, you will notice the interface is quite similar and easy to use. Of course, it would be best if you had a good internet connection and you're good to go.
The process is fast and best for transferring large files containing heavy images. Of course, both the devices must be in the vicinity for a successful transfer.
Note: To successfully transfer photos, you must connect both devices to the same network.
Hopefully, you know how to transfer pictures from Samsung phone to Chromebook.
Part 3: Transfer Photos From Samsung Phone to Chromebook with Google Drive
As mentioned above, the methods are very flexible and numerous. Another equally excellent way to transfer your Samsung phone photos to Chromebook is through Google Drive. Again, it's a cloud service, and the process is very hassle-free.

For this, you must have a Google account, and then you can upload the images to its application, known as Google Drive. Chromebooks are cloud-based and come with a built-in Google drive. To transfer photos from your Samsung phone to Chromebook, you can:
3.1 If Both the Devices Have Same Logged in Google Accounts.
- On your Samsung phone, open Google Drive App.
- Now, tap on + sign.
- Select Folder option, create a name.
- Then, tap on photos you want to upload.
- This action will upload the images using the Internet; uploading speed depends on your connectivity and file size.
- Now, on your Chromebook, open Google Drive.
- Download the folder.
- This action will save all your photos on Chromebook.
3.2 If Both the Devices have Different Google Accounts
It may be possible that both your devices, Samsung phone and Chromebook, may have different google accounts. In such a scenario, you can:
- Open Google Drive on your Samsung phone.
- Now, tap on + sign to upload photos to a folder.
- Now, create a folder name.
- Tap on Upload.

- Select the images.
- The images will upload according to size and internet speed.
- Now, tap on share.
- You can share it to the email id logged in to the Chromebook.
- Now, open your Email id on Chromebook.
- Tap on the link.
- Your Google Drive will open on Chromebook, containing the desired folder.
- You can easily download the folder containing images from there.
Note: By clicking on three dots on the uploaded folder, you can change the access powers of the folders. Also, you can share it via link and control actions.
Google Drive is a cloud-based, wireless way of transferring photos from your Samsung phone to Chromebook. The process requires a good internet connection. The only drawback is it's a little slower than other methods. So your heavy images may need fast connectivity and time to download. The best part is it doesn't require both the devices to be at the exact location.
Bonus Tip: How to Transfer Photos From Samsung Phone to PC/MAC
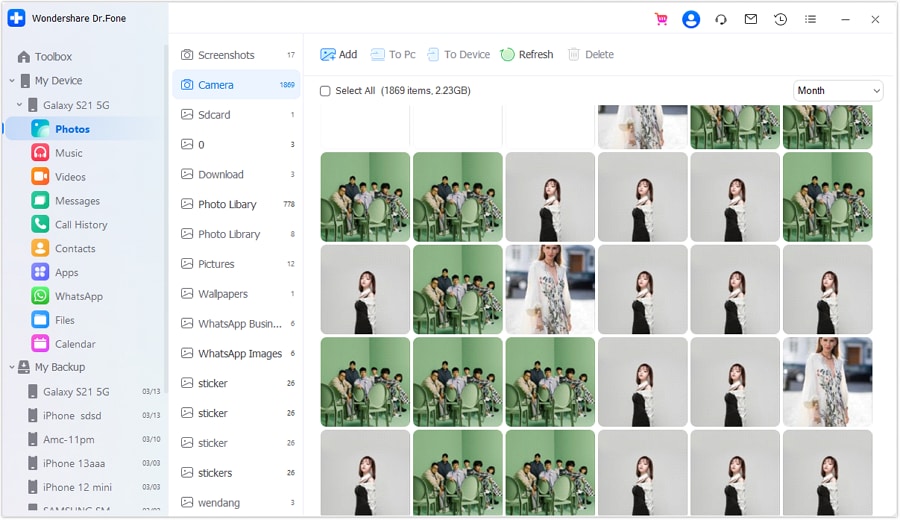
If you have a PC or Mac, you can transfer your photos from Samsung phones to these devices. The one-stop solution is Dr.Fone - Phone Manager (Android). You can transfer data in the form of files, photos, or anything.
In addition, you can use it for data recovery, creating a backup, WhatsApp transfer, and much more.

Dr.Fone - Phone Manager (Android)
One-Stop Solution to Manage and Transfer Photos on Android Phone
- Transfer files between Android and computer, including contacts, photos, music, SMS, and more.
- Manage, export/import your music, photos, videos, contacts, SMS, Apps, etc.
- Transfer iTunes to Android (vice versa).
- Manage your Android device on the computer.
- Fully compatible with Android 11.
For transferring photos from your Samsung phone to PC/Mac, follow these steps:
- Install Dr. Fone for free on your PC/Mac.
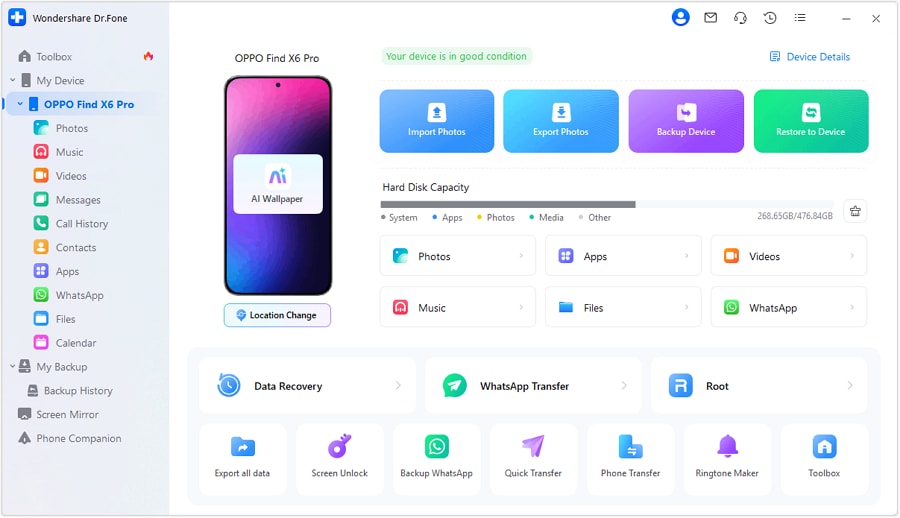
- Now, launch Dr. Fone - Phone Manager (Android).
- Connect your Samsung phone to your PC/Mac with the help of a compatible USB cable.

- Select Phone Manager for Android.
- Now, view and choose files you want to transfer.
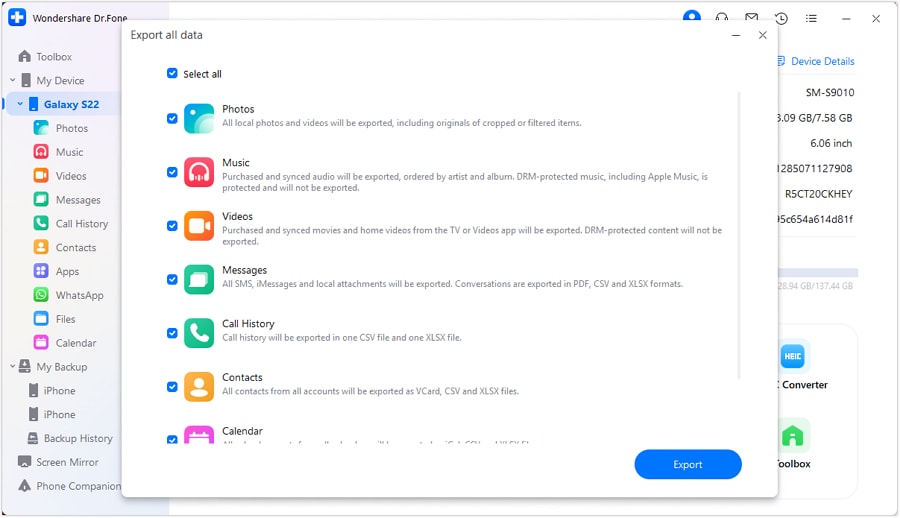
- Click on “Export” on your PC/MAC for transfer.
- This will move all your photos to your PC/MAC in no time.

Also, you can select various options at starting like:
- Transfer Media Files between Android and iTunes
- Transfer Media Files between Android and Computer
- Transfer Other Media File Types, like Music and Video

The benefit of Dr. fone Android Phone Manager is that you can sort out photos, create folders and delete unwanted photos in bulk. All these operations require a few clicks. It is best for transferring from Android to PC or vice versa. In addition, you can convert HEIC photos to JPG without any quality loss.
Transfer Completes!
At some point, everyone needs sharing of files between two devices. Thanks to the flexibility of devices, you can transfer your photos from a Samsung phone to Chromebook in so many ways. We hope this article helped you gather information about how to transfer photos from Samsung phone to Chromebook. All the techniques discussed are after, safe, and provide multiple options.
If you want to quickly transfer your photos from Samsung to PC/Mac, then try Dr.Fone - Phone Manager (Android)!
Dr.Fone Basic:
Better Control for Your Phone
Manage, transfer, back up, restore, and mirror your device
Samsung Transfer
- Android to Samsung
- 1. Transfer Content To Galaxy
- 2. Transfer Data from Android
- 3. Transfer Huawei to Samsung
- 4. Transfer Data from LG
- 5. Transfer from Xiaomi to Samsung
- 7. Transfer Data from Pixel
- 8. Transfer Google Nexus to Samsung
- 9. Transfer Data from Motorola
- 10. Transfer Data from Sony
- iCloud to Samsung
- iOS to Samsung
- 1. Transfer Photos from iPad
- 2. Transfer Music from iPod
- 3. Switch from iPhone to Samsung
- 4. Switch from iPhone to Samsung S
- 5. Transfer from iPhone to Samsung
- 6. Transfer WhatsApp from iPhone
- 7. Transfer WhatsApp to Samsung S10
- Samsung Switch
- 1. Samsung Smart Switch Backup
- 2. Smart Switch
- 3. Samsung Switch Alternative
- 4. Samsung Smart Switch Solution
- Samsung to Android
- 1. Transfer Photo to Samsung
- 2. Transfer Everything to Samsung S8
- 3. Transfer Data from Samsung
- 4. Transfer Music to Samsung
- Samsung to iOS
- 1. Transfer Data to iPad
- 2. Transfer Photos to iPhone
- 3. Samsung to iPhone Transfer
- 4. Transfer Contacts to iPhone
- Samsung Tips
- 1. Fix Samsung Brick
- 2. Play Flash on Samsung
- 3. PC Suites for Samsung
- 4. Track Samsung Lost Phone
- 5. Top 10 Samsung Music Players
- 6. Take Screenshots on Samsung J5
- 7. Top 6 Video Calling Apps
- 8. Remove Google Account Bypass
- 9. Bypass Lock Screen Pattern
- 10. Uninstall an App from Samsung
- 11. Import Contacts to Samsung
- 12. Transfer Photos to Chromebook?
- 13. Transfer Data to Another Phone
- 14. Transfer Photos to Samsung
- ● Manage/transfer/recover data
- ● Unlock screen/activate/FRP lock
- ● Fix most iOS and Android issues
- Transfer Now Transfer Now


Daisy Raines
staff Editor