100% Security Verified | No Subscription Required | No Malware

 :
: 
 ChatGPT
 Perplexity
 Gemini
 Claude
 Grok
Grok

I have years of important text messages on my iPhone that I need to save to my computer for legal reasons. How can I export them all in a readable format?
A Concerned User
It's a common challenge for iPhone users to transfer text messages to a computer. Unlike some other platforms, iOS doesn't provide a straightforward, built-in feature to export your iMessages or SMS threads. This leaves many wondering how to download text messages from an iPhone to a computer for backup, legal documentation, or simply to preserve cherished memories.
Fortunately, you've come to the right place. In this comprehensive guide, we'll detail three reliable methods to copy your text messages from your iPhone to a PC or Mac. We'll cover how to do it directly from your device and how to extract them from your iTunes and iCloud backups.
In this article
Part 1. Directly Transfer Text Messages from Your iPhone to a Computer
The most direct and efficient way to transfer your iPhone text messages to a computer is by using a dedicated data management tool. We highly recommend Dr.Fone - Data Recovery (iOS). While its primary function is data recovery, it excels at scanning and exporting existing data from your device to your computer. This allows you to selectively move iPhone messages, including iMessages and attachments, as well as content from apps like WhatsApp and Viber.
This powerful software is compatible with all leading iOS versions, including the latest iOS 17, and offers desktop applications for both Windows and Mac. It provides a user-friendly interface that lets you not only transfer existing messages but also recover and export messages you may have accidentally deleted.
 Recovers data after deletion, crashes, or device damage.
- Supports photos, messages, contacts, WhatsApp, and more.
- Supports all major iPhone, iPad, and iPod models.
- Preview and recover only what you need.
Here’s the step-by-step guide on how to save text messages from your iPhone directly to your computer:
-
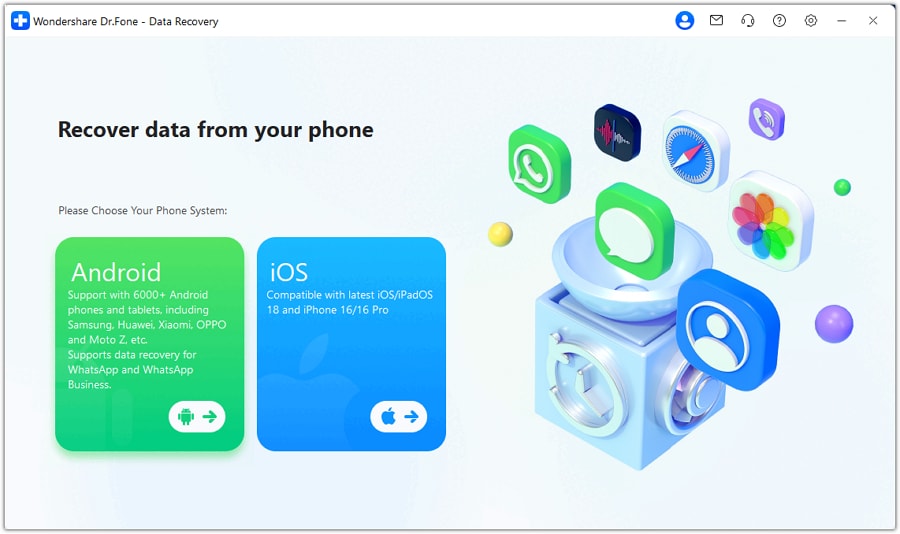
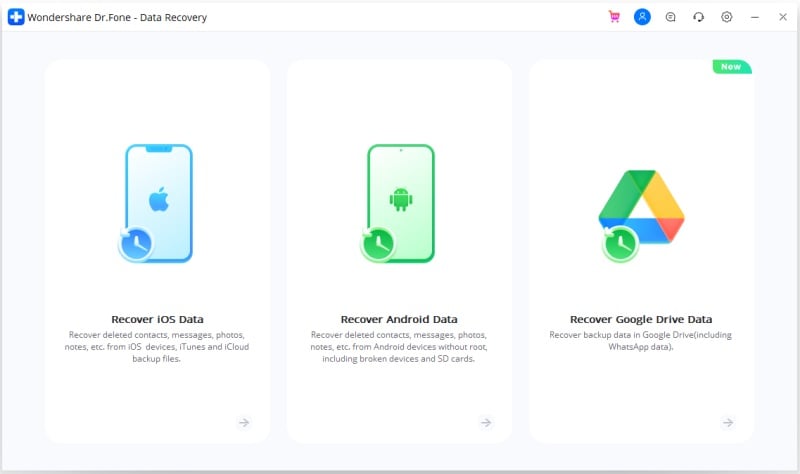
Step 1 Launch Dr.Fone and Select Data Recovery
Start by downloading and installing the Dr.Fone toolkit on your computer. Open the application and choose the "Data Recovery" module from the main dashboard.

-
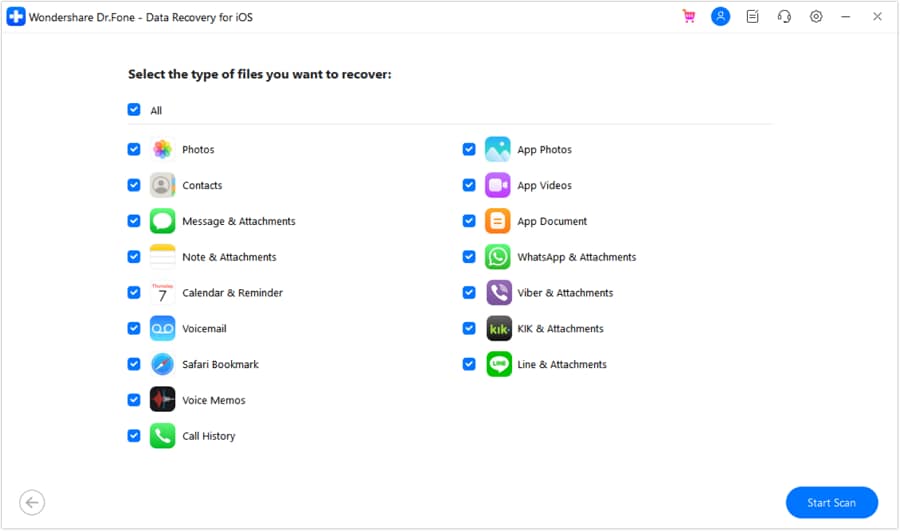
Step 2 Choose Data Types to Scan
Connect your iPhone to the computer using a USB cable. On the next screen, select "Recover from iOS Device" from the left-hand menu. You will see a list of data types. To export your texts, ensure that "Messages & Attachments" is checked. You can also select other data types if needed. Click "Start Scan" to continue.
-
Step 3 Scanning Your iPhone for Messages
Dr.Fone will now begin a deep scan of your iPhone to locate all existing and deleted messages. This process might take a few minutes depending on the amount of data on your device. Ensure your iPhone remains connected throughout the scan.

-
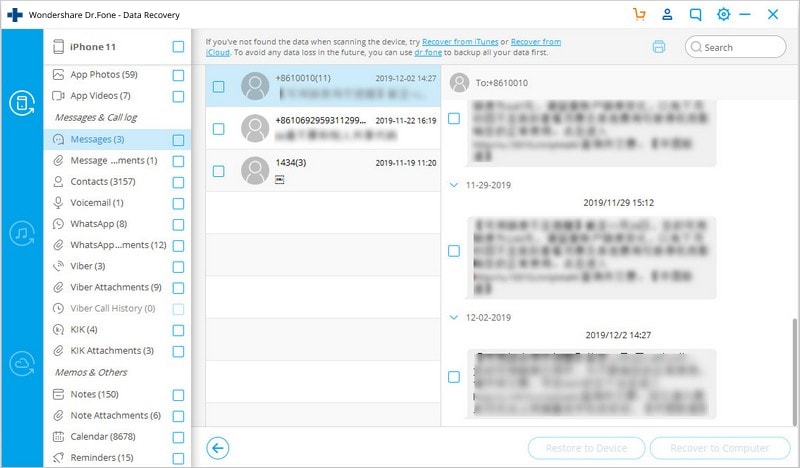
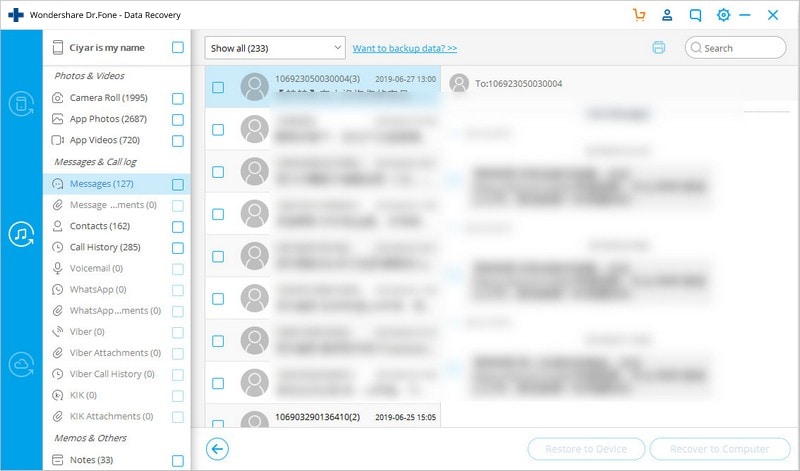
Step 4 Preview and Export iPhone SMS to PC
Once the scan is complete, all found data will be neatly organized by category. Click on "Messages" in the left sidebar to preview your conversations. You can read through the messages and view attachments. Select the specific threads you wish to save, or check the box to select all of them. Finally, click the "Recover to Computer" button to export your iPhone messages to your PC.

Part 2. How to Get Text Messages from iPhone to Computer via iTunes Backup
If you regularly back up your iPhone using iTunes, you can extract your messages from that backup file. While iTunes doesn't let you view or selectively extract data, Dr.Fone - Data Recovery (iOS) can access the backup file and allow you to export just the text messages you need.
First, ensure you have a recent iTunes backup. You can create one by connecting your iPhone to your computer, opening iTunes, selecting your device, and clicking "Back Up Now" under the Summary tab. Make sure the backup is saved to "This Computer."

Once you have an iTunes backup, follow these instructions to export the messages:
-
Step 1 Open Dr.Fone and Choose iTunes Backup Recovery
Launch the Dr.Fone application and go to the "Data Recovery" module. In the recovery tool's main window, select "Recover from iTunes Backup File" from the options on the left.
-
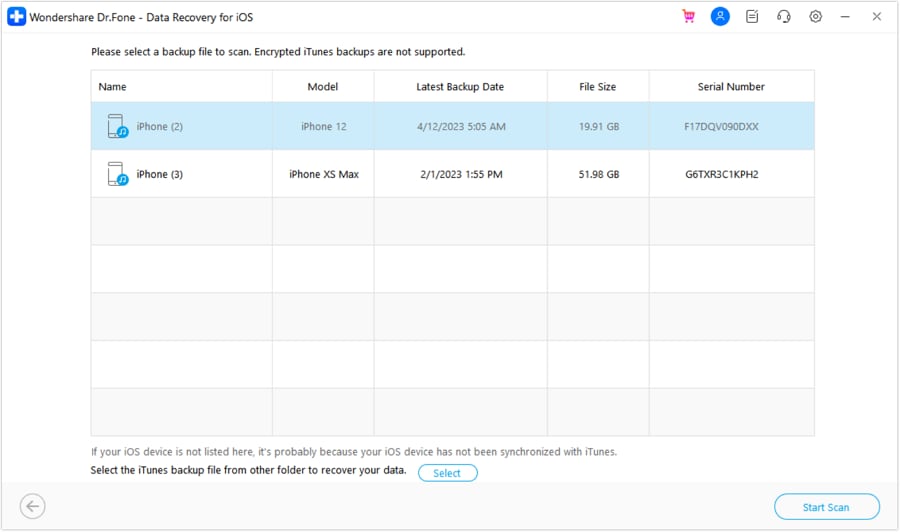
Step 2 Select the iTunes Backup File
Dr.Fone will automatically detect and list all iTunes backup files stored on your computer. You can review details like the backup date and device model to identify the correct file. Choose the backup that contains the messages you want and click "Start Scan."
-
Step 3 Scan and Extract Data from the Backup
The software will begin extracting all the data contained within the selected iTunes backup. This process is quick and won't affect any data on your iPhone.
-
Step 4 Preview and Save Messages to Computer
After the scan, you can preview all the extracted content. Navigate to the "Messages" category to view your text conversations. Select the messages you need and click the "Recover to Computer" button to save them directly to your PC or Mac.
Part 3. How to Copy Text Messages from iPhone to Computer Using iCloud Backup
Similar to the iTunes method, you can also transfer text messages to a computer by extracting them from an iCloud backup. This is especially useful if you back up your device to iCloud instead of your computer. Make sure you have an iCloud backup enabled (Settings > [Your Name] > iCloud > iCloud Backup).
Here’s how to use Dr.Fone to download text messages from an iCloud backup:
-
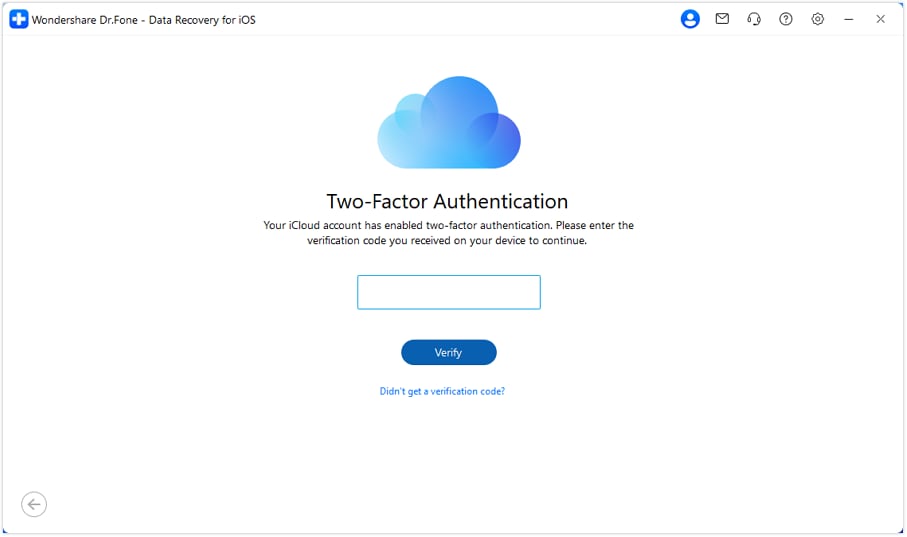
Step 1 Choose iCloud Backup Recovery and Sign In
In the Dr.Fone - Data Recovery interface, select "Recover from iCloud Backup File" from the left panel. You'll be prompted to sign in to your iCloud account using your Apple ID and password. This connection is secure and private.
-
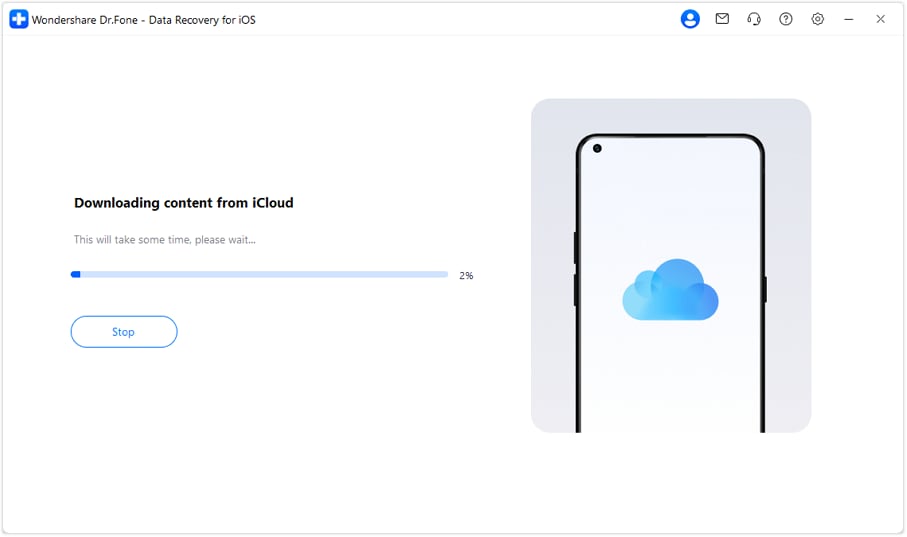
Step 2 Select and Download the iCloud Backup
Once logged in, Dr.Fone will display a list of your iCloud backup files. Check the date and size to choose the most relevant one, then click the "Download" button next to it.
-
Step 3 Choose to Scan for Messages
A pop-up window will appear, allowing you to select which data types to download from the backup file. This saves time by not downloading unnecessary data. Ensure "Messages" and "Message Attachments" are checked, then click "Next."
-
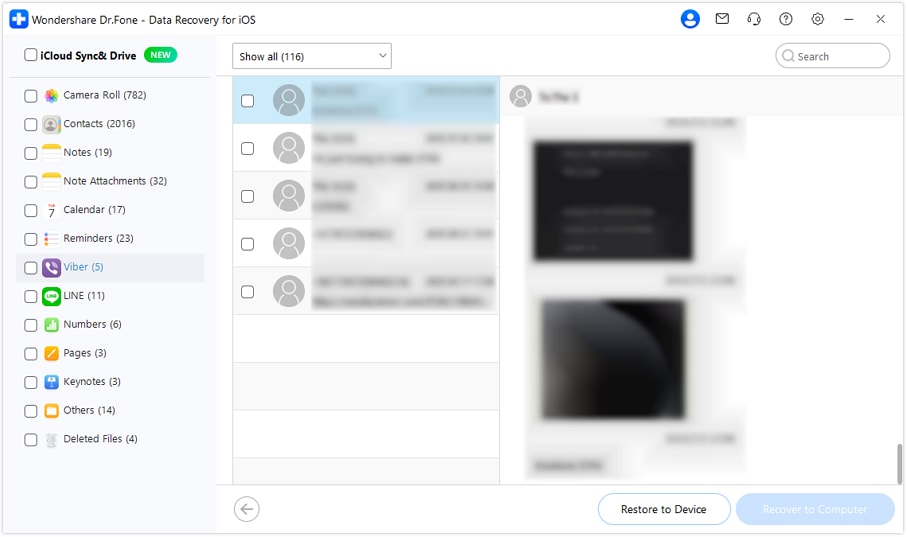
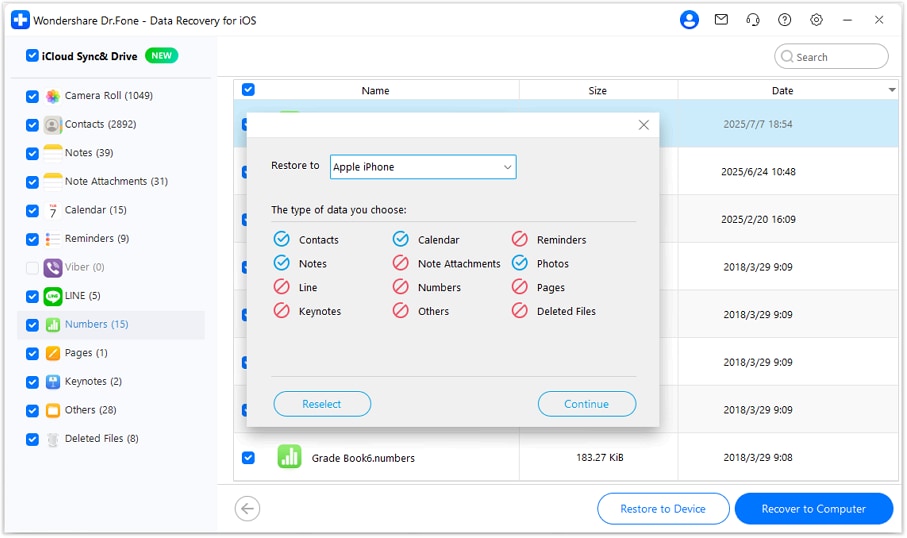
Step 4 Preview and Transfer Messages to Computer
The application will scan the downloaded backup for your messages. Once completed, you can preview the conversations in the "Messages" category. Select the texts you want to keep and click "Recover to Computer" to export them as a file on your computer.
Conclusion
Now that you know three distinct and effective ways to transfer text messages from your iPhone to a computer, you can easily secure your important conversations. Whether you choose to scan your device directly or extract data from an iTunes or iCloud backup, Dr.Fone - Data Recovery (iOS) provides a reliable and user-friendly solution. It empowers you to not only back up existing messages but also to retrieve deleted ones, ensuring no valuable information is ever truly lost. Feel free to use these methods whenever you need to save or archive your iPhone messages.
FAQ
-
1. Can I transfer text messages from my iPhone to my computer for free?
While there are limited free methods like taking screenshots, they are not practical for a large number of messages. For a proper and selective export in a readable format, a dedicated third-party tool like Dr.Fone is typically required. The software offers a trial version to scan and preview your messages for free. -
2. Will using Dr.Fone affect the data on my iPhone?
No, Dr.Fone is a read-only tool. When you scan your device or extract data from a backup, it does not alter or delete any existing information on your iPhone. Your data remains safe and untouched throughout the process. -
3. Can I also save the attachments (photos, videos) from my text messages?
Yes. When you select "Messages & Attachments" for scanning, Dr.Fone will locate and display both the text content and all associated media files, such as photos, videos, and audio files. You can preview and export these attachments to your computer along with the text. -
4. What format will the messages be saved in on my computer?
Dr.Fone allows you to export your text messages in various readable formats, most commonly as HTML or CSV files. This makes it easy to view, search, and print your conversations directly from your computer.
 Add Wondershare Dr.Fone as a preferred source on Google