How to Recover and View Deleted iMessage History on Windows/Mac OS X?

Aug 27, 2025 • Filed to: Device Data Management • Proven solutions
Is it Possible to View Deleted iMessages?
Deliberately, or accidentally, you have deleted iMessages from your iPhone, iPad, or iPod Touch and wonder if you can still view them. The simple answer is 'no'. You can no longer view messages which have been deleted, if you never have saved the iMessages on the computer for backup. Certainly, you cannot view them directly on your device or computer, they are deleted and gone forever …
… or are they? Maybe not! If the deleted iMessages have not been overwritten with new data, there is still a chance you can see them. You will need a little help, and we will do our best.

How to View Deleted iMessages
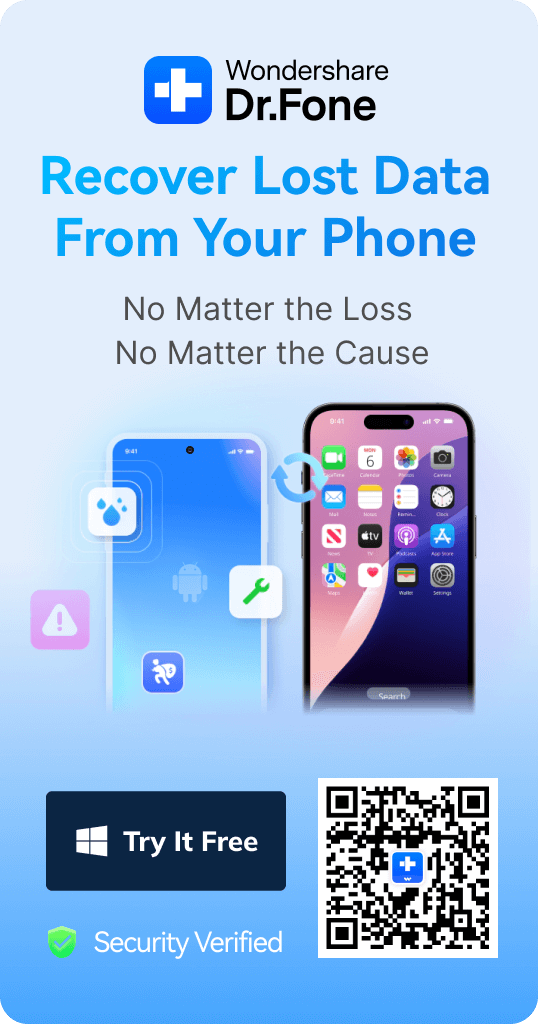
In order to see deleted iMessages, you need to recover them first. To do this, you can use Dr.Fone - Data Recovery (iOS). This software tool allows you to recover lost iMessages, including any attachments, by scanning your iPhone, iPad, or iPod Touch. Dr.Fone also looks for information which might be extracted from any iTunes backup and iCloud backup that is available.
There are three ways to recover and view deleted iMessages from iPhone.
If you were to try Dr.Fone offers, you will soon see that it offers a great deal more than just message recovery.
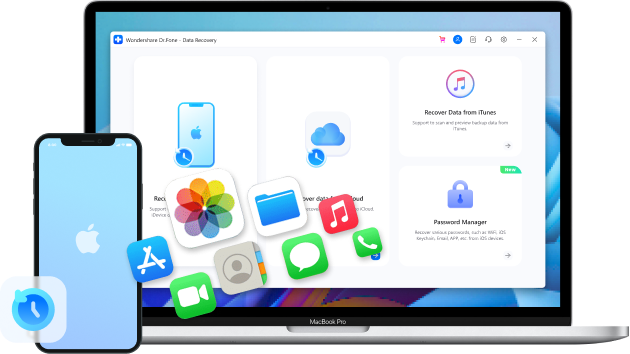
Dr.Fone - Data Recovery (iOS)
3 ways to recover and veiw deleted iMessages from iPhone
- Selectively recovers iPhone data from internal memory, iCloud, and iTunes.
- Works perfectly with all iPhone, iPad, and iPod touch.
- Original phone data will never be overwritten during recovery.
- Step-by-step instructions provided during the recovery.


Solution One – Directly Scan Your Device to Read Deleted iMessage History
Step 1. Connect Your iOS Device and Scan It
When you connect your iPhone, iPad, or iPod Touch, click on the option of “Recover Data from iOS Device” from Dr.Fone Data Recovery Module, the screen below will appear. You only need to click on the 'Start Scan' button, which you can see center of the bottom of the screen. You can save a little time by checking only 'Messages & Attachments' before starting the scan. Dr.Fone will then look for only those items.
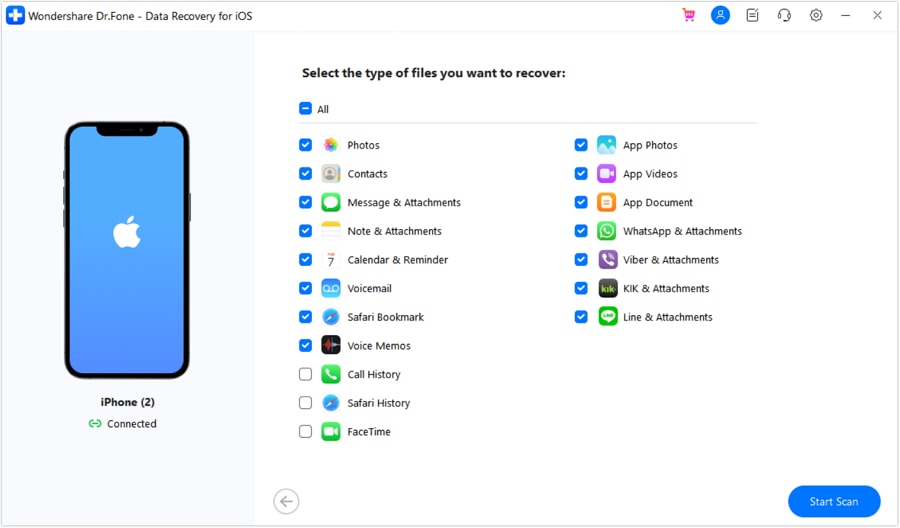
You will be recovering the iMessages direct from your phone.
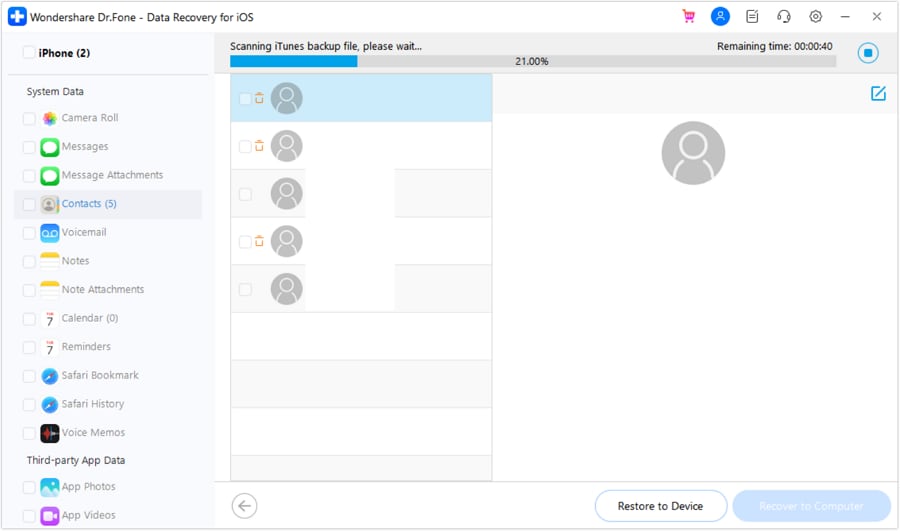
Step 2. View iMessages on Your iOS Device
When the scan is finished, you will see the results clearly presented (as shown in the screenshot below). To view these iMessages, choose 'Messages' by putting a check mark in the box on the left of the message. You can read all the content in detail and see what is available to be rescued.
When you are ready, you can click to either 'Restore to Device' which puts the messages back where they originally came from. Alternatively, you can click 'Recover to Computer' button and save the iMessage history to your computer. When you take the latter choice, the file can be saved as a '*.csv' or '*.html' file. You will be able to view the contents of the file by clicking, and choosing which program you want to use. That might sound a little complicated. However, when you actually do it, we are sure you will find it is easy.
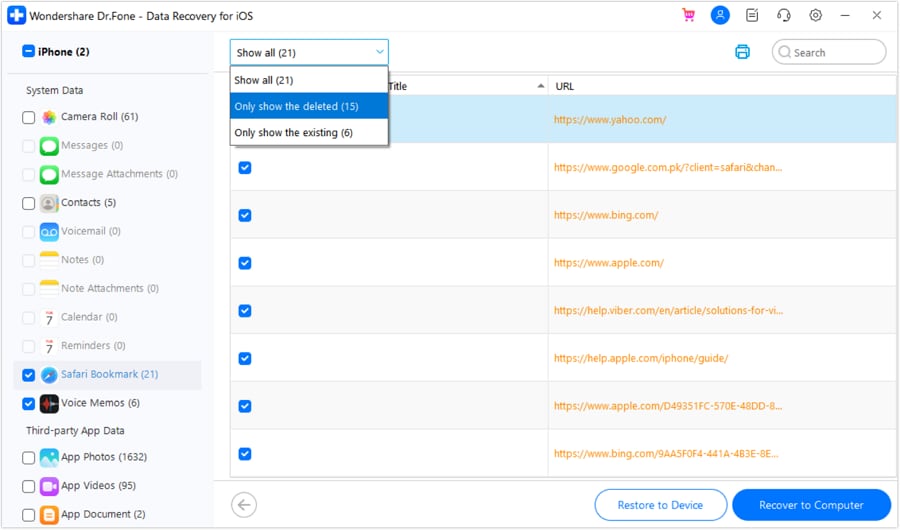
You can see what is available to be recovered.
Above, we have described one approach which you can take by using the Dr.Fone tools. Here is another approach below.
Solution Two – Extract iTunes Backup to View Deleted iMessage History
Dr.Fone also allows you to read your iMessage history from iTunes backup. You can do it in just two steps.
Step 1. Extract the iTunes Backup
After running the program, switch to the other recovery mode, by selecting from the left-hand side 'Recover Data from iTunes '. The program will automatically find all the iTunes backup files on your computer. Select the backup which you think has the iMessages that you want to view and click 'Start Scan'.
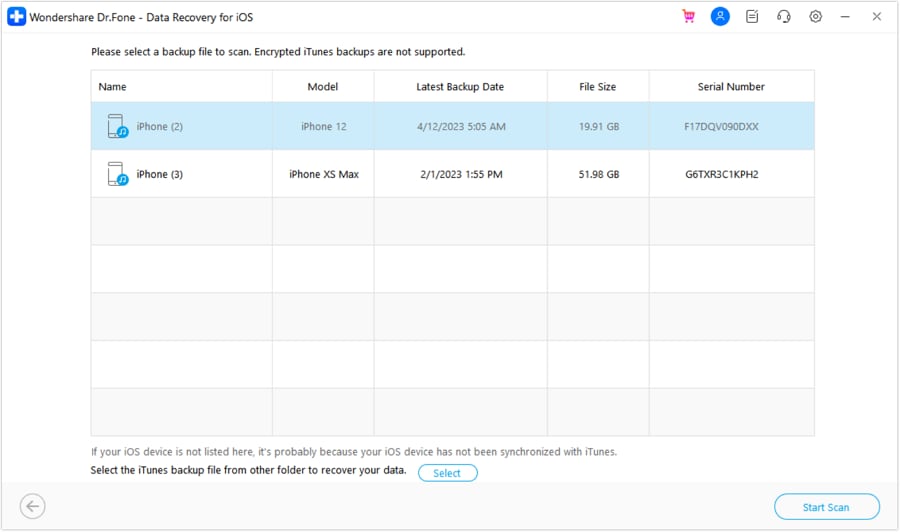
Choose the right backup.
Step 2. Recover iMessage History in iTunes Backup
After the quick scan, you can read the iMessage history by clicking and checking 'Messages' on the left side of the window. Further, to view attachments, you can select the category of 'Message Attachments'. You can decide to recover the iMessage history to your device or to computer. Select the recovery button of 'Restore to Device' or 'Recover to Computer'. If you recover the file containing the messages to your computer, they cannot be read, unless you use Dr.Fone to scan the file.
You can select whether you want to recover back to your device.
Please note, that Dr.Fone can recover contacts, photographs, notes … all your data which is included in the backup.
If there is no iTunes backup on your computer, there is even a third route which you might take.
Solution Three – Download iCloud Backup to View iMessage History
Step 1. Sign in iCloud Account
After launching 'Dr.Fone – Data Recovery' on your computer, you need to select 'Recover Data from iCloud'. You may need to enter the username and password for your iCloud account.
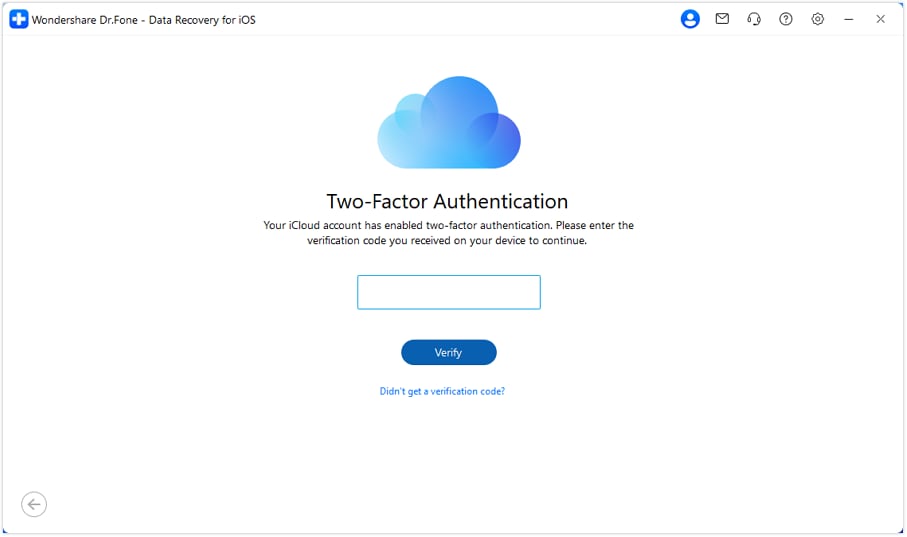
It is good to have your username and password available.
Do not worry, though, you can always recover it from Apple.
Step 2. Download and Extract iMessages from iCloud Backup Files
Once you are logged in, you will see a list of all your backup files in the iCloud account. The usual thing is to choose the most recent backup. To recover the iMessages, click 'Download' to save the file onto your computer. This may take you some time, depending on the size of the file and your internet connection.
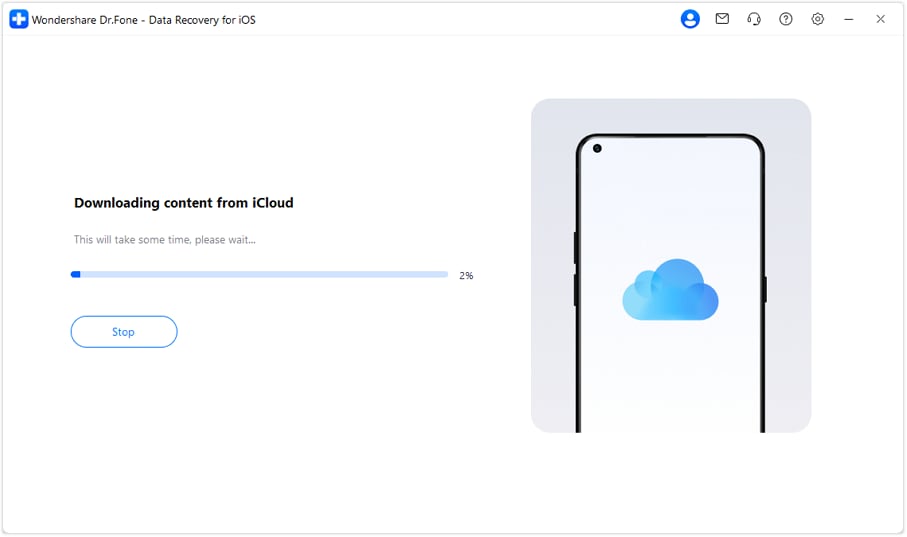
Once the download is completed, this is where Dr.Fone becomes really very clever. The backup file is unreadable, it cannot be opened and looked at in any other program. Dr.Fone can solve this for you, though. All you need to do is to use Dr.Fone to 'Scan' the download of the iCloud backup, which is now on your computer.
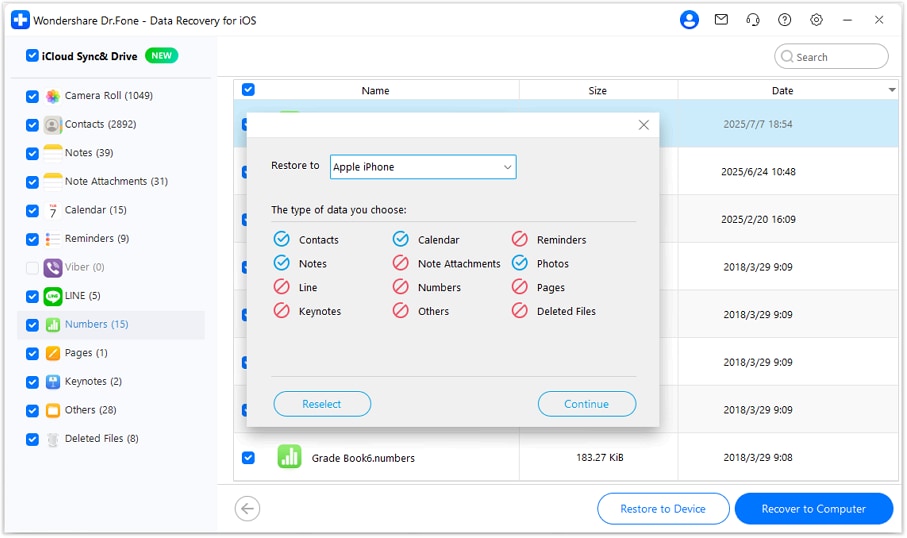
Step 3. View iMessages History in Your iCloud Backup
To view iMessages, select 'Messages' and 'Message Attachments', you can then read every item and select which ones you want to save to your device.


iPhone Messages
- Back Up iPhone Messages
- 1. Back up Messages on iPhone
- 2. Save Text Messages on iPhone
- 3. Back up Viber messages
- 4. Back up WhatsApp Data to Computer
- 5. Export WhatsApp Message from iOS
- Delete iPhone Messages
- 1. Delete iMessages on iPhone and iPad
- 2. Delete Snapchat Messages on iPhone
- 3. Delete WA for Everyone
- 4. Delete WA Message Permanently
- 5. Delete Text Messages from iPhone
- 6. Tips about WhatsApp Delete Message
- 7. Undelete Messages on iPhone
- 8. View Deleted iMessage History on PC
- Recover iPhone Messages
- 1. Recover iPhone Deleted Text Messages
- 2. Recover Deleted Viber Messages
- 3. Recover Messages on iPhone 13
- 4. Recover Deleted Message on iPhone 8
- 5. Recover Deleted Message iPhone 6
- 6. Transfer from iPhone to iPhone
- 7. Recover WhatsApp Messages Online
- 8. Restore 1-Year-Old WhatsApp Chats
- Restore iPhone Messages
- 1. Restore Kik Messages from iPhone
- 2. Restore Text Messages on iPhone
- 3. Restore Viber Messages Selectively
- 4. Restore Kik Messages to iPhone
- Transfer iPhone Messages
- 1. Transfer from Android to iPhone
- 2. Transfer from iPhone to iPhone
- 3. Transfer from iPhone to Computer
- 4. Transfer from Android to iPhone XS
- 5. WhatsApp from Android to iOS
- 6. Transfer from Android to iPhone 13
- 7. WhatsApp from iPhone to PC
- 8. Download Text Messages from iPhone
- 9. Sync iMessage between iPhone and Mac
- iPhone Messages Problems
- 1. iMessage Not Working
- 2. iMessage Keeps Crashing
- 3. iMessage Not Syncing on a Mac
- 4.iPhone won't send or receive texts
- 5. Message Blocking Is Active
- 6. Why Are My iPhone Messages Green
- iPhone Message Tricks
- 1. Export Messages from iPhone to PDF
- 2. Read Others WA Messages
- 3. iPhone Message Tips and Tricks
- 4. Access iMessage Online
- 5. Extract Text Messages from iPhone
- 6. Forward Text on iPhone and Android
- 7. Print Text Messages from iPhone
- 8. View iPhone Messages on PC/Mac
- 9. Tell If You Are Blocked on iMessage

Selena Lee
chief Editor