How to Access Android Phone from a Mac Computer
Oct 24, 2025 • Filed to: Device Data Management • Proven solutions
Dr.Fone Basic:
Better Control for Your Phone
Manage, transfer, back up, restore, and mirror your device
“It is my first time using an Android on Mac, but I can’t seem to make it work. Can someone please tell me how to access Android Phone on Mac?”
As a reader asked us this, I realized that lots of users also struggle to access Android from Mac. This is because unlike Windows, we can’t directly browse the file system of an Android device. While it might seem a bit tedious to access Android from Mac, you can easily fulfill your requirements. There are plenty of third-party applications solely dedicated to access Android phone from Mac. I have shortlisted the 4 best ways to teach you how to access Android phone from Mac right here.
Part 1: How to access Android from Mac using Android File Transfer?
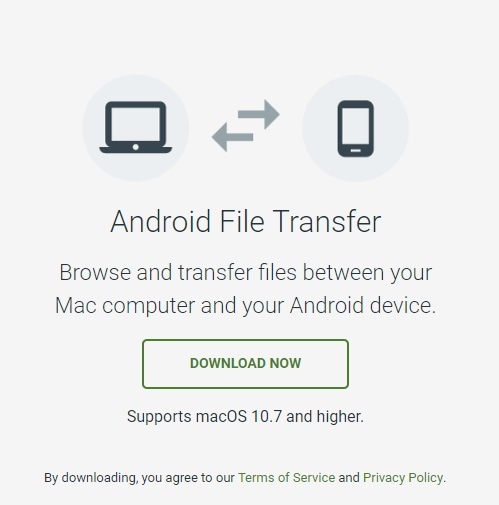
The first solution that I would recommend is the native tool developed by Google. To make it easier for users to access Android from Mac, Google has come up with Android File Transfer. Ideally, you can browse the file system of your Android device with it. While the interface is not user-friendly, it will meet your basic requirements. You can run Android File Transfer on macOS X 10.7 or a newer version. Here’s how you can access Android files from Mac with AFT.
Step 1: Install and launch AFT
To start with, go to the official website of Android File Transfer and download it. After completing the installation, you need to add it to your Mac’s applications.
Step 2: Connect your Android to Mac
Use a working USB cable and connect your Android to Mac. When the device would get connected, choose to perform media transfer (MTP).
Step 3: Access its file system
Launch Android File Transfer on Mac. It will detect your device and display its file system. You can now just visit any folder and manage your data easily.
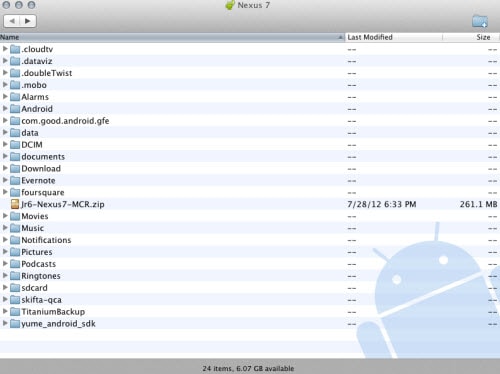
In this way, you can learn how to access Android on Mac for free. While it is a freely available application, it provides a time-consuming and complicated solution.
Part 2: How to access Android from Mac using Dr.Fone - Phone Manager?
The easiest way to access Android phone from Mac is Dr.Fone - Phone Manager (Android). It is a part of the Dr.Fone toolkit that comes for both Windows and Mac systems. Also, it is compatible with every major Android device, manufactured by all the leading brands like Samsung, LG, HTC, Sony, Lenovo, Huawei, etc. You can view all the saved data on your phone like photos, videos, music, contacts, etc. Also, it can help you transfer data between Android and Mac with just one click. Here’s how you can access Android files from Mac using Dr.Fone - Phone Manager.

Dr.Fone - Phone Manager (Android)
Access and Manage Android Phone from Mac Flexibly.
- Transfer files between Android and computer, including contacts, photos, music, SMS, and more.
- Manage, export/import your music, photos, videos, contacts, SMS, Apps etc.
- Transfer iTunes to Android (vice versa).
- Manage your Android device on computer.
- Fully compatible with Android 8.0.
Step 1: Launch the Dr.Fone - Phone Manager application
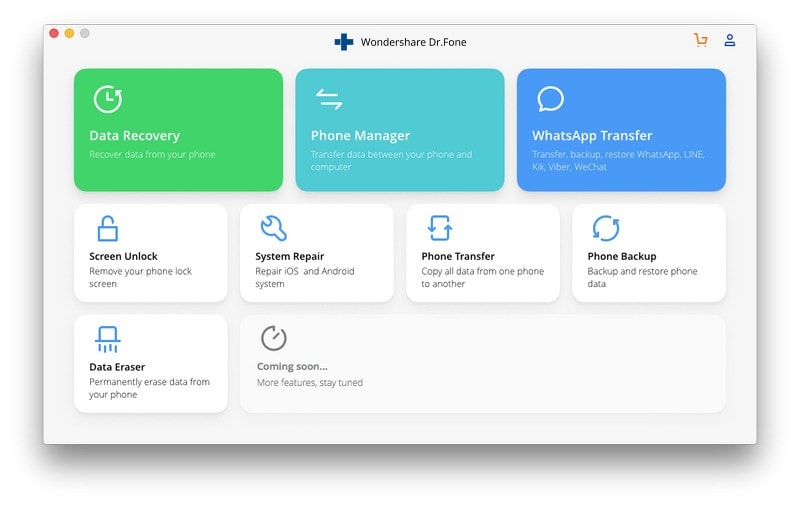
Install the application on your Mac by visiting its website. Whenever you wish to access Android from Mac, launch the Dr.Fone toolkit. Pick the "Phone Manager" section from its home. Also, connect your phone to the system using an authentic cable.
Step 2: Preview your data
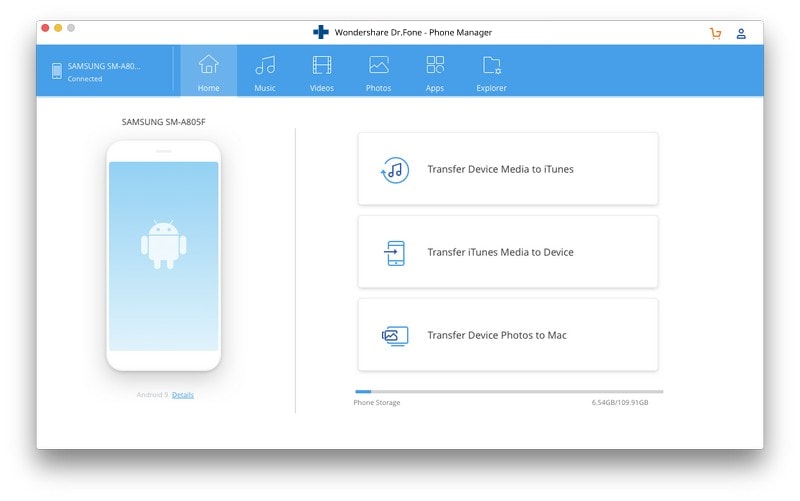
You can see a snapshot of the connected device on the interface with dedicated tabs. There are different tabs for photos, videos, music, information, etc. Simply visit any tab of your choice and view the stored content.
Step 3: Transfer data between Mac and Android
In the end, you can just select the data of your choice. To move it from Android to Mac, click on the Export icon.
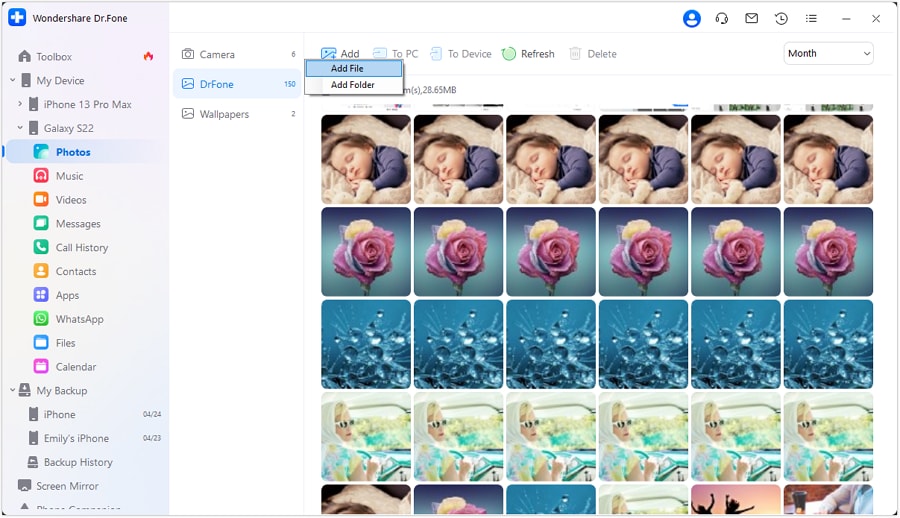
Similarly, you can click on the Import icon to transfer data from your Mac to Android as well.
Important Note: Before you use Dr.Fone - Phone Manager, just make sure that USB Debugging on your phone is enabled. First, go to its Settings > About Phone and tap the Build Number 7 times. Later, go to its Settings > Developer Options and turn on USB Debugging.
Part 3: How to access Android from Mac using Samsung Smart Switch?
If you own a Samsung device, then you can also take the assistance of Smart Switch. The tool is developed by Samsung for Galaxy devices. The mobile app allows us to move to a Samsung device from another phone. On the other hand, the Mac application can take a backup of your data and later restore it. Unlike Dr.Fone - Phone Manager, it doesn’t allow us to preview our data or perform a selective transfer. If you want, you can follow these steps to access Android phone from Mac.
Step 1: Install and launch Smart Switch
Firstly, install the Samsung Smart Switch on your Mac by visiting its official website. Also, connect your phone to Mac using an authentic USB cable.
Step 2: Backup your data
From its welcome screen, choose to take a backup of your data. Grant the needed permissions on your phone and start the transfer process. Don’t close Smart Switch in between.

Step 3: View your data and restore it
When the backup is completed, you will be notified. Now you can just view your transferred data. Later, you can even restore the backup content as well.

One of the major disadvantages is that Smart Switch is limited to Samsung devices. Also, there is no provision to preview your data or transfer it selectively.
Part 4: How to access Android from Mac using AirDroid App?
AirDroid is a popular app that can mirror your Android on your Mac. In this way, you can get notifications on your Mac, remotely control certain features, and even transfer your data. The solution will let you access Android phone from Mac without any USB cable. While the solution is limited and time-consuming, it will certainly help you connect your Android and Mac wirelessly. If you want, you can follow these steps to learn how to access Android phone on Mac using AirDroid.
Step 1: Install the AirDroid application
Open Play Store on your Android phone and download the AirDroid application. Launch it and create your account. Also, grant the app all the permissions it needs.

Step 2: Access AirDroid on Mac
Now, go to AirDroid’s web-based interface (https://web.airdroid.com/). You can access it on any browser irrespective of the platform (i.e. Mac or Windows). Log-in to the same account or simply scan the QR code.

Step 3: Transfer your files
Wait for a while for the phone to get mirrored. Once it is done, you can go to the “Files” section and access Android files from Mac via AirDroid.

In this guide, I have listed not one, but four different solutions to access Android phone from Mac. From all the provided solutions, Dr.Fone - Phone Manager (Android) is a recommended choice. The tool is used by both experts and beginners alike. It is extremely reliable and will let you access Android files from Mac without any hassle.
Dr.Fone Basic:
Better Control for Your Phone
Manage, transfer, back up, restore, and mirror your device
Android Mirror
- Access Android from PC
- 1. Access Android Phone from Mac
- 2. Access Android Files From PC
- 3. Access Android from PC over WiFi
- 4. Access Android from PC
- 5. Remote Access Android from PC
- Android Control
- 1. Control PowerPoint from Android
- 2. Control Android from iPhone
- 3. Control Android from a PC
- 4. Control Android with Broken Screen
- 5. Control PC on Android Devices
- 6. Remote Control iPhone from Android
- 7. Control Mac from Android with Apps
- Mirror Android
- 1. Mirror Your Android to PC/Mac
- 2. Mirror PC to Android with Apps
- 3. Mirror Android Screen to PC
- 4. Mirror Your Android to Android
- 5. Play Android Games on PC/Mac
- 6. Stream Anything to Apple TV
- 7. Use iOS Emulator for Android
- 8. Share Screen to PC with TeamViewer
- 9. Mirror Android to Roku
- 10. Cast Android Screen to PC
- 11.Mirror Android Screen on PC
- 12.Mirror Android to Mac
- Android Recorder
- 1. Game Screen Recorders for Android
- 2. Best Free Android Voice Recorder
- 3. Download MP3 Voice Recorder
- 4. Android Screen Recording App
- 5. Use Screen Recorder With Audio
- 6. Record Screen on Android with Root
- 7. Use Call Recorder for Android
- 8. Record Screen With the Android SDK
- 9. Android Screen Recorder
- 10. Android Screen Recorder with Root
- Mirror Apps


Bhavya Kaushik
contributor Editor