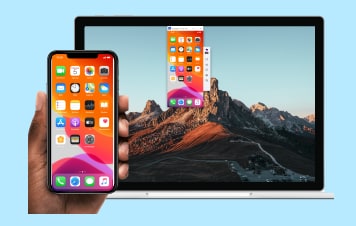
Effortlessly manage data through preview, delete, export, etc.

 100% Security Verified | No Subscription Required | No Malware

 :
: 
 ChatGPT
 Perplexity
 Gemini
 Claude
 Grok
Grok
macOS is universally celebrated as a powerful and intuitive operating system developed by Apple Inc., favored by millions for its seamless user interface, robust security features, and stellar performance on Mac PCs and MacBooks. However, despite its impressive software ecosystem, macOS does not natively support running Android applications. This boundary can be quite limiting if you wish to access your favorite mobile games, specific utility tools, or essential productivity apps directly from your desktop workspace.
Fortunately, this software barrier can be effectively bypassed by utilizing a dedicated android emulator for Mac. These specialized applications act as virtual machines, mimicking a full Android environment right on your Apple computer. In this comprehensive guide updated for 2026, we will delve into the three best Android emulators available for macOS, allowing you to seamlessly run wanted Android apps with optimal speed and zero hassle.
In this article
Part 1. Why You Would Run Android Apps on Mac
Running a reliable android emulator for Mac isn't merely about accessing a handful of mobile widgets; it unlocks an entirely new dimension of possibilities for both casual users and professional software developers. Here are the primary reasons why simulating an Android OS on your Mac is highly beneficial:
- Access to a Massive App Library: Break free from macOS limitations and easily run over 1.2 million diverse applications directly from the Google Play Store on your Mac desktop.
- Enhanced Gaming Experience: Play graphics-intensive Android games on a much larger monitor. Emulators allow you to utilize keyboard and mouse controls, providing better precision and an immersive gameplay experience.
- Seamless Communication: Professionals and everyday users who spend a significant amount of time in front of their desktops will find it far more convenient to manage messages using apps like WeChat, WhatsApp, Viber, and Line without constantly reaching for their mobile phones.
- Application Testing for Developers: App creators can meticulously test their beta builds on a stable desktop environment, diagnosing bugs and assessing UI elements before sending the final product to the Google Play Store for user review.
- Advanced Hardware Simulation: Premium emulators support sophisticated widget simulations such as battery drainage profiles and GPS spoofing. Developers can rigorously test how their apps perform under various geographical locations and distinct battery constraints.
Part 2. Top 3 Android Emulators for Mac
With numerous virtualization options available in the tech market today, choosing the right platform can be challenging. We have narrowed down the top three choices that deliver exceptional performance, usability, and advanced features for macOS users.
1. BlueStacks
BlueStacks App Player continues to hold its ground as arguably the most popular and widely utilized emulator for running Android apps on Mac systems. Available for both Mac and Windows, it creates a seamless virtual copy of the Android OS within your guest operating system. What sets it apart is its proprietary "LayerCake" technology, which empowers you to launch complex Android applications on your PC without needing any external Virtual Desktop Application infrastructure. Once successfully installed, users can immediately dive into high-end Android games and manage daily apps—such as News Feeds and Social Networks—on a massive display.
Furthermore, BlueStacks features a highly efficient internal search manager. This functionality enables users to effortlessly search for any APK (the standard package file format used to distribute and install applications and middleware on any Android device) and install it directly within the emulator's robust ecosystem.
- .apk files can be installed into BlueStacks from Mac simply by double-clicking them.
- Seamlessly sync between the apps on Mac and your Android phone or tablet by installing the BlueStacks Cloud Connect app on your Android Device.
- Apps can be launched directly from your native Mac dashboard for quick access.
- No need to configure an additional internet connection; it automatically inherits the network setup of the host computer.
- BlueStacks App Player is universally available for both Windows and Mac environments.
- When running complex, highly graphic applications, it occasionally fails to respond to input in a timely fashion.
- It does not provide a built-in mechanism to easily and cleanly uninstall from the host computer.

How to Use BlueStacks
-
Step 1 Install the application
Download BlueStacks for Mac OS X from the official website of BlueStacks and install it precisely like any other standard software on your Apple PC.
-
Step 2 Navigate the Home Screen
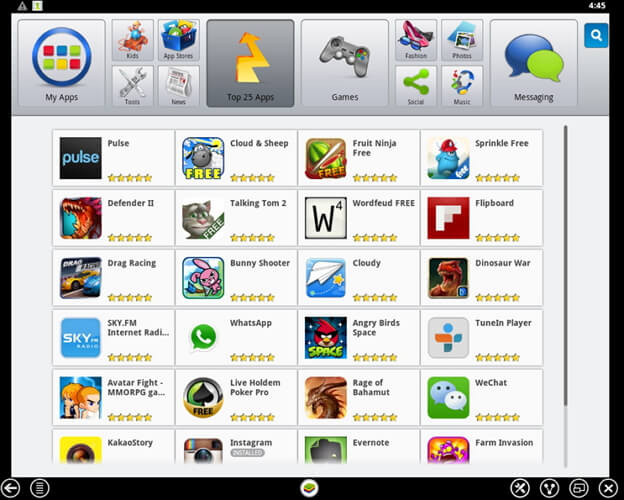
Once successfully installed, the emulator will boot up to its Home Screen. From this central dashboard, you can locate your installed apps, discover new trending apps in the "Top Charts", search for specific tools, play games, and modify emulator settings.
-
Step 3 Connect your account
Your Mac's mouse will act as the basic touch controller. To gain full access to Google Play and download apps, you will have to securely associate a Google Account with BlueStacks.
 Effortlessly manage data through preview, delete, export, etc.
- Transfer all data between devices.
- Robust backup solutions for reliable data protection.
- Mirror screens to PC for meetings, teaching, and control.

2. Genymotion
Genymotion is a remarkably fast and robust third-party emulator tailored specifically to create a versatile virtual environment for Android. Widely recognized as one of the fastest Android emulators on earth, it serves as an indispensable tool designed primarily to develop, rigorously test, and run Android apps on Mac PCs. The software is multi-platform, natively available for Windows, Mac, and Linux machines.
It is designed for rapid installation and grants developers the freedom to create a highly customized Android device profile. Furthermore, you can start multiple virtual devices simultaneously to test cross-device communication. It boasts pixel-perfect functionality, ensuring you can be mathematically precise with your UI development. By utilizing advanced OpenGL acceleration, Genymotion achieves best-in-class 3D performance. It also directly bridges your physical computer's commands with virtual device sensors. As a powerful evolution of the Android open-source project, Genymotion is already trusted by roughly 300,000 developers around the globe.
- The best 3D performance is achieved via direct hardware OpenGL acceleration.
- Fully supports a seamless full-screen viewing option.
- Can boot and start multiple virtual Android devices at the exact same time.
- Fully compatible with ADB (Android Debug Bridge) for deeper system testing.
- Universally available for Mac, Windows, and Linux machines.
- Requires the installation of Oracle VM VirtualBox to run the Genymotion engine.
- Cannot initially deploy or set up the Android machine entirely offline.
How to Use Genymotion
-
Step 1 Download and Extract
Download Genymotion from the main site. You will need to actively create a user account to authorize the download. Open the .dmg installer. Note that it will also prompt the installation of Oracle VM Virtual Box on your computer.
-
Step 2 Launch the Application
Move both Genymotion and the Genymotion Shell tool directly into your macOS Application directory. Click the icon from the Application directory to launch it.
-
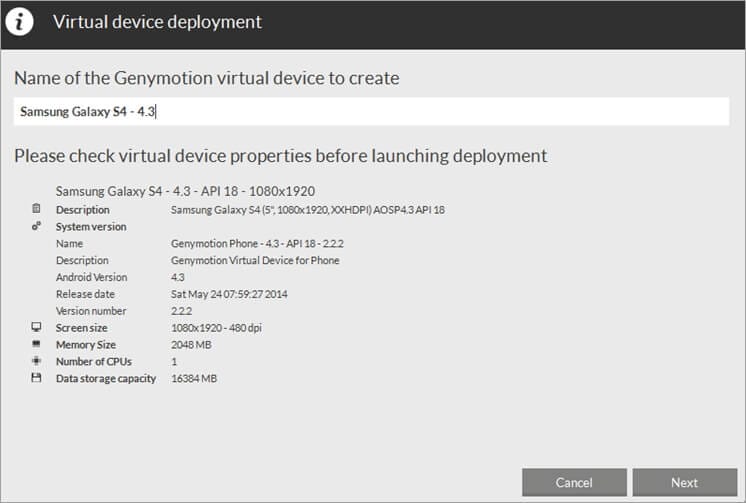
Step 3 Configure Virtual Device
To add a new virtual device, click on the "Add" button. Following this, click on the connect button and enter your user name and password to securely connect to the Genymotion Cloud ecosystem.
-
Step 4 Deploy and Play
Once authenticated, select a virtual machine model from the list and click Next. Provide a recognizable name for the virtual machine. Your designated virtual device will now be downloaded and securely deployed. Click Finish after deployment, and finally, hit the Play button to start the virtual machine and enjoy.
3. Andy
Andy is a highly flexible, open-source emulator that allows independent developers and casual users to enjoy significantly more robust Android apps. It breaks down technical barriers, enabling users to experience mobile tools in multiple device environments and permanently stop being constrained by hardware limits like device storage capacity, rigid screen sizes, or restrictive, separate OS platforms. Additionally, users can automatically update their Android OS layers directly through Andy.
One of Andy's standout features is that it provides a seamless, real-time sync between your Mac desktop and your physical mobile device. Gamers especially love Andy because it allows users to actively utilize their physical smartphones as a tactile joystick while playing games on their Mac.
- It provides a profoundly seamless sync architecture between your desktop and mobile device.
- Actively enables consistent Android OS updates within the virtual space.
- Enables rapid app downloads from any standard desktop browser directly to the Andy OS ecosystem.
- Smartphones can be effortlessly mapped and used as intuitive joysticks while playing high-speed games.
- Offers virtually unlimited virtual storage expansion capabilities.
- Significantly increases overall CPU usage, which may heat up older Mac models.
- Consumes a considerably large amount of physical system RAM (memory).
How to Use Andy
-
Step 1 Install
Download the installer from the main website and follow the setup wizard to fully install Andy on your macOS system.
-
Step 2 Launch and Boot
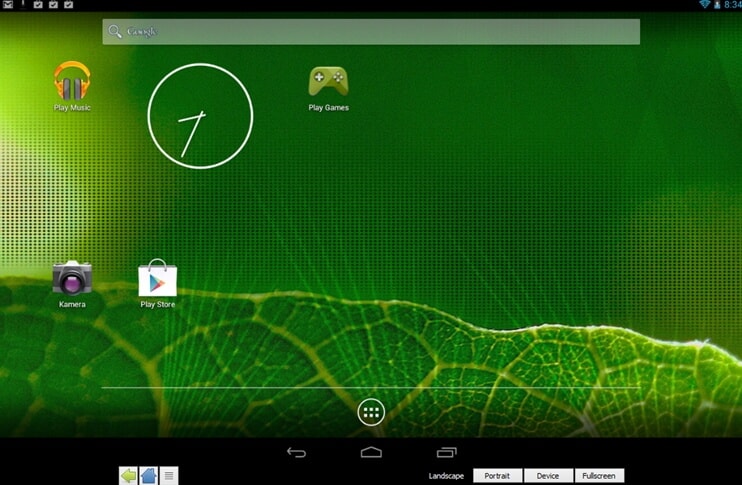
Launch the Andy application. Note that the initial setup will take about a minute to completely boot up the Android kernel, after which it should display the main welcome screen.
-
Step 3 Complete Setup
Sign securely into your Google Account and complete the remainder of the setup screen steps. You will explicitly be asked to provide your Google Account Information to the "1ClickSync" feature, which is the internal app that lets you automatically sync data between Andy and your physical mobile device.
Conclusion
Running Android applications on your macOS device in 2026 is no longer a complex workaround but a seamless, integrated experience thanks to advanced virtualization tools. Whether you are a dedicated gamer looking for massive screen real estate with BlueStacks, a professional developer in need of Genymotion's precise testing capabilities, or an everyday user seeking to sync their smartphone utilizing Andy, these top three Android emulators offer tremendous value and robust functionality. Selecting the right one simply comes down to identifying your specific computing needs and performance capabilities.
FAQ
-
1. Is it safe to use an Android emulator on a Mac?
Yes, using mainstream Android emulators like BlueStacks, Genymotion, and Andy is entirely safe. They operate within a confined virtual machine sandbox, meaning that the Android environment does not have unpermitted access to your host Mac's core system files. -
2. Do these Android emulators drastically drain my MacBook's battery?
Running any virtual machine inherently requires significant CPU and RAM resources, which will lead to faster battery consumption on a MacBook. It is highly recommended to keep your MacBook plugged into a power source when engaging in extended gaming or heavy developmental tasks on these emulators. -
3. Can I use these emulators to play heavy graphics Android games?
Absolutely. Emulators like BlueStacks and Andy are explicitly designed with features like LayerCake and hardware mapping to seamlessly run graphics-intensive games. However, a Mac with a decent graphics card and sufficient RAM is required for optimal, lag-free performance. -
4. Are Android emulators for Mac free to use?
Most top-tier emulators, including BlueStacks and Andy, offer fully featured free versions intended for personal use and casual gaming. Genymotion also offers a free version for non-commercial use, though professional developers may need to purchase premium licenses to unlock advanced enterprise features.
 Add Wondershare Dr.Fone as a preferred source on Google