Permanently erase all iOS & Android data—completely unrecoverable.

 100% Security Verified | No Subscription Required | No Malware

 :
: 
 ChatGPT
 Perplexity
 Gemini
 Claude
 Grok
Grok
So, you are eyeing a newer model and thinking, 'I need to sell my iPhone 11 to fund the upgrade.' Whether you plan to trade it in with a service provider, recycle it, or pass it on to a new owner, your device currently holds a massive amount of personal data. Simply deleting your photos and apps manually is never enough when preparing an iPhone 11 second hand device for the secondary market.
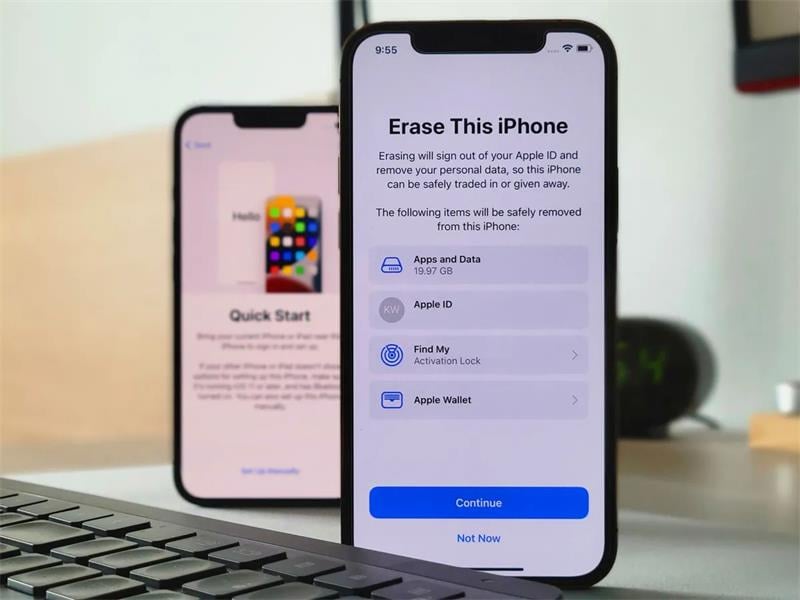
If you fail to properly wipe your phone, you risk exposing sensitive financial details, stored passwords, and private media. Leaving residual data on an old device is a severe security risk. This comprehensive guide will walk you through exactly what you must do before handing over your second hand iPhone 11, demonstrating how to securely erase your data and ensure your privacy remains fully intact.
In this article
Part 1. What Happens When You Don't Wipe Your Old iPhone 11 Series?
Selling or trading in your old smartphone is a fantastic way to offset the cost of a new one while promoting electronics recycling. However, if you decide to 'sell my iPhone 11' without completely stripping it of personal data, you could become a prime target for cybercriminals. Apple has heavily invested in privacy protection, making it straightforward to delete all content and settings without requiring complex hacks.
Think about the digital footprint stored on your phone: banking application caches, saved credit card autofills, frequently visited locations, behavioral biometrics, and intimate messages. If you hand off an iPhone 11 second hand without executing a secure wipe, these fragments travel with the hardware. Malicious actors know how to extract this residual data to commit identity theft, financial fraud, and severe privacy breaches. Protecting yourself requires more than just logging out; it requires a systematic data destruction approach.
Part 2. Back Up Your Old iPhone 11 Series Before Erasing
Before you even think about hitting the reset button, you must secure a reliable copy of your data. Erasing an iPhone is an irreversible process, meaning any forgotten contacts, photos, or documents will be lost forever if not properly backed up. A solid backup ensures a seamless transition when setting up your new device. Below are the three most effective methods to secure your data.
Method 1: Back Up iPhone to iCloud
Utilizing iCloud is arguably the most convenient method, as it operates wirelessly in the background. Apple provides 5 GB of free storage, though users with extensive photo libraries will likely need to upgrade their storage plan temporarily to complete a full backup.
Step 1 Access iCloud Settings
Navigate to Settings, tap on your Apple ID profile at the top, and select iCloud. Sign in with your Apple ID and password if prompted.
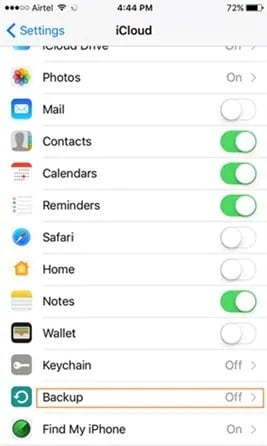
Step 2 Initiate the Backup
Tap on iCloud Backup and toggle it on. Tap Back Up Now to force the device to immediately begin saving your files to the cloud.
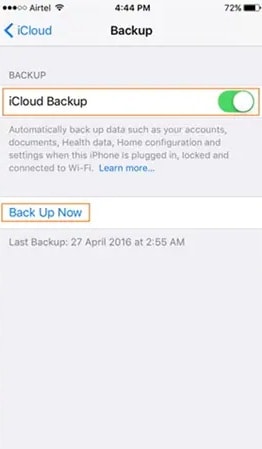
Step 3 Wait for Completion
Stay connected to a strong Wi-Fi network and wait for the process to finish. This may take several minutes depending on your network speed and data size.

Method 2: Back Up iPhone Using iTunes
For users who prefer local storage over cloud subscriptions, backing up via iTunes (or Finder on newer macOS versions) is the traditional and secure route. This can be done via a wired connection or wirelessly over your local network.
Wired Backup via USB Cable
This is the fastest way to transfer large amounts of data securely to your computer's hard drive.
Step 1 Connect the Device
Connect your iPhone to your Mac or PC using an official lightning to USB cable.

Step 2 Select iPhone in iTunes
Launch iTunes (or Finder) and click on the small iPhone icon located near the top-left corner of the interface.

Step 3 Access the Summary Tab
Navigate to the Summary tab on the left-side panel to view your device's storage and backup options.
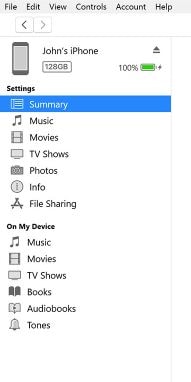
Step 4 Execute the Backup
Under the Backup section, select This Computer and click Back Up Now to encrypt and save your data locally.
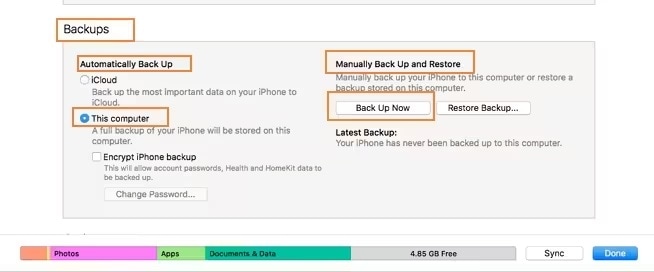
Wireless Backup via Wi-Fi Sync
If you have previously synced your phone with your computer, you can trigger a backup over the same Wi-Fi network without physically plugging it in.
Step 1 Enable Wi-Fi Sync
While connected via USB for the first time, go to iTunes > Summary and check the box that says Sync with this iPhone over Wi-Fi. Click Apply.
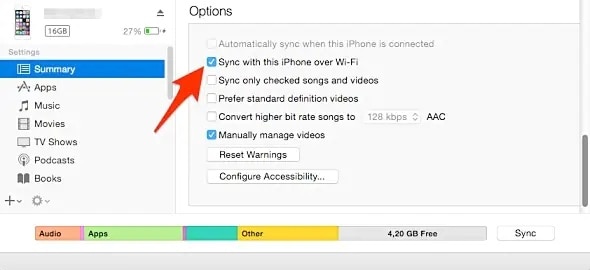
Step 2 Sync Wirelessly
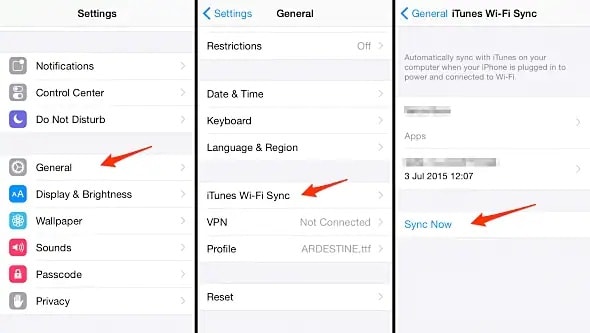
On your phone, navigate to Settings > General > iTunes Wi-Fi Sync and tap Sync Now.
Method 3: Back Up iPhone using Dr.Fone Basic
 Effortlessly manage data through preview, delete, export, etc.
- Transfer all data between devices.
- Robust backup solutions for reliable data protection.
- Mirror screens to PC for meetings, teaching, and control.

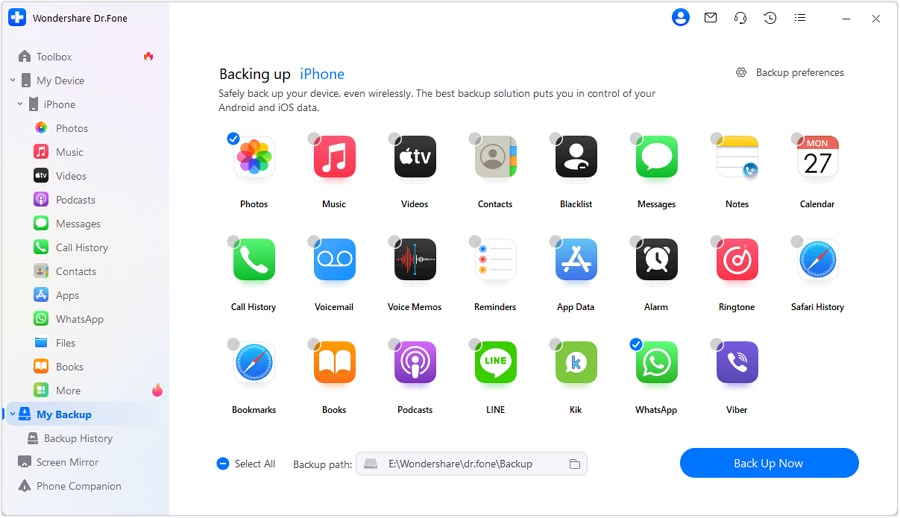
While iTunes and iCloud are standard solutions, they lack flexibility. Wondershare Dr.Fone Basic offers a powerful alternative that allows you to selectively back up files. Instead of a massive, unreadable backup file, you can choose exactly which photos, messages, or contacts to archive, providing a much more manageable and efficient experience.
Using this software prevents storage bloat on your computer by leaving behind junk files and cache data. It is the perfect preparatory step before deciding to fully erase your hardware.





 Add Wondershare Dr.Fone as a preferred source on Google