
Cydia Eraser: How to Remove Cydia from iPhone/iPad

Jun 11, 2026 • Filed to: Data Wipe Solutions • Proven solutions
 TL;DR:
To remove Cydia from your iPhone or iPad, you can batch-delete all tweaks directly within the Cydia app, perform a full device restore using iTunes, or selectively uninstall it using desktop software like Dr.Fone - Data Eraser.
● To delete tweaks without a computer, open Cydia, navigate to the Installed tab, select Modify and Remove for a tweak, choose Continue Queuing to bundle all tweaks, and click Confirm to erase them simultaneously.
● Using iTunes to remove Cydia requires you to execute a Restore iPhone command, which permanently deletes all synced data and resets the device to factory defaults, making a complete prior backup a mandatory prerequisite.
● If using Dr.Fone - Data Eraser, connect your iOS device via cable, access the Free Up Space module, and utilize the Erase Application function to target and uninstall Cydia without performing a full system wipe.
Ask AI for a summary
 ChatGPT
 Perplexity
 Gemini
 Claude
 Grok
Grok
When you jailbreak your iPhone or iPad, the jailbreak process installs Cydia to your iOS device. Cydia enables you to install applications, themes, and tweaks outside Apple’s official App Store. So, it is a one-stop solution for iOS device customization and gives you the capability to customize your device. Once it is installed, it becomes quite difficult to remove it from the device.
Now, if you really want to remove Cydia and return back to a non-jailbroken system, then you have come to the right page. Here, in this post, we have shared several effective methods on how to delete Cydia from iPhone/iPad.
Part 1: Why remove Cydia from your iPhone/iPad
There is no doubt that jailbreaking your iOS device with Cydia provide you access to new wallpapers, more free applications or ringtones to customize your device. However, these customization features come with side effects –
- Cydia can badly damage the iOS system.
- It can lower the device’s speed and hinder the smooth user experience.
- It also voids your device warranty immediately.
- Your device becomes vulnerable to virus and malware attacks.
Considering all these side effects, it is quite important to delete Cydia from your iPhone/iPad to make sure that your device runs smoothly.
Part 2: Remove Cydia from your iPhone/iPad in one click
If you want a one-click solution to remove Cydia from your iPhone or iPad, then you can try Dr.Fone - Data Eraser. It is a reliable and powerful solution that will take a few minutes to delete Cydia from your iOS device with a few clicks of buttons.
Dr.Fone - Data Eraser
Remove Cydia from your iDevice easily
- Permanently erase all data, such as photos, videos, etc from your iOS device.
- It let you uninstall or delete useless applications from your device in batch.
- You can preview data before erasing.
- Easy and click through the erase process.
- Provide support to all iOS versions and devices, which include the iPhone and iPad.
Follow the below step-by-step guide to learn how to delete Cydia from your iOS device using Dr.Fone - Data Eraser:
Note: The Data Eraser feature only erases phone data. If you'd like to remove Apple ID after you forgot the password, it's recommended to use Dr.Fone - Screen Unlock (iOS). It will erase the Apple account from your iPhone/iPad.
Step 1: Download and install the Dr.Fone - Data Eraser on your computer. Next, run it and connect your device to the computer using a digital cable. Then, choose “Erase” option.

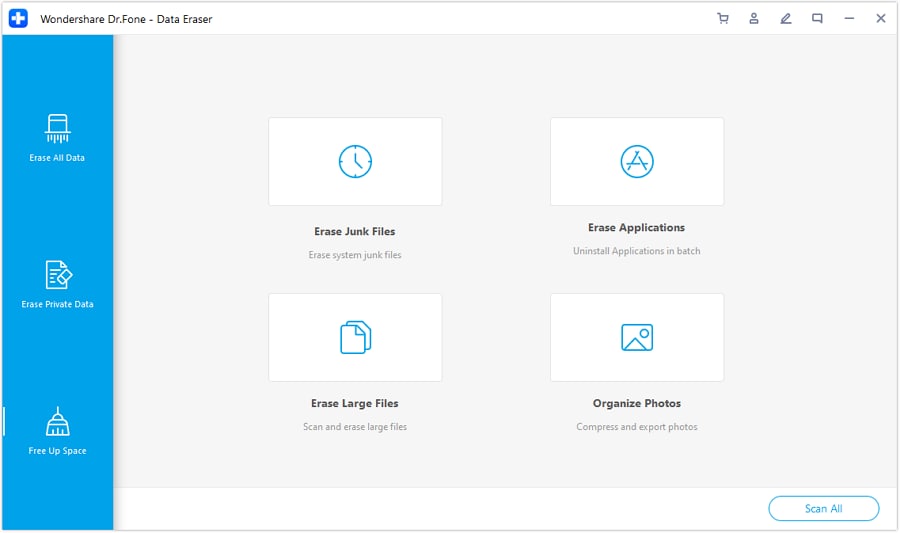
Step 2: From the main interface of the software, choose “Fee Up Space Option” and then, tap on “Erase Application”.
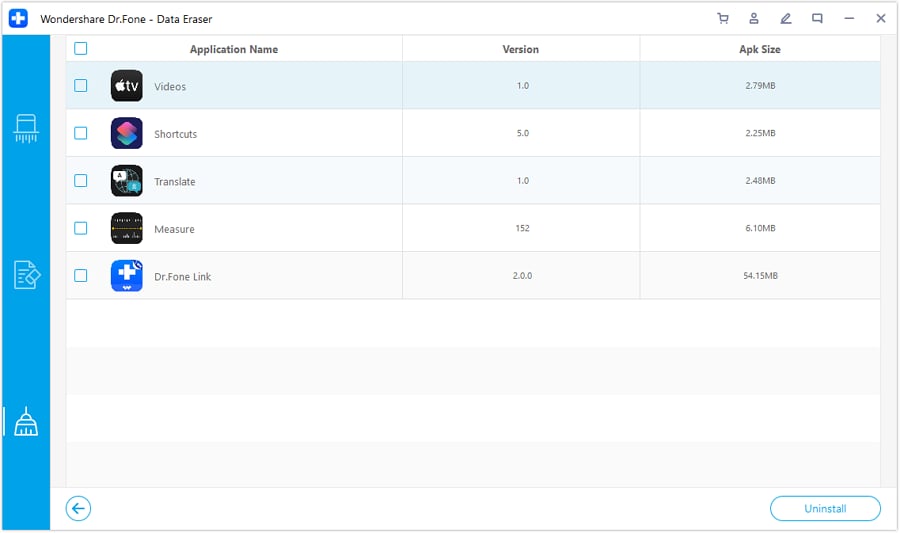
Step 3: Here, select the Cydia application and then, click on the “Uninstall” button to remove it from your device forever.
That’s how you can get rid of Cydia from your iPhone or iPad with the help of iOS data eraser software like Dr.Fone - Data Eraser. This software will help you to speed up your device by deleting unnecessary applications from it.
Part 3: Remove Cydia from your iPhone/iPad without a PC
Removing Cydia from your iOS device isn’t so difficult without a PC. There is a way to delete all Cydia tweaks on the iPhone/iPad directly. Luckily, this method works most of the time. However, it is recommended that you should take a backup of your device data for the safe side.
To learn how to remove Cydia from iPhone/iPad without a computer, follow the below steps:
Step 1: To start with, run Cydia on your iPhone from home screen.
Step 2: Next, move to the “Installed” tab and then, click on the first tweak you want to uninstall from your device.

Step 3: After that, click on “Modify” and then, choose the “Remove” option.
Step 4: Now, choose “Continue Queuing” option instead of clicking on the “Confirm” button.

Step 5: Next, you need to add all the tweaks to the queue. After adding all tweaks to the queue, move to the “Installed” tab and next, click on the “Queue” button.

Step 6: Finally, click on the “Confirm” button to remove all tweaks from your device at once.
That’s how you can uninstall all Cydia Tweaks from your iPhone. But, if this method doesn’t work for you, then you can go for the next solution.
Part 4: Remove Cydia from your iPhone/iPad with iTunes
You can also delete Cydia from your iOS device with iTunes, but, this approach removed all of your sync data too and restores your iDevice to its original state or factory default. Thus, it is highly advisable that you should back up all of your device data before you start removing Cydia with iTunes. Follow the below steps on how to uninstall Cydia from iPhone/iPad using iTunes:
Step 1: Run latest iTunes version on your computer and connect your iOS device to the computer using a digital cable.
Step 2:Next, click on the Device icon to open the “Summary” page and here, select “This Computer” and choose the “Back Up Now” option to back up your device data.

Step 3:After that, find and choose the “Restore iPhone” option. After you confirm that you want to restore, iTunes will begin the restoring process and this will erase your iPhone data, which include Cydia.

Step 4: After the completion of the restore process, you can restore your data from the latest backup you have created.

Part 5: Backup your iPhone/iPad and erase the whole device
Do you want to reset your device and make it like a brand new one? If so, then you can completely erase your device using Dr.Fone - Data Eraser. It has a function called Erase All Data you can use to erase all of your iOS content in an easy and simple way.
However, before you erase your device, it is recommended to backup your iPhone/iPad using Dr.Fone – Backup & Restore to be on the safe side.
To learn how to erase the whole device using Dr.Fone - Data Eraser, follow the below guide:
Step 1: Run Dr.Fone - Data Eraser on your computer and next, choose “Erase” option.
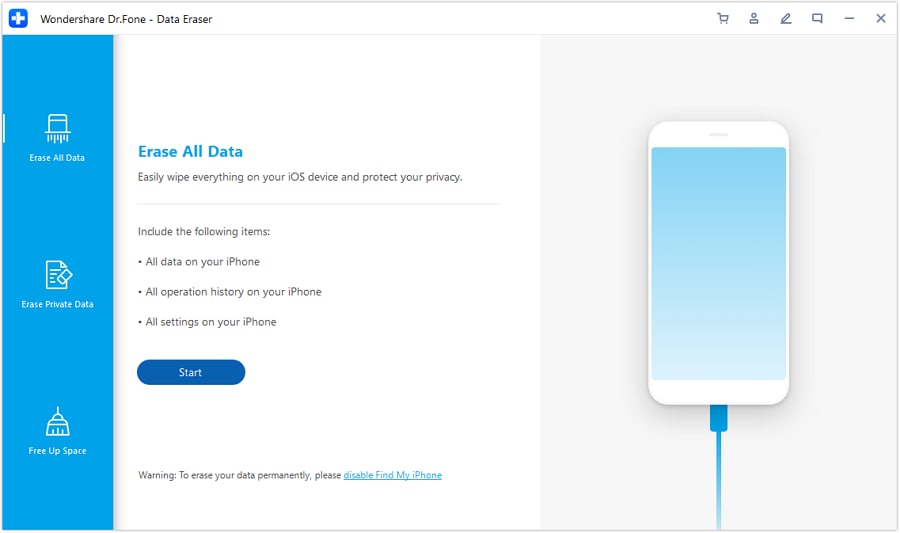
Step 2: After that, connect your device to the computer and now, select “Erase All Data” to initiate the erasing process.
Step 3: Here, you can choose a security level for erasing your device data and then, you need to confirm your action by entering “00000” as shown in the below figure.
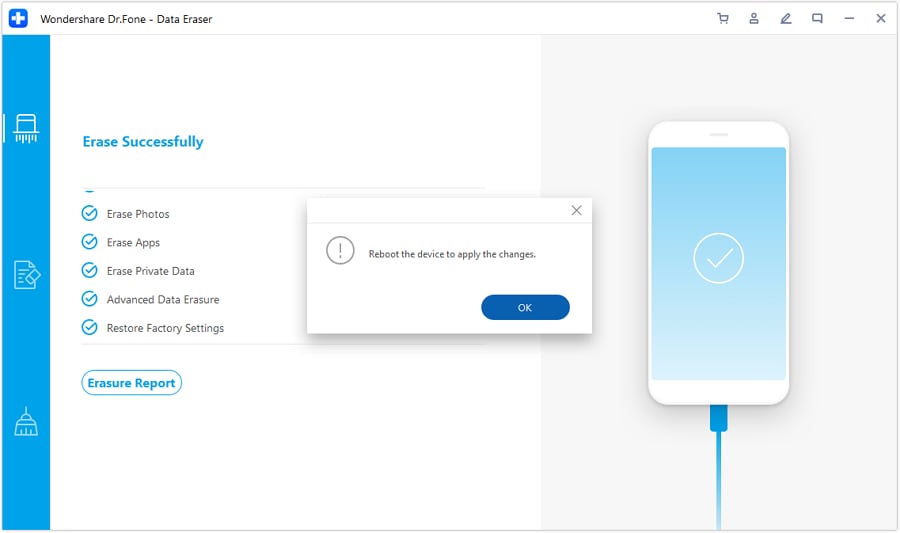
Step 4: Now, the software will start the data erasing process. Once the device data is erased completely, you will get a message saying “Erased Successfully”.
Conclusion
We hope that this helps you to remove Cydia from your iOS device. There are so many ways available to erase Cydia from iPhone/iPad. But, using Dr.Fone - Data Eraser to remove it can help you to save your time and efforts as it enables you to uninstall Cydia application from your device with one click of a button.


iPhone Erase
- Clear iPhone
- Delete iPhone
- 1. Delete Albums on iPhone
- 2. Delete Apps from iPhone
- 3. Delete Calendar Event on iPhone
- 4. Delete Documents on iPhone
- 5. Delete Email Account on iPhone
- 6. Delete Visited Sites on iPhone
- 7. Delete Music from iPhone
- 8. Delete Snapchat Messages on iPhone
- 9. Delete Songs from iCloud
- 10. Delete Voicemail on iPhone
- 11. Delete WhatsApp Message for Everyone
- 12. Delete WhatsApp Message Permanently
- 13. Delete Downloads on iPhone
- 14. Delete Calendars from iPhone
- 15. Delete History on iPhone
- 16. Delete Snapchat Story/History
- 17. Delete Call History on iPhone
- 18. Delete Kik on iPhone
- 19. WhatsApp Delete Message Tips
- 20. Anti Spyware for iPhone
- 21. Get Rid of Virus on iPhone
- 22. Delete Other Data on iPhone/iPad
- 23. Remove Subscribed Calendar iPhone
- Erase iPhone
- 1. Erase an iPhone without Apple ID
- 2. iPhone Data Erase Softwares
- 3. Remove Cydia from iPhone/iPad
- 4. Erase All Content and Settings
- 5. Erase Old iPhone
- 6. Erase iPhone 13 Data
- 7. Erase Data Old Device
- 8. Erase iPhone without Apple ID
- 9. Empty Trash on iPhone
- 10. Sell My Old iPhone
- 11. Sell A Used Phone
- 12. Safely Sell Used Phones
- 13. Apple Trade in Program
- iPhone Storage Full
- 1. iPhone Cleaners to Clean iPhone
- 2. Clean Master for iPhone
- 3. Clean Up iPhone
- 4. Free Up Storage on iPhone
- 5. Make iPhone Faster
- 6. Speed Up iPhone/iPad
- Wipe iPhone
- Sell Old iPhone
- ● Manage/transfer/recover data
- ● Unlock screen/activate/FRP lock
- ● Fix most iOS and Android issues
- Free Download Free Download Free Download


James Davis
staff Editor