How to Remove Subscribed Calendar iPhone?

May 22, 2026 • Filed to: Data Wipe Solutions • Proven solutions
 TL;DR:
To declutter your iPhone schedule, you can delete third-party subscriptions via the Settings app, remove self-created personal calendars directly within the default Calendar app, or unsubscribe via a synced Macbook.
● Third-party subscriptions must be removed by navigating to Settings, selecting Accounts & Passwords, and deleting the account under Subscribed Calendars, while personal calendars are deleted using the Edit button inside the Calendar app.
● For calendars synced across multiple Apple devices using the same iCloud account, right-clicking and selecting Unsubscribe in the Macbook Calendar app will automatically remove the subscription from all linked iDevices.
● Standard iOS deletion methods leave calendar data recoverable from the device memory; permanently wiping this private information to prevent recovery requires a specialized tool like Dr.Fone - Data Eraser, which supports versions including iOS 14.
Ask AI for a summary
 ChatGPT
 Perplexity
 Gemini
 Claude
 Grok
Grok
The Calendar app on an iPhone/iPad is one of the most useful built-in tools of iOS. It lets users create and subscribe to multiple calendars, making it quite convenient for people to keep their personal and professional lives separated. However, the same feature can seem a bit frustrating when you subscribe to too many calendars. When you subscribe to different calendars simultaneously, everything will become cluttered, and you’ll have a hard time finding a specific event.
One way to avoid this situation is to remove unnecessary subscribed calendars from your iDevice to keep the entire app clean and easily navigable. So, in this guide, we’re going to share the best way to remove subscribed calendar iPhone so that you won’t have to deal with a cluttered Calendar app.
Part 1. About Calendar Subscription iPhone
If you have just bought an iPhone and haven’t used the Calendar app, here’s what you need to know about the iOS Calendar subscription. Basically, a Calendar subscription is a way to stay up-to-date with different events such as your scheduled team meetings, national holidays, and your favorite teams' sports tournaments.
On your iPhone/iPad, you can subscribe to public Calendars and access all their events within the official Calendar app itself. To subscribe to a specific Calendar, all you need is its web address.
One of the major advantages of using the Calendar subscription is that you can sync it across all your Apple devices. To do this, you’ll just have to connect all the devices to the same iCloud account and subscribe to a Calendar via Mac.
This is an extremely convenient feature for users who have multiple Apple devices and want to keep their Calendar events synced across all of them. In addition to this, you can also create your own Calendars and allow other users to subscribe to it.
But, as we mentioned earlier, when you’ll subscribe to multiple Calendars, the app will become too difficult to navigate. It would always be a great strategy to remove unnecessary subscribed Calendars from the list and track all your events more conveniently.
Part 2. Ways to Remove Subscribed Calendars on iPhone
So, now that you know what the benefits of the Calendar app are, let’s quickly start with how to delete a Calendar subscription iPhone. Basically, there are multiple ways to remove a subscribed calendar in iDevices. Let’s discuss each of them individually so that you can keep your Calendar app neat.
2.1 Use the Settings App
The first and probably the most common way to remove a calendar subscription on an iPhone is to use the “Settings” app. This is a suitable approach if you want to remove third-party calendars you haven’t created yourself. Let’s take a look at the step-by-step procedure to delete a subscribed calendar on iPhone/iPad through the Settings menu.
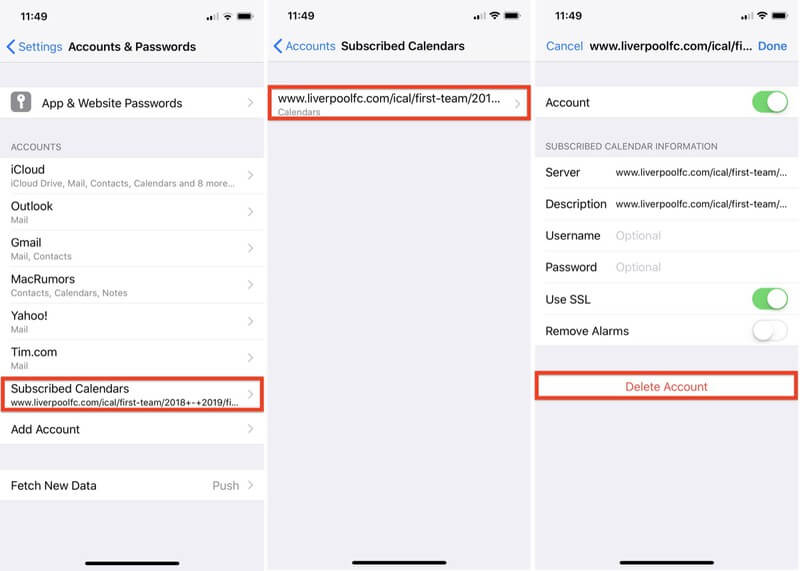
Step 1 - Launch the “Settings” app on your iDevice and click “Accounts & Passwords”.
Step 2 - Now, click the “Subscribed Calendars” option and choose the calendar subscription you want to remove.
Step 3 - In the next window, simply click “Delete Account” to permanently delete the subscribed Calendar.
2.2 Use the Calendar App
If you want to remove a personal calendar (the one you created on your own), you won’t have to go to the “Settings” app. In this case, you’ll remove the specific calendar using the default Calendar app by following this quick process.
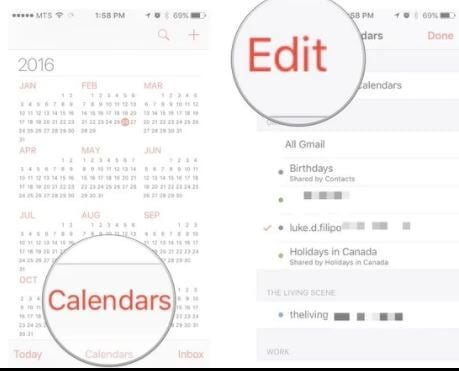
Step 1 - Go to the “Calendar” app on your iPhone or iPad.
Step 2 - Click the “Calendar” button at the bottom of your screen and then tap “Edit” at the top-left corner.
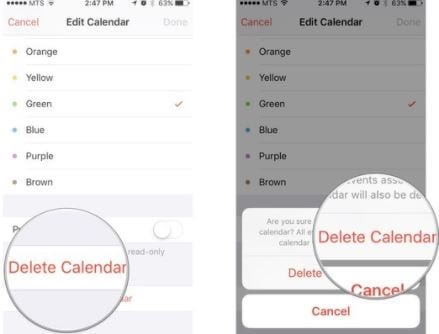
Step 3 - You’ll see a list of all your calendars. Choose the Calendar that you want to delete and click “Delete Calendar”.
Step 4 - Again tap “Delete Calendar” in the pop-up window to remove the selected calendar from your app.
2.3 Remove a Subscribed Calendar from Your Macbook
These were the two official ways to remove the calendar subscription iPhone. However, if you have synced the Calendar subscription across all your Apple devices, you can even use your Macbook to remove it. Launch your Macbook and follow these steps to delete a subscribed calendar.
Step 1 - Open the “Calendar” app on your Macbook.
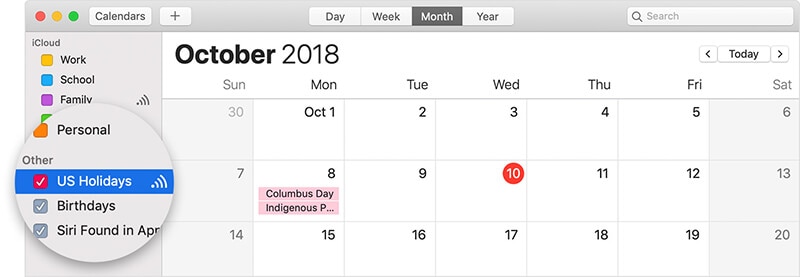
Step 2 - Right-click the specific calendar that you want to remove and click “Unsubscribe”.
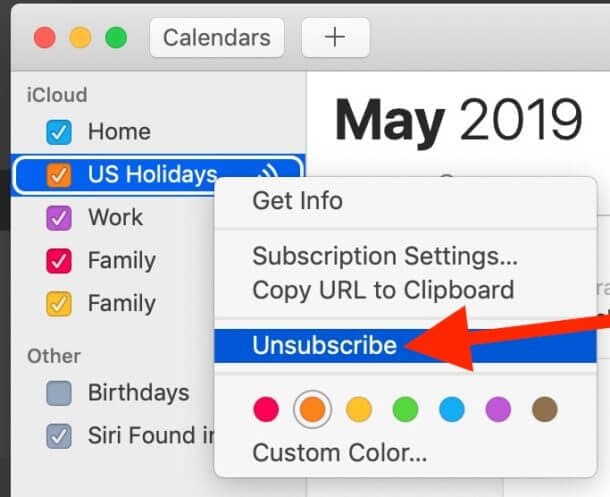
This will remove the selected calendar from all the iDevices that are linked to the same iCloud account.
Bonus Tip: Delete Calendar Event iPhone Permanently
While the previous three methods will help you delete calendar subscription iPhone, they have one major downside. If you use these traditional methods, keep in mind that the Calendars won’t be removed permanently. It may sound surprising, but just deleting calendar subscriptions (or even other files) doesn’t remove them from memory completely.
This means that an identity thief or potential hacker would be able to recover deleted files from your iPhone/iPad without any hassle. Since identity theft is becoming one of the most common crimes in today’s digital world, it’s your responsibility that no one can recover your deleted data.
Recommended Tool: Dr. Fone - Data Eraser (iOS)
One way to do this is to use a professional eraser tool such as Dr.Fone - Data Eraser. The software is specifically designed for all iOS users to permanently delete data from their iDevice and keep their privacy intact.
With Data Eraser (iOS), you’ll be able to delete pictures, contacts, messages, and even Calendar subscriptions in such a way that no one will be able to recover them, even if they use professional recovery tools. As a result, you can stay assured that no one will be able to misuse your personal information at all.
Key Features:
Here are a few additional features of Dr.Fone - Data Eraser that make it the best eraser tool for iOS.
- Permanently delete different types of files from your iPhone/iPad
- Selectively Erase data from an iDevice
- Clear unnecessary and junk files to speed up your iPhone and optimize its performance.
- Works with all iOS versions, including the latest iOS 14
Step by Step Tutotrial
So, if you’re also ready to permanently remove a subscribed Calendar from your iPhone, grab your cup of coffee and follow the below-mentioned steps to use Dr.Fone - Data Eraser.
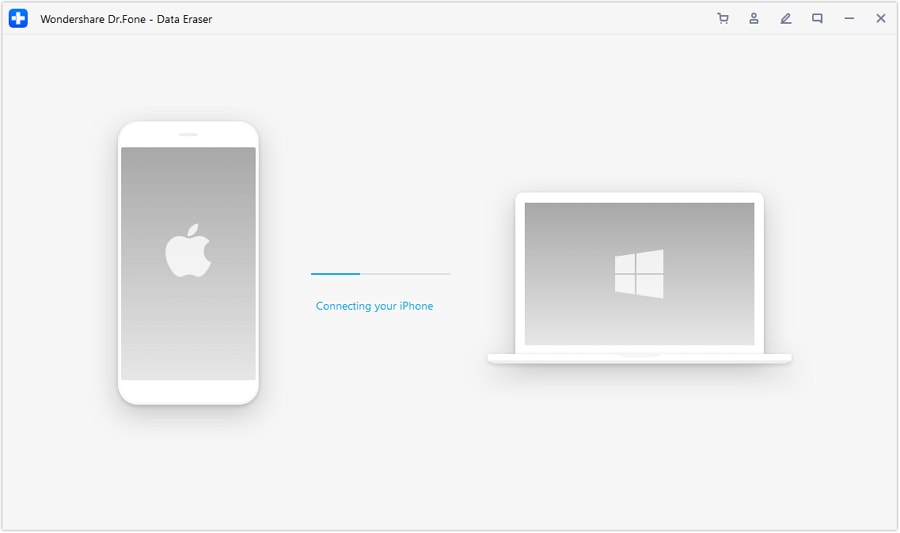
Step 1 - Start by installing Dr.Fone - Data Eraser on your PC. Once the installation process completes, launch the application and select “Data Eraser”.

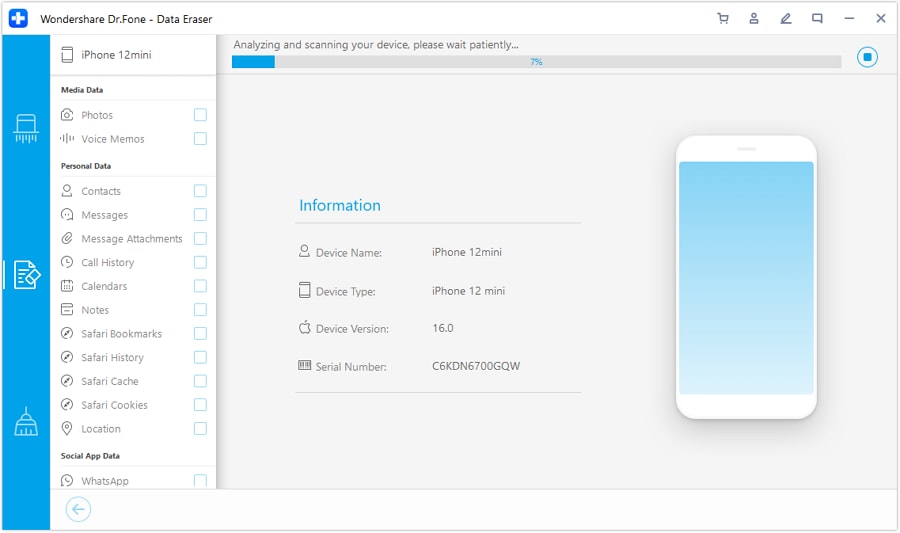
Step 2 - Now, connect your iPhone/iPad to the PC and wait for the software to recognize it automatically.
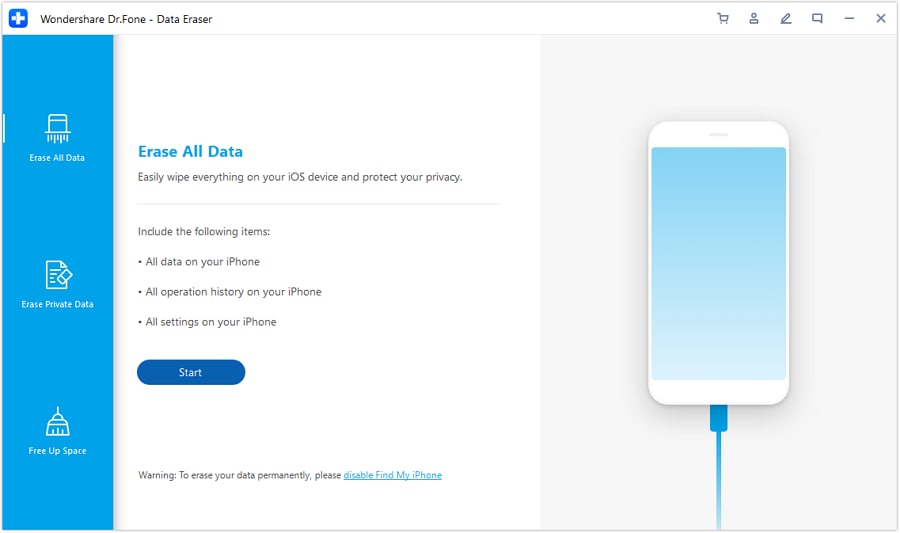
Step 3 - In the next window, you’ll be prompted with three different options, i.e., Erase All Data, Erase Private Data, and Free Up Space. Since we only want to delete Calendar subscriptions, choose the “Erase Private Data” option and click “Start” to proceed further.
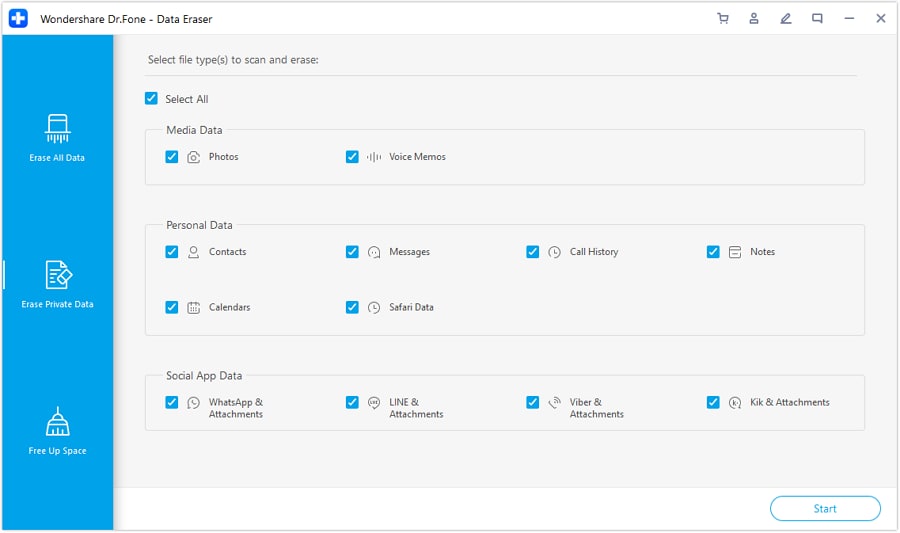
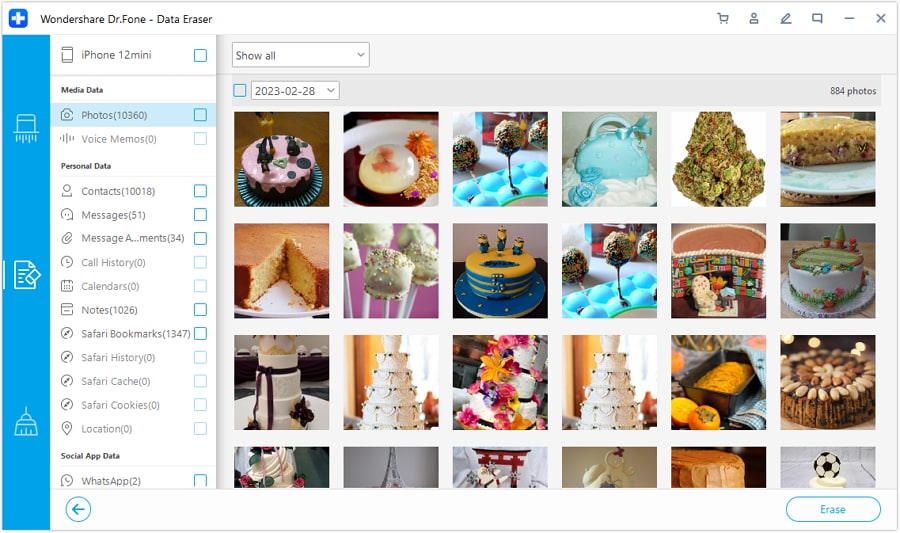
Step 4 - Now, uncheck all the options except for “Calendar” and click “Start” to scan your device for the desired data.
Step 5 - The scanning process will most likely take a few minutes. So, be patient and sip on your coffee while Dr.Fone - Data Eraser scans for calendar subscriptions.
Step 6 - As soon as the scanning process will complete, the software will display a list of files. Just choose the calendar subscriptions that you want to remove and click “Erase” to get the job done.
Wipe off only the already deleted data from your iOS device
In case you have already deleted a Calendar subscription using the traditional methods, but want to delete them for full security permanently, Dr.Fone - Data Eraser will help you as well. The tool has a dedicated feature that will only scan delete files from your iPhone and erase them with one click.
Follow these steps to erase deleted files from your iPhone using Dr.Fone - Data Eraser.
Step 1 - After the scanning process completes, use the drop-down menu and select “Only Show the Deleted”.

Step 2 - Now, choose the files that you want to remove and click “Erase”.
Step 3 - Enter “000000” in the text field and click “Erase Now” to erase the data.
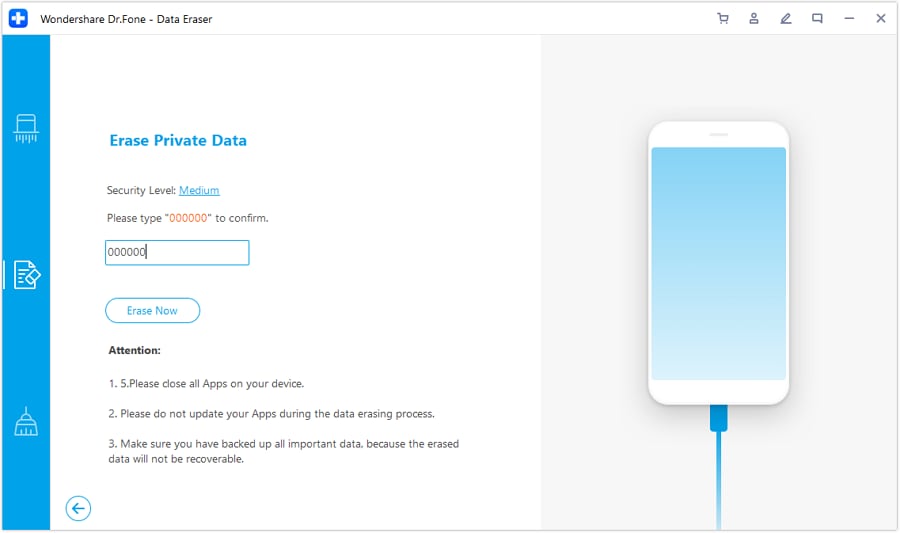
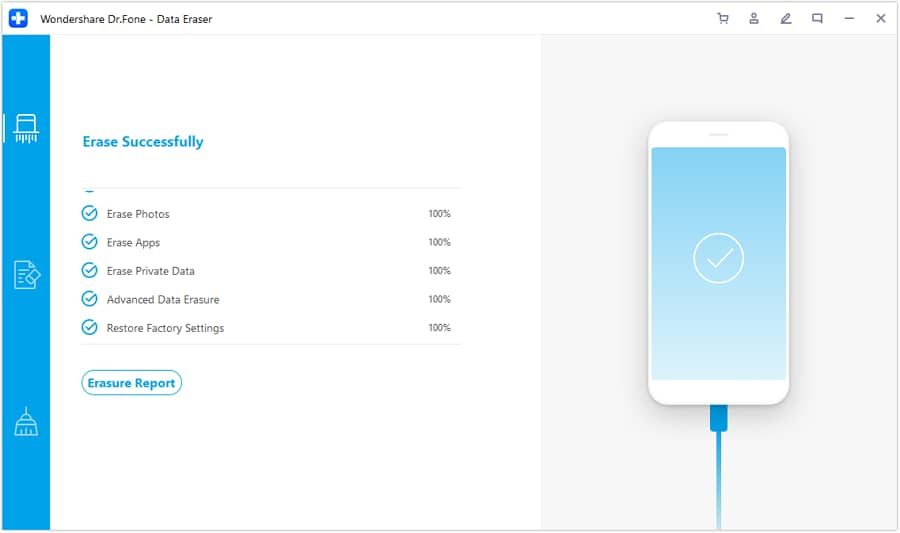
The tool will start erasing deleted data from your iPhone/iPad’s memory. Again, this process may take a few minutes to complete.
Conclusion
Despite being a handy app in iOS, you may find the Calendar app to be quite annoying, especially when it accumulates too many calendar subscriptions. If you’re dealing with the same situation, simply use the above-mentioned tricks to remove subscribed calendar iPhone and keep the app easy to navigate.


iPhone Erase
- Clear iPhone
- Delete iPhone
- 1. Delete Albums on iPhone
- 2. Delete Apps from iPhone
- 3. Delete Calendar Event on iPhone
- 4. Delete Documents on iPhone
- 5. Delete Email Account on iPhone
- 6. Delete Visited Sites on iPhone
- 7. Delete Music from iPhone
- 8. Delete Snapchat Messages on iPhone
- 9. Delete Songs from iCloud
- 10. Delete Voicemail on iPhone
- 11. Delete WhatsApp Message for Everyone
- 12. Delete WhatsApp Message Permanently
- 13. Delete Downloads on iPhone
- 14. Delete Calendars from iPhone
- 15. Delete History on iPhone
- 16. Delete Snapchat Story/History
- 17. Delete Call History on iPhone
- 18. Delete Kik on iPhone
- 19. WhatsApp Delete Message Tips
- 20. Anti Spyware for iPhone
- 21. Get Rid of Virus on iPhone
- 22. Delete Other Data on iPhone/iPad
- 23. Remove Subscribed Calendar iPhone
- Erase iPhone
- 1. Erase an iPhone without Apple ID
- 2. iPhone Data Erase Softwares
- 3. Remove Cydia from iPhone/iPad
- 4. Erase All Content and Settings
- 5. Erase Old iPhone
- 6. Erase iPhone 13 Data
- 7. Erase Data Old Device
- 8. Erase iPhone without Apple ID
- 9. Empty Trash on iPhone
- 10. Sell My Old iPhone
- 11. Sell A Used Phone
- 12. Safely Sell Used Phones
- 13. Apple Trade in Program
- iPhone Storage Full
- 1. iPhone Cleaners to Clean iPhone
- 2. Clean Master for iPhone
- 3. Clean Up iPhone
- 4. Free Up Storage on iPhone
- 5. Make iPhone Faster
- 6. Speed Up iPhone/iPad
- Wipe iPhone
- Sell Old iPhone
- ● Manage/transfer/recover data
- ● Unlock screen/activate/FRP lock
- ● Fix most iOS and Android issues
- Free Download Free Download Free Download


Alice MJ
staff Editor