A Complete Guide on Odin Root

May 19, 2026 • Filed to: Device Data Management • Proven solutions
 TL;DR:
Odin Root is a free utility designed exclusively for rooting Samsung Android smartphones and tablets by flashing a device-specific CF Auto Root package.
● The software lacks a built-in data backup feature and requires the device to have at least a 60% battery charge, installed Samsung USB drivers, and enabled USB Debugging.
● Users must download the exact CF Auto Root package matching their phone's build number and boot the device into Download mode by simultaneously pressing the Home, Power, and Volume down buttons.
● The root is executed through Odin3.exe by confirming a blue ID:COM connection status, loading the extracted .tar.md5 file via the PDA button, and clicking Start until a Pass notification displays.
Ask AI for a summary
 ChatGPT
 Perplexity
 Gemini
 Claude
 Grok
Grok
Dr.Fone Basic:
Better Control for Your Phone
Manage, transfer, back up, restore, and mirror your device
We all know the numerous benefits of rooting our Android device. It enables any user to unleash the true potential of their device by giving them a wide range of options. One can truly customize their Android device using any reliable rooting software like Odin Root. Though rooting might tamper the warranty of your device, but it also comes with plenty of other advantages.
Before you root your device, make sure that you have taken its backup and are well-equipped. It is a crucial task and you need to make sure that you use a reliable tool to root your device. Here, in this comprehensive post, we will provide an in-depth walkthrough on how one can use Odin root and its best alternative.
Part 1: What is Odin Root?
It is one of the most widely used and recommended applications that is used to root Samsung Android devices. The application majorly functions for Samsung smartphones and tablets and can be used to install custom ROMs as well. One can download the latest version of Odin Root from its official website and undertake a series of stepwise instructions to root most of the Samsung Android devices.
Pros:
• High success rate
• Can install custom ROM
• Custom Kernel
• Provides easy root facility
• Free of cost
Cons:
• Doesn’t provide an in-built data backup method
• It is compatible only with Samsung Android devices
• The interface is not extremely user-friendly
• One needs to download different Auto Root package file for every Samsung device
Part 2: How to use Odin Root to Root Your Android Phone
If you think using Odin Root is quite complicated, then don’t worry. We are here to assist you. To help you root your Samsung Android device using Odin Root, we have come up with this comprehensive guide. Nevertheless, before you proceed with the overall process, keep the following prerequisites in mind.
1. Since Odin Root doesn’t take the backup of your data automatically, it's better to backup everything on your phone before rooting the device.
2. Your device should be at least 60% charged.
3. If the USB driver is not installed, make sure that you have downloaded the USB driver of your respective Samsung device. Additionally, install Odin Root application from its official website.
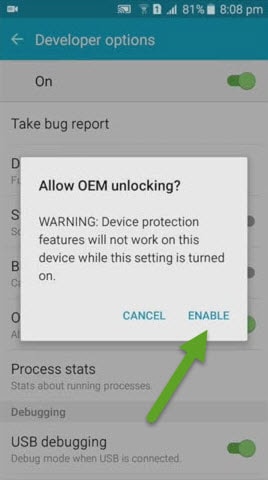
4. Also, you need to enable the USB Debugging option on your device. All you need to do is visit “Settings” and tap the “Developer Options”. In a few new Samsung Devices, you might need to go to Settings > About Phone > Build Number and tap it several times (5-7) to enable the Developer options.
After meeting all the above-mentioned prerequisites, simply follow these easy steps to root your Samsung device.
Step 1. In order to proceed, you need to download the CF Auto Root package of your Samsung Device. To get to know the exact build number of your device, visit the “About Phone” section under “Settings”.
Step 2. After downloading the package, extract it and save it on a particular location.
Step 3. Turn your device off and enable the Download mode. This can be done by simultaneously pressing the Home, Power, and Volume down button in most of the Samsung devices. After turning the Download mode on, connect it to your system using a USB cable.

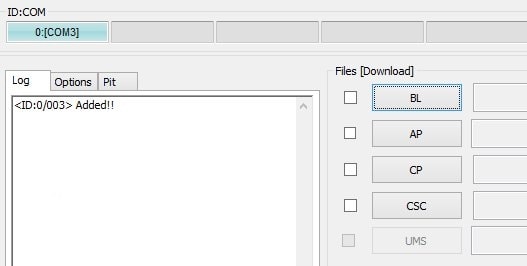
Step 4. Now, go to the location where the CF Auto Root (.rar) file has been extracted and select the Odin3.exe file. Since you have installed the USB drivers on your computer, you would be able to see an “Added” message on the subsequent window. Additionally, the ID:COM option will be turned blue.
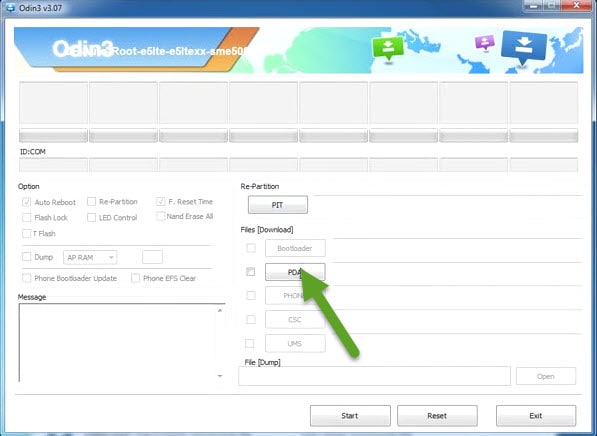
Step 5. Go to the PDA button in the window and select .tar.md5 file from the location where the Auto Root package is stored.
Step 6. After adding the package, simply click on the “Start” option for the rooting operation to commence.

Step 7. Once the process is completed, you would be able to see a “Pass” notification on the window.

Step 8. After getting the above notification, you can simply disconnect your device and start it again. Congratulations! You have successfully rooted your device now.
Dr.Fone Basic:
Better Control for Your Phone
Manage, transfer, back up, restore, and mirror your device


Android Root
- Generic Android Root
- 1. Text Message Apps for Android
- 2. Root Android ONE Devices
- 3. Best Android Root File Managers
- 4. Get Root Access with Computer
- 5. Delete Preinstalled Apps on Android
- 6. Get Free In-APP Purchase
- 7. Wifi Hotspot Apps without Rooting
- 8. Get Root Access on Android
- 9.Root Android Devices
- 10.Root Android Phones and Tablets
- 11.Root Smartphone on Android
- 12.Why Root Android and How to Root it
- 13.Root Android 4 Series in Two Ways
- 14.Tools to Root Android Online
- 15.Root Android without PC
- Specific Android Root
- 1. Root Samsung Galaxy S7& S7 Edge
- 2. Root LG Devices with Root Script
- 3. Samsung Root Software to Root
- 4. Root Motorola Devices
- 5. 2 Solutions to Root ZTE Devices
- 6. Solution to Root Huawei P9 Safely
- 7. 2 Methods to Root Nexus 7 Easily
- 8. Solutions to Root Sony Devices
- 9. Root Any HTC Device in One Click
- Android Root Tools
- ● Manage/transfer/recover data
- ● Unlock screen/activate/FRP lock
- ● Fix most iOS and Android issues
- Free Download Free Download Free Download


James Davis
staff Editor