Top Full Guide: How To Transfer Files From Samsung to MacBook

Jul 12, 2024 • Filed to: Data Transfer Solutions • Proven solutions
Due to smartphones’ limited storage, transferring files from mobile devices to computers is common. However, transferring files from mobile to MacBook is not as seamless as to Windows. MacBook devices don’t make it easy for data transfer through a USB cable without a supporting app like Android File Transfer.
Now, if you have a Samsung mobile and are wondering how you can quickly and easily transfer your files to a MacBook - wireless or not - you’ve come to the right place. This article will reveal the four best ways to transfer files from Samsung to MacBook.
Part 1: How To Transfer Samsung Photos to MacBook With Android File Transfer
Android File Transfer comes in handy when figuring out how to transfer Samsung photos to MacBook. It’s the official Google app for sharing data from Android devices to Mac. The app is required because Mac does not support data transfer via USB cable like Windows.
How it Works: Android File Transfer requires a USB cable to work.
Step-by-Step Guide
The following are the steps for Samsung to Mac photo transfer process using Android File Transfer:
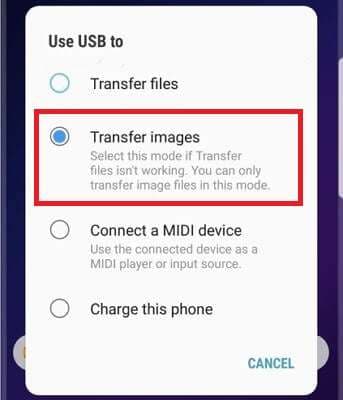
Step 1: After installing Android File Transfer app on your Mac, launch the program and connect your Samsung device to your Mac using a USB cable. Once you see the pop-up notification that says Charging via USB, tap it, then choose Transfer images from the options presented.
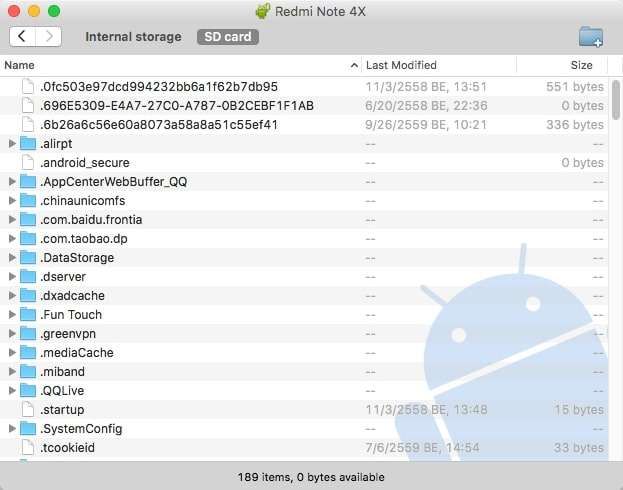
Step 2: You will see a window on your Mac with all your Samsung files. Select the photos you want to transfer, then drag and drop them to your Mac. Repeat this process until all your desired photos have been transferred.
Pros
Check out Android File Transfer’s advantages below:
- Because it’s the official Google app, it’s lightweight and free to use for data transfer.
- This app works with all Android devices and offers secure data transfer.
Cons
Below are the Android File Transfer app’s limitations:
- Since data cannot be copied or pasted, it must be transferred manually.
- The app’s interface needs to be updated and can be challenging for new users.
Part 2: How To Transfer Samsung Files to MacBook via Smart Switch
You can also use Samsung’s official data transfer app, Smart Switch, to transfer files from Samsung to MacBook. It copies the data on your Samsung device to your Mac as a backup. Smart Switch requires MacOS X, 10.9, or later versions to function.
How it Works: Smart Switch requires a USB cable to work.
Step-by-Step Guide
The steps for using Smart Switch as a Samsung to MacBook transfer method are as follows:
Note: Make sure Smart Switch supports the file types on Mac before you begin transferring data.
Step 1: To start, turn off or temporarily disable your PC’s firewall, anti-virus, anti-spyware, anti-malware, and other security tools so that all of your files can transfer.
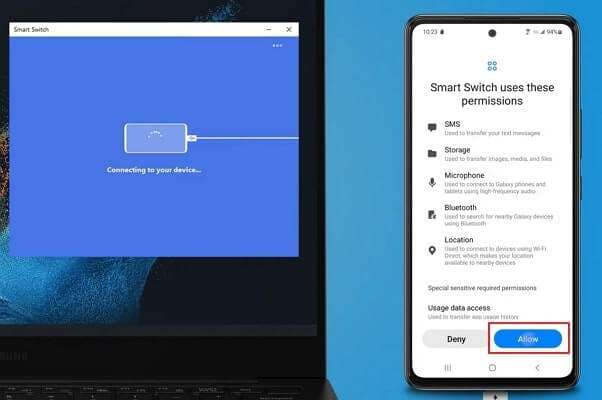
Step 2: Launch Smart Switch on your Mac, then connect your Samsung phone with a USB cable when prompted. Once the permission window appears on your Samsung device, click Allow to continue. The Smart Switch options screen will then appear once it is connected.
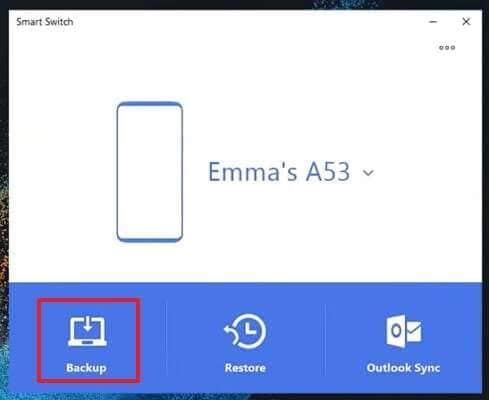
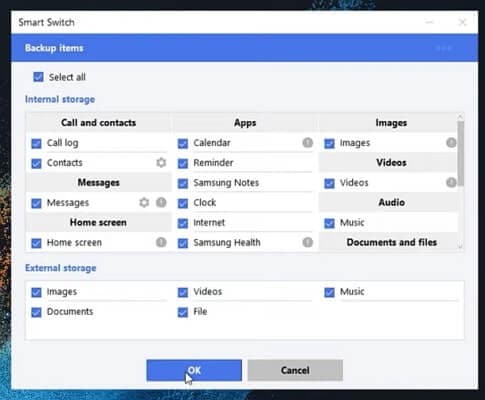
Step 3: Tap Backup on Smart Switch once the program detects the device. It will then display a screen with various data categories that can be backed up.
Step 4: Select the Samsung device data to be transferred to your Mac and press OK to begin the process. The process may take some time to complete depending on the data size.
Note: To complete the backup, you may need to grant permission on your phone.
Pros
Here are some of the benefits of using Smart Switch to transfer files from Samsung to Macbook:
- It’s an official Samsung app that is entirely free to use.
- You can also use this app to back up and restore the data on your Samsung device.
Cons
Listed below are the cons of Smart Switch as a Samsung to MacBook transfer method:
- The app is only compatible with Samsung devices and cannot be used on other Android devices.
- It has very limited data transfer capabilities, such as the inability to transfer data to non-Galaxy devices.
Part 3: How To Transfer Data From Samsung to MacBook Using Bluetooth
Bluetooth is a built-in feature in all Mac and Samsung devices that can be used to transfer various types of files between two devices. Though it’s not recommended if you have large amounts of data to share, it may be your only option if you have no other choices.
How it Works: Bluetooth is a wireless Samsung to MacBook transfer method.
Step-by-Step Guide
The following are the steps needed to transfer Samsung to Mac:
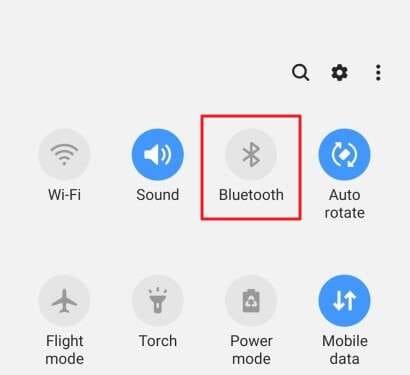
Step 1: Turn on Bluetooth on your MacBook and Samsung device. You can activate Bluetooth on Samsung via the “Quick Access” menu or Connections in the device’s Settings. Bluetooth device visibility should be set for everyone.
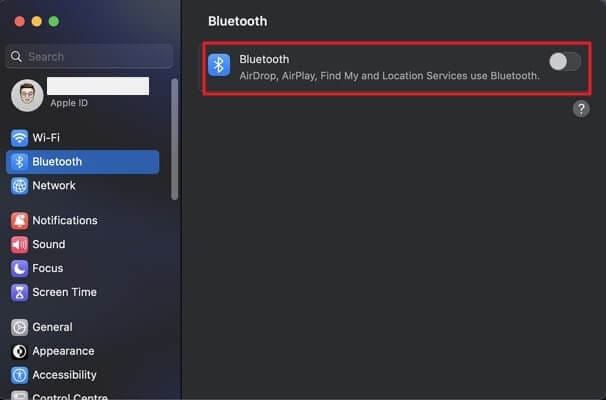
Step 2: Go to your MacBook and open the System Settings menu. Enable Bluetooth by tapping Bluetooth in the left sidebar. When your device appears in the list of available devices, choose and pair it with your MacBook.
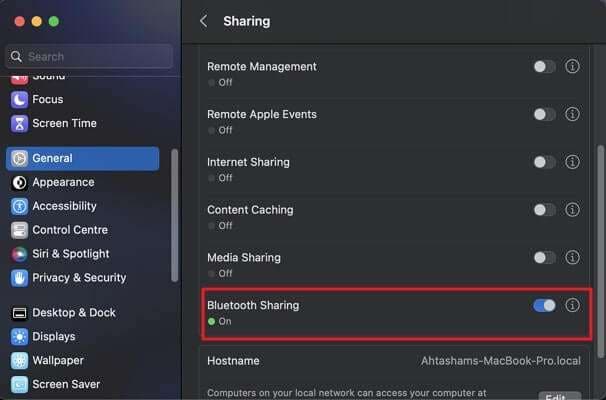
Step 3: From the left sidebar, select General and enable Bluetooth Sharing in the Sharing settings. Select the file you want to transfer on your Samsung device, press Share, then select Bluetooth as the sharing method. Select your MacBook to transfer the file.
Pros
Now that you know how to transfer data from Samsung to Mac using Bluetooth, learn its advantages below:
- It doesn’t require any download or installation of apps on your Samsung device or Mac.
- It’s an easy-to-use wireless method of transferring files.
Cons
Below are the limitations that come with Bluetooth as a Samsung to MacBook transfer method:
- If you need to transfer large files, Bluetooth transfer is very slow and can take a long time.
- Bluetooth transfer requires your Samsung device and your MacBook to be close to each other.
Part 4: The Best Samsung to MacBook File Transfer Tool – Dr.Fone Air
Dr.Fone Air is a straightforward solution for online file management. With Dr.Fone Air, not only can you transfer files between devices, but you can also use it to mirror screens to any web browser. It brings everything – from transferring and sharing files to mobile device screen mirroring – together in one place.
Key Features
Dr.Fone Air prides itself on its highly intuitive user interface, making it easier for everyone to transfer their files with no sweat. Check out more of its key features below:
- Cross-Platform Support
With Dr.Fone Air, you may quickly and easily share content through Wi-Fi between your computer and mobile device.
- Costless and Ads-Free
Very hassle-free and straightforward to operate. There are no advertisements or bundled software. Everything is in the name of smoother information transfer.
- Share Files Without Limitations
The number of file transfers is not limited. You can send multiple files online at the same time using batch processing. Photos, videos, music, apps, and other large files can be easily transferred from phone to computer or computer to phone using a web browser.
How it Works: Dr.Fone Air is a wireless transfer of files from Samsung to Macbook.
Step-by-Step Guide
Follow the steps given below to transfer files from Samsung to MacBook using Dr.Fone Air:
Step 1: Open your computer’s browser and navigate to drfone.io. Then, join the same Wi-Fi network as your phone and Mac.
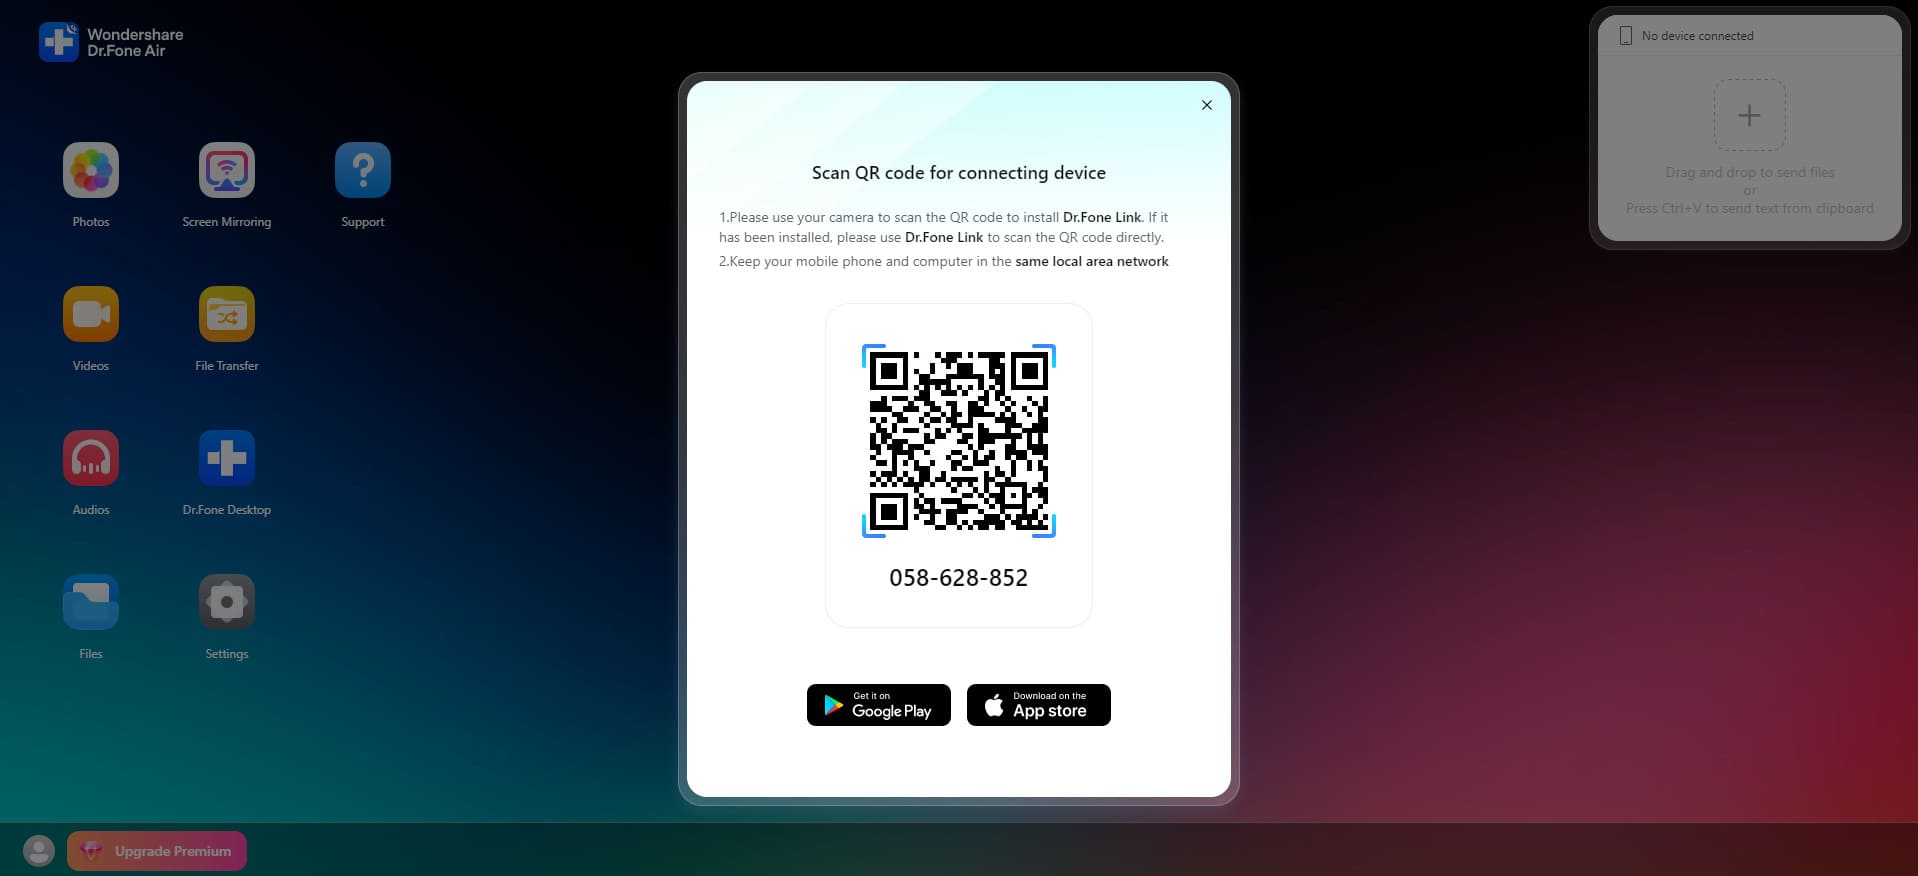
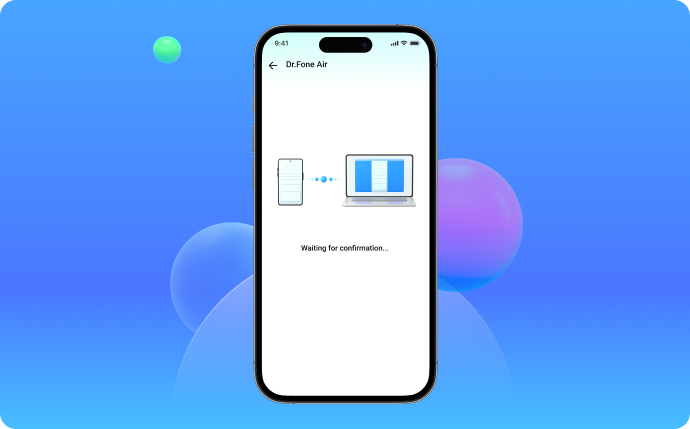
Step 2: To connect your phone and Mac, open Dr.Fone Air on your phone, scan the QR code, or enter the cast code.
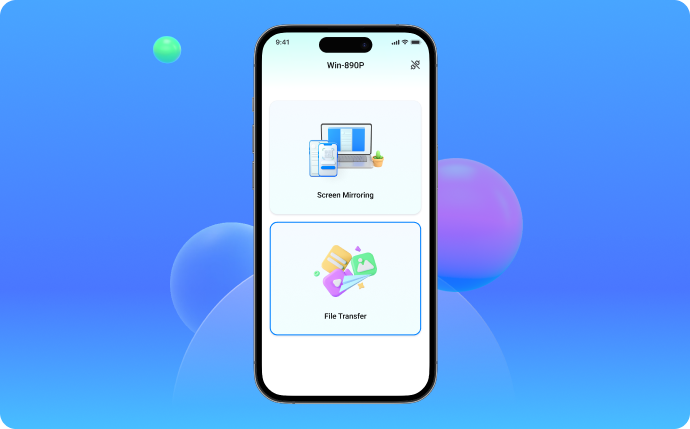
Step 3: Select File Transfer and browse the files on your phone. The files or folders you select will be uploaded to the browser. You can then save, review, and share them on your Macbook.
Pros
Check out below the amazing advantages of using Dr.Fone Air to transfer files from Samsung to Macbook:
- Easy and Reliable File Transfer
Access directly from the web, with complete security. There is no need to register and no software to download.
- Completely Lossless File Transfer
Maintain file quality - Because Dr.Fone Air employs lossless compression, the size and quality of your transferred files will be fully preserved. After being transferred to another device, your videos and photos will be preserved.
- Security and Privacy
All of your stored and transmitted data is encrypted. Dr.Fone does not collect or share your private information without your consent.
Cons
Below is a limitation of Dr.Fone Air:
- The cost of the entire toolkit can be reconsidered.
Conclusion
After comparing the top four ways to transfer files from Samsung to MacBook above, you may choose the one that best suits your needs and preferences. You may use Android File Transfer or Smart Switch to do the work if you prefer to transfer your files using a USB cable.
Bluetooth, on the other hand, is a wireless Samsung to MacBook transfer method, although it’s a pretty slow process that takes a lot of time to transfer larger files. So, if you want the easiest and quickest way to share your Samsung files to your Macbook, Dr.Fone Air is the best option among the abovementioned methods.
Dr.Fone Air is known to transfer data faster, is compatible with more devices, and is undoubtedly easy to set up. It’s a simple, reliable, and 100% lossless file transfer tool where you can share your files without restrictions.


Samsung Manage
- Samsung Data Manage
- 1. Best Samsung Manager
- 2. Manage Contacts on S9/S8
- 3. Manage Music on Samsung
- 4. Manage Music on Samsung S8
- 5. Transfer Photos to Samsung S8
- 6. Manage Photos on Samsung S9
- 7. Best Galaxy S9 Manager
- 8. Samsung Gear Manager
- 9. Samsung Task Manager
- 10. Remove Samsung Bloatware
- Samsung Erase
- 1. Tips for Selling Old Samsung
- 2. Wipe A Samsung Phone
- 3. Tips to Erase Data
- 4. Remove Samsung Apps
- 5. Uninstall Apps on Samsung
- Samsung Mirror
- 1. Share the Phone Screen
- 2. Screen mirror to Samsung TV
- 3. Use Allshare Cast To Mirror
- 4. Samsung Mirror Screen to PC
- Samsung Record
- 1. Screen Record on Samsung A50
- 2. Screen Record on Samsung S10
- 3. Screen Record on Samsung s9
- 4. Samsung S8 Screen Record
- 5. Top Samsung Screen Recorder
- Samsung Root
- 1. Root Samsung Galaxy S7
- 2. Jailbreak Samsung Phones
- 3. Root Samsung Galaxy S3
- 4. Root Samsung Galaxy S4
- 5. Root Samsung Galaxy S5
- 6. Root Samsung Galaxy J5
- 7. Samsung Root Apps Without PC
- 8. Top 6 Samsung Root Software
- 9. Used Apps to Root Samsung Note
- 10. Root Samsung Galaxy S3 mini
- 11. Root Galaxy Tab 2 7.0
- 12. Unroot Android Devices
- Samsung to Mac
- 1. Transfer Photos to Mac
- 2. Samsung File Transfer for Mac
- 3. Transfer Photos from Samsung
- 4. Transfer Pictures to Mac
- 5. Transfer Pictures from Samsung
- 6. Transfer Files to Macbook
- Samsung to PC
- 1. Transfer Contact from Samsung
- 2. Transfer Photos to PC
- 3. Transfer Photos to Laptop
- 4. Transfer Photos from Samsung
- 5. Transfer Files to PC
- 6. Transfer Photos From Note 8 to PC
- USB Debugging
- Samsung Tips
- ● Manage/transfer/recover data
- ● Unlock screen/activate/FRP lock
- ● Fix most iOS and Android issues
- Manage Now Manage Now Manage Now
James Davis
staff Editor