100% Security Verified | No Subscription Required | No Malware
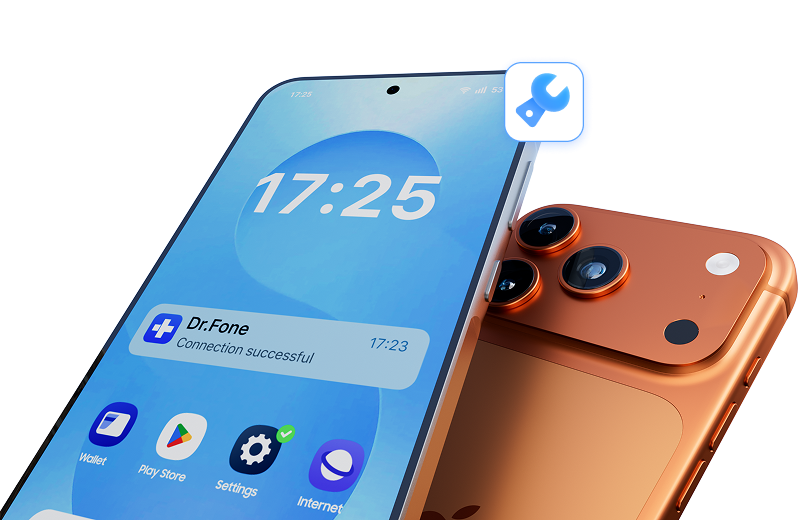

 :
: 
 ChatGPT
 Perplexity
 Gemini
 Claude
 Grok
Grok
When your Android phone won’t turn on, it can feel like a major setback. You press the power button, but nothing happens—just a black, unresponsive screen. This is a surprisingly common problem that many Android users encounter, often after a software update or seemingly out of nowhere.
Don't panic just yet. The cause can range from a completely drained battery to a more complex software conflict or hardware issue. In this comprehensive guide, we'll explore 7 effective solutions to diagnose and resolve the problem. We’ll cover everything from basic troubleshooting steps to advanced system repairs, providing clear instructions to get your device working again.
Let's dive into these tried-and-tested methods and bring your Android phone back to life.
In this article
- Part 1. Common Reasons Your Android Phone Won’t Turn On
- Part 2. 7 Effective Ways to Fix an Android Phone That Won't Turn On
- Method 1: Check the Battery and Charging Equipment
- Method 2: Reboot Your Device into Safe Mode
- Method 3: Wipe the Cache Partition in Recovery Mode
- Method 4: Perform a Factory Reset on Your Android Device
- Method 5: Flash a Custom ROM as an Advanced Solution
- Method 6: Contact the Manufacturer for Hardware Support
- Method 7: The Ultimate Fix for When Your Android Won't Turn On
- Part 3. How to Recover Lost Data From an Unresponsive Android Device
Part 1. Common Reasons Your Android Phone Won’t Turn On
Before jumping into solutions, understanding the root cause can help you choose the right fix. If you're asking, "Why is my Android not turning on?" the answer likely falls into one of these three categories.
1-1. Battery and Power-Related Issues
Power problems are the most frequent culprits when an Android phone cannot turn on. A dead device often points to a simple lack of charge.
- Completely Drained Battery: If the battery is fully depleted, the phone won't have enough power to even display the charging indicator. It may need to be connected to a power source for several minutes before showing any signs of life.
- Defective Battery: An old or damaged battery may lose its ability to hold a charge. If your phone has a removable battery, check for signs of swelling or leakage.
- Faulty Charging Accessories: A broken charger, a frayed USB cable, or a dirty charging port can prevent your phone from charging, leading to a situation where your Android phone is charging but not turning on.
1-2. Software and System Problems
If the battery and charger are working correctly, the issue might be with the device's software. These problems can render the phone unresponsive.
- Corrupted System Files: Critical operating system files can become corrupted due to a malicious app or an interrupted process, preventing the phone from booting up correctly.
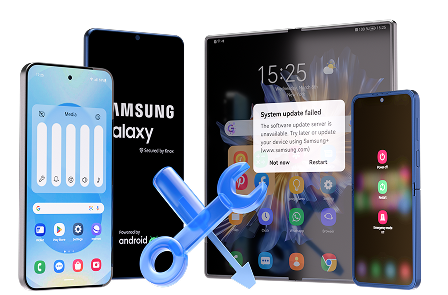
- Botched Software Updates: An incomplete or failed Android update can leave the system in an unstable state, resulting in an Android phone black screen that won’t turn on.
- Incompatible Third-Party Apps: A recently installed app might conflict with the system software, causing crashes that prevent the phone from starting.
1-3. Hardware Failures
If software troubleshooting doesn't work, a hardware component might be at fault. This is often the case after a physical impact or exposure to liquids.
- Damaged Power Button: The physical power button might be broken or stuck, preventing it from registering your press.
- Water Damage: Even minor exposure to moisture can short-circuit internal components, causing the phone to fail.
- Motherboard Failure: A critical failure of the main logic board is a serious issue that typically requires professional repair.
Part 2. 7 Effective Ways to Fix an Android Phone That Won't Turn On
Now that you know the potential causes, let's explore the solutions. Start with the simplest methods and work your way up to the more advanced ones.
Method 1: Check the Battery and Charging Equipment
Before trying anything else, rule out power issues. If your Android phone won't turn on after an update, it could be a coincidence, and the real problem might be a dead battery.
Step 1 Charge Your Phone
Connect your phone to a wall charger using a cable and adapter you know are working. Leave it to charge for at least 30 minutes. If the battery was completely drained, it might take a while to show a charging icon.
Step 2 Perform a Force Restart
While the phone is still connected to the charger, press and hold the Power button and the Volume Down button simultaneously for 10-20 seconds. This action simulates a battery pull on devices with non-removable batteries and can often force a reboot.
Step 3 Test with Different Accessories
If there's still no response, try a different charging cable, power adapter, and wall outlet to ensure your charging equipment isn't the problem.
Method 2: Reboot Your Device into Safe Mode
Safe Mode starts your Android with only the essential system apps, disabling all third-party applications. If a faulty app is causing the problem, your phone should be able to boot in this mode.
Step 1 Press and hold the power button until the manufacturer's logo appears, then release it.

Step 2 As soon as the logo appears, press and hold the Volume Down button until the device finishes booting.

Step 3 You should see “Safe Mode” displayed in the bottom-left corner of the screen. If the phone starts successfully, a third-party app is likely the culprit.
Step 4 From Safe Mode, you can uninstall recently installed apps that you suspect are causing the issue. After uninstalling, restart your phone normally to see if the problem is resolved.

Method 3: Wipe the Cache Partition in Recovery Mode
The system cache stores temporary files to help apps load faster. If this data becomes corrupted, it can prevent your phone from booting. Wiping the cache partition is a safe procedure that doesn't delete your personal data.
Step 1 Power off your device. Then, press and hold a specific key combination to enter Recovery Mode. This is usually Power + Volume Up or Power + Volume Down. The combination varies by manufacturer.
Step 2 Once in Recovery Mode, use the Volume buttons to navigate the menu and highlight the “Wipe Cache Partition” option.

Step 3 Press the Power button to select it. You may be asked to confirm your choice. Use the Volume buttons to select “Yes” and press the Power button again.

Step 4 After the process completes, select “Reboot System Now” to restart your phone.
Method 4: Perform a Factory Reset on Your Android Device
A factory reset is a more drastic measure that will erase all data on your device, returning it to its original out-of-the-box state. Only use this method if you have backed up your data or if you have no other choice.

Step 1 Enter Recovery Mode using the same steps described in the previous method.
Step 2 Use the Volume buttons to navigate to “Wipe Data/Factory Reset” and select it with the Power button.

Step 3 Confirm your selection by choosing “Yes” or “Factory data reset.” The process will begin.
Step 4 Once finished, select “Reboot System Now.” Your phone will restart as if it were brand new.
Method 5: Flash a Custom ROM as an Advanced Solution
For tech-savvy users, flashing a new ROM (a modified version of the Android OS) can fix deep-seated software issues. This is a complex process that can permanently damage your device if done incorrectly.
Step 1 Research and download a stable ROM file specifically designed for your Android model from a trusted source like the XDA Forums.
Step 2 Transfer the downloaded ZIP file to an SD card and insert it into your phone.
Step 3 Boot your device into Recovery Mode as explained earlier.
Step 4 Select the option “Install ZIP from SD Card” or a similar command depending on your recovery environment.

Step 5 Navigate to the ROM file on your SD card, select it, and confirm the installation. After it's done, choose “Reboot System Now.”
Method 6: Contact the Manufacturer for Hardware Support
If your Android phone won't turn on and none of the software fixes have worked, it's time to consider a hardware problem. If your device is still under warranty, contact the manufacturer or your carrier for support. They can diagnose the issue and may offer a repair or replacement, especially if the problem is a known defect.
Method 7: The Ultimate Fix for When Your Android Won't Turn On
When you've exhausted all other options and your Android phone is charging but not turning on, the problem likely lies within the core operating system. In this situation, a professional repair tool is your best bet. Dr.Fone - System Repair (Android) is designed to fix a wide range of system issues without requiring any technical expertise.
This powerful software can resolve problems like the black screen of death, boot loops, and system crashes with a high success rate. It automatically downloads the correct firmware for your device and guides you through a simple, click-through repair process.
 Fix Android instantly – no skills needed.
- Solve boot loop, black screen, won’t turn on, etc.
- High success rate for all system issues.
- User-friendly interface with easy-to-follow steps.
Steps to Fix an Unresponsive Android Phone via Dr.Fone
Here’s how to use Dr.Fone to repair your device:
Step 1 Download and launch Dr.Fone on your computer. Select “System Repair” from the main toolbox.

Step 2 Connect your Android phone and choose “Android” as the device type.

Step 3 Select the specific issue you are facing, such as “Black Screen,” and click “Start.”

Step 4 Enter your device’s brand, name, and model information accurately and click “Next.”

Step 5 Follow the clear on-screen instructions to put your device into “Download Mode.”

Step 6 Dr.Fone will then begin downloading the appropriate firmware for your specific model.

Step 7 After the download is complete, click “Fix Now” to start the repair process.

Step 8 Confirm the action by entering “000000” when prompted.

Step 9 The software will now repair your Android system. Keep your phone connected throughout the process.

Step 10 Once you see the confirmation screen, click “Done.” Your phone should restart and function normally.


Keep in mind that this repair process will wipe your device data. If you need to recover your files, continue to the next section.
Part 3. How to Recover Lost Data From an Unresponsive Android Device
If you fixed your phone using a method that erased your data, such as a factory reset or system repair, you might be worried about your lost files. Fortunately, Dr.Fone - Data Recovery (Android) can help.
This tool is specifically designed to retrieve data from Android devices, even if they are broken or unresponsive. It can scan your phone's internal storage and recover photos, contacts, messages, and more. It's an essential tool for rescuing your valuable information from a seemingly dead phone.
- Scan Android phones and tablets directly.
- Preview and recover only what you want.
- Supports WhatsApp, photos, videos, contacts, and more.
- Works with 6000+ Android devices.
Steps to Recover Data Using Dr.Fone - Data Recovery (Android)
Follow these simple steps to retrieve your important data:
Step 1 Open Dr.Fone on your PC and click on “Data Recovery” from the toolbox.
Step 2 Select “Android” as the device platform.
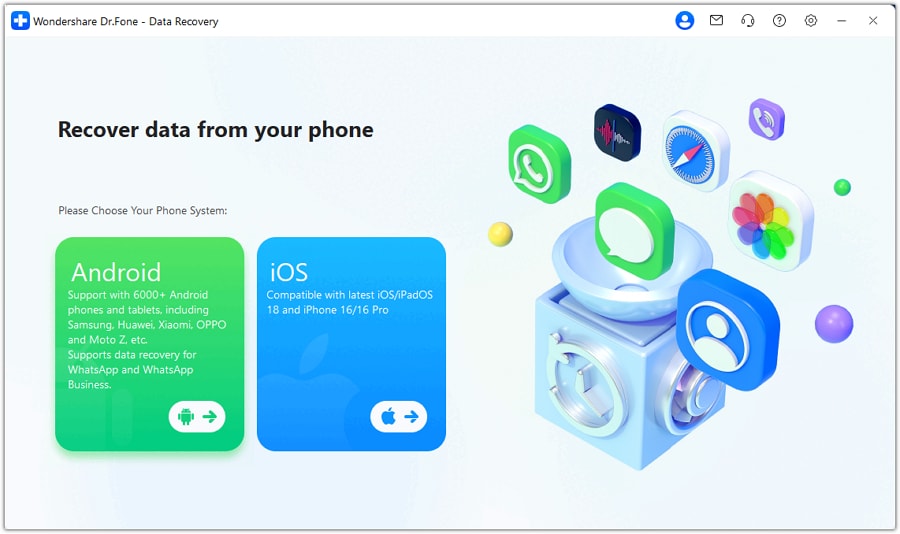
Step 3 Choose “Recover From Broken Phone” from the options on the left.

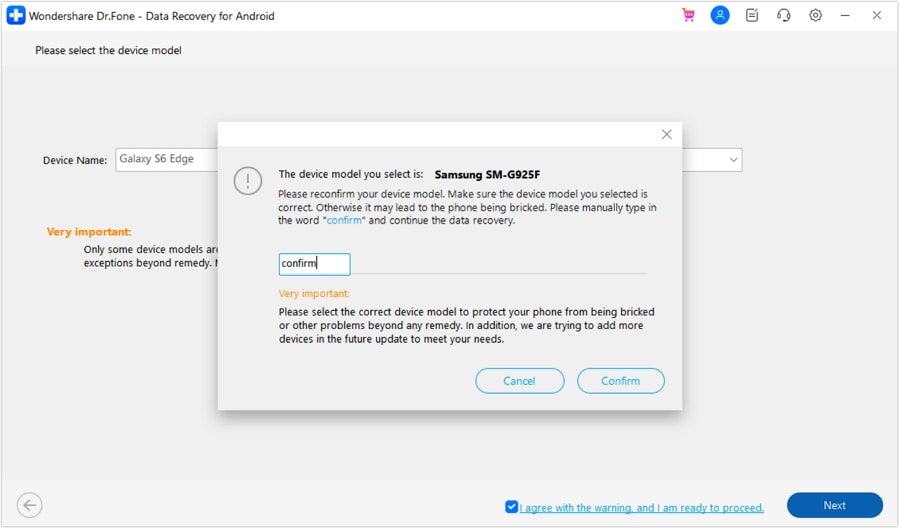
Step 4 Select the type of fault your device has, such as “Black/Broken Screen.” Then, provide your device's name and model accurately.
Step 5 You will be prompted to confirm your action. Type “Confirm” and click the “Confirm” button to proceed.
Step 6 Follow the on-screen guide to enter Recovery Mode on your Android device.

Step 7 Dr.Fone will begin analyzing your phone and display all recoverable data types.
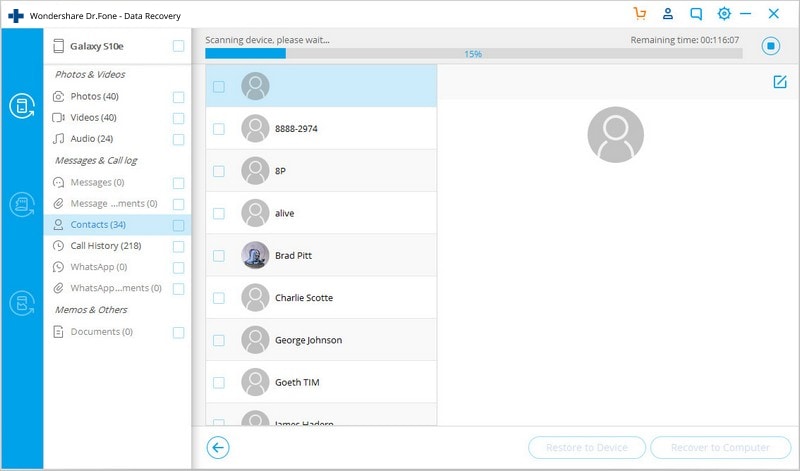
Step 8 Preview the files, select the items you wish to recover, and click “Recover to Computer” to save them to your PC.

With these steps, you can safely rescue your important files before or after fixing your phone, providing complete peace of mind.
Conclusion
Facing a situation where your Android phone won’t turn on is stressful, but it's often fixable. By systematically working through the solutions in this guide, from checking your charger to performing a system repair, you have a strong chance of reviving your device.
We've covered everything from basic troubleshooting to advanced techniques like flashing a ROM. For a reliable and user-friendly solution that handles complex system errors, we highly recommend Dr.Fone - System Repair (Android). And if data loss is a concern, Dr.Fone - Data Recovery (Android) provides a safety net to retrieve your precious files. With these tools, you can confidently tackle nearly any Android system issue.
FAQ
1. How can I tell if the problem is the battery or the software?
Start by plugging your phone into a known working charger for at least 30 minutes. If you see a charging icon, the battery is likely okay, and the issue is probably software-related. If there's no response at all, even after trying a different cable and adapter, a faulty battery or charging port is a strong possibility.2. Will performing a factory reset delete all my data?
Yes, a factory reset will erase everything on your phone's internal storage, including photos, contacts, apps, and settings. It returns the device to its original state. Only proceed with this step if you have a backup or are prepared to lose your data.3. Is there a way to fix my phone without losing my data?
Yes. The first steps, like a force restart, booting into Safe Mode, and wiping the cache partition, will not delete your personal data. For more severe issues, using a tool like Dr.Fone - System Repair offers a standard repair mode that can fix many system problems without data loss. However, its advanced mode, like a factory reset, will erase data.4. What is the difference between Safe Mode and Recovery Mode?
Safe Mode is a diagnostic startup mode that loads only the essential operating system, disabling third-party apps. It's used to determine if an app is causing instability. Recovery Mode is a separate, more powerful environment that allows you to perform system-level tasks like wiping the cache, applying updates, or performing a factory reset.
 Add Wondershare Dr.Fone as a preferred source on Google