How to Fix a Bricked Android Phone: 5 Proven Methods (2026)

Jun 30, 2026 • Filed to: Phone Repair Solutions • Proven solutions
 TL;DR:
A soft-bricked Android phone stuck in a boot loop or frozen on the logo can typically be fixed by wiping the cache partition, performing a factory reset via recovery mode, or flashing a new ROM.
● Before executing a data-erasing factory reset, extract your files using Wondershare Dr.Fone - Data Recovery (Android), a tool noted to be particularly effective for repairing Samsung Galaxy devices.
● These DIY software methods only resolve "soft bricks"; if your phone is a completely dead and unresponsive "hard brick," you are dealing with a hardware failure that requires professional repair.
● To fix a corrupted system by flashing a custom ROM, you must save the required ROM in a ZIP format onto an inserted SD card and trigger the installation directly from the device's recovery menu.
Ask AI for a summary
 ChatGPT
 Perplexity
 Gemini
 Claude
 Grok
Grok
If your Android device becomes unresponsive or frozen after a botched ROM flash or rooting attempt, it's likely been 'bricked', a dreaded scenario that not only renders the device unusable but also puts your valuable data at risk of erasure. But what exactly does it mean for an Android phone to be 'bricked', and more importantly, is there a way to fix it? Understanding the causes and solutions for a bricked Android phone can help you recover your device and rescue your precious data.
This article will explain what a bricked Android phone is, the common causes, and several methods to fix a bricked Android device. We will also introduce an essential android unbrick tool to help you recover data before you start.
Key Takeaways:
- A 'bricked' Android phone is unresponsive, often due to software errors during updates or rooting.
- Common fixes include rebooting in Safe Mode, wiping the cache partition, or performing a factory reset.
- For severe cases, flashing a new ROM might be necessary.
- Before attempting risky fixes, use a tool like Dr.Fone to recover your data from the bricked device.
Part 1. What Causes an Android Phone to Get Bricked?
A bricked Android phone becomes unresponsive primarily due to software corruption. This often happens during critical processes like flashing an incompatible custom ROM, a failed rooting attempt, an interrupted firmware update, or malware infection. Understanding these triggers is the first step toward diagnosing and fixing the issue.
Here are some common reasons why your Android device is bricked:
- Flashing an Incorrect ROM: Installing an incompatible stock or custom ROM, or experiencing an interruption (like the phone shutting off) during the flashing process, can corrupt the system and cause it to get stuck in a boot loop.
- Rooting an Android device: You are unable to effectively root the device.
- Android firmware is being updated: If the phone is interrupted when updating the Android firmware, it will be bricked.
- Installing harmful applications: You installed harmful programs on your Android phone, or the phone was infected with a virus.
Part 2. How Can You Fix a Bricked Android Phone?
The first step is to establish how badly your device is bricked. In most cases, you will be working with soft bricks that are pretty simple to repair. If your phone is stuck in a boot loop or enters recovery mode every time you turn it on, you may have a soft brick.
Reviving a bricked Android phone or tablet requires a thorough assessment of the device's condition, followed by identifying the type of bricking that has occurred, whether it's a soft brick, hard brick, or bootloop. While there isn't a one-size-fits-all software solution to unbrick an Android device, understanding the intricacies of the issue can help you troubleshoot and potentially resolve the problem on your own.
Answer: To fix a bricked Android phone, start with the simplest solutions. You can try rebooting into Safe Mode, wiping the cache partition, or performing a factory reset from recovery mode. If these fail, you may need to flash a stock or custom ROM. Before complex steps, always use a tool like Dr.Fone to recover your data.
Here are some simple methods for repairing bricked Android devices:
Method 1. Reboot the Phone in Safe Mode
Trying to reboot your android device in safe mode is the first and easiest thing you should try if your phone is bricked. Here's how to do it:
- Step 1: Turn off your smartphone and press the Volume Up + Power button to enter recovery mode. Then, using the volume controls, navigate the menu and select Reboot system now.
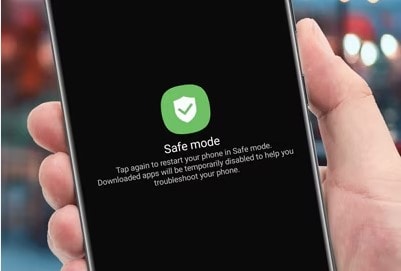
- Step 2: Select the highlighted option by pressing the Power button . After that, wait for your device to reset normally.
- Note: The steps for booting into recovery mode may change based on the manufacturer of your device. For further information, go to the user manual for your phone or tablet.
Method 2. Wipe the Cache Partition
This is the first indication that a user's phone has gone bricked. The phone turned on automatically, however it became stuck or frozen on the logo screen. The issue might be caused by the undeleting of data and cache, which prevents the phone from displaying the home screen.
This issue, however, may be resolved by wiping the data and cache partitions in recovery mode. You must do the following to do this:
- Step 1: Turn off your smartphone and enter recovery mode by pressing the Power and Volume Down buttons simultaneously. Different devices have various approaches for entering recovery mode, so you may perform better.
- Step 2: After entering recovery mode, you should see the screen below. Remember to pick Advanced and then “Wipe Dalvik Cache” if your device is under Clockwork Mod recovery. Return to the main screen and select “Wipe Cache Partition” once more.
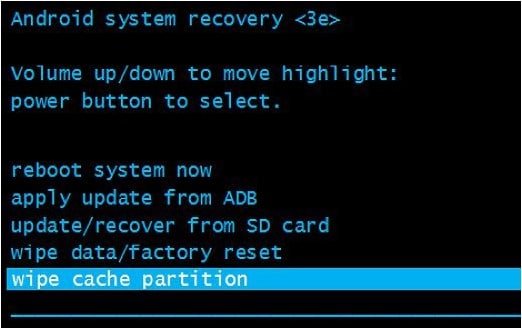
- Step 3: Finally, on your smartphone, choose the Reboot system immediately.
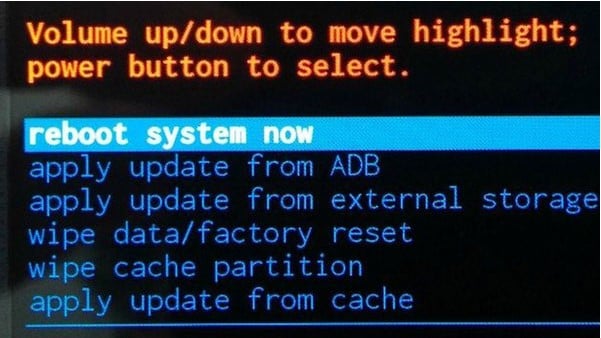
Method 3. Perform a Factory Reset
A factory reset can undo the alterations made to your device that resulted in the brick phone, but you will lose everything you have downloaded and installed in the process. Here's how to restore a bricked Android phone to factory settings:
- Step 1: Boot your device into recovery mode (turn off your device, then press power button + volume up button).
- Step 2: Select “ Wipe Data/“Factory Reset” then confirm the action. When the process is done, you'll be returned to the recovery mode menu.
- Step 3: Select “Reboot System Now” to restart your device.
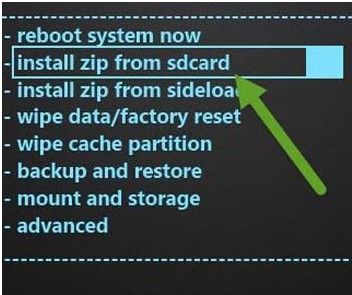
Method 4. Flash a Custom ROM
If you boot your phone directly into recovery mode, there's a problem with the ROM you loaded. Then simply flash the following custom ROM on your phone:
- Step 1: Save the required ROM (in ZIP format) to an SD card. The SD card should then be inserted into your Android device.
- Step 2: Click the “Install zip from sdcard” button. Then, select the ZIP file that contains the ROM. Finally, click the "reboot system now" button.
Method 5. Recover Data from a Bricked Android with an Essential Tool
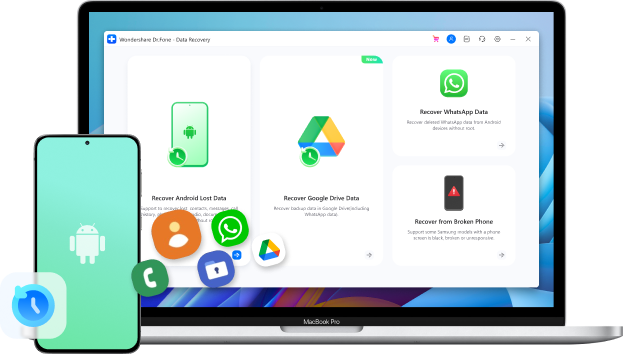
Before attempting fixes like a factory reset that will erase your data, it's crucial to recover your important files. While not a direct android unbrick tool, Wondershare Dr.Fone - Data Recovery (Android) is an indispensable part of the process. It is the world's first data recovery solution for broken Android devices, allowing you to safely extract photos, videos, contacts, and messages from an unresponsive phone.
This ensures your valuable data is secure before you proceed to fix your bricked Android. The tool is especially effective with Samsung Galaxy devices. Here's how to use it:
- Step 1: Launch Wondershare Dr.Fone and select “Data Recovery” > “Android” from the menu. Then, select “ Recover from Broken Phone” .

- Step 2: Choose the file types you wish to recover. Click “Next” and then select the type of damage your phone is experiencing. Select “Touch screen not responsive, or cannot access the phone” or “Black/broken screen”.

- Step 3: Use the recovery wizard to enter your Android smartphone into Download Mode. Connect your Android handset to the computer after following the instructions to begin automatically analyzing your device.

- Step 4: The program will provide a list of all recoverable files, organized by file type. To preview the file, highlight it. Choose the files you wish to recover and then click “Restore to Device” to save all the data you want to restore.

Part 3. How Can You Prevent Your Android Phone From Bricking?
Preventing your Android phone from bricking is far better than trying to fix it. By following some best practices, you can significantly reduce the risk of rendering your device unusable. The key is to be cautious with software modifications and system updates.
Here are some things to remember to prevent your device from bricking:
- Avoiding unofficial firmware updates: Installing unapproved OS firmware on your phone will most certainly violate any manufacturer's warranty you have on it. Read the installation instructions for your unique phone model thoroughly and then carefully follow them, taking time and patience.
- Being cautious when rooting or jail breaking: Rooting and Jail breaking disables parts of the operating system's built-in security mechanisms, which are part of what makes the operating system safe, and your data protected from exposure or damage.
- Install an antivirus application on your device: Mobile devices increase the danger of data leaks and breaches. As a result, antiviral software is beneficial on mobile phones. Mobile Device Management is an excellent choice for virus protection on your mobile device.
- Backup your phone data regularly: Creating a backup of your phone is a crucial step in protecting your valuable data from loss, theft, or device failure. By regularly backing up your device using a solution like Dr.Fone - Phone Backup, you can ensure seamless data transfer to a new phone when it's time to upgrade, making it easy to restore your contacts, photos, and apps.
- Avoid installing apps from untrusted sources: Apps installed from unauthorized sources make your device and personal data more exposed to dangers such as Ransomware. So you should be wary of where you download applications.
Conclusion
Facing a bricked Android device is stressful, but it's often not the end for your phone. By following the methods outlined above—from safe mode reboots to factory resets—you have a strong chance of reviving your device. The most critical step, however, is to secure your data first. Using a reliable tool like Dr.Fone - Data Recovery (Android) allows you to extract data from a bricked device before attempting any fixes that could lead to data loss. This ensures that even if you need to wipe your phone, your precious memories and contacts are safe.
Frequently Asked Questions
1. What is the difference between a soft brick and a hard brick?
A soft brick is a software issue where the device fails to boot correctly but still shows signs of life (e.g., stuck on the logo, boot loops). It's usually fixable. A hard brick is a hardware-level failure where the device is completely unresponsive and often requires professional repair.
2. Can a completely dead bricked phone be fixed?
If a phone is 'hard bricked' (completely dead, no signs of power), it is very difficult to fix at home. This usually indicates a hardware failure. While some advanced techniques exist, it's best to consult a professional technician. Most guides, including this one, focus on fixing 'soft bricks'.
3. Will a factory reset unbrick my phone?
Yes, a factory reset is one of the most effective methods to fix a bricked Android phone, especially for soft bricks caused by software conflicts or bad installations. However, it will erase all your personal data, which is why data recovery with a tool like Dr.Fone beforehand is highly recommended.


Android Recover
- Recover Apps
- 1. Data Recovery Software for Android
- 2. Top 4 Android Data Recovery Tools
- 3. Restore Deleted Files on Android
- 4. Coolmuster Android Data Recovery
- 5. Guide of Disk Drill for Android
- 6. Android Data Recovery Software
- 7. Gihosoft Android Data Recovery
- 8. Jihosoft Android Phone Recovery
- 9. Minitool Android Mobile Recovery
- 10. Recover Android Data from Fucosoft
- 11. Best Mobile Forensics Tools to Recover Data
- 12. PhotoRec Review
- 13. FoneDog Toolkit
- 14. TWRP Recovery
- Contacts Recover
- 1. Recover Contacts from Stolen phone
- 2. Recover Contacts from Android
- 3. Retrieve Contacts Without Backup
- Files Recover
- 1. Recover Files from Internal Memory
- 2. Recover Miscellaneous Files
- 3. Recover Android's Hidden Files
- 4. Recover Deleted Files from Android
- 4. Recover Deleted Files Without Root
- 5. Recover Files from SD Card
- 6. Undelete Files on Android
- Messages Recover
- Music/Videos Recover
- Photos Recover
- 1. DiskDigger Photo Recover Review
- 2. Recover Deleted Photos from Android
- 3. Recover Photo from Internal Storage
- 4. Recover Photos from Lost Phone
- 5. Restore Android Deleted Photos
- Broken Android Recover
- 1. View Files from Broken Phone Screen
- 2. Recover Data from Dead Phone
- 3. Recover Contacts with Broken Screen
- 4. Recover Text Messages from Android
- 5. Recover Data from Internal Memory
- Social Apps Recover
- 1. Recover Facebook Messages
- 2. Recover WhatsApp Messages
- 3. Recover WhatsApp Messages
- 4. Restore Deleted WhatsApp Messages
- Android Recover Tips
- 1. SD Card Recovery Tools
- 2. Fix Recovery Mode Not Working
- 3. Enter Recovery Mode on Android
- 4. Recover Calendar from Android
- 5. Recover Deleted Call Log on Android
- 6. Clear Cache Partition
- 7. Repair a USB Stick
- 8. USB Repair Tools
- Cloud Storage Tips
- ● Manage/transfer/recover data
- ● Unlock screen/activate/FRP lock
- ● Fix most iOS and Android issues
- Free Download Free Download Free Download

Selena Lee
chief Editor