iPhone Flashlight Not Working? Here's How To Fix iPhone Flashlight!

Jul 12, 2024 • Filed to: Mobile Repair Solutions • Proven solutions
Over time the iPhone has become an essential device for millions of people worldwide. With its sleek design and impressive features, the iPhone offers a wide range of functionalities that make our lives easier. One such feature is the built-in flashlight. It can come in handy in various daily life tasks. For example, if you need to find your way in the dark or search for something in a dimly lit room.
However, like any other tech, iPhones are not immune to glitches. Finding your iPhone flashlight not working when you need it the most can be frustrating. There are several potential solutions to this common issue. This article will explore the most effective methods to fix your iPhone flashlight.
Part 1: Why Did My iPhone Flashlight Stop Working
Before we delve into the solutions, it's essential to understand why the iPhone torch is not working. Several factors could contribute to this issue. These range from software glitches to hardware issues. Here are some common reasons why your iPhone flashlight may have ceased to function:
Software Glitch
Like any other software-based feature, temporary glitches can affect your iPhone's flashlight. These flashlight glitches may occur due to various reasons. These reasons include software updates, incompatible apps, or minor system errors.
Control Center Settings
The Control Center on your iPhone provides quick access to many features, including the flashlight. However, it's possible that the flashlight option has been accidentally disabled. Sometimes, it could be hidden within the Control Center settings, preventing you from using it.
Battery Level
If your iPhone's battery is low, the flashlight functionality may be disabled to preserve power. This feature ensures that your device can still perform essential functions. At the same time, it focuses on conserving energy for longer usage.
Physical Damage
Any physical damage to your iPhone, such as a drop or water exposure, can affect its components. It can also include the iPhone flashlight. If there has been damage to the flashlight module or its connection, it may cause the feature to stop working.
Hardware Failure
In some cases, a hardware failure within the iPhone may be the culprit. Pinpointing the hardware issue behind the non-functional flashlight can be hard. This could be due to a faulty flashlight module, a loose connection, or other internal issues.
Part 2: 11 Ways To Fix iPhone Flashlight Not Working
Having your phone flashlight not working can be frustrating, but there's no need to panic. You can often resolve the issue by understanding the potential causes and applying the right solutions. From simple settings adjustments to using a specialized tool, here are 11 methods to fix your iPhone flashlight:
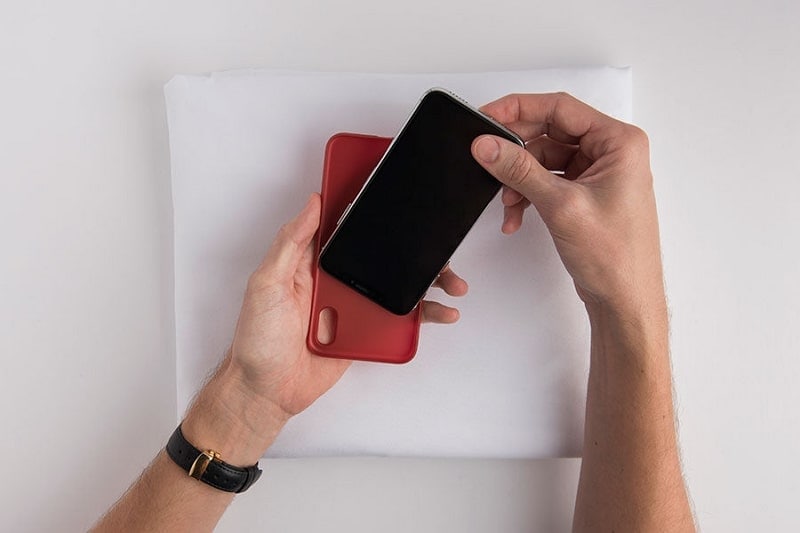
Fix 1. Check Your Case
Sometimes, the issue with your iPhone flashlight not working can be as simple as a case interfering with its functionality. In this case, take off any protective case or cover that you have on your iPhone. Once the case is removed, open the Control Center and try turning on the flashlight again.
Check if the flashlight now works properly without the case. If the flashlight starts working, it's likely that the case was the reason my flashlight is not working.
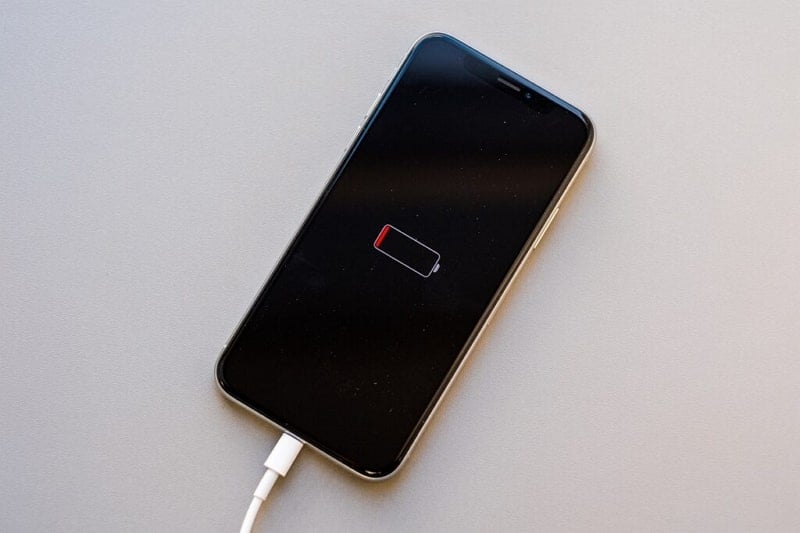
Fix 2. Charge Your iPhone
A low battery level can cause certain features of your iPhone to be temporarily disabled. It happens to conserve power, and the flashlight is one of these features. By charging your iPhone adequately, you give it the necessary power. As a result, the iPhone can operate all functions, including the flashlight.
When charging, leave your iPhone connected to the power source for at least 15-30 minutes. It ensures iPhone has enough time to recharge to resolve the torch not working on iPhone.
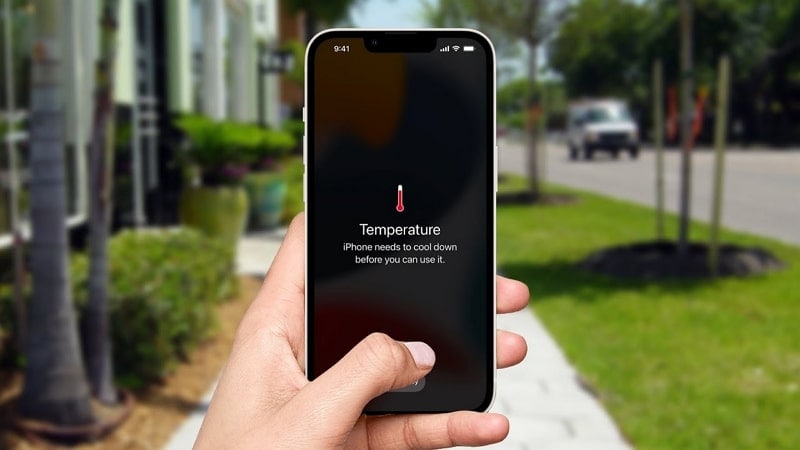
Fix 3. Cool Down Your iPhone
Heat can affect the internal components of your iPhone. It can also impact the flashlight's performance. If your iPhone feels unusually warm, try cooling it down. Ensure that there are no objects covering your iPhone, such as a protective case.
After your iPhone has cooled down, access the Control Center and try turning on the flashlight again. Check if the flashlight is now working and get rid of the flashlight is not working on iPhone 11 issue.
Fix 4. Turn the Flash On and Off
By toggling the flash on and off within the Camera app, you initiate the flashlight module. It allows you to test its functionality in a different context. This method can sometimes trigger any software glitches related to the flashlight. The Camera app allows you to capture photos and videos and also controls flash activation. Here is how to toggle the flash on and off in the camera app:
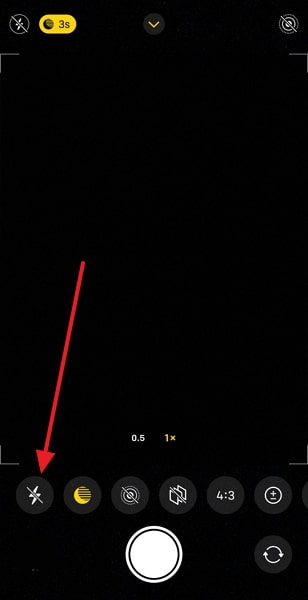
Step 1: Open the Camera app on your iPhone and switch to the rear-mode camera. Following this, press the "^" icon from the top of the screen.
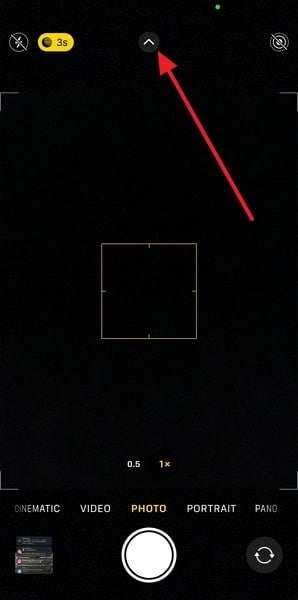
Step 2: It will open a menu above the capture button of the Camera app. Here, tap the "Flash" icon and choose "On." Now take a photo to check the flashlight functionality.
Fix 5. Force Close the Camera App
Force closing the camera app allows you to reset its state and resolve any temporary glitches. It also helps remove conflicts that may have been affecting the flashlight. You can determine if the issue has been resolved by relaunching the app and testing the flash. Use the following steps to force close and relaunch the Camera App:
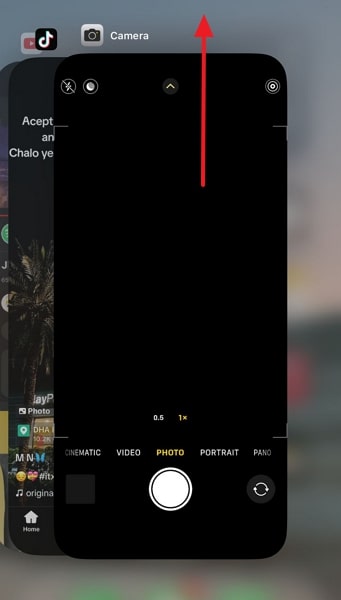
Step 1: Swiple upward on your iPhone to access the app switcher. You can access the app switcher for older iPhone models by double-tapping the "Home" button.
Step 2: In the app switcher, find the Camera app. Now swipe it upward to force close it. Afterward, navigate to the Camera app and relaunch it.
Fix 6. Turn Off Low Power Mode
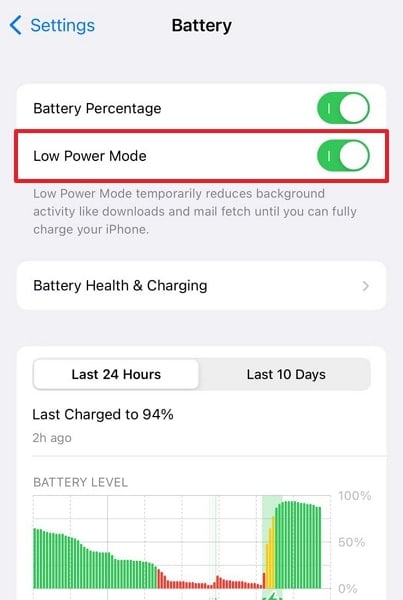
Is the Low Power Mode enabled on your iPhone? If yes, it is likely to cause the flashlight not working on iPhone 12. Low Power Mode is a feature designed to conserve battery life. It reduces system animations, disables background app refresh, and limits performance. However, it can also disable certain features, including the flashlight. Follow these steps to disable Low Power Mode on your iPhone:
Step 1: Open the Settings app on your iPhone, scroll down, and tap the "Battery" option. Here toggle off the "Low Power Mode" to disable it.
Fix 7. Force Close All Apps
Conflicts or glitches between apps in the background can also cause the flashlight not working on iPhone 13. Force closing all apps allows you to clear the background processes. It can also resolve any conflicts that may be impacting the flashlight. By closing all apps and testing the flashlight, you can determine if the issue has been resolved. The step needed to force close all apps are the following:
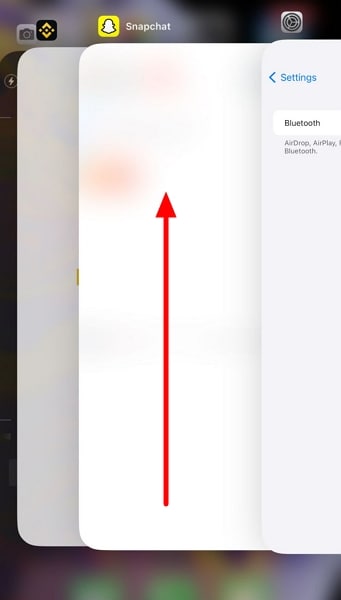
Step 1: To force close all apps, you will first need to access the app switcher. On iPhone models without the "Home" button, swipe upward from the bottom of the screen.
Step 2: For the older iPhone models with the "Home" button, double-tap the "Home" button. Now, swipe each app upward one by one to force close them.
Fix 8. Restart Your iPhone
Restarting your iPhone can help refresh the system. Moreover, it clears temporary software issues that may affect the flashlight. It's a simple and effective method that often resolves various minor problems. Rebooting your iPhone essentially resets and refreshes system processes. You can follow these steps to restart your iPhone:
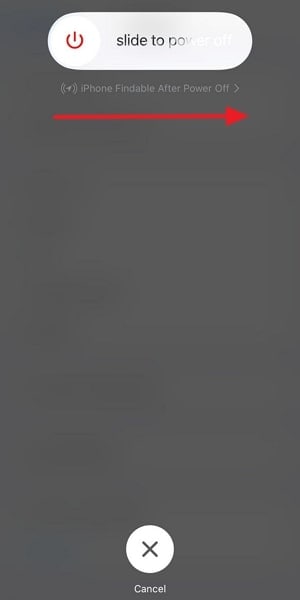
Step 1: Press and hold the "Side" button and any volume for a while. Release the button once you see the power slider.
Step 2: Now, slide it to the right side to turn off your device. After waiting a few moments, use the "Side" button to turn on your iPhone.
Fix 9. Update Your Device's iOS
It is possible that the iPhone 13 flashlight not working is related to outdated software. Apple provides weekly or monthly iOS update releases that include bug fixes and improvements. These updates can address various issues, including problems with the flashlight. Learn how to check and update your iPhone's iOS below:
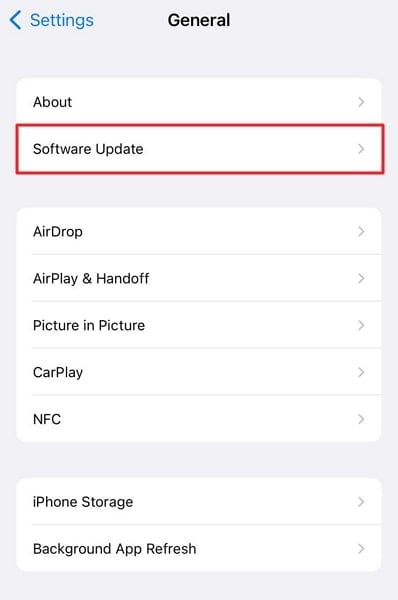
Step 1: Start by accessing the Settings app and moving to the "General" tab. In the "General" settings, press "Software Update."
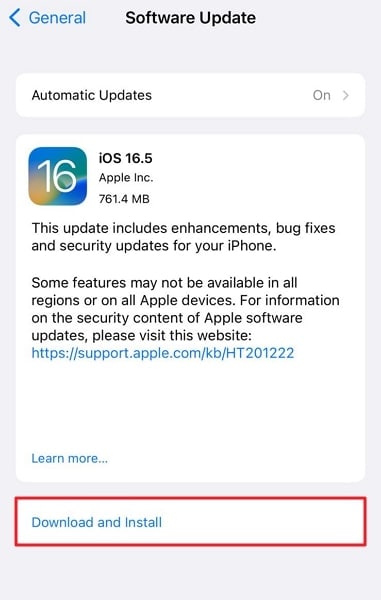
Step 2: You will see the available updates on the following screen. To update to the new iOS, you need to use the "Download and Install" option.
Fix 10. Reset All Settings
Still nowhere near resolving my iPhone flashlight is not working issue? If you've tried the previous fixes and your iPhone flashlight is still not working, resetting all settings on your device can help. It can resolve any underlying software conflicts or settings affecting the flashlight. Moreover, it's important to note that this fix will reset all your personalized settings to their default values. However, it won't affect your iPhone data. The procedure for resetting all your iPhone settings is given below:
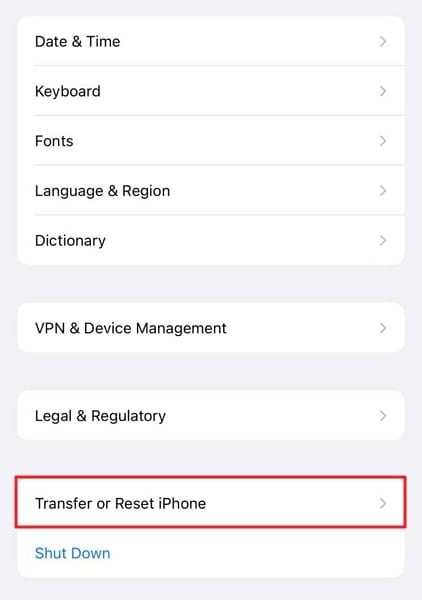
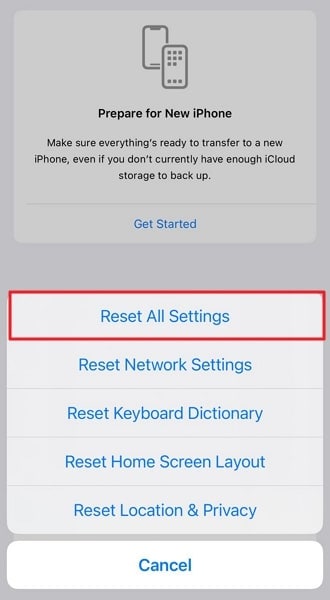
Step 1: To begin, open the Settings app on your iPhone and select "General" from the menu. Scroll down to locate the "Transfer or Reset iPhone" option near the bottom and give it a tap.
Step 2: Look for the "Reset" option on the following screen and choose "Reset All Settings." To proceed with resetting the settings, you will be prompted to confirm by selecting "Reset All Settings" once more.
Fix 11. Use Wondershare Dr.Fone
If you've exhausted all the previous fixes and your flashlight is not working iPhone, you may consider using a reliable third-party tool. The best tool currently available to resolve iOS system issues is Wondershare Dr.Fone. It is a reputable software specializing in iOS system repair. This tool can resolve over 150 iOS system issues with ease and in a secure and safe manner.
This tool offers two modes for iOS system repair, Standard Repair and Advanced Repair. One is able to fix general iOS system issues, while the other can fix even the most complex ones.
Key Features of Wondershare Dr.Fone
- When repairing issues like the flashlight not working on your iPhone, your iPhone data is not affected at all.
- You can easily downgrade your iPhone’s iOS version to your desired version.
- It lets you enjoy developer privileges by letting you update your iPhone to the latest beta versions.
Steps To Resolve Flashlight Not Working Issue via Wondershare Dr.Fone
Wondershare Dr.Fone provides you with a seamless and quick process to repair iOS system issues. Described below are the steps you need to follow to resolve the flashlight won't work on your iPhone:
Step 1: Install Wondershare Dr.Fone and Connect Your iPhone
To repair your iPhone, make sure to install Wondershare Dr.Fone from its official website. Once it is installed on your system, launch it to proceed with the repair process. After that, connect your iPhone to your system using a dedicated USB cable. Furthermore, navigate to the "Toolbox" section to select the "System Repair" option.

Step 2: Choose Standard Repair Settings
After selecting the “System Repair” option, you will be navigated to a new window. Here, select the “iOS” button and continue on the next screen to select the “iOS Repair” option. As you proceed next, choose “Standard Repair” from the available options and follow the instructions to enable your iPhone’s Recovery Mode.

Step 3: Choose the iOS Firmware
Now that your iPhone is in Recovery Mode, the tool will detect the iPhone’s model. Furthermore, according to your device’s model, it will suggest compatible firmware. After that, download the preferred firmware by hitting the “Download” option.

Step 4: Resolve Your Device’s System Issues
Since you've selected your desired firmware, Wondershare Dr.Fone downloads and verifies it. After the verification, access the "Repair Now" option. Once you've selected it, the tool will start repairing your device's system issues. As the process is completed, a new window will appear; press the "Done" button to complete the repair process.

Conclusion
In conclusion, encountering iOS 16 flashlight not working can be frustrating, but several effective fixes can help you get it up and running again. Throughout this article, we've explored various troubleshooting steps to address the problem of a non-working iPhone flashlight.
While these fixes should address most flashlight issues, there may be instances where more advanced repair methods are required. In such cases, a trusted third-party tool like Wondershare Dr.Fone is worth considering. With its iOS system repair expertise, Wondershare Dr.Fone can be a valuable resource for diagnosing and fixing complex software issues that may affect your iPhone flashlight.


iPhone Problems
- iPhone Hardware Problems
- 1. iPhone Keyboard Problems
- 2. iPhone Flashing Not Working
- 3. iPhone Not Detecting Sim Card
- 4. iPhone Sim Not Supported
- 5. Touch ID Not Working
- 6. iPhone Unable to Activate Touch ID
- 7. Fix iPhone Flashlight Greyed Out
- 8. iPhone Ear Speaker Test
- 9. iPhone Ear Speaker Not Working
- 10. iPhone Backlight
- 11. iPhone Proximity Sensor by Yourself
- 12. Replace iPhone Digitizer
- 13. Accessory May Not Be Supported
- iPhone Battery Problems
- 1. iPhone Battery Percentage Not Show
- 2. Replace iPhone Battery
- 3. iPhone Battery Problems
- 4. iPhone's Battery Drains Fast
- 5. iPhone Shuts Off with Battery Left
- 6. iPhone Overheating
- iPhone Button Problems
- 1. iPhone Home Button Not Working
- 2. iPhone Volume Buttons Not Working
- 3. iPhone Silent Switch Not Working
- 4. iPhone Power Button Stuck
- 5. iPhone Volume Button Stuck
- 6. iPhone Back Tap Not Working
- iPhone Charging Problems
- 1. iPhone Charging Port Not Working
- 2. iPhone Charging Slowly
- 3. iPhone Stops Charging
- 4. Wireless Charging Not Working
- 5. iPhone Not Charging
- 6. iPhone Stuck on Charging Screen
- iPhone Headphone Problems
- Apple Pencil and Watch Issues
- 1. Apple Pencil Double Tap Not Working
- 2. Apple Pencil Keeps Disconnecting
- 3. Apple Pencil Not Charging
- 4. Apple Pencil Not Connecting/Pairing
- 5. Apple Pencil Not Working
- 6. Apple Watch Not Pairing with iPhone
- 7. Apple Watch Stuck on Apple Logo
- Other iPhone Problems
- ● Manage/transfer/recover data
- ● Unlock screen/activate/FRP lock
- ● Fix most iOS and Android issues
- Repair Now Repair Now Repair Now
Alice MJ
staff Editor
Generally rated4.5(105participated)