100% Security Verified | No Subscription Required | No Malware
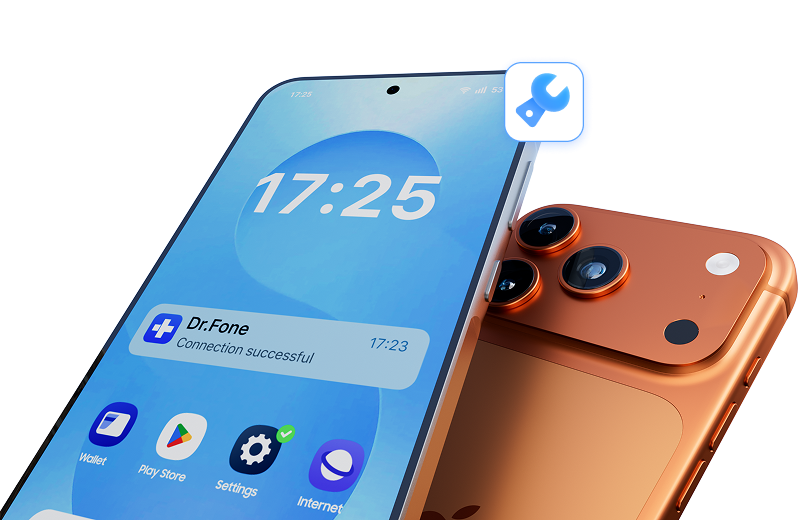

 :
: 
 ChatGPT
 Perplexity
 Gemini
 Claude
 Grok
Grok
My iPhone was working flawlessly until it ran out of charge. Now, when I try to recharge it, it simply won't turn back on. Every time I press a button, it just displays the red battery logo without the lightning cable image. I’ve tried different outlets and cables, but it seems to be stuck in a boot loop. Is there any way to fix this without losing my data?
Reddit User Community

Finding your iPhone stuck on the dead battery screen is a common yet highly stressful scenario in 2026. This phenomenon typically occurs when the device lacks the threshold power required to initialize the iOS kernel or when a software conflict interrupts the charging "handshake" between the battery and the logic board. Whether you are dealing with an iPhone 6 or the latest flagship, being stuck on a red battery screen prevents you from accessing critical data and communications.
In this updated guide, we will explore the technical reasons behind these charging failures and provide nine proven methods to break the charging loop. From simple hardware adjustments to advanced system repairs, these solutions are designed to get your iOS device back into operational status quickly and safely.
In this article
- Part 1: Why is My iPhone Stuck on the Dead Battery Screen?
- Part 2: How to Fix iPhone Stuck on Charging Screen
- Method 1: Heat iPhone Battery Before Charging
- Method 2: Force Restart your iOS Device
- Method 3: Drain iPhone Battery to Get Out of Charging Screen
- Method 4: Use a Professional iOS Repair Tool (No Data Loss)
- Method 5: Replace Your iPhone’s Battery
- Method 6: PC/Mac Connection Method
- Method 7: DFU Mode Booting
- Method 8: Recovery Mode & Force Restart
- Method 9: iTunes Restore (Data Loss)
Part 1: Why is My iPhone Stuck on the Dead Battery Screen?
Before diving into the fixes, it is essential to understand the mechanics of the "Charging Screen Loop." The iPhone's Power Management Unit (PMU) requires a specific voltage level to allow the processor to start. If this threshold isn't met or if the software fails to recognize the power input, the device stays in a low-power display mode.
1. Deeply Drained Chemical State
When a lithium-ion battery reaches 0%, it enters a deep discharge state. In 2026, modern iOS versions require a "pre-charge" phase that can take up to 30 minutes before the screen even shows signs of life. If interrupted, the device may get stuck displaying only the red logo.
2. Accessory Authentication Failures
Using non-MFi (Made for iPhone) cables can cause the charging logic to fail. If the internal chip in the cable doesn't authenticate with the iPhone's Lightning or USB-C port, the PMU might restrict the current, leaving the iPhone stuck on the charging screen indefinitely.
3. iOS Firmware Corruption
Sometimes, a crashed background process or a failed automatic update can leave the bootloader in a state of confusion. The hardware is charging, but the software is unable to trigger the "Boot" command, resulting in a persistent battery icon.
4. Hardware Degradation
Over years of use, the physical battery health drops. A degraded battery may show a voltage that appears sufficient but fails under the load of a system boot. Additionally, lint or debris in the charging port can prevent a stable connection, causing intermittent charging cycles.
 Fix iOS issues, no data loss.
- One-click repair for all iOS problems.
- Solve recovery mode, Apple logo, black screen, etc.
- Upgrade or downgrade iOS without iTunes

Part 2: How to Fix iPhone Stuck on Charging Screen
Resolving a charging loop requires a systematic approach. We recommend starting with the least invasive methods (restarts) before moving toward professional software repair or hardware replacement. Below are the most effective strategies for 2026.
Method 1: Heat iPhone Battery Before Charging
Lithium-ion batteries are highly sensitive to temperature. If your iPhone 6 or newer model is in a cold environment, the internal resistance of the battery increases, making it difficult for the device to draw the initial power needed to boot. A common community-fix is to gently warm the battery area.
Disconnect the device and use a hairdryer on a low-heat setting for about 2 minutes, focusing on the back-right side where the battery sits. Once the device feels slightly warm, plug it back into a high-wattage charger. Many users report the red battery logo instantly switching to the Apple logo after this procedure.


Method 2: Force Restart your iOS Device
A force restart is the most reliable way to clear minor firmware glitches and reset the power cycle of your PMU. This does not delete your data but forces the hardware to initiate a fresh boot sequence.
1. iPhone 8, X, 11, 12, 13, 14, 15, and 2026 Models:
Quickly press and release the Volume Up button. Quickly press and release the Volume Down button. Finally, press and hold the Side (Power) button until you see the Apple logo on the screen.
2. iPhone 7 and 7 Plus:
Press and hold both the Volume Down and Sleep/Wake (Power) buttons simultaneously for at least 15 seconds until the Apple logo appears.
3. iPhone 6s and Earlier:
Hold the Home button and the Power button together until the Apple logo is visible.

Method 3: Drain iPhone Battery to Get Out of Charging Screen
Calibrating the battery management system can sometimes resolve persistent charging loops. By completely exhausting the residual charge, you force the logic board to recalibrate its 0% and 100% threshold points.
Step 1Complete Discharge
Allow the iPhone to sit until it no longer displays the red battery logo when buttons are pressed. You may need to leave it overnight to ensure all residual energy is gone.
Step 2Extended Charging
Plug the device into a wall outlet (not a computer USB port) and let it charge undisturbed for at least 5 to 6 hours.
Step 3Standard Boot
Attempt to turn the device on while still connected to the power source. Often, the recalibrated PMU will now allow the boot sequence to finish.
Method 4: Use a Professional iOS Repair Tool (No Data Loss)
If hardware tricks fail, the issue is likely a corrupted iOS system file. Tools like Dr.Fone - System Repair (iOS) are designed to rewrite the system partition without touching your personal photos or messages. This is the safest way to fix the "iPhone stuck on charging screen" issue in 2026.
Step 1Select System Repair
Launch the Dr.Fone toolkit on your PC or Mac and choose "System Repair" > "iOS". Connect your iPhone via an authentic cable.
Step 2Standard Repair Mode
Choose "Standard Repair" to fix the charging loop without erasing data. The software will detect your device model and suggest the correct firmware package.
Step 3Download and Fix
Click "Download" to get the firmware. Once verified, click "Repair Now". Within minutes, your iPhone will reboot into the normal iOS lock screen.


Method 5: Replace Your iPhone’s Battery
If your device is several years old, the battery may have reached its chemical end-of-life. A physically swollen or dead battery cannot provide the surge current needed to launch iOS. While we recommend visiting an Apple Store, advanced users can perform a DIY replacement with the correct tools.
- Restores original battery life
- Solves physical power failures
- Can be done with standard toolkits
- Voids official warranty
- Risk of damaging the screen
- Requires precision tools
Method 6: PC/Mac Connection Method
Connecting your iPhone to a computer can trigger a "data handshake" that force-wakes the power management chip. Launch iTunes or Finder, connect your iPhone via USB, and wait to see if the computer recognizes the serial number. If it does, the computer might push enough current through the data pins to bypass the red battery screen.
Method 7: DFU Mode Booting
Device Firmware Update (DFU) mode is the deepest level of recovery. It allows the device to interface with iTunes without loading the OS or the bootloader. To enter DFU mode, follow the specific button combinations for your model while connected to a charger. If the screen remains black but the charging sound or vibration triggers, the device is successfully drawing power in DFU mode.
Method 8: Recovery Mode & Force Restart
Booting into Recovery Mode is another effective way to break a charging loop. Connect your phone to a computer and perform a force restart, but continue holding the buttons until you see the "Connect to Computer" or "Support.apple.com/iphone/restore" screen. From here, you can choose to "Update" the system, which re-installs iOS without wiping data.
Method 9: iTunes Restore (Data Loss)
If all else fails and you have a backup, a factory restore via iTunes in DFU mode will wipe the entire device and install a fresh copy of iOS. This usually solves any software-related power management issues, though all local data will be erased.
Conclusion
Dealing with an iPhone stuck on the charging screen is frustrating, but most cases are solvable using the methods above. Start with hardware checks like cleaning the port and warming the battery. If the loop persists, professional tools like Dr.Fone offer a high success rate without compromising your data. If hardware damage is suspected, 2026 Apple Support remains your best resource for battery replacements.
FAQ
1. Why is my iPhone stuck on the red battery logo for hours?
This usually means the power adapter isn't providing enough wattage or the battery's chemical state is too low to trigger the boot sequence. Try a 20W or higher power brick and leave it for at least 60 minutes.2. Can a cold environment really stop my iPhone from charging?
Yes. Lithium-ion batteries fail to move ions effectively in near-freezing temperatures. Warming the device gently can often resolve the charging loop immediately.3. Will Dr.Fone - System Repair delete my photos?
No, the Standard Repair mode is specifically designed to fix iOS firmware issues, including charging loops, without touching your user data.4. What is the difference between the red battery logo with and without a cable icon?
The logo with the cable means the device is NOT currently charging. The logo without the cable means the device IS receiving power but hasn't reached the threshold needed to turn on.
 Add Wondershare Dr.Fone as a preferred source on Google