Permanently erase all iOS & Android data—completely unrecoverable.

 100% Security Verified | No Subscription Required | No Malware

 :
: 
 ChatGPT
 Perplexity
 Gemini
 Claude
 Grok
Grok
My iPhone storage is completely full, and I have thousands of images taking up space. What is the fastest way to delete all photos from iPhone, and how can I ensure they are permanently erased?
Sarah J. - iPhone User

Apple continually enhances the iPhone's camera capabilities, allowing users to capture stunning high-resolution memories. However, these brilliant photos and 4K videos quickly consume internal storage. When your device alerts you that storage is full, knowing exactly how to delete photos from iPhone becomes a daily necessity rather than a rare task.
Whether you need to quickly remove a few blurry shots from a recent trip, or you want to completely remove photos from iPhone to prepare the device for resale, having the right strategy saves hours of manual tapping. Standard deletion methods are great for quick fixes, but they do not always free up space immediately or erase the files permanently. In this comprehensive guide, we will explore three distinct solutions to help you effectively manage your gallery and delete all photos from iPhone efficiently.
In this article
Part 1. How to Delete Multiple Photos from iPhone/iPad Camera Roll
If you are wondering how to delete photos from iPhone without relying on third-party cables or computers, the native Photos app is your primary destination. Apple has integrated intuitive gestures that allow users to select multiple images rapidly. While this guide references foundational iOS systems, this swipe-to-select method seamlessly applies to every modern iOS version.
Step 1 Launch the Photos Application
Unlock your device and tap on the native 'Photos' application from your home screen. Navigate to your primary gallery.
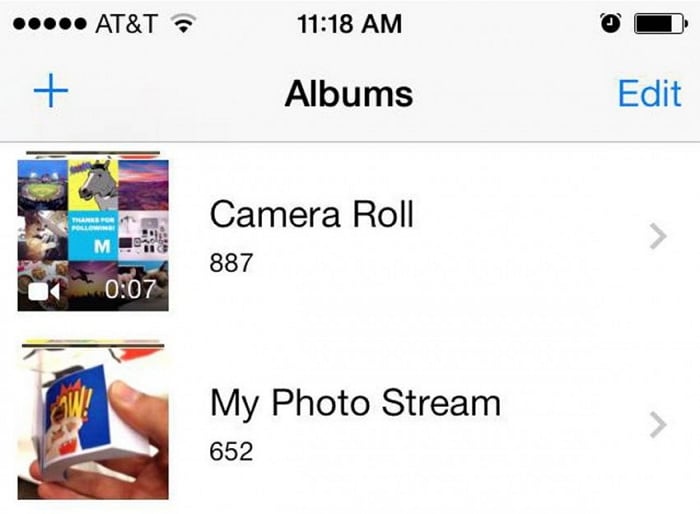
Step 2 Locate Your Camera Roll or Recents Album
Depending on your iOS version, look for the 'Camera Roll' or 'Recents' album under the Albums tab to view your complete media timeline.
Step 3 Activate the Selection Tool
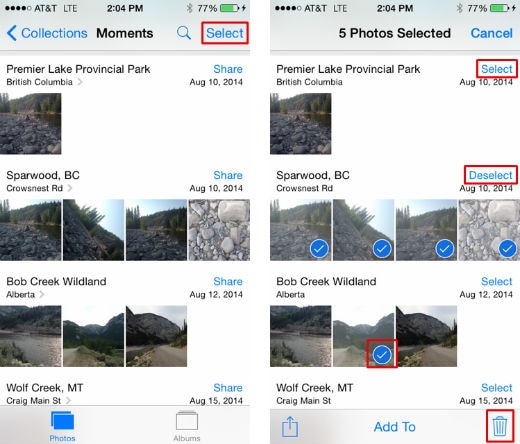
In the upper-right corner of your screen, tap the 'Select' button to initiate the multi-selection mode.
Step 4 Choose Photos to Remove
You can tap individual photos one by one. For a much faster approach, use the sliding technique: place your finger on one photo and drag it horizontally across a row, then vertically down or up the columns. This gesture allows you to highlight hundreds of photos in seconds.
Step 5 Tap the Trash Icon to Delete
Once your unwanted photos are highlighted, press the 'Trash' icon situated at the bottom corner of the interface to safely remove photos from iPhone.

Part 2. How to Delete All Photos from iPhone Using Mac or PC
While the drag-and-select technique is incredibly convenient, it becomes exhausting if your gallery holds thousands of accumulated images. When you urgently need to know how to delete all photos from iPhone at once, connecting your smartphone to a desktop computer (Mac or Windows PC) is universally the most efficient route.
2-1. Using Mac to Clear Your iPhone Gallery
Mac users have built-in utilities designed to streamline iOS media management.
Step 1 Connect iPhone to Mac
Use an original Apple USB or Lightning cable to securely link your iPhone to your Mac computer.
Step 2 Launch Image Capture
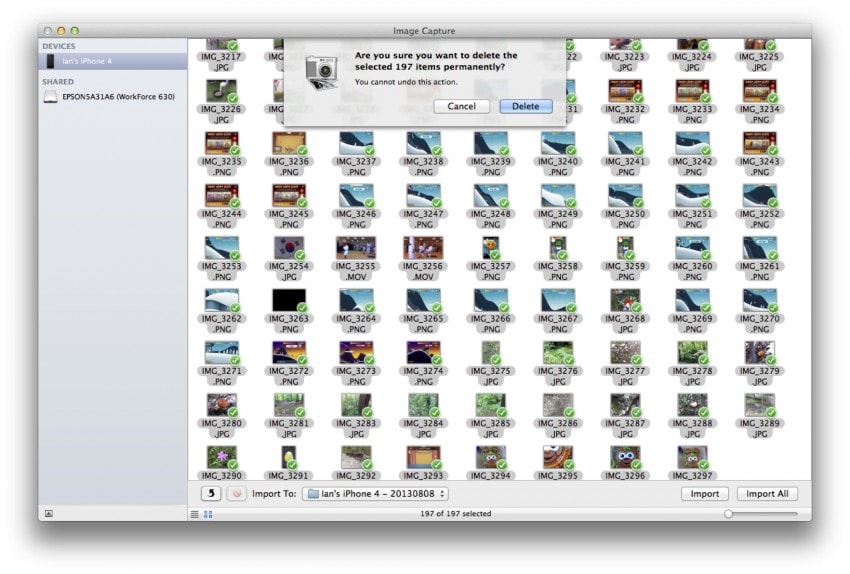
Open the Applications folder or use Spotlight search to launch 'Image Capture'. Your connected iPhone will appear on the left sidebar.

Step 3 Select All Media
Click inside the main gallery window and press the hotkeys 'Command + A' to highlight every single picture on the device.
Step 4 Execute the Bulk Deletion
Look for the delete button (often a red circle or a trash icon at the bottom of the window). Clicking this will instantly remove photos from iPhone in bulk.
2-2. Using Windows PC to Delete Images
Windows users can treat the iPhone largely like a standard digital camera or USB drive.
Step 1 Establish a USB Connection
Connect your iPhone to your Windows desktop or laptop. You may need to tap "Trust This Computer" on your iPhone screen.
Step 2 Open File Explorer
Navigate to 'My Computer' or 'This PC' and double-click on the device labeled 'Apple iPhone'.
Step 3 Access the DCIM Folder
Double-click the 'Internal Storage' folder, then open the 'DCIM' directory. Here you will see subfolders containing all your photos and videos.
Step 4 Select All and Delete
Press 'Ctrl + A' to select all the contents within these folders. Right-click and choose 'Delete' (or press the Delete key) to completely wipe them from your mobile device.
Part 3. How to Permanently Delete Photos from iPhone (Unrecoverable)
It is crucial to understand that the aforementioned manual methods do not prioritize your data privacy. Whether you delete items from the Photos app or through a computer, the files are not permanently erased—they are simply marked as available storage space and can often be recovered using basic software. If you are selling your phone, trading it in, or dealing with highly sensitive imagery, you must employ a permanent wiping solution.
 Permanently erase all data on iOS & Android — completely unrecoverable.
- Military-grade wiping to fully protect your privacy.
- Generate verified erasure reports to boost device resale value.
- Selectively erase private data and remove junk & large files.
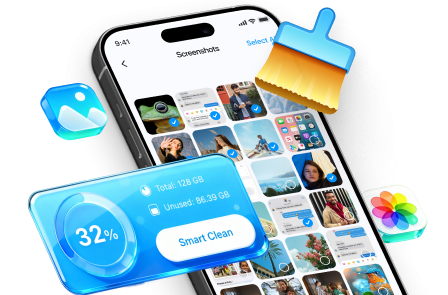
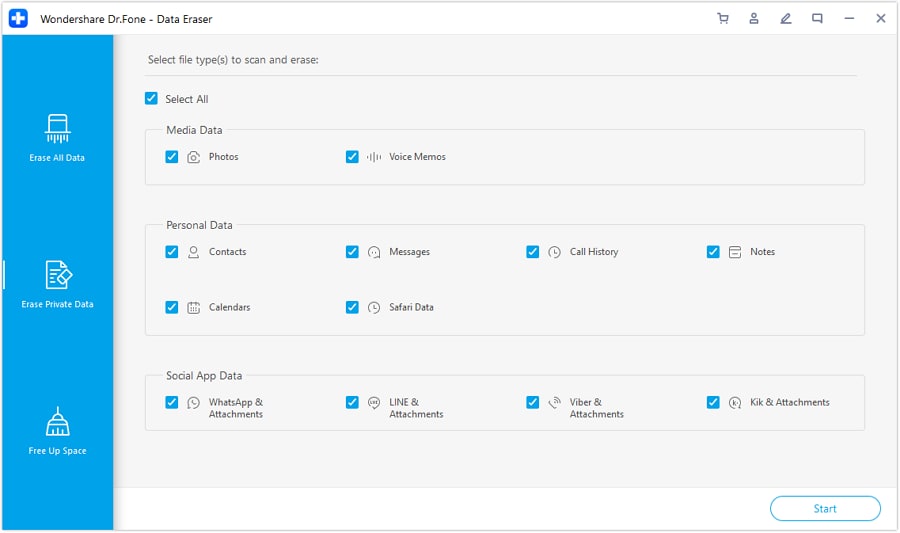
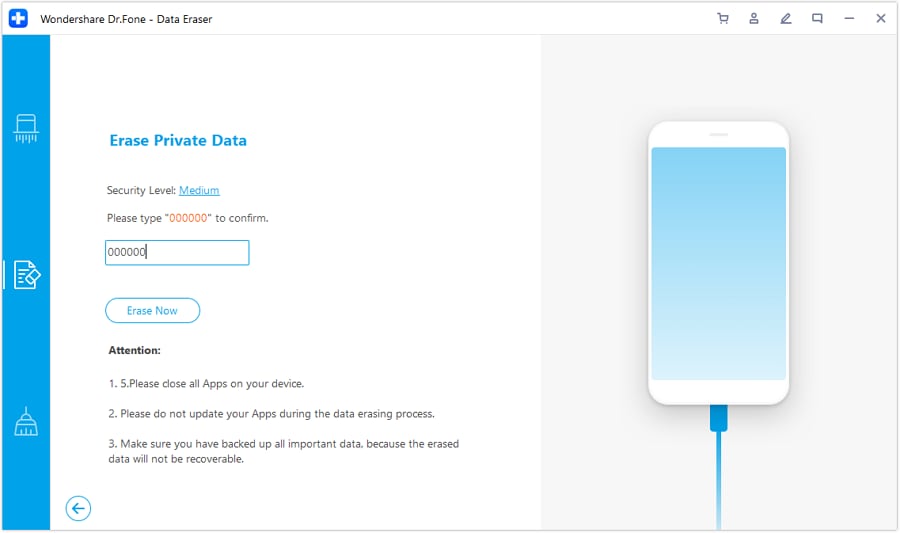
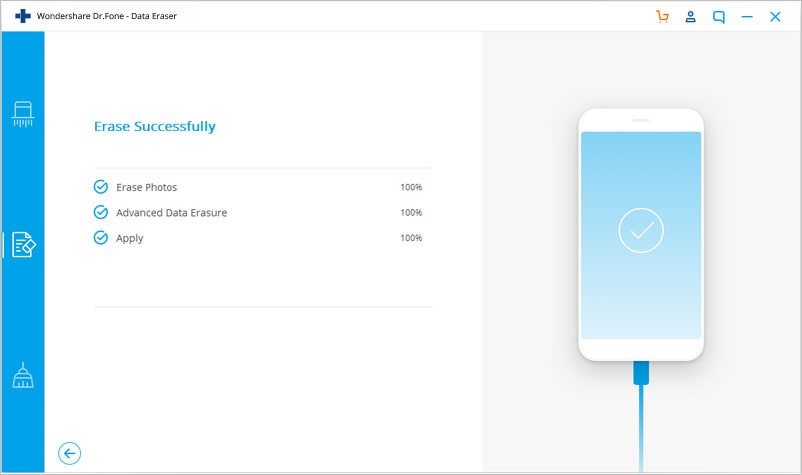
To eliminate any risk of identity theft or privacy invasion, you need a specialized utility like Dr.Fone - Data Eraser. This professional toolkit is explicitly engineered to overwrite system sectors, ensuring that once you choose to remove photos from iPhone, they are permanently eradicated.
Beyond just photos, this software can selectively target and obliterate deleted messages, call logs, contacts, and browsing history. Utilizing advanced wiping algorithms, it guarantees that no commercial or forensic recovery software can ever retrieve your private digital footprint. Before proceeding with the steps below, you can acquire this toolkit from its official website.




Important Tip: The Data Eraser tool requires full device access to thoroughly wipe content. If you are locked out of your device because you forgot the Apple ID password or screen passcode, you cannot proceed with a normal erase. In such situations, it is highly recommended that you use Dr.Fone - Screen Unlock (iOS) first to regain control and bypass the iCloud account restrictions on your iPhone or iPad.
- Unlock iPhone/iPad passcode in minutes.
- Remove Face ID, Touch ID, and screen lock.
- Bypass iCloud Activation Lock easily.
- Support all iOS versions and devices.
- Simple steps, no technical skills needed.

Dr.Fone - Screen Unlock is an intuitive desktop utility designed to remove all types of lock screens, including 4-digit/6-digit passcodes, Face ID, and Touch ID. Whether you are dealing with a disabled iPhone or need to bypass an Activation Lock on a second-hand device, this tool acts as the perfect prerequisite before executing a permanent data erase.


 Add Wondershare Dr.Fone as a preferred source on Google