Teleport your device anywhere instantly with one click.


 100% Security Verified | No Subscription Required | No Malware

 :

 ChatGPT
 Perplexity
 Gemini
 Claude
 Grok
To add a location filter on Snapchat, take a photo or video and swipe left or right through the available overlays. For a place label instead, open the sticker drawer on the preview screen and choose Location. These are editing features for a Snap, not the same controls as sharing your position on Snap Map.
Snapchat on iPhone and Android supports visual messages, chat, audio, and other shared content, but its location features serve different purposes. This 2026 guide explains geofilters, Location stickers, device permissions, a supported GPS-testing workflow, and Ghost Mode without implying that a fake tag makes an account anonymous or reveals another person's hidden position.
In this article
Review permissions and intended recipients before sharing location-related content.
Part 1: What Are Snapchat Location Filters?
A location filter, often called a geofilter, is a graphic overlay associated with a place or venue. It sits on top of a captured photo or video and can give viewers geographic context. It is an editing choice, not a certificate that the sender is physically standing at that place.
A Location sticker is a separate way to add a place label from the sticker drawer. Filters and stickers can both provide context, but their controls differ: swipe across the Snap for filters, or choose a sticker from the preview tools. Snapchat's filter instructions also distinguish filters from Lenses.
Availability varies by place and the app's current offerings. Some locations have several relevant designs and others may have none. A missing city overlay does not by itself mean your GPS is broken, and choosing a place label does not guarantee that the same place has a matching geofilter.
Part 2: Enable Location Access and Add the Filter or Sticker
Start with the phone's location settings and Snapchat's permission. On Android, inspect Settings > Location and the app's location permission. On current iPhones, look under Settings > Privacy & Security > Location Services; older layouts may show Privacy. Choose the access level appropriate to your intended use rather than enabling continuous sharing just to add a sticker.
The original article uses an older Additional Services > Manage > Filters menu. The three stages below preserve that setting discussion while explaining that it is not present on every current version. Do not spend time searching for a removed switch if the normal capture-and-swipe workflow is already available.
Step 1 Open Snapchat's profile and settings
Launch the app and tap your profile icon, then open Settings. Inspect the location-related permission information for your installed version if a feature is unavailable.
Step 2 Recognize the older Additional Services screen
Earlier releases exposed Additional Services and Manage from Settings. The source screenshot illustrates that historical interface; current releases may instead rely on the normal editing tools and the phone's app permissions.

Step 3 Use the available filter controls
If your release contains a Filters toggle under Manage, enable it when you want those effects or disable it when you do not. If it does not, return to the camera and test the current filter workflow. Removing a filter from a Snap and changing Snap Map privacy remain separate actions.
Once location access is appropriate, create the Snap and select the visual element you actually want to share. Snapchat's sticker guidance identifies the sticker icon on the preview screen and Location stickers as a way to show where a Snap was taken.
Step 1 Capture the photo or video
Take a Snap so that you reach the preview and editing screen. This is where filters and stickers are applied before sending, rather than a setting that changes every previous post.
Step 2 Swipe to inspect available filters
Swipe left or right through the offered overlays and select a location design if one appears. Its availability can depend on the app's location information and current offerings. A filter shown in an old screenshot is not guaranteed to appear in every account or city.
Step 3 Add a Location sticker when appropriate
Tap the sticker icon, choose the Location option if available, and select the intended place from the offered choices. Move or resize the label as needed. Selecting a label edits the Snap; it does not establish that the handset's GPS position or Snap Map sharing has changed.

Step 4 Review and send the finished Snap
Check that the label is accurate for the context and that it reveals only what you intend. Complete any other edits, tap Send To, and choose the recipients or Story audience. Do not assume Ghost Mode removes a place you deliberately included in the picture.

To avoid sharing a location tag, remove that element before sending. To limit map visibility, use Snap Map's own privacy controls. To limit the app's access to device location, review the operating system permission. These choices affect different things and should not be treated as one master switch.
Part 3: GPS Simulation and a Different Snapchat Location
 Set your map route to simulate GPS movement.
- Set your wanted movement speed.
- HD and large map view to check location.
- Fake GPS location to anywhere.
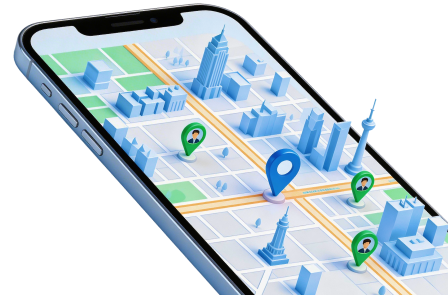
Dr.Fone - Virtual Location lets a supported connected phone report a selected GPS coordinate and can simulate movement along a chosen route. That is relevant to readers testing location-aware features. It does not guarantee that Snapchat will offer a requested geofilter, accept a simulated position, or treat a chosen tag as the device's real location.
A VPN primarily changes the network IP address seen by a service; it is not inherently a GPS spoofer. The original claim that Snapchat location cannot be changed without a VPN is therefore misleading. Conversely, GPS simulation is not encryption or anonymity. Account activity and permissions still matter, and each social app can handle location differently.
Dr.Fone - Virtual Location
The product's relevant capabilities are choosing a point, drawing a route, and using supported movement or joystick controls. Check the current iOS, Android, and desktop requirements before installation. Use location simulation only where permitted, and never describe it as a way to reveal someone who has chosen not to share their location.
The original product section also points to guides about Pokemon Go, Snapchat, Instagram, and Facebook. Those references do not establish universal support for every social platform, and location functions in WhatsApp, Viber, Messenger, or Telegram should not be assumed identical.
The five-step guide below retains the original connection and location-selection workflow, with platform-specific setup made explicit. Follow the installed version's prompts rather than applying Android debugging instructions to an iPhone.
Step 1 Connect the supported phone
Use a suitable USB cable to connect the handset to the computer. On Android, select an appropriate USB mode such as file transfer only when the connection guide requests it. On iPhone, follow the trust and connection prompts instead; Transfer Files is not a universal iPhone setting.
Step 2 Open Virtual Location on the desktop
Install and launch the intended Dr.Fone edition, choose Virtual Location, and continue through Get Started or its current equivalent. Confirm that the program recognizes the correct device before applying any location.
Step 3 Complete the correct platform setup
If an Android connection prompt requires USB debugging, enable it through the phone's Developer options and authorize only the trusted computer. The source gives Additional Settings > Developer options > USB debugging as one manufacturer-specific path. If a mock-location app must be selected, choose the actual installed component indicated by the guide rather than assuming every edition uses the same name.
iOS connection setup is distinct from Android's USB debugging menu. iPhone setup follows its own trust and connection instructions; it does not use Android Developer options.
Step 4 Select and apply the GPS test point
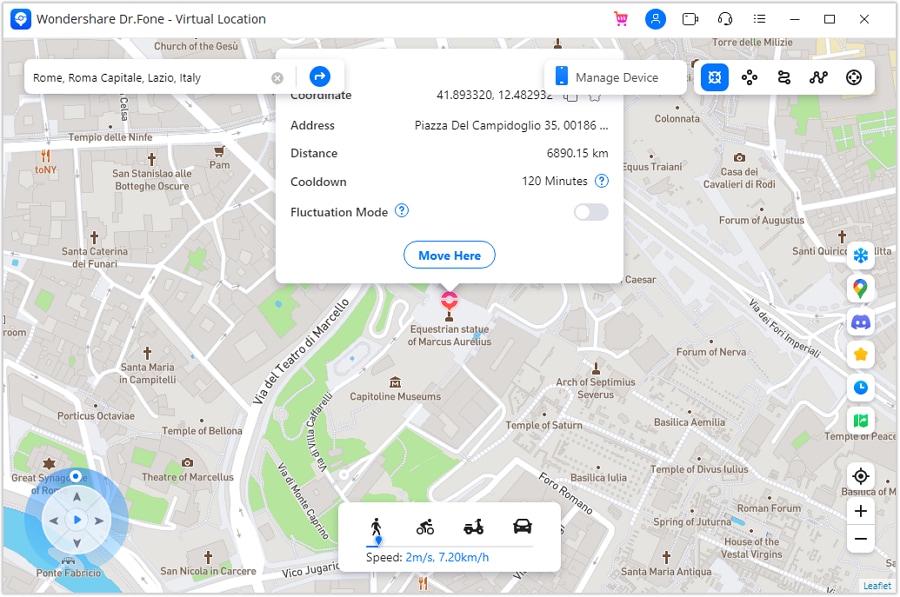
In the map interface, select Teleport Mode, search for the desired address or coordinates, and inspect the chosen point. Use Move Here to apply it. Verify the reported position in the phone's maps app before attributing any change in another application to the GPS tool.
Step 5 Inspect the available Snapchat effects
Return to Snapchat, create a new Snap, and inspect its filters or Location stickers. The expected place effect may not appear, so do not claim a guaranteed result. Review your sharing audience and remove any misleading label before posting. When the authorized test ends, restore the actual location using the supported procedure; the product's official guide describes restarting the device.
This completes the full device-location walkthrough, including the final Snapchat check after the last source screenshot. A visible place tag, device GPS, and Snap Map privacy still need to be assessed separately.




Conclusion
Use the captured Snap's filter carousel or Location sticker drawer to add geographic context, then check the audience before sending. For authorized device-location testing, Dr.Fone - Virtual Location offers supported GPS controls, but it does not promise every Snapchat effect or invisible activity. Ghost Mode, map permissions, and a place label in a post address different privacy questions; none should be described as a way to override another person's choice not to share.
Respect location-sharing choices and review permissions after a test.
FAQ
1. What does Ghost Mode on Snapchat actually hide?
Ghost Mode controls visibility of your location to other people on Snap Map. Snapchat's support guidance says location can still be shared with Snap, and Snaps submitted to Snap Map may still appear regardless of that setting. Review separate live-location sharing where applicable; Ghost Mode is not universal anonymity.2. Is Ghost Mode the same as disabling location filters?
No. Ghost Mode concerns map visibility. Removing a filter or Location sticker changes what a particular Snap shows, while device permissions control the app's access to location. A place name already included in a posted image is not erased by changing map privacy.3. How does Snap Map obtain location, and how accurate is it?
Location depends on device services, permissions, timing, and available signals such as GPS or Wi-Fi; Wi-Fi does not always reveal an exact position. Do not assume every pin is live or perfectly precise. Snapchat says map behavior differs between Always and Only while using access, and under the latter its map location expires after 24 hours.4. Can I find a friend who has enabled Ghost Mode?
Turning off your own Ghost Mode does not reveal a friend's hidden location. You may see only the locations people choose to share with you. If you need to coordinate, message the person and ask them to share a place voluntarily. A name search is not a bypass for their privacy choice.
 Add Wondershare Dr.Fone as a preferred source on Google