What should I do to Restore Android Deleted Photos?

Jul 12, 2024 • Filed to: Data Recovery Solutions • Proven solutions
Have you ever felt the pain and frustration of losing your precious files and photos? Once you realize your files are gone, it can be a terrible and saddening experience. That’s why backups are highly recommended, but what can you do if you don’t have a backup?
Fortunately, data recovery has become incredibly good, and it’s now possible to recover photos regardless of the situation that led to data loss. Below, we’ll explore Android data recovery, what you can do about deleted cloud photos, and show you a fantastic app that can quickly recover deleted photos from Android devices.
Part 1. Is It Possible to Recover Lost Photos Without Any Backup?
Although performing backups is highly recommended for all vital files stored on your devices, it’s not entirely necessary for data recovery. Namely, numerous data recovery tools and apps have gotten incredibly good and efficient at what they do, that they can retrieve your lost files even if you don’t have a backup.
In some situations, your files might have ended up in a recycle bin or an app’s trash, where recovering them is incredibly easy. Similarly, if you’ve also deleted these files from the trash or the recycle bin, that doesn’t mean they’re irrecoverable, but you’ll have to work quickly.
When Android removes files, it removes their data from your phone’s storage sectors. As long as you haven’t written over these storage sectors where your files once were, you can still recover them. However, file recovery is no longer possible if these sectors are overwritten with new data.
Part 2. How to Recover Deleted Photos from Android from the Cloud?

Android users often utilize cloud technologies, such as Google Drive and Photos, and Microsoft Drive, to store their data when the phone’s storage isn’t enough and to back up their vital files and have them in another location other than the phone. However, files in the cloud can also get deleted, and accidental deletion is often a problem. Even so, these files can still be recovered.
If You’re Using Google Photos
Users who back up to Google Drive and Google Photos can quickly and efficiently recover their files from these apps under two conditions. The files must be in the app’s Trash folder, and no more than 30 days should have passed from the day of file loss or accidental deletion. Otherwise, you won’t be able to recover your files, at least not through the Google Photos app.
Here’s what you need to do to recover data from Google Photos:
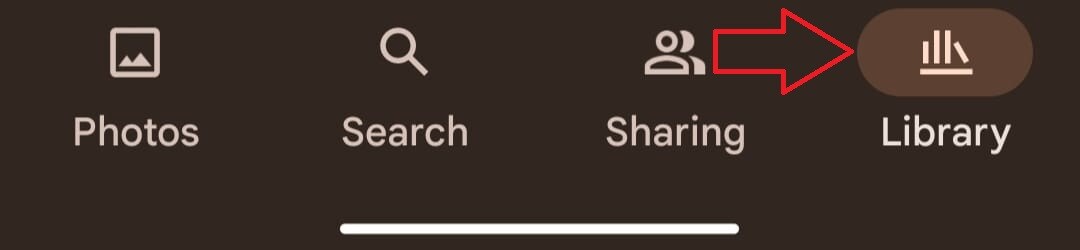
- Step 1: Launch the Google Photos app on your Android phone and select Libraryin the bottom right corner.
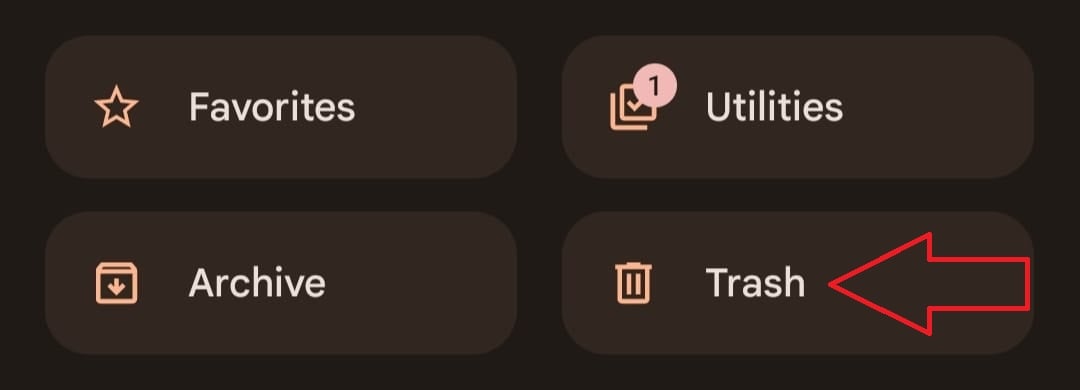
- Step 2: Choose Trashin the top right corner.
- Step 3: Select the photos you want to recover and hit the Recoverbutton in the bottom right.

- Step 4: Your photos will now be back in the folders they were deleted from.
This method only applies if your deleted photos and videos are in Google’s Photos Trash folder. However, if you deleted them over 60 days ago, emptied the Trash folder manually, or deleted these files from the Android phone’s Gallery app before they were uploaded to Google Photos, your files will be irrecoverable.
Moreover, older devices that run on Android 11 or older operating systems only have 30 days before the Trash folder is automatically emptied. In contrast, accounts that were inactive for longer than two years can have their photos automatically removed.
For Microsoft OneDrive Users
Similarly, Android users who store their files on Microsoft’s OneDrive service share a similar pain. The method only works if you haven’t manually emptied the Recycle Bin. If you have and the Recycle Bin is empty when you’re looking for your files, you won’t be able to get them back through the app.
Microsoft OneDrive users can follow this step-by-step guide to recover their lost data:
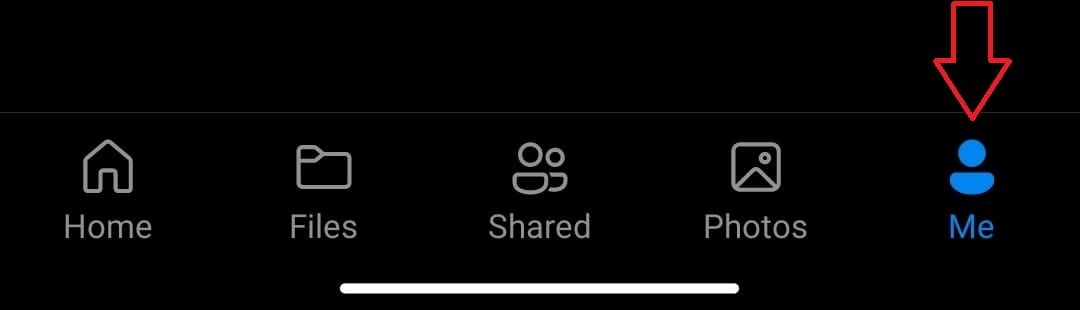
- Step 1: Open the OneDrive app on your Android phone and tap the Meicon in the bottom right corner.
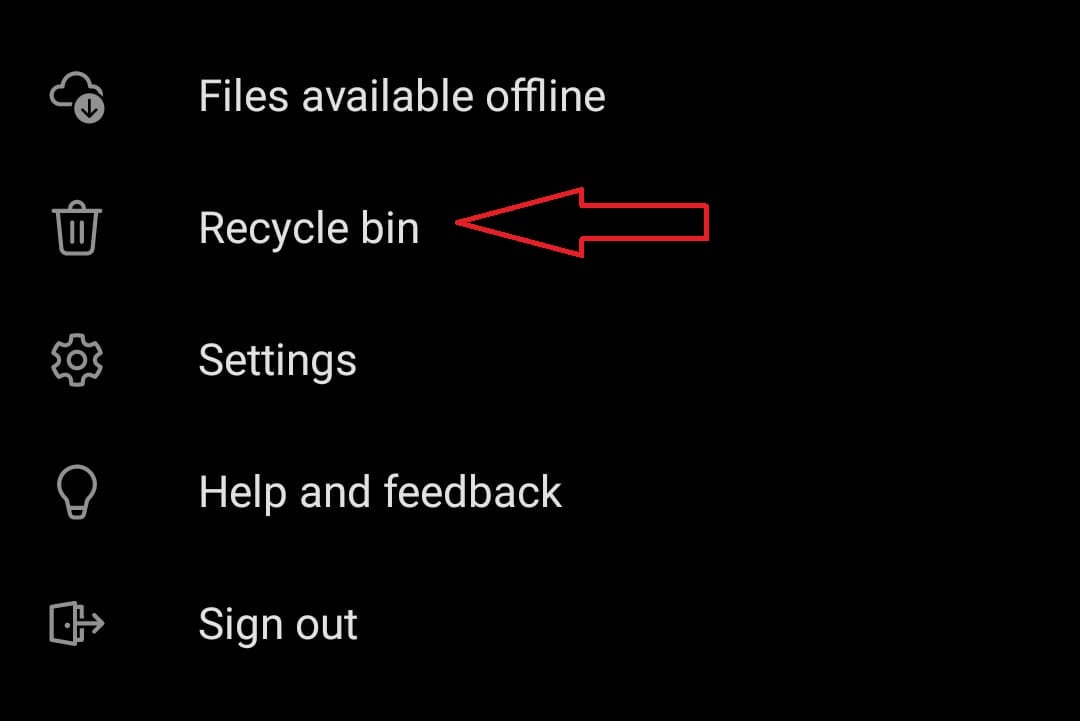
- Step 2: Select your account and then press Recycle Bin.
- Step 3: Select all the files you wish to restore and tap the Restore
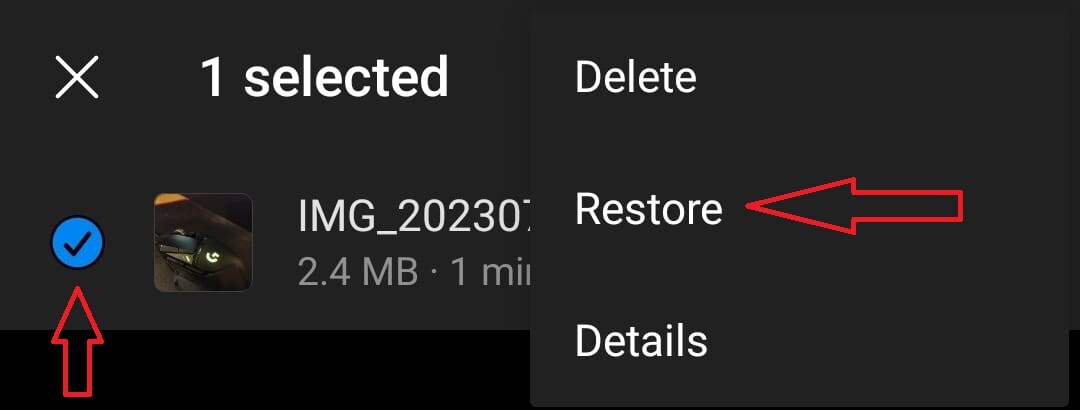
- Step 4: Your deleted photos should now be in their corresponding folders.
Like Google Photos, your images stay for 30 days in Microsoft OneDrive’s Recycle Bin folder. After that period, they’re automatically deleted. However, school and work accounts will keep photos in the Recycle Bin for 93 days, giving you more time to react and recover your accidentally deleted pictures.
Part 3. How to Recover Deleted Photos from Gallery on an Android?
If the methods above can’t be applied in your case or you want a better data recovery solution, Wondershare Dr.Fone is your answer. The app has the highest data recovery success rate among the recovery apps, and it can recover any file type, regardless of what you might have lost.
These files include documents, pictures, videos, audio files, contacts, call history, SMS messages, WhatsApp data, Google Drive files, etc.
The app supports over 6,000 Android devices and can handle data recovery regardless of how data loss happened. Whether you’ve accidentally deleted files, submerged your phone in water and damaged it, experienced a system crash, forgotten your password, hit and damaged your device, had it stolen, or played with jailbreaking or ROM flashing, Wondershare Dr.Fone can help.
Dr.Fone - Data Recovery (Android)
World's 1st Android smartphone and tablet recovery software.
- Recover Android data by scanning your Android phone & tablet directly.
- Preview and selectively recover what you want from your Android phone & tablet.
- Supports various file types, including WhatsApp,Messages & Contacts & Photos & Videos & Audio & Document.
- Supports 6000+ Android Device Models & Various Android OS.


Although the process of Android data recovery is incredibly straightforward with Wondershare Dr.Fone, you’ll also find a step-by-step guide below. Let’s see how to recover permanently deleted photos on Android with Wondershare Dr.Fone.
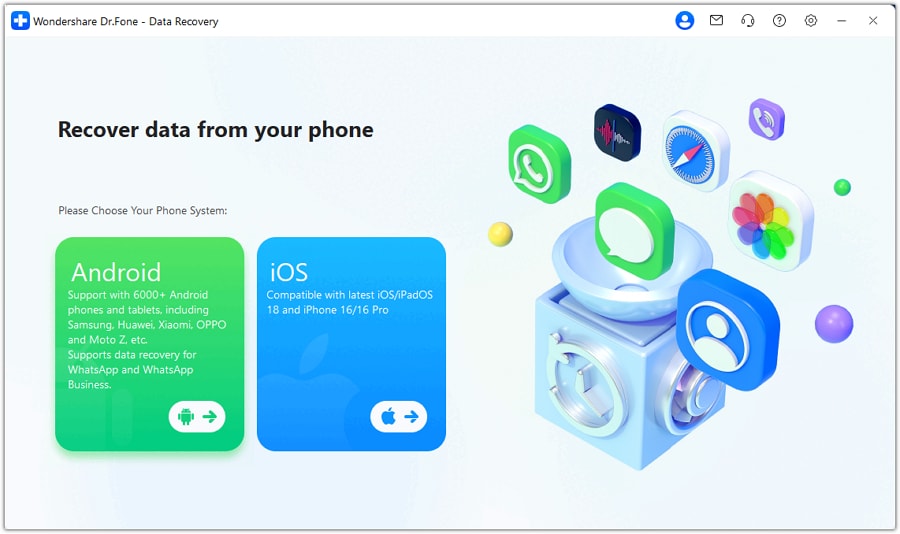
- Step 1: Launch the app on your PC and head into Toolbox> Data Recovery.

- Step 2: Hit Android, which lets you choose one of over 6,000 supported Android devices to recover data from.
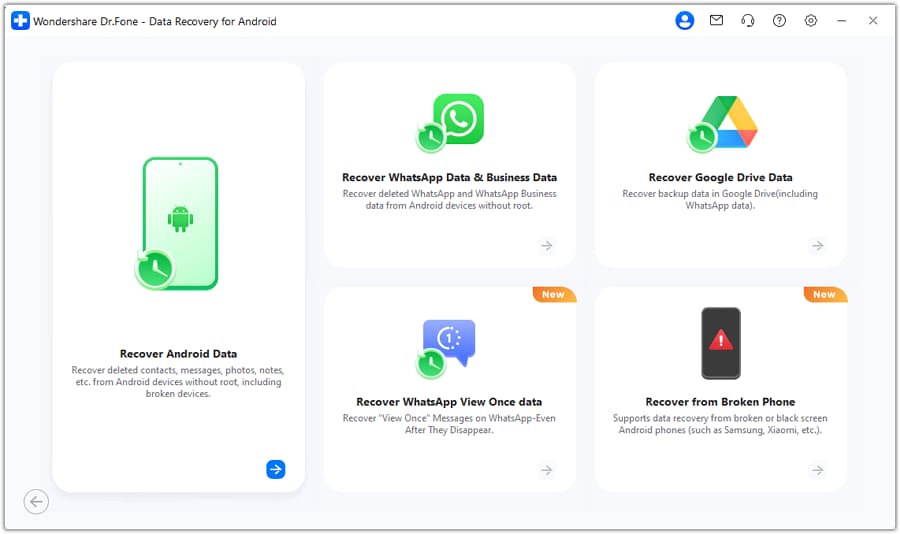
- Step 3: Choose Recover Android Dataat this step. Google Drive and WhatsApp data recovery are also possible.
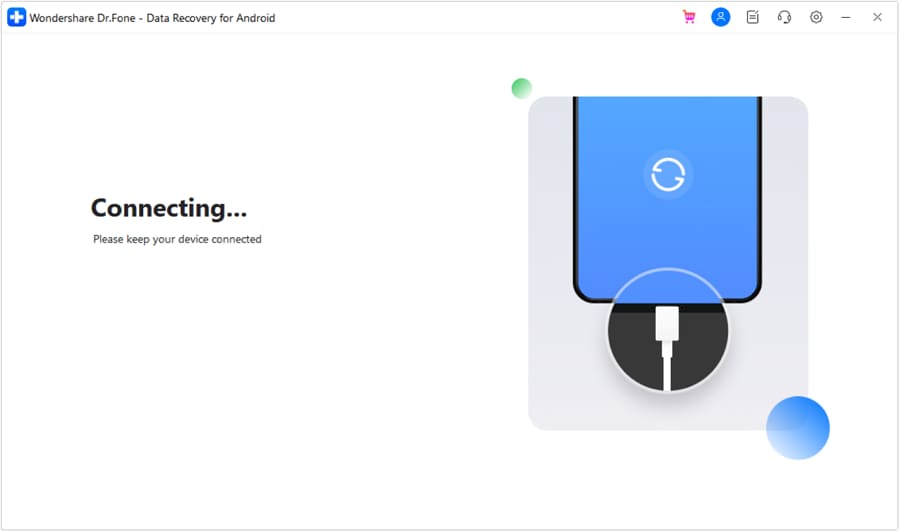
- Step 4: Follow the instructions and connect your phone to the PC to begin data recovery.
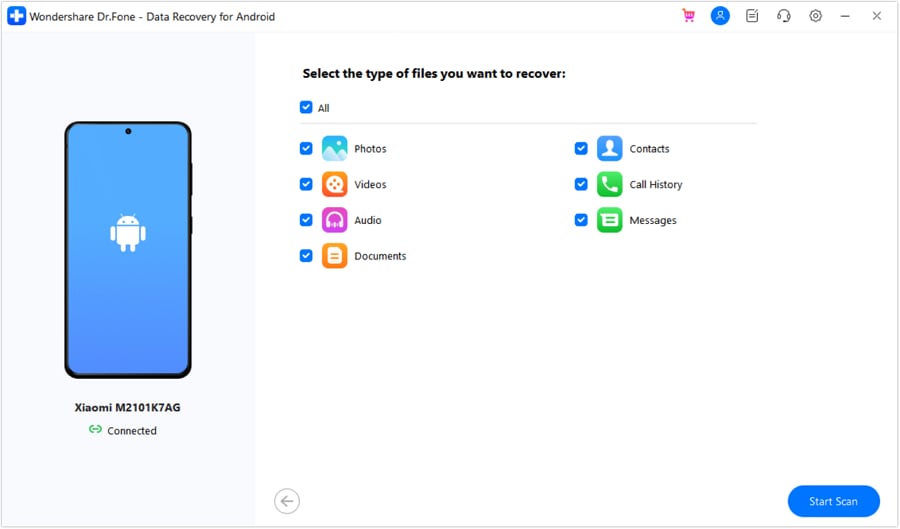
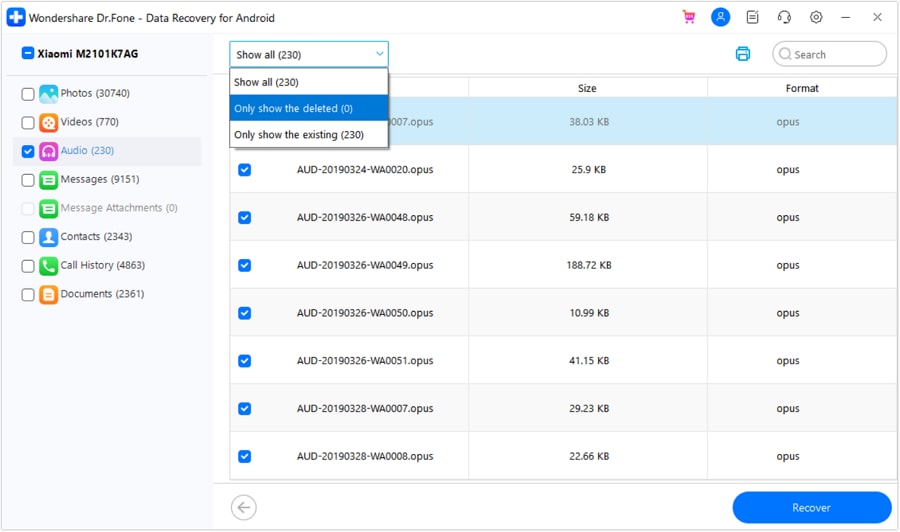
- Step 5: Select the file types you wish the app to recover and click on Start Scan.
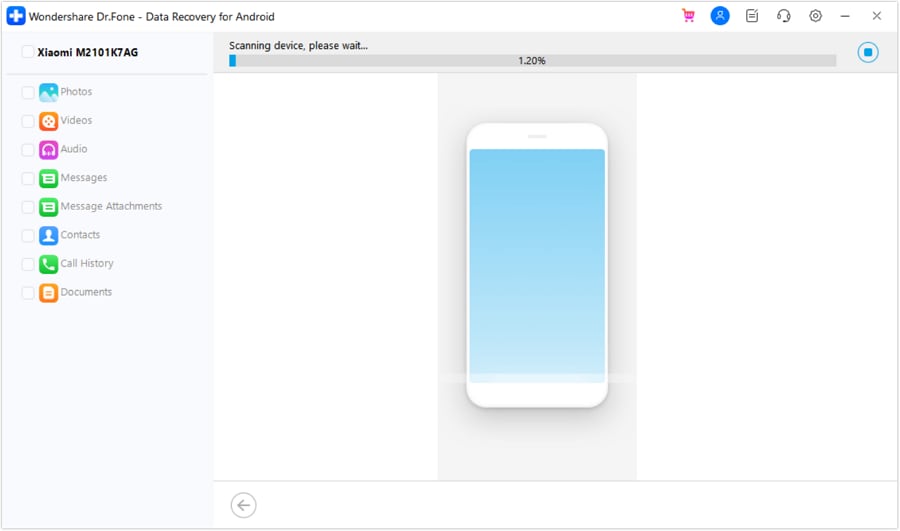
- Step 6: The data recovery process will begin, and you can preview any recovered files.
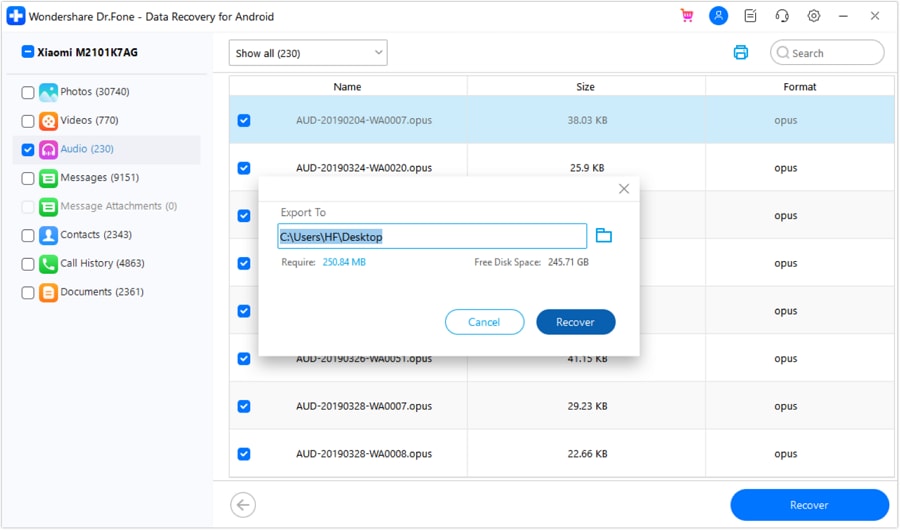
- Step 7: Once the data recovery process finishes, you can select individual or all files and hit the Recoverbutton to save them to a PC.
- Step 8: Choose a location on your PC to export recovered data and hit Recover.
That’s all it takes to recover data from an Android phone using the Wondershare Dr.Fone app. The process is highly intuitive and straightforward, and you certainly won’t have any issues if you’ve followed the step-by-step guide.
It’s worth noting that, during step 3, you can also choose other options to recover Google Drive or WhatsApp data, and the app will even let you retrieve items from a broken phone.
During step 5, having fewer data types selected means the app will recover your files quicker, and there’s no need to search for audio files, for example, if you haven’t lost any audio files.
Finally, the process can also be stopped during step 6 if you have already found the files you’re looking for.
Part 4. What Should You Do to Keep Your Android Photos Safe?
Android photos can be made safer and more secure in numerous ways. Various methods can be utilized to make your precious images less prone to accidental deletion or file loss due to unforeseen circumstances. Here’s what you can do to keep your Android photos safe:
- Create backups– these are an excellent method of preventing data loss, yet very few people utilize them properly. By creating a backup of your essential files, you multiply your files by two and ensure that if one location ceases to exist, another has your vital photos. That’s why backups are crucial and should be created weekly or monthly.
- Use multiple clouds– having your photos in another location apart from the phone is a great idea. However, having these photos in various places is even better, especially if the pictures in question are ones you hold dear. Therefore, you should use a few cloud technologies and have photos in three, four, or more locations.
- Utilize device security methods– by adding a PIN, pattern, or password, you’re securing your device from unwanted access, but you can also add a different security method for each app. Some phones let you set up a security method for file deletion, which can prevent accidental deletion on your side.
By using and combining these methods, you’re ensuring that your files are safe and secure in multiple locations. If someone steals your phone, they’ll only steal a device with a monetary value, which you can purchase again. On the other hand, your photos, which are priceless and can’t be repurchased, won’t be lost.
Conclusion
Losing your precious photos is undoubtedly a terrible experience. Realizing you can’t bring them back is even worse. That’s why having your vital files in multiple locations, creating backups, and ensuring the safety of your data is highly recommended, yet not many people do it.
However, technology has advanced enough, and some tools can recover your priceless photos, even if you don’t have backups. For example, cloud backups often have recycle bins, which can prevent accidental deletion, and apps like Wondershare Dr.Fone can recover your deleted photos and files, even if they’re also gone from the trash.


Android Recover
- Recover Apps
- 1. Data Recovery Software for Android
- 2. Top 4 Android Data Recovery Tools
- 3. Restore Deleted Files on Android
- 4. Coolmuster Android Data Recovery
- 5. Guide of Disk Drill for Android
- 6. Android Data Recovery Software
- 7. Gihosoft Android Data Recovery
- 8. Jihosoft Android Phone Recovery
- 9. Minitool Android Mobile Recovery
- 10. Recover Android Data from Fucosoft
- 11. Best Mobile Forensics Tools to Recover Data
- Contacts Recover
- Files Recover
- 1. Recover Files from Internal Memory
- 2. Recover Miscellaneous Files
- 3. Recover Android's Hidden Files
- 4. Recover Deleted Files from Android
- 4. Recover Deleted Files Without Root
- 5. Recover Files from SD Card
- 6. Undelete Files on Android
- Messages Recover
- Music/Videos Recover
- Photos Recover
- 1. Android Photo Recovery Apps
- 2. Recover Deleted Photos from Android
- 3. Recover Photo from Internal Storage
- 4. Recover Photos from Lost Phone
- 5. Restore Android Deleted Photos
- Broken Android Recover
- 1. View Files from Broken Phone Screen
- 2. Recover Data from Dead Phone
- 3. Recover Contacts with Broken Screen
- 4. Recover Text Messages from Android
- 5. Recover Data from Internal Memory
- Social Apps Recover
- 1. Recover Facebook Messages
- 2. Recover WhatsApp Messages
- 3. Recover WhatsApp Messages
- 4. Restore Deleted WhatsApp Messages
- Android Recover Tips
- ● Manage/transfer/recover data
- ● Unlock screen/activate/FRP lock
- ● Fix most iOS and Android issues
- Recover Now Recover Now Recover Now
Alice MJ
staff Editor