 Recover photos, messages, WhatsApp, and more — no backup
needed.
Recover photos, messages, WhatsApp, and more — no backup
needed.

 100% Security Verified | No Subscription Required | No Malware

 :
: 
 ChatGPT
 Perplexity
 Gemini
 Claude
 Grok
Grok
Imagine waking up to find your Android device missing and all your mobile data gone. Losing your device can be an overwhelming experience, especially when you realize you have lost pictures on Samsung phone. But do not panic just yet. In this article, you will discover effective methods to retrieve your lost data seamlessly.
Whether your device screen is shattered, entirely unresponsive, or misplaced, knowing how to retrieve photos from a lost phone is essential. We will guide you through the process of recovering Google Photos, alongside a powerful software solution designed to recover data from lost Samsung phone. Dive in to regain control of your precious memories and explore a bonus guide on restoring deleted contacts!
In this article
Part 1: Recover Google Photos Using the Same Google Account
If you have lost photos on Samsung phone but had cloud sync enabled, getting your memories back is straightforward. You can easily access and restore your media files from Google Photos using any other smartphone or computer by logging into the same Google account.
1. Use Another Phone or New Phone
If you are using a new Android device, follow these steps to recover Google photos from a lost phone:
Step 1 Open the App and Access the Library
Open the Google Photos application on your new Android device. Tap on the "Library" option located at the bottom left corner, then select "Bin" or "Trash".
Step 2 Select Your Target Images
Browse through the deleted or missing photos. Long-press the specific images you wish to bring back to your active gallery.
Step 3 Tap the Restore Button
After selecting your desired files, tap the "Restore" option visible at the bottom of the screen.
Step 4 View the Recovered Photos
Your media will be instantly restored to the main library in Google Photos, allowing you to view and download them onto your new device.
If you have switched to an iPhone, follow these steps to recover your deleted photos from Google Photos:
Step 1 Navigate to the Bin Menu
Firstly, open the Google Photos application on your iPhone. Hit the Hamburger icon in the top corner, followed by selecting the "Bin" option.
Step 2 Trigger the Selection Mode
In the top right corner of your screen, locate the three Horizontal Dots. Tap on them, and choose the "Select" option from the dropdown menu.
Step 3 Pick Your Desired Images
Now, tap on the images that you want to restore. At the bottom of the screen, you will see two primary actions: "Delete" and "Restore".
Step 4 Execute the Restoration
Once you have selected the memories you want to retrieve, tap on the "Restore" button to move them back to your main grid.
2. Use the Web Version of Google Photos on PC
Step 1 Log In to Google Photos Web
Open your browser and visit Google Photos at the https://photos.google.com/ link. Ensure you log in to the same Google account associated with your missing Android phone.
Step 2 Access the Trash Folder
On the left-hand sidebar menu, click on "Bin" or "Trash" to view your recently deleted or missing photos.
Step 3 Hover and Select
Hover your mouse pointer over the desired photo, click the Check icon that appears, and then select "Restore" at the top right of the screen.
Step 4 Individual Photo Restoration
Alternatively, you can click on an individual photo to open it in full view, then tap the "Restore" button to recover it securely.

Part 2: Use a Professional Tool to Recover Data from Lost Samsung Phone
If you lack a Google cloud backup, or if your phone is severely damaged, you can rely on a highly professional tool - Dr.Fone - Data Recovery (Android). This robust software enables you to safely extract your lost data from Android devices. So, if you have ever accidentally deleted files or need to urgently recover data from lost Samsung phone due to system crashes, this is the most secure method available.
 Scan Android phones and tablets directly.
- Preview and recover only what you want.
- Supports WhatsApp, photos, videos, contacts, and more.
- Works with 6000+ Android devices.

A notable advantage of Dr.Fone is its versatility in retrieving data regardless of the cause. Whether dealing with accidental deletion, rooting errors, physical damage, system crashes, or SD card complications, this software has you covered. Let us delve into the process of recovering your missing files and media directly.
Step 1 Launch the Data Recovery Module
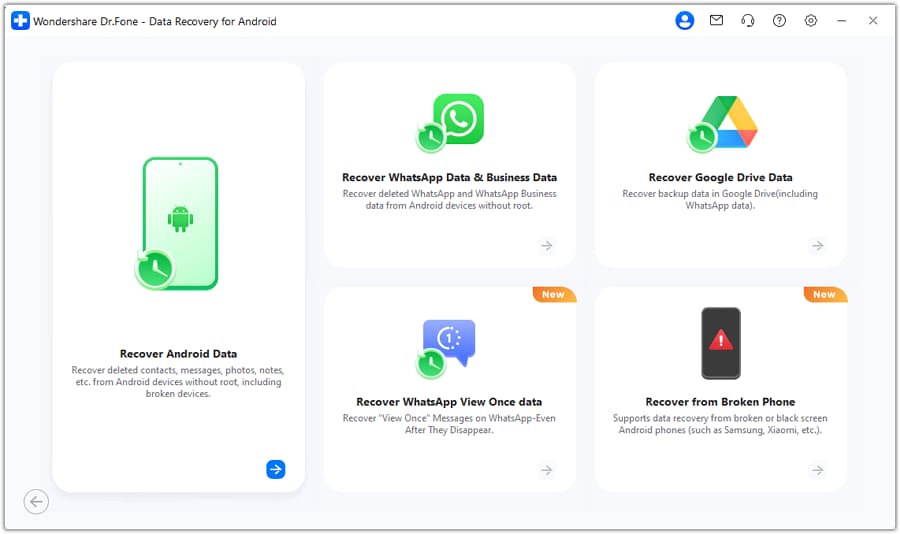
The initial step is to download and launch the Dr.Fone software on your computer. From the main interface dashboard, simply click on the "Data Recovery" module.

Make sure you have previously enabled USB debugging on your Android device if the screen is still partially accessible.
Step 2 Connect Your Device and Start the Scan
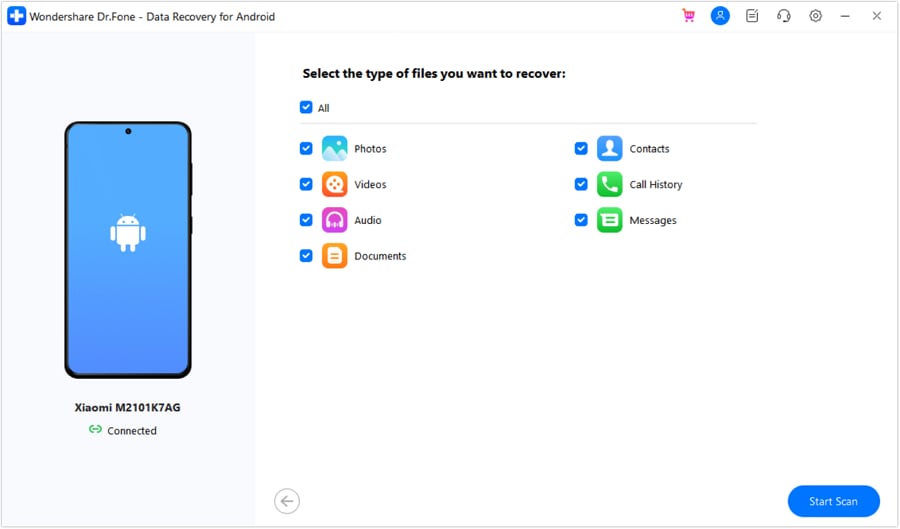
With your device ready for the recovery process, connect it to the computer using a high-quality USB cable. Once a secure connection is established, Dr.Fone will automatically detect your phone and display the supported data types it can retrieve.
By default, all data formats are highlighted. Carefully select the specific file categories you need, such as photos or contacts, and uncheck the rest to speed up the process. Afterward, click the "Start Scan" button. Dr.Fone will thoroughly analyze your Android device's storage. This scanning phase takes a few minutes, so be patient while it locates your missing files.
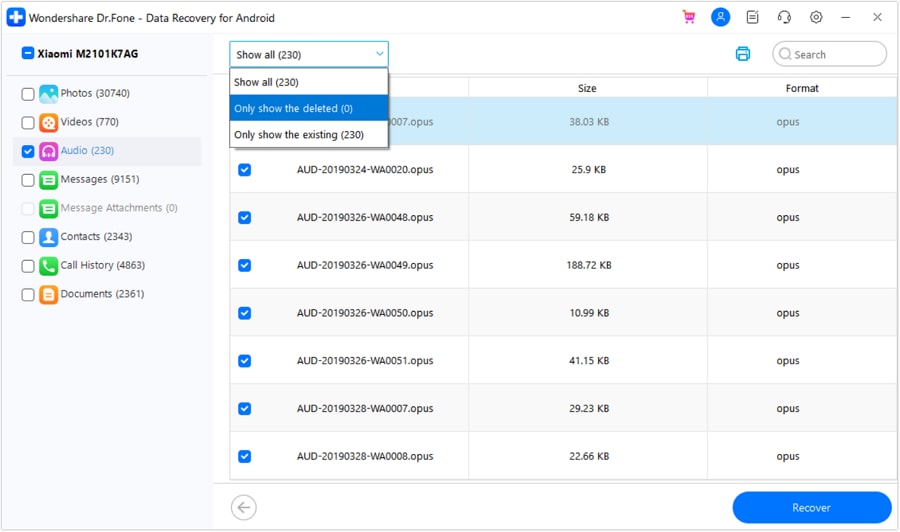
Step 3 Preview and Recover Data
The final screen will showcase all the recoverable data sorted by category. Navigate through the items, preview them, and select what you wish to restore. Finally, click the "Recover" button to extract and safely save your files directly to your computer's hard drive.




Dr. Fone App-Data Recovery (Android)
Tips: If you prefer operating directly on a mobile interface, the Dr. Fone App-Data Recovery (Android) is an excellent mobile-first solution. This application empowers you to retrieve lost files directly from your smartphone without needing a desktop connection. It simplifies the recovery process immensely, making it easy to bring back missing videos, photos, and crucial documents.
With an intuitive interface, you can effortlessly restore numerous data types. The tool scans for audio files, contacts, call logs, messages, WhatsApp media, and Google Drive backups. Take advantage of its seamless design to rapidly restore peace of mind when unexpected data loss occurs.

Part 3. Bonus Tips: How to Recover Lost Google Contacts?
In addition to pictures, learning how to recover lost contacts from a Google account is vital for full restoration. For this, we leverage the native "Undo changes" feature integrated into Google Contacts. This powerful utility lets you reverse any accidental deletions or unwanted sync changes made over a span from the last 10 minutes up to 30 days. Any contact erased during this window will be effectively un-deleted.
Follow the guidelines outlined below to restore deleted Google Contacts using your computer browser:
Step 1 Access Google Contacts Dashboard
First, open your preferred web browser on your PC or Mac and navigate to contacts.google.com. Ensure you log into the exact Google account linked to your missing contacts.
Step 2 Locate the Undo Changes Option
At the top right corner of the user interface, click on the "Settings" gear icon. A dropdown menu will appear; click on the "Undo Changes" option to proceed.

Step 3 Select the Reversal Timeframe
You will now be prompted to define the specific time window during which your contacts vanished. For instance, if you noticed the deletion an hour ago, choose the "1 hr" option. Alternatively, use the "Custom" feature to pick a timeframe of up to 30 days.

Step 4 Confirm and Verify Restoration
After clicking confirm, wait a few moments for Google to process the rollback. Once completed, refresh your page to verify that the missing contacts have successfully repopulated in your list.
Conclusion
Losing your device does not necessarily mean permanent data loss. We have extensively covered how to retrieve photos from a lost phone by utilizing built-in Google account features, ensuring your media and important contacts can be swiftly rescued. For deeper data recovery needs - such as extracting WhatsApp chats, localized files, and when cloud sync is not an option - turning to a powerful desktop utility is paramount.
By using professional software like Dr.Fone - Data Recovery, you can deeply scan and recover data from lost Samsung phone devices securely and selectively. Make sure to download the software, try out its risk-free scanning features, and regain full control of your vital files today.
FAQ
1. Can I recover data from a lost Samsung phone without a backup?
If your phone is lost and you do not have physical access to it, recovering data without a prior cloud or PC backup is impossible. However, if you subsequently recover the phone but it is broken, you can use professional software like Dr.Fone - Data Recovery (Android) to extract internal data.2. How do I access my Google Photos if my phone is stolen?
You can simply access your Google Photos by logging into your Google account on any web browser (photos.google.com) or by installing the Google Photos app on a new device. All images previously synced to the cloud will remain secure and accessible.3. Does Google permanently delete photos from the bin?
Yes. Google Photos automatically empties items from the trash bin after 60 days. Once the 60-day window expires, the photos are permanently deleted and cannot be recovered via Google's native recovery settings.4. How can I track my lost Samsung phone to retrieve my physical data?
You can track a missing Samsung phone using Samsung's "SmartThings Find" service or Google's "Find My Device". Both tools allow you to locate your phone on a map, ring it remotely, or lock it to secure your files until you physically retrieve the device.
 Add Wondershare Dr.Fone as a preferred source on Google



