Effortlessly manage data through preview, delete, export, etc.

 100% Security Verified | No Subscription Required | No Malware

 :
: 
 ChatGPT
 Perplexity
 Gemini
 Claude
 Grok
Grok
Have you wrongly deleted Facebook messages on your Android device? Are you desperately trying to figure out how to recover deleted Facebook messages? Whether it was an accidental swipe or a hasty decision, losing critical conversations can be a highly stressful experience. Fortunately, we have gathered the most effective methods to help you understand how to recover deleted Facebook messages easily in 2026!
As we all know, Facebook Messenger remains one of the most important applications on your Android device for staying connected with friends, family, and colleagues. Sometimes, it functions as a critical tool in a work environment, storing crucial files, contact details, and project discussions. Many of us prefer to communicate through Facebook because it enables faster interaction and ensures seamless cross-device connectivity.
Because these messages often hold significant personal or professional value, losing them from your Facebook Messenger can be incredibly frustrating. Not only do you risk losing memorable exchanges with your loved ones, but also important work-related details. With a little bit of effort, it is entirely possible to recover deleted Facebook messages on your Android phone, especially if you have backed up the messages or leverage hidden system cache files. Yes, it doesn't matter if you have completely deleted the Facebook messages from the Messenger app interface; you can still regain access to those lost conversations by following the right protocols.
In this article
 Scan Android phones and tablets directly.
- Preview and recover only what you want.
- Supports WhatsApp, photos, videos, contacts, and more.
- Works with 6000+ Android devices.

Part 1. Can You Recover Deleted Facebook Messenger Messages from an Android Device?
The short answer is yes. Facebook Messenger follows an architectural principle known as "off the internet." In simple terms, this means that even if a message is deleted from your active app interface, there is usually a temporary copy of those same messages stored deep within your phone's physical memory. Therefore, messages you thought were permanently gone might still be residing on your local storage cache. It is highly feasible to retrieve deleted Facebook messages by following a few technical yet simple steps.
How to retrieve deleted Facebook messages using Android cache:
-
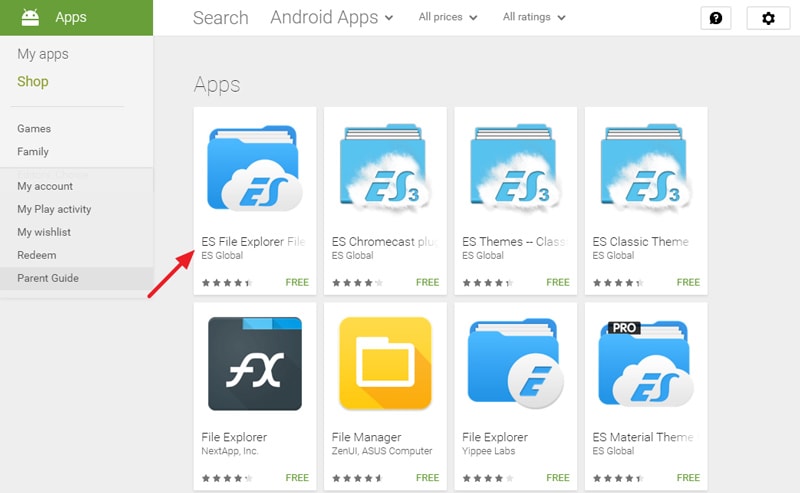
Step 1 Install a Robust File Explorer
To begin, you will need to download a file explorer application for Android. This tool will allow you to navigate through the hidden system folders on your internal storage or SD card. We highly recommend using a reputable file manager like ES File Explorer, as it simplifies the process significantly.
-
Step 2 Locate the Android Data Folder
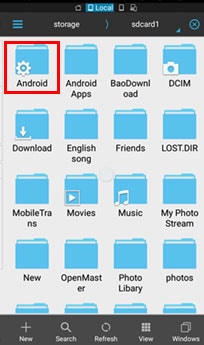
Launch the ES File Explorer app. Navigate to your primary storage or SD card directory. Within the root directory, locate and tap on the "Android" folder. This directory holds all the data and cache files associated with your installed applications.
-
Step 3 Access Facebook Messenger's System Folder
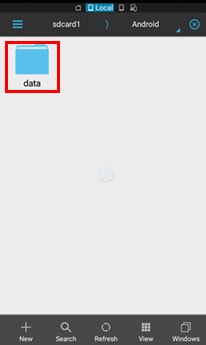
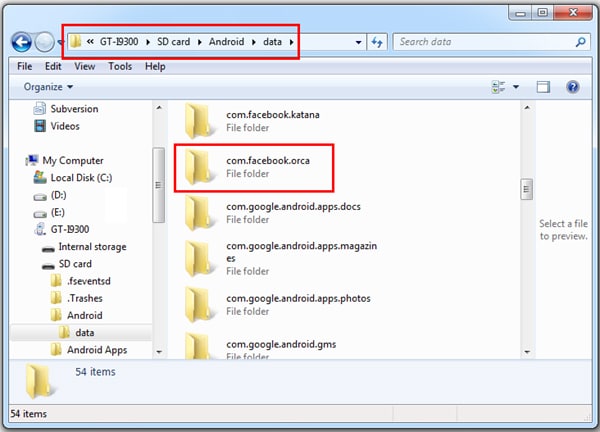
Inside the Android folder, open the "data" directory. Scroll through the list of application folders until you find the one named "com.facebook.orca". This specific folder belongs to Facebook Messenger and contains its localized cache.
-
Step 4 Recover the Backup Files
Tap on the "cache" folder inside "com.facebook.orca". Here, you will discover a sub-folder titled "fb_temp". This folder contains all the relevant backup files automatically saved by Facebook Messenger. By accessing this folder, we can effectively recover Facebook messages right on our phones without internet access.
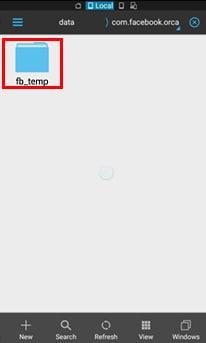
-
Step 5 Alternative Method via PC Connection
Another reliable way to find these same recovery files is by accessing your phone's memory from a computer. Simply connect your Android phone to your PC or Mac using a USB cable. Open your phone's storage from your computer's file browser, follow the exact same path (Android > data > com.facebook.orca > cache), and access the "fb_temp" folder.
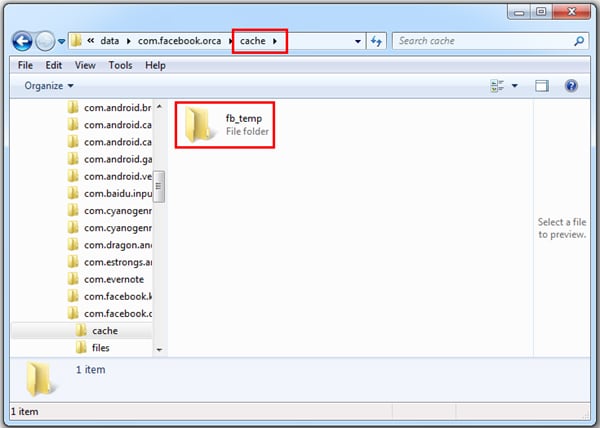
Part 2. How to Archive Facebook Messenger Messages to Prevent Data Loss
While recovery is possible, archiving your messages is a highly recommended proactive strategy to secure your conversations from future digital mishaps. Archiving hides the messages from your main inbox but keeps them perfectly safe and searchable. The process is straightforward and gives you maximum control over your chat history, whether you are using the Facebook website or the Messenger app.
-
Step 1 Select the Conversation
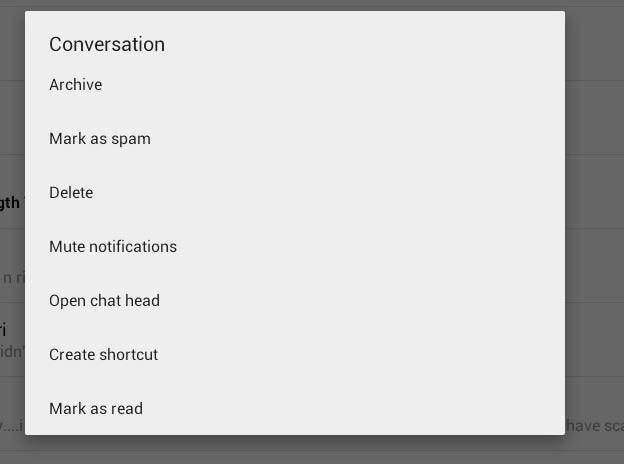
Open the Messenger application and scroll through your recent conversation list. Locate the specific contact whose chat history you wish to safeguard. Perform a long press (tap and hold) on that conversation thread until a pop-up menu appears.
-
Step 2 Archive the Chat
From the options that appear, select "Archive". The entire chat will be instantly moved to your archived messages list, where it remains protected. It can be easily unarchived later whenever you need it by simply messaging that contact again or searching their name.
It is incredibly simple to archive Facebook messages. However, keep in mind that when archiving a contact, the conversation history is safely retained but hidden from plain view. If you accidentally choose the "Delete" option instead of "Archive" from the Recent tab, it is considered a permanent action by the app. Always double-check your selection to ensure you are archiving rather than deleting.
Part 3. How to Recover Deleted Facebook Messages from a Downloaded Archive
If your cache files were cleared or the first method did not yield the desired results, you have another powerful official method: downloading your Facebook account data. Once you have an archive of your data requested from Facebook, you can review nearly everything you have ever sent or received on the platform.
-
Step 1 Access Facebook Account Settings
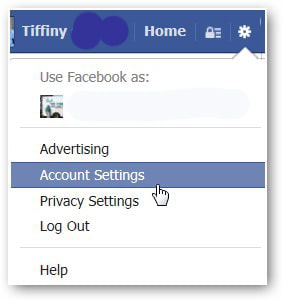
If you'd like to recover deleted Facebook messages officially, you must first log in to your Facebook account via a web browser (preferably on a desktop). Navigate to the top-right corner, open the dropdown menu, and click on "Account Settings" (or "Settings & Privacy" > "Settings" in modern layouts). Look for the option labeled "Download a copy of your Facebook data" or "Download Your Information".
-
Step 2 Initiate the Archive Process
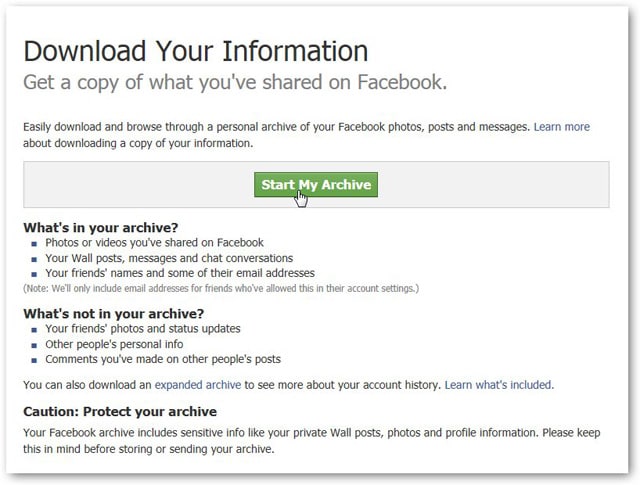
You will be directed to a page where you can request a comprehensive package containing everything associated with your profile. Click the button labeled "Start My Archive" or "Request a Download".
-
Step 3 Confirm the Download Request
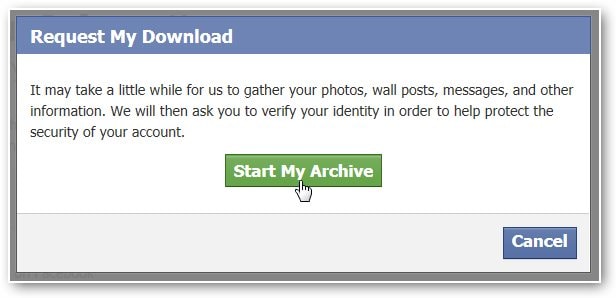
A pop-up box named "Request My Download" will appear, informing you that gathering this vast amount of Facebook information will take a little while. Click the green "Start My Archive" button once more to confirm and begin the data collation process.
-
Step 4 Wait for the Download Link
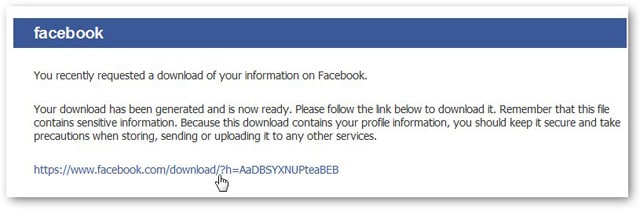
Facebook will process your request securely. Once the archive is ready, you will receive an email and a notification containing a download link. Keep in mind that depending on your account's age and activity level, it may take a few hours to generate. Click the provided link in the small dialog box to download your archive file.
-
Step 5 Verify Your Identity
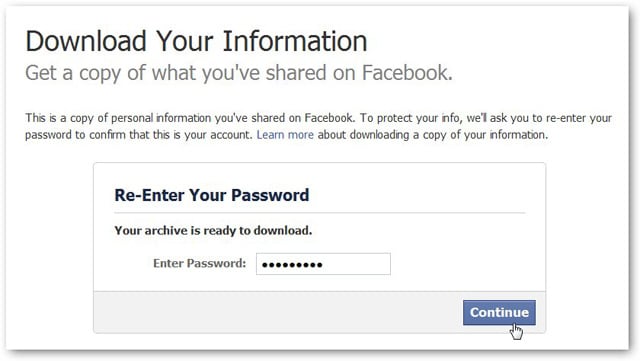
For security and privacy reasons, Facebook requires you to re-enter your account password before the actual file transfer begins. Enter your password to proceed.
-
Step 6 Unzip and Review Your Messages
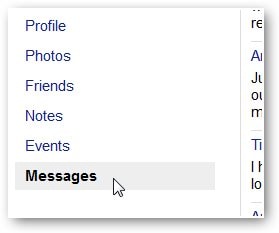
Click on the "Download Archive" button, and the ZIP file will save to your computer's local drive. Extract the ZIP file using standard extraction tools. Open the extracted folder, look for a file named "index.html", and open it in your web browser. From the menu, click on "Messages". This will load an offline view of all your past conversations, allowing you to manually locate and recover Facebook messages.

Part 4. Video Tutorial: How to Recover Facebook Messages on Android
If you prefer a visual walkthrough, check out the detailed video tutorial below. It visually demonstrates the steps we've covered on navigating the Android file system and securely downloading your account archive to retrieve your most critical conversations.
Conclusion
Losing important conversations no longer has to be a disaster. As we have explored in this 2026 guide, whether you dive into your Android's hidden cache folders or officially request your data archive from Facebook, there are highly effective strategies to restore what you've lost. As our digital needs evolve—much like the ever-present debate of upgrading your devices, such as wondering Will you choose iPhone XS or Samsung S9?—the necessity for dependable data recovery solutions remains constant. Always remember to use the 'Archive' function instead of 'Delete' to prevent unwanted data loss in the future, and regularly check your app cache before resorting to extreme measures.
FAQ
-
1. Can I retrieve deleted Facebook messages without a backup?
Yes, even if you do not have an explicit cloud backup, you can often retrieve deleted Facebook messages on Android by accessing thecom.facebook.orcacache folder. Messenger temporarily stores chat logs offline in this directory, meaning the messages may still reside locally on your device's memory. -
2. Does clearing the app cache delete my Messenger recovery files?
Yes. If you go into your Android settings and clear the cache or data for the Facebook Messenger app, it will completely wipe out thefb_tempfiles. Doing this destroys the local copies, making it impossible to recover the messages using the file explorer method. -
3. How long does it take for Facebook to prepare my data archive?
The time it takes for Facebook to compile your data archive varies wildly depending on your account's age, media volume, and overall activity. It generally takes anywhere from 15 minutes to a few hours. Facebook will send you an email notification as soon as the ZIP file is ready to be downloaded safely. -
4. Are there third-party tools that can recover Facebook messages on Android?
While manual methods like extracting cache files or downloading official account data are the safest, certain third-party Android data recovery tools claim to scan deep system memory for deleted files. However, the success rate depends heavily on whether the device memory has been overwritten by new data, and users should only use highly trusted, reputable recovery software to avoid privacy risks.
 Add Wondershare Dr.Fone as a preferred source on Google