 Recover photos, messages, WhatsApp, and more — no backup
needed.
Recover photos, messages, WhatsApp, and more — no backup
needed.

 100% Security Verified | No Subscription Required | No Malware

 :
: 
 ChatGPT
 Perplexity
 Gemini
 Claude
 Grok
Grok
One of the most essential priorities for smartphone users in 2026 is data security. We all want our precious memories and vital documents to remain entirely safe, even when unexpected disasters happen to our iOS devices. I’ve seen countless individuals experience genuine panic when they suddenly lose their iPhones or realize critical files are missing. Cloud storage solutions have evolved to offer excellent security, but many users still choose to restore data with iTunes due to its direct offline management and local convenience. However, users occasionally face a frustrating roadblock: the notorious iTunes corrupt backup issue, which completely halts the restoration process.
As tempting as it might be to panic over potentially lost digital memories, there are proven methods to tackle this problem head-on. In this comprehensive guide, we will explore effective solutions for iTunes corrupt backup errors. By following these targeted fixes, you can regain control of your files and bypass the compatibility glitches that interrupt your recovery workflow.
In this article
- Part 1. Why do I encounter the "iTunes Backup was Corrupt or Not Compatible” message?
- Part 2. How to recover data from iPhone/iCloud
- Part 3. How to fix iTunes corrupt backup issue
- Part 4. How to fix iTunes corrupt backup issue on iPhone/iPad
- Part 5. How to find iTunes backup on your computer
- Conclusion
Part 1. Why do I encounter the "iTunes Backup was Corrupt or Not Compatible” message?
If you are reading this troubleshooting guide, chances are you have already encountered the dreaded "iTunes Backup was Corrupt or Not Compatible" warning on your screen. Before diving into the technical steps on how to resolve the iTunes corrupt backup problem, it is essential to understand the root causes behind this error. Knowing what triggers the issue will help prevent it in the future.
Generally, this frustrating alert is triggered by one of two primary reasons during the restoration process:
- The backup file you are attempting to restore has become genuinely corrupted due to interrupted downloads, hard drive errors, or incomplete syncs.
- The backup was originally created on a completely different iOS version than the firmware currently installed on your device, causing a severe compatibility mismatch.

Part 2. How to recover data from iPhone/iCloud
This first method is highly recommended if you are not completely dependent on using iTunes for restoration. When facing the frustrating iTunes corrupt backup error, preserving your precious memories is the ultimate goal, regardless of the software you use. While we provide manual fixes later in this guide, those native Apple methods often involve time-consuming trial and error, and they cannot always guarantee successful data retrieval.
To bypass unnecessary technical complications and save valuable time, you can utilize an intuitive third-party alternative like Dr.Fone - Data Recovery (iOS). This robust utility allows you to extract and restore your essential data smoothly, bypassing frustrating iOS compatibility warnings entirely. It serves as a highly reliable alternative to Apple's native software.
Developed by Wondershare, this versatile data extraction software offers incredible multi-purpose functionalities. Having it installed in 2026 ensures you are well-prepared to tackle various iOS data loss scenarios, far beyond simple backup corruption.
 Recovers data after deletion, crashes, or device damage.
- Supports photos, messages, contacts, WhatsApp, and more.
- Supports all major iPhone, iPad, and iPod models.
- Preview and recover only what you need.

2-1. Recover data directly from iPhone
-
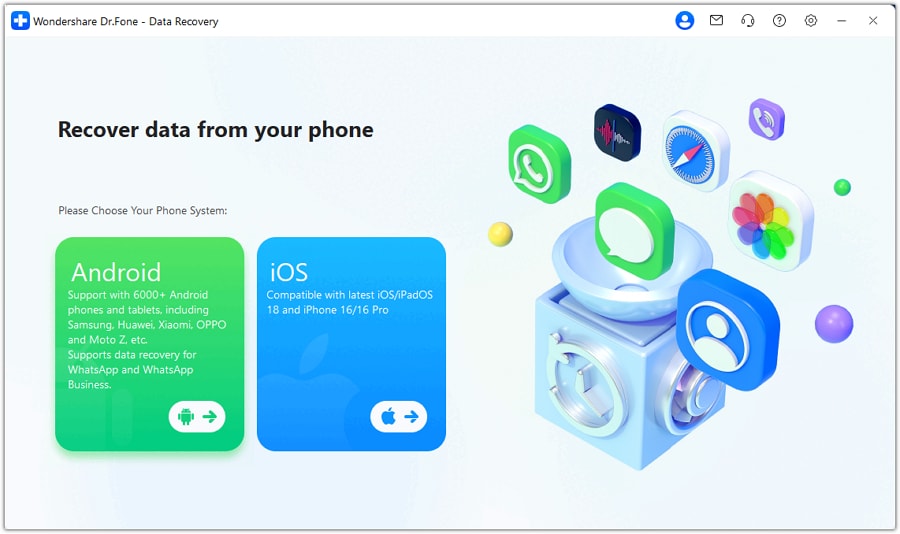
Step 1 Access Dr.Fone - Data Recovery (iOS)
Begin by downloading and installing the Dr.Fone software on your computer. Launch the application and select the "Data Recovery" module from the main interface. Next, securely connect your iPhone to the computer using a certified lightning or USB-C cable to establish a stable connection.

-
Step 2 Click on ‘Start Scan’
Once your device is successfully detected, navigate to the left-hand blue panel and click the iPhone icon situated at the top. Afterward, click on the "Start Scan" button to initiate a comprehensive deep scan of your iPhone's internal storage for recoverable files.
-
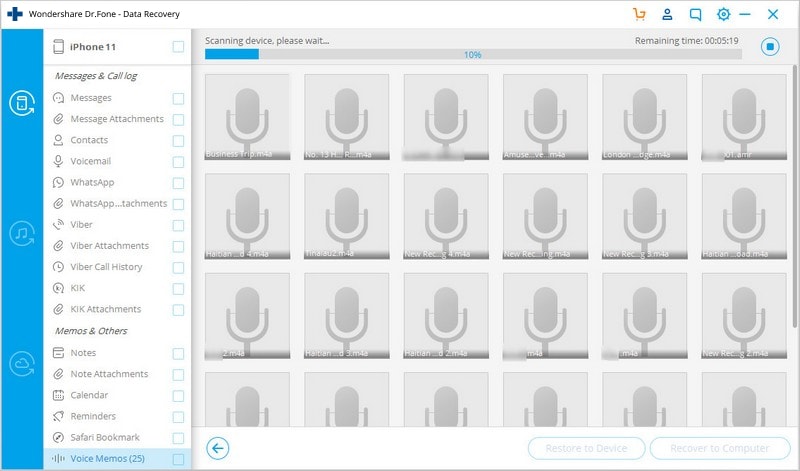
Step 3 Select and Recover
Upon completion of the scan, you will be presented with an organized list of data categories on the left, displaying specific contents on the right panel. Browse through the respective folders, select the precise files you wish to retrieve, and simply click "Recover" to securely export the information to your computer.




2-2. Recover data from iCloud
If you prefer syncing your vital information to cloud storage where it remains accessible and secure indefinitely, the previous local recovery method might not be entirely applicable to your situation. Fortunately, Dr.Fone operates as a versatile, one-stop solution. This means it is fully equipped to securely extract your necessary files directly from your cloud backups. Here is a detailed breakdown of how to accomplish this when dealing with an iTunes corrupt backup.
-
Step 1 Access Dr.Fone - Data Recovery (iOS)
Install the Dr.Fone software suite and open the primary dashboard. Choose the Data Recovery module, then connect your iOS device firmly to your PC or Mac using a compatible data cable.
-
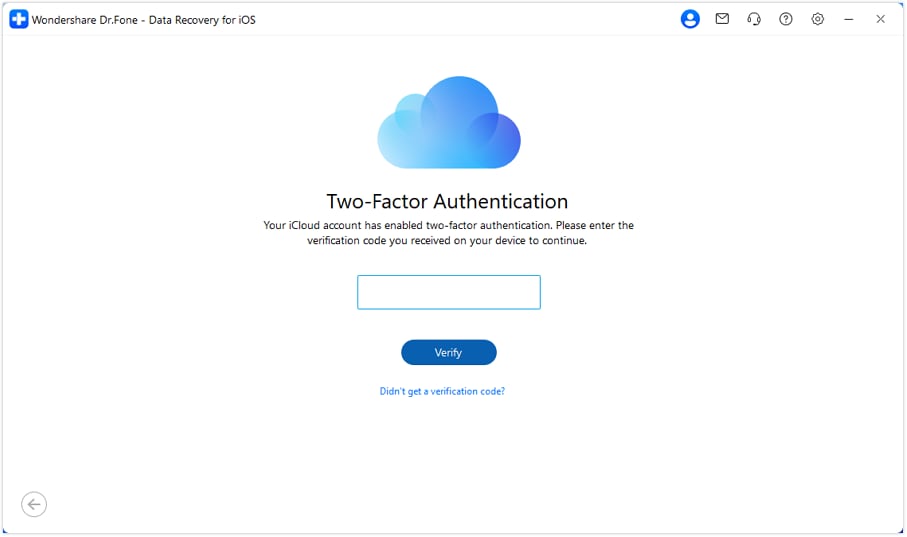
Step 2 Click on ‘Recover from iCloud Backup File’
On the left-side navigation panel, locate and click the third icon, which resembles a cloud. You will be prompted to safely input your Apple ID credentials to securely sign into your iCloud account.
-
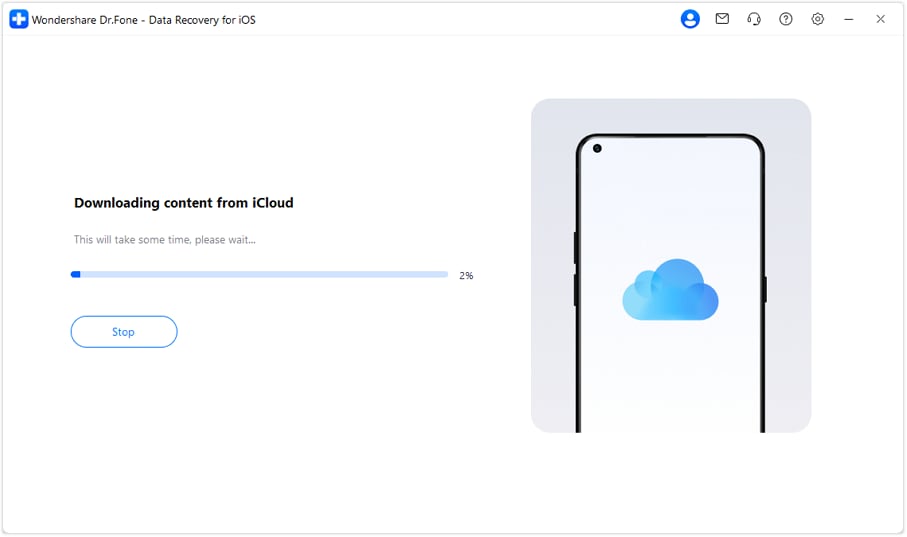
Step 3 Choose the Backup File
After logging in, the software will display a detailed list of all devices historically backed up to your iCloud profile. Identify the specific backup corresponding to the data you wish to retrieve, and proceed by clicking the ‘Download’ button.
-
Step 4 Select and Recover
Once the download concludes, you can meticulously browse through categorized archives of your pictures, messages, and multimedia. Select exactly what you need and click the export button to secure your items locally!
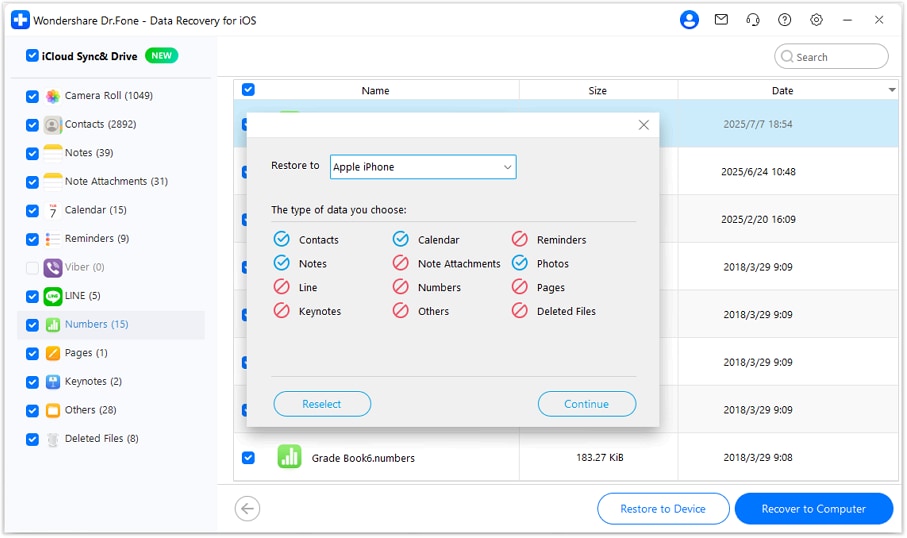
And with that, your task is accomplished! All your critical documents and cherished media have been successfully safeguarded at your preferred offline destination without struggling against an incompatible iTunes environment.
Part 3. How to fix iTunes corrupt backup issue
The third-party data extraction method described above is an incredibly reliable approach to instantly retrieving your files. However, if you are deeply invested in the native Apple ecosystem and are determined to resolve the underlying iTunes corrupt backup issue, you can attempt to manually diagnose and eliminate the software glitch using these troubleshooting techniques:
- Hardware Connection Check: At times, the core issue is as simple as a faulty USB port or an uncertified lightning cable. Ensure your iOS device is firmly connected to your computer utilizing an original Apple accessory.
- Storage Space Verification: The restoration sequence requires adequate local storage to execute. Verify that your destination drive (commonly the 'C' drive on Windows) holds sufficient free gigabytes to accommodate the unpacked backup payload.
- Software Update: Using an outdated software client is a frequent trigger for compatibility errors. Confirm you are running the most recent iteration of iTunes by navigating to the top menu: Help > Check for Updates (Windows) or updating via the App Store (Mac).
- Removing Conflicting Backups: Curiously, one of the most effective workarounds is purging older, redundant backup iterations. Erasing previous syncs often clears the corrupted state and allows a fresh installation to proceed smoothly.

Part 4. How to fix iTunes corrupt backup issue on iPhone/iPad
For those willing to manually remove conflicting files to clear the iTunes corrupt backup message, you must dive into the underlying folder structures. Follow these specific steps to relocate or delete troublesome backup configurations:
-
Step 1 Log out of iTunes and locate folders
For Windows Users: Click the ‘Start’ button and type “%appdata%” into the search bar. Proceed through Roaming > Apple Computer > MobileSync > Backup. Carefully copy or move the specific backup folder to your local desktop.

For Mac Users: Open Finder, use the 'Go to Folder' shortcut, and navigate to ~/Library/Application Support/MobileSync/Backup/. Cut and paste the affected backup folder onto your desktop for safekeeping.

-
Step 2 Access iTunes Preferences
For Windows: Relaunch the program, navigate to the main toolbar, and click on Edit > Preferences.

For Mac: Access the top menu bar, click on the application name, and select Preferences from the drop-down list.

-
Step 3 Delete existing Backup records
Inside the Preferences menu, switch to the 'Devices' tab to reveal a list of Device Backups. Select the corrupted backups highlighted on screen, and click 'Delete Backup' to remove them from the system registry completely.

-
Step 4 Move the Backup folders back
Return to your desktop, select the previously isolated backup directory, and move it back into the original MobileSync > Backup folder location.
-
Step 5 Retry data restoration
Relaunch the client and attempt to sync your device once again. This folder refresh method frequently resolves persistent iTunes corrupt backup anomalies, allowing your digital records to be unpacked correctly.
Part 5. How to find iTunes backup on your computer
If you are attempting to manually clear the cache to resolve an iTunes corrupt backup scenario, pinpointing the precise directory of your stored archives is critical. Because Apple organizes file systems differently across distinct operating systems, the storage path changes depending on your current desktop setup. Below is an exhaustive directory guide detailing exactly where to look for your backup payload:
- Mac OS (All modern versions): Navigate through ~/Library > Application Support > MobileSync > Backup.
- Windows XP (Legacy): C:\Documents and Settings\[Username]\Application Data\Apple Computer\MobileSync\Backup.
- Windows Vista: C:\Users\[Username]\AppData\Roaming\Apple Computer\MobileSync\Backup.
- Windows 8: C:\Users\[Username]\AppData\Roaming\Apple Computer\MobileSync\Backup.

- Windows 10 / Windows 11: C:\Users\[Username]\AppData\Roaming\Apple Computer\MobileSync\Backup.

Conclusion
In summary, tackling the dreaded iTunes corrupt backup error doesn't have to spell the end of your cherished data. By carefully executing the troubleshooting solutions outlined above, you can often diagnose the core compatibility flaw and repair the file hierarchy manually. Methods like updating your software, confirming cable integrity, or meticulously deleting redundant backup records are completely free and usually resolve minor glitches.
However, relying solely on manual fixes involves a substantial degree of trial-and-error, without a guaranteed outcome. For users seeking rapid, stress-free results in 2026, bypassing native software entirely with dedicated iOS recovery tools remains the most effective strategy. Should you wish to sidestep the frustration completely, adopting an advanced data recovery platform ensures that your photos, messages, and crucial files are securely restored without compatibility roadblocks. Whichever path you choose, staying informed and backing up proactively are your best defenses against permanent digital loss.
FAQ
-
1. What does it mean when iTunes says the backup is corrupt?
When iTunes displays the corrupt backup error, it means the backup file was partially saved, damaged by a hard drive error, or is incompatible with the iOS firmware currently installed on your iPhone or iPad. As a result, the Apple software blocks the restoration process to prevent system instability. -
2. Can a corrupted iTunes backup be fixed?
Yes, in many instances, you can resolve the issue. Simple fixes include updating iTunes to the latest version, freeing up storage space on your hard drive, or deleting older, conflicting backup folders manually. If these fail, third-party data recovery software can often bypass the corruption and extract the remaining healthy files. -
3. Will deleting old iTunes backups delete my photos?
No, deleting an old iTunes backup from your computer will only remove the archived copy stored on your PC or Mac. It does not affect any existing photos, messages, or files that are currently stored locally on your active iPhone or synced to your live iCloud account. -
4. How do I force iTunes to backup my iPhone?
To force a manual backup, connect your iPhone to your computer via a USB cable, launch iTunes, select the device icon near the top left corner, and navigate to the Summary tab. Under the Backups section, simply click the "Back Up Now" button to initiate a fresh save of your current device data.
 Add Wondershare Dr.Fone as a preferred source on Google



