
How to Record Your Screen Using VLC Media Player (Step-by-Step Guide)

Jun 30, 2026 • Filed to: Phone Mirroring Solutions • Proven solutions
 TL;DR:
VLC Media Player (version 3.0 or later) functions as a free screen recorder for Windows, Mac, and Linux that captures desktop activity, playing videos, and external camera feeds once the hidden recording toolbar is enabled.
● To initiate a capture session, users must manually reveal the Record button by navigating to View → Advanced Controls, and adjust the capture frame rate to 25–30 fps for standard presentations or 50–60 fps for gameplay.
● The native recording tool cannot capture DRM-protected content, lacks annotation and multi-source features, and requires Mac users to install third-party audio routing tools like BlackHole or Soundflower to capture system audio.
● For mobile screen recording, Dr.Fone - Screen Mirror serves as a specialized alternative designed to mirror, control, and capture smartphone screens (supporting up to iOS 26, the iPhone 17 series, and Android 16) on a computer via Wi-Fi or USB cable.
Ask AI for a summary
 ChatGPT
 Perplexity
 Gemini
 Claude
 Grok
Grok
Dr.Fone Basic:
Better Control for Your Phone
Manage, transfer, back up, restore, and mirror your device
Have you ever thought that apart from being the app you mainly use for watching videos, VLC Media Player also has a great screen recorder? And if that is not enough, it is free, you don't have to download any other software, and it works seamlessly on Windows, Mac, as well as on Linux.
VLC is not only a media player, but it is also an amazing open-source and versatile tool that can play almost any video or audio format. It has some advanced features including screen recording, audio capturing, and streaming. This instructional tutorial will take you through the steps of efficiently utilizing the VLC screen recording features, from setting up your recording options to saving the video.

This guide will also discuss a bonus tip: if you are looking for more capabilities and features besides VLC, Dr.Fone - Screen Mirror is the way to go. Let's explore how to record using VLC:
Part 1. What VLC can (and can't) record
Before recording, you should simply know how to record on VLC player, what the VLC can do and what the limitations are. VLC can capture videos, screens, and even external devices, but it doesn't offer advanced editing, annotation, or live streaming features.
1.1 Three Recording Modes VLC Supports
VLC has the capability to record in three different ways:
- Recording a video currently playing in VLC: You can watch a movie or video clip in VLC and record it there without having to get another tool. This method is suitable for both saving pieces of movies and recording streams.
- Recording your screen using VLC: You can either capture your whole desktop or a particular window by using VLC. Therefore, it is a great tool for anyone who needs it for tutorials, presentations, or even games, and the fact that it is quite simple doesn't really matter because it's sufficient for most people just doing a casual recording.
- Recording from an external device via VLC: Furthermore, it is possible to record via webcam, capture card, and other devices that are connected. If you like, you can thus simply record the live footage or camera input straight to your computer.
Knowing these three modes, you will not struggle to figure out how to record a video in VLC in different recording situations.
1.2 Important limitations to keep in mind before you start
Before moving to next step on how to capture screen with VLC, here are few important considerations:
- The recording quality largely depends on your system's codec settings: If your codecs are not set up correctly, VLC screen recordings may look pixelated or be in a low frame rate. Changing the settings ahead of time can result in better output.
- It is not possible to record DRM-protected content: Netflix, Hulu, or some DVDs' videos are protected and cannot be captured with VLC. Obtaining these restrictions may lead to legal issues.
- Just a simple screen recording function: VLC can be used to make tutorials, demo, or casual gameplay recordings but lacks features like annotation, multi-source recording, or live streaming which are normally needed for the professional level usage.
For advanced needs: Consider using Dr.Fone – Screen Mirror & Recording Tool, which offers more powerful and flexible recording options (covered in the Bonus Tip section).
4,624,541 people have downloaded it
Part 2. Before You Start — Quick VLC Setup Checklist
Doing just a few simple checks before you press "Record" will make sure your screen recording runs smoothly and looks great:
- Check your VLC version: Be sure you have VLC version 3.0 or later because the recording features are most stable on the latest release. You may download or update VLC via the official Videolan website.
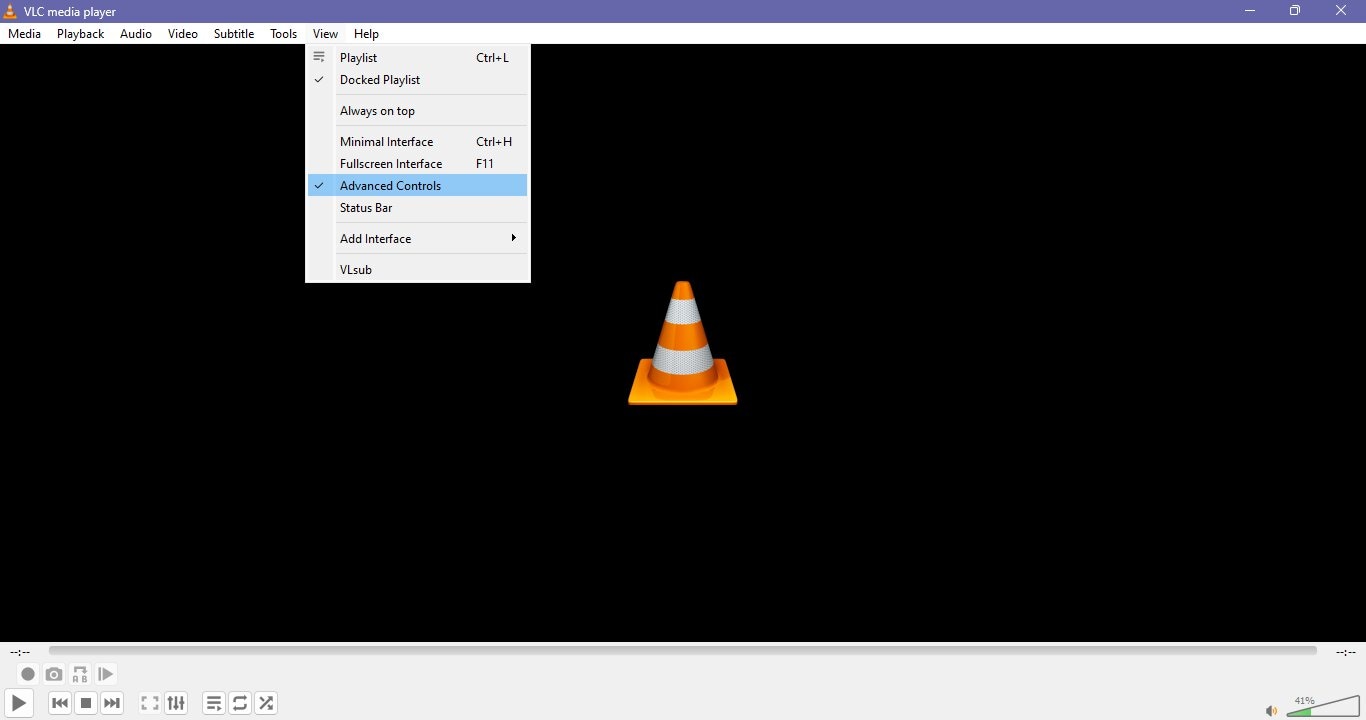
- Find the Record button: Sometimes the record button is hidden by default. You can turn it on by going to View → Advanced Controls. This extra toolbar will give you the Record, Snapshot, and other handy buttons.

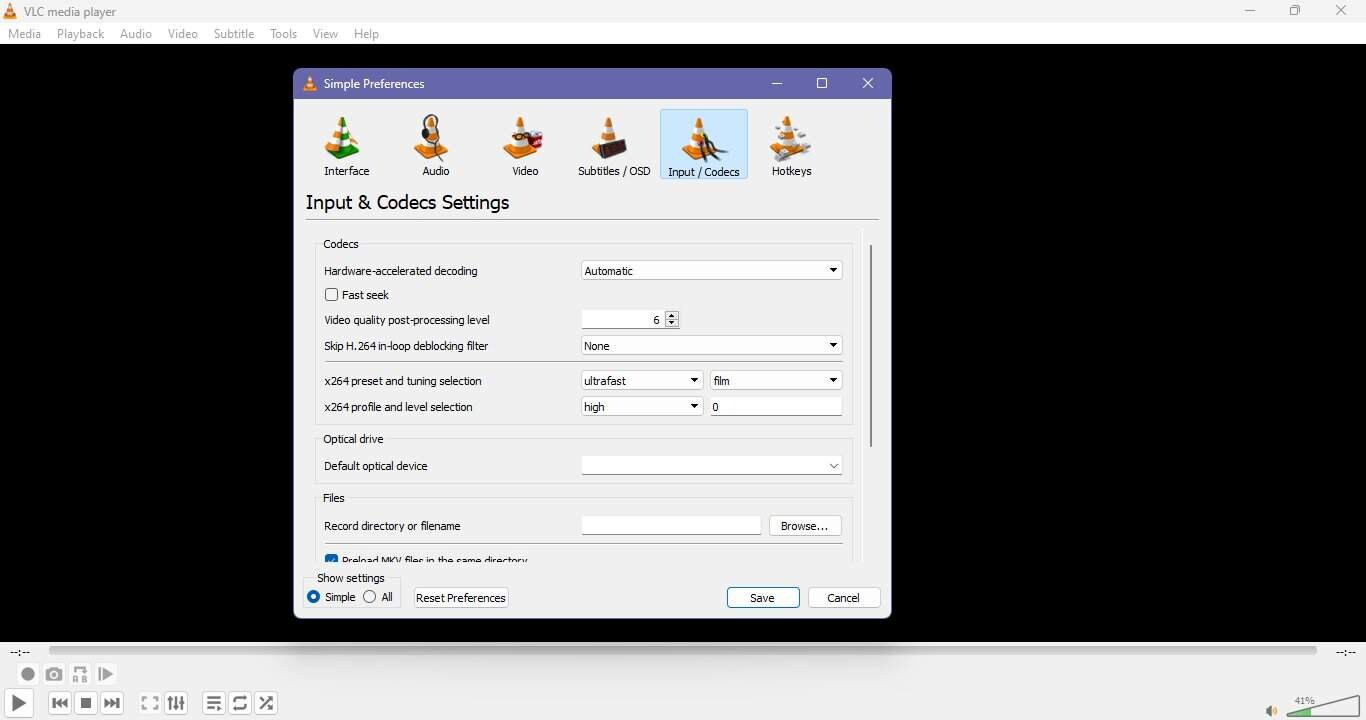
- Set the save folder: VLC will save your recordings in a default location, which might be hard to find. You can set a new folder for your recordings by going to Preferences → Input / Codecs → Files → Record directory or filename.
- Verify storage space: Ensure your hard disk has enough space so the recording will not stop or be incomplete.
- Turn off unnecessary apps: To record even better and seamlessly, turn off those apps that are running in the background.
Part 3. How to Record Using VLC Media Player
Most people have a hard time believing it, but screen recording with VLC is quite easy. With VLC, you can create videos of your instructions, the most exciting game sequences, or video call memories, all these without needing any other software. So, let us find out together the detailed instructions on screen recording in Windows with VLC.
Here is how to record using VLC:
3.1 How to Record Screen Using VLC on Windows
Make sure you have VLC 3.0 or a newer version installed before going any further. The use of advanced controls and the proper settings will allow you to produce recordings that are both smooth and of high quality. Take a good look at the steps to be able to screen record effectively.
- Step 1. Open VLC and turn on Advanced Controls
- Step 2. Prepare for a desktop recording
- Step 3. Record the screen
- Step 4. End the recording and check
Launch VLC player on your Windows PC. To make the Record button and some other useful tools appear, go to View → Advanced Controls.
Choose Media → Open Capture Device and pick Desktop as the capture mode. Adjust the frame rate.

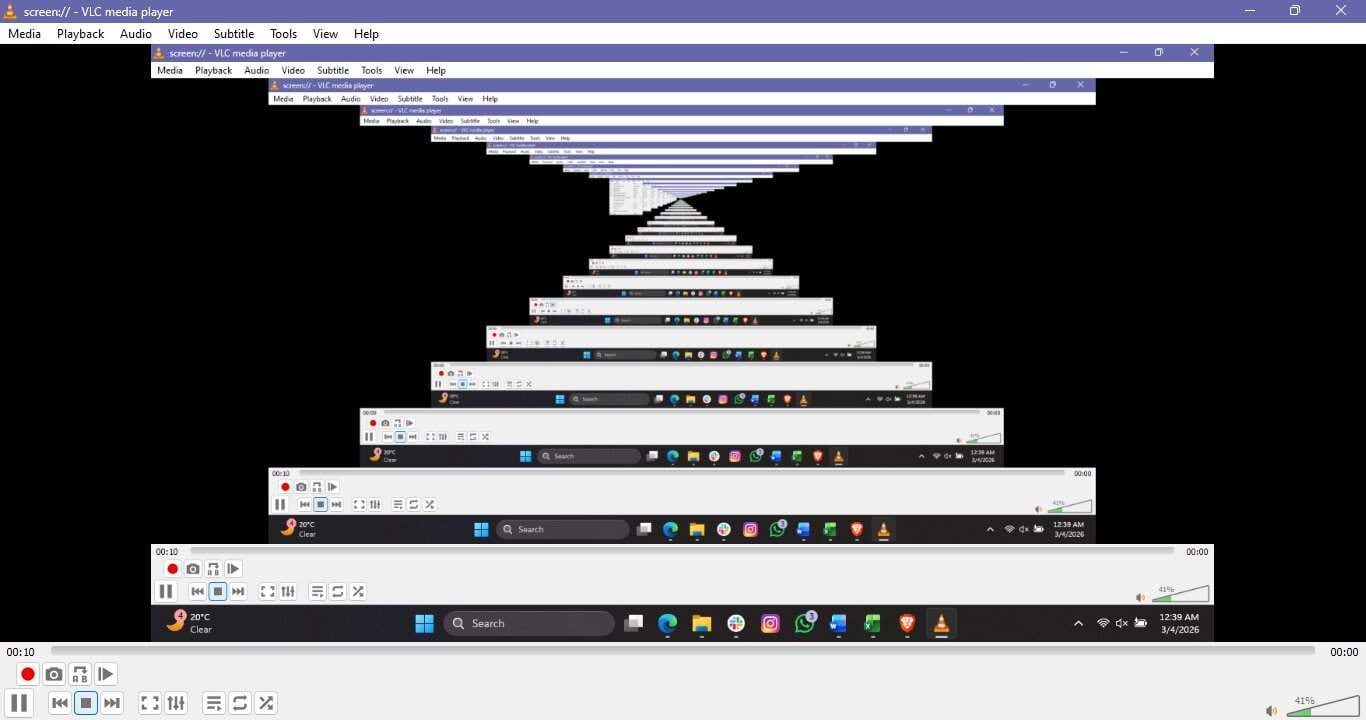
Click Play and then the Record button in the Advanced Controls toolbar to capture the screen.
Click the Record button once more to stop recording. To make sure everything was properly recorded and the quality of the video is up to your standards, open the video file that was saved.
3.2 How to Record Screen Using VLC on Mac
Since VLC's menu layout on Mac is different from Windows, Mac users must take slightly different steps. Use these instructions cautiously if you want to get the best quality video from your Mac.
- Step 1. Run VLC and go to the capture panel
- Step 2. Select screen as the capture mode
- Step 3. Set the frame rate
- Step 4. Record
- Step 5. Save and exit the recording
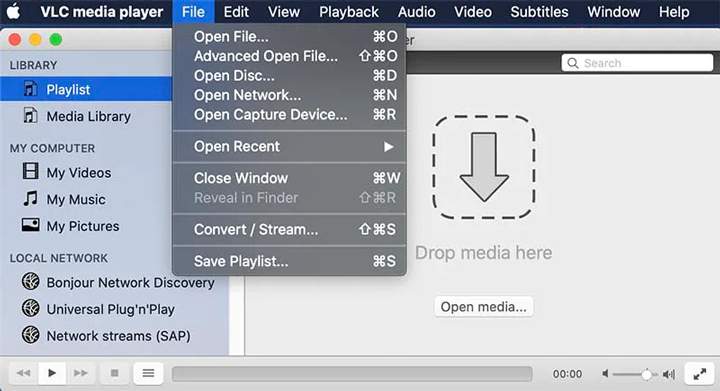
Start VLC on your Mac. Click File > Open Capture Device in the menu bar to bring up the screen capture dialog.
Under the Capture Device tab, hit Capture and pick Screen as your capture mode.
Hit Settings and choose a frame rate for your video. Usually, 25 to 30 frames per second is the most common pick to get a smooth video.
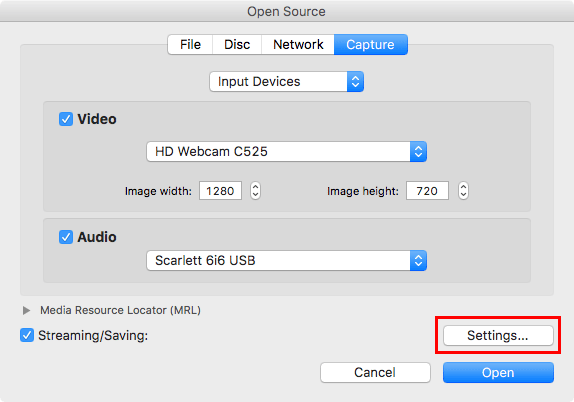
Hit Open and hide the VLC window. To start recording your screen, move the mouse to the top toolbar and go to Playback > Record.
Once done, tap the Stop icon on the VLC panel. Your vid will be stored in the default folder or the one you have set in Preferences.
3.3 How to Record a Video That's Playing in VLC
Sometimes, during playback, you may decide to save the video in VLC. It could be a segment of a local file, a video you have downloaded, or a streamed one. In such a situation, VLC is very accommodating, allowing you to record right away without the need for any additional software installation.
Here's how to record from VLC media player:
Steps to record a video playing in VLC
This is an easy and simple way to save a video clip from streaming or file-on-demand with VLC. It works on both Windows and Mac.
- Step 1. Play the video with VLC
- Step 2. Show Advanced Controls
- Step 3. Record
- Step 4. End the recording session
Start playback in VLC for the movie or stream clip you want to capture. Get the video ready to play.
Click View → Advanced Controls. A Record button among other handy tools will show up at the bottom of the VLC window.
Start the playback and tap the Record button. Playback recording will start from the exact point that you clicked the Record button.

Click the Record button a second time to finish and save the time part.
Part 4. Expert Tips for Better VLC Screen Recordings
From picking the exact settings to getting your desktop ready, these best practices always guarantee smooth, professional-looking recording on your side.
| Tip / Setting | Recommendation | Why it matters |
|---|---|---|
| Frame rate | Use 25–30 fps for tutorials or presentations; 50–60 fps for fast-moving content like gameplay | Ensures smooth playback and prevents choppy recordings |
| Format selection | Record in MP4 for compatibility or MKV for higher quality | Balances file size, quality, and ease of editing |
| Screen prep | Close unnecessary apps, disable notifications, clear desktop | Reduces distractions, prevents accidental captures, and improves system performance |
| Audio alternative | On Mac, use BlackHole or Soundflower to capture system audio | Ensures recordings have synchronized audio for tutorials, presentations, or gameplay |
| Hotkeys | Configure hotkeys in Preferences for start, pause, or stop | Saves time and allows smoother recording without manual clicking buttons |
| Test first | Do a short test recording before the main session | Verifies that settings work, ensures video quality, and helps fix issues before the full recording |
Bonus Tip — When VLC Isn't Enough, Use Dr.Fone – Screen Mirror & Recording Tool
Meanwhile, if you want advanced features while recording your screen, Dr.Fone - Screen Mirror is a truly excellent choice. Besides syncing with PC or Mac through a cable or Wi-Fi, the app also allows mirroring of iPhone, iPad, or Android screens so that real-time TV viewing and recording will be made a reality.
It is an excellent tool for tutorials, lectures, presentations, and gameplay because you can record very clear videos, take screenshots, and even resize screens for easier navigation. The app has a wide range of support for the latest devices such as iOS 26, iPhone 17 series, Android 16, etc.; therefore, it is compatible with almost all modern smartphones and tablets.
Wondershare Dr.Fone
Mirror iOS/Android Phone, Tablet & iPhone to Computer in Clicks
- Mirror iOS/Android screen to computers with a cable or Wi-Fi.
- Extend your device screen to your PC or Mac.
- Record iOS/Android screen and take screenshots from PC or Mac.
- Control your iOS/Android phone/tablet on a PC.


How to Mirror and Record Your Phone Screen Using Dr.Fone:
With Dr.Fone, start by launching the app on your PC or Mac and navigate to My Device → Screen Mirror. Connect your Android device via Wi-Fi or USB cable, then select your device in the left panel and click Screen Mirror. Once mirrored, use the Record button to capture your screen.

4,624,541 people have downloaded it
Conclusion
Knowing how to record using VLC can really boost your creativity. If you want to capture your desktop, a video or an external device, VLC Media Player makes the process of screen recording very straightforward and easy. It is a great free option for basic recordings. However, Dr.Fone, Screen Mirror & Recording Tool, for example, offers advanced features such as mobile screen mirroring, high-quality recordings, and full device control. Just by following these instructions and expert tips, recording professional, smooth videos on your screen shouldn't be a problem either on computer or mobile devices.
4,624,541 people have downloaded it
Dr.Fone Basic:
Better Control for Your Phone
Manage, transfer, back up, restore, and mirror your device


Screen Recorder
- 1. Android Screen Recorder
- Best Screen Recorder for Mobile
- Samsung Screen Recorder
- Screen Record on Samsung S10
- Screen Record on Samsung S9
- Screen Record on Samsung S8
- Screen Record on Samsung A50
- Screen Record on LG
- Android Phone Recorder
- Android Screen Recording Apps
- Record Screen with Audio
- Record Screen with Root
- Call Recorder for Android Phone
- Record with Android SDK/ADB
- 10 Best Game Recorder
- Android Mp3 Recorder
- Free Android Voice Recorder
- Android Record Screen with Root
- 2 iPhone Screen Recorder
- How to Turn on Screen Record on iPhone
- Screen Recorder for Phone
- Screen Record on iOS 14
- Best iPhone Screen Recorder
- Screen Record on iPhone 11
- Screen Record on iPhone XR
- Screen Record on iPhone X
- Screen Record on iPhone 8
- Screen Record on iPhone 6
- Record iPhone without Jailbreak
- Screen Record on iPod
- iPhone Screen Video Capture
- Free Screen Recorder iOS 10
- Emulators for iOS
- Free Screen Recorder for iPad
- Free Desktop Recording Software
- Record Gameplay on PC
- How to Record Clash Royale
- How to Record Pokemon GO
- Geometry Dash Recorder
- How to Record Minecraft
- Record YouTube Videos on iPhone
- 3 Screen Record on Computer


Alice MJ
staff Editor