Move contacts, messages, photos, videos, app data, and more between iOS and Android.

 100% Security Verified | No Subscription Required | No Malware

 :
: 
 ChatGPT
 Perplexity
 Gemini
 Claude
 Grok
Grok
We are always excited to upgrade to a brand-new device, especially when shifting to the latest iPhone models available in 2026. The upgraded cameras, faster processors, and advanced iOS features make buying a new iPhone a thrilling experience. However, once the initial excitement settles, a critical task awaits: migrating your digital life. You will definitely want to move all your existing applications, games, photos, work files, and messages to the new handset without losing any personal progress or vital data.
This brings up a very common question for many users: exactly how to transfer apps from iPhone to iPhone securely and efficiently? Fortunately, Apple and third-party developers provide several seamless solutions. Whether you prefer using computer-based backups like iTunes, wireless methods like iCloud, or simply redownloading via the App Store, there is a method perfectly tailored to your needs. In this comprehensive guide, we will explore the top methods to help you transfer apps to new iPhone devices effortlessly.
In this article
Part 1. How to Transfer Apps from iPhone to iPhone in One Click
While there are multiple methods available for migrating your applications between iOS devices, many users prefer a direct, time-saving approach. If you want to bypass cloud storage limits or slow internet connections, you can try out Dr.Fone - Phone Transfer to seamlessly migrate your apps.  This powerful desktop tool eliminates compatibility issues and removes the common limitations found across different iOS versions.
With just a single click, it enables you to migrate cross-platform data directly from an old phone to a new one, supporting a massive range of data types including apps, messages, videos, contacts, and images. It functions flawlessly on both Windows and Mac operating systems.
 Move data between iOS to Android and vice versa.
- Transfer contacts, SMS, photos, videos, music, and more types.
- Available with all phones with Android and iOS versions.
- Simple, click-through process.
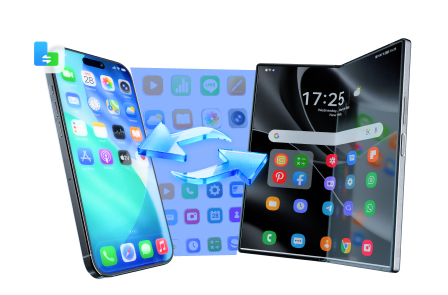
To use this method, connect both the two iPhones to your computer using their respective Lightning or USB-C cables. Once both the iPhones are connected successfully, all the available data from your source device will be detected and listed securely on the screen. You can quickly adjust the target devices and source devices by clicking the "Flip" button directly at the top center of the interface.
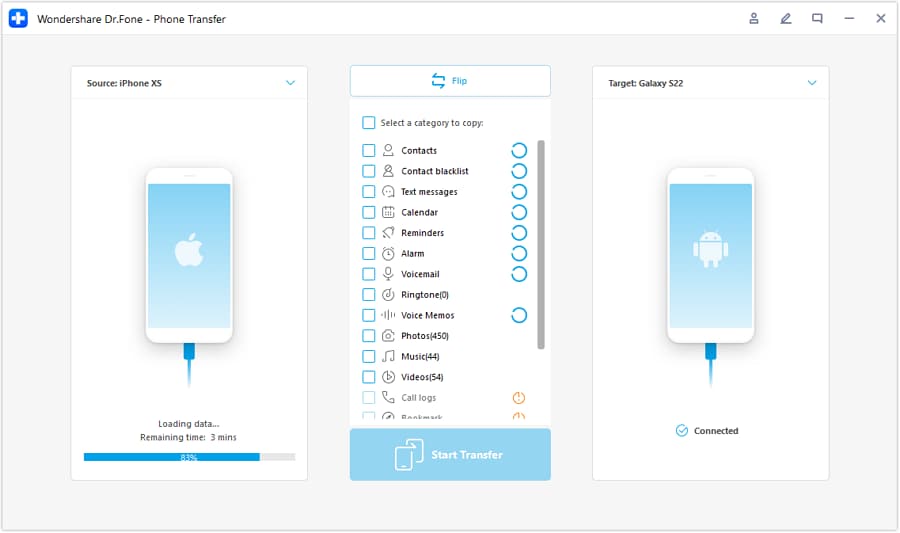
A more detailed guide can be learned from this user guide. Check it out below!
If your migration involves cross-platform movement, another excellent resource to assist you is the Dr.Fone - Phone Manager (Android). This software is incredibly convenient because it offers highly selective data management. Rather than executing a full device overwrite, you can choose specific contacts, messages, podcasts, and media files to move within minutes. Both tools guarantee a 100% safe and risk-free environment for your data, making sure nothing is compromised during the swap.




Part 2. How to Transfer Apps to New iPhone via iTunes
iTunes backup is one of the most commonly used transfer methods for robust, offline data management. All you have to do is take the full backup from the old iPhone and, using iTunes, you can transfer it to the new iPhone. Very simply, you can restore apps from the old device to a brand-new handset without relying on an active internet connection. The whole process is essentially divided into two core sections: backing up the old device, and then restoring that data to the new one.
Section A - Backing up old phone data to iTunes
-
Step 1 Connect the Device
Firstly, you have to connect the old iPhone and the computer using an original Apple USB cable.
-
Step 2 Launch iTunes
Next, open the iTunes application. Ensure you have the latest version of iTunes installed to avoid driver compatibility issues.
-
Step 3 Select Your Phone
Choose the device icon located at the top left corner of the iTunes window.
-
Step 4 Create Encrypted Backup
Under the Backups section, choose 'This Computer'. It is highly recommended to create a passcode and check 'Encrypt local backup' so that your app passwords and health data carry over. After that, click the 'Back Up Now' button directly.


Section B - Transferring backed-up data to a new phone
Once you are done with backing up your old phone data with iTunes, the next process is to transfer those apps onto the new iOS device:
-
Step 1 Power On New iPhone
The first step is to switch on your new iPhone. The “Hello” screen should be visible to you. If you already completed the initial setup on your new iPhone, you have to reset it completely to reach this screen again before transferring the apps.
-
Step 2 Choose Restore Option
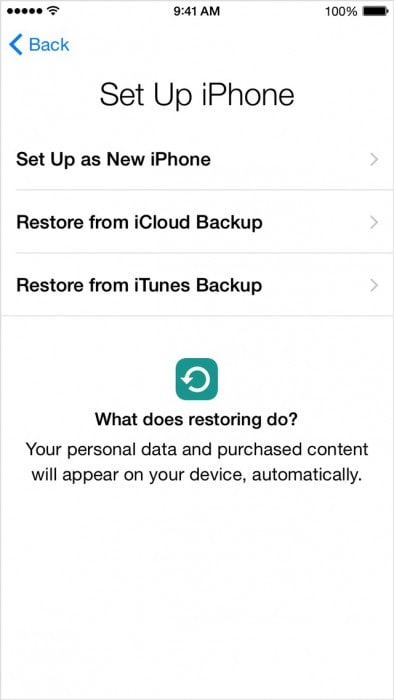
Follow the on-screen prompts until you reach the Apps & Data screen. Click it and choose the option “Restore from Mac or PC” (or “Restore from iTunes backup”) among other options.
-
Step 3 Connect and Select Backup
Now, you have to connect the new iPhone device to the same PC where the backup from the old iPhone was stored. View iTunes from the computer and choose your new iPhone.
-
Step 4 Finalize Restore
Choose the “Restore Backup” option and cross-check the date, time, and old iPhone name to ensure you select the correct archive. If you set an encryption passcode earlier, enter it now. Just wait for a few minutes to complete the restore process. Keep the Wi-Fi connected so your apps can fully re-download automatically onto the new iPhone after the initial restore.
Part 3. How to Transfer Apps from iPhone to iPhone Using iCloud
The next highly successful method is an iCloud backup. iCloud is the most used cloud storage architecture embedded natively in iOS. This method is very genuine, and no complex technical complications usually occur throughout the process when you want to wirelessly transfer apps from an old iPhone to a new model.
Section A - Backing up the process via iCloud
Let’s look at the steps to secure a reliable backup in iCloud using the old iPhone first:
-
Step 1 Connect to Wi-Fi
Connect the old iPhone to a stable and fast Wi-Fi connection. iCloud backups can consume significant data, so cellular data is generally not recommended.
-
Step 2 Enable iCloud Backup
Tap the Settings icon, tap your Apple ID profile at the top, and choose iCloud. Select iCloud Backup and ensure the toggle is turned ON.
-
Step 3 Execute Backup
Select the "Back Up Now" button and don’t turn off the Wi-Fi until the progress bar reaches completion.

Section B - Restoring apps to the new iPhone via iCloud
Now let us move ahead to the exact steps needed to pull those apps directly onto the new iPhone:
-
Step 1 Prepare the New Device
First, we need to turn on the new iPhone and wait for the "Hello" message to appear. If you have already completed the setup, you must factory reset the device. To remove the setup, choose Settings > General > Reset (or Transfer or Reset iPhone) > Erase All Content and Settings.
-
Step 2 Connect to Internet
Proceed through the initial setup screens and ensure Wi-Fi is connected to the device in order to access cloud servers.
-
Step 3 Select iCloud Restore
Once you reach the Apps & Data screen, select “Restore from iCloud backup”.

-
Step 4 Sign In
You will get a prompt on the screen to enter your iCloud credential details such as your Apple ID and password.

-
Step 5 Choose Archive
After entering the credentials, you will see a list of available backups. Ensure you verify the date and time of the backup process before selecting one.
-
Step 6 Wait for Download
The restore process starts on your new phone. Do not interrupt or stop the Wi-Fi connection. Your photos, videos, files, and apps will automatically populate into your new Phone using iCloud over the next few minutes or hours, depending on file sizes.
Part 4. How to Transfer Apps from iPhone to iPhone via App Store
In this part, we are going to look at transferring individual apps to your new iPhone using the Apple App Store. In this method, you do not need to connect to a computer or go through full-device backup/restore steps. It is perfect if you only want a fresh start but need a specific set of apps. Let us see the steps carefully!
-
Step 1 Sign into App Store
You can access your purchased history in the App Store as long as you log in to the same Apple ID. Ensure your new iPhone is signed into your iCloud account within the Settings app.
-
Step 2 Open Your Profile
Launch the App Store and tap your profile icon (usually located in the top right corner of the main screen).

-
Step 3 View Purchase History
Once you tap on your profile, it will show the option “Purchased” or "My Purchases". Select it to view your account's entire app download history.

-
Step 4 Filter by Device
You will notice two tabs at the top: "All" and "Not on this iPhone". Select the option “Not on this iPhone” to filter out apps that are already installed.
-
Step 5 Download Manually
You will get the list of applications you have previously downloaded. Click the cloud download button next to the app icons you wish to restore. The apps will instantly begin installing on your new phone.

Conclusion
We have explored three core native methods—iTunes, iCloud, and the App Store—alongside powerful third-party tools to help you seamlessly transfer apps from iPhone to iPhone with proper guidance. Each method offers unique advantages depending on whether you are looking for a complete mirror copy of your old device or simply wish to selectively download your favorite tools. You now do not need to struggle with complex configurations or wait for a technician to transfer apps to your new iPhone.
FAQ
-
1. Will my app data and login status transfer to the new iPhone?
Yes, if you utilize an encrypted iTunes backup or an iCloud backup, most of your in-app data, customized settings, and login statuses are preserved and seamlessly migrated. However, downloading the apps manually from the App Store will only install the application framework, meaning you will have to log in again. -
2. Why are some of my apps missing after transferring to the new iPhone?
There are a few reasons this could happen. Some applications may no longer be available in the current Apple App Store, or they might be completely incompatible with the newer iOS version running on your latest device. Additionally, if you downloaded apps using multiple Apple IDs historically, you will need to sign in with those specific IDs to trigger the redownload process. -
3. How long does it take to transfer apps using iCloud?
The overall transfer speed relies heavily on your internet bandwidth and the total storage size of your backup. A fast, stable Wi-Fi network can typically complete a standard device restore within 15 to 30 minutes. Conversely, migrating a massive iCloud backup on a slower connection could easily exceed an hour. -
4. Can I transfer apps without using an active Wi-Fi connection?
Yes, you can bypass Wi-Fi dependency altogether by using an offline, computer-based method. Both iTunes (or Finder on newer macOS versions) and dedicated desktop transfer software allow you to securely route your app data directly through a physical USB cable connection.
 Add Wondershare Dr.Fone as a preferred source on Google