 Recover photos, messages, WhatsApp, and more — no backup
needed.
Recover photos, messages, WhatsApp, and more — no backup
needed.

 100% Security Verified | No Subscription Required | No Malware

 :
: 
 ChatGPT
 Perplexity
 Gemini
 Claude
 Grok
Grok
Many people frequently search for solutions on how to recover data from Samsung internal memory after accidentally deleting vital files. We completely understand how gut-wrenching it can be to realize your priceless memories, critical documents, or essential contacts have seemingly vanished from your device. For most of us, our smartphones act as a treasure trove of special moments and irreplaceable data. It is entirely natural to feel shocked and stressed when this happens.
Fortunately, data deleted from a mobile device is rarely gone forever if you act swiftly. In this comprehensive 2026 guide, we will explore highly effective methods to successfully recover lost data from Samsung's internal storage. Whether you have recently cleared your gallery or accidentally wiped a vital folder, let's explore the best recovery solutions tailored to your specific needs.
In this article
Part 1: Overview of Samsung Phone Internal Memory Dynamics
With over a billion users globally as of 2026, Samsung smartphones continue to offer powerful computational features and advanced cameras. However, a persistent challenge many users face is managing limited internal storage. While modern Samsung devices come in various storage configurations—ranging from 128GB on entry-level models up to a massive 1TB on premium flagship versions like the Galaxy S Ultra series—the demand for space is higher than ever.
Due to the increasing file sizes of high-resolution 4K and 8K videos, complex apps, and RAW photography, even the largest storage options can quickly fill up to the brim. This chronic storage limitation often creates dangerous data loss scenarios. If the internal memory reaches full capacity, your Samsung phone may fail to save new files correctly, crash during operations, or force you into a hasty cleanup where you accidentally delete the wrong files. Understanding how data is stored in flash memory is crucial: when you delete a file, it isn't immediately erased. Instead, the space it occupied is marked as "available." Therefore, to maximize the success of Samsung internal storage recovery, you must stop using the device immediately to prevent new data from overwriting the deleted files.
Part 2: 3 Proven Methods to Recover Deleted Data on Samsung
Now that we have established the underlying risks of data loss and the mechanics of modern smartphone storage constraints, let's examine three straightforward and highly effective methods to recover deleted photos and files from your Samsung device.
2-1. Method 1: Check Your Samsung Gallery Recycle Bin
If you have just accidentally deleted photos or videos straight from your Samsung phone's default Gallery, there is a very high probability that you can recover them from the built-in recycle bin. Modern Samsung devices utilizing One UI are designed to temporarily store deleted media for up to 30 days, providing users with a convenient window for easy restoration.
Follow the simple steps below to check the Trash folder and initiate your Samsung internal storage recovery:
-
Step 1 Open the Gallery Application
Navigate to your app drawer or home screen and launch the default Samsung "Gallery" app.
-
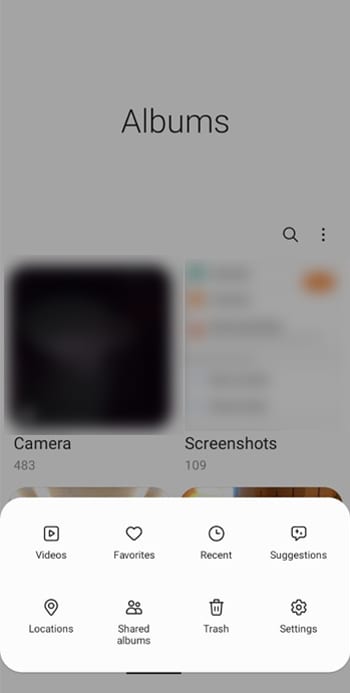
Step 2 Access the Trash/Recycle Bin
Tap the hamburger menu (three horizontal lines) usually located at the bottom right corner of the screen. Look for and tap the "Recycle Bin" or "Trash" icon. Here, you will discover the deleted photos that have not yet been permanently erased from your device's internal storage. Carefully browse through the available media to locate the specific items you wish to retrieve.
-
Step 3 Select the Target Media
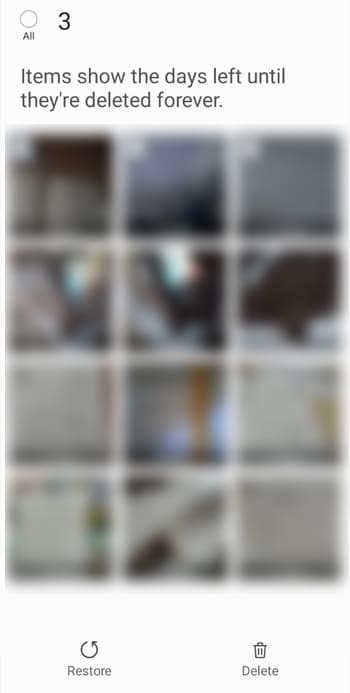
You can either long-press to select individual photos and videos or utilize the "Select all" button at the top if you intend to restore everything in the folder in one go.
-
Step 4 Restore the Files
After finalizing your selection, tap on the "Restore" button (often indicated by a curved arrow icon). The system will seamlessly restore the selected photos to their original albums and locations within the Gallery app.
- Incredibly quick and straightforward procedure to recover recently deleted media.
- No necessity for downloading any third-party applications or navigating complex technical processes.
- Completely free and built natively into Samsung devices.
- The built-in recycle bin features a strict retention timeframe (typically capping at 30 days).
- Photos or videos removed prior to turning on the recycle bin feature—or those that have passed the expiration window—cannot be recovered using this native method.
While the Gallery recycle bin acts as a brilliant primary safety net, it is naturally not completely foolproof. If your incorrectly deleted pictures are not visibly present in the trash folder, or the standard 30-day retention countdown has definitively passed, there is no need for panic. Additional robust recovery methods are still at your disposal to rescue your valuable files.
2-2. Method 2: Retrieve Files Using Google Photos Backup
For Android users, integrating with Google's ecosystem is incredibly common. If you had the Google Photos synchronization and automatic backup feature enabled on your Samsung mobile device prior to the incident, your erased images might still be entirely recoverable. Even after an item is deleted from your local internal storage via the native gallery, a secure cloud copy is retained securely within Google Photos.
Here is an easy-to-follow guide on how you can execute a recovery for deleted photos utilizing the Google Photos platform:
-
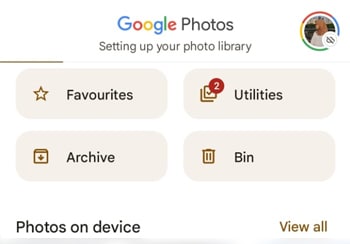
Step 1 Access the Bin Folder
Launch the Google Photos application on your device. Navigate to the "Library" tab situated at the bottom right, and tap on "Bin" (or "Trash"). This action directs you to the specific folder where your recently discarded photos are temporarily preserved.
-
Step 2 Locate Your Deleted Images
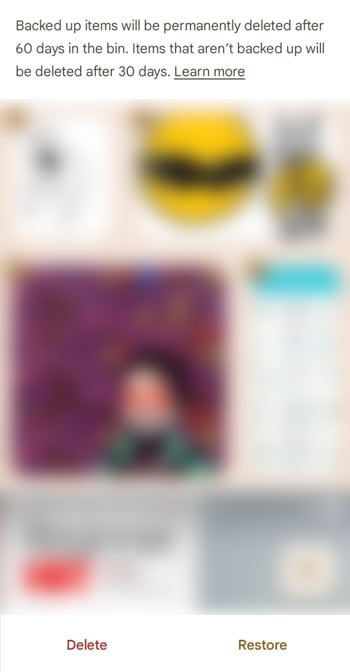
Take your time to browse comprehensively through the items housed in the Trash to pinpoint the ones you intend to bring back. Crucially, if a photo was successfully backed up to the Google cloud prior to deletion, it will reside in the bin for up to 60 days. Conversely, if the photo was merely deleted from local storage without a prior cloud backup, Google Photos typically retains it in the bin for just 30 days.
-
Step 3 Complete the Restoration
To finalize the restoration process, simply tap to open the photo (or long-press to select multiple items simultaneously), then tap the "Restore" button located at the bottom of the screen. The items will instantly return to your main Google Photos timeline and potentially back into your device's native gallery.
- Google Photos' cloud backup capability automatically safeguards your pictures in the background without needing any manual intervention.
- Fully accessible from any internet-connected device using your Google account credentials, making cross-device recovery effortless even if your Samsung phone is broken.
- Only viable if the automatic sync functionality was successfully toggled on before the deletion incident occurred.
- The retention timeline in the Trash folder is strictly enforced; after the 30 to 60-day window, items are permanently eradicated from Google's servers.
- Requires an active, stable internet connection to execute the restoration process.
If the stringent trash retention period has completely lapsed or the Google Photos backup switch was regrettably left off, all is not lost. We have a highly specialized solution prepared for you in Method 3, which relies on cutting-edge data extraction technology.
2-3. Method 3: Use Advanced Data Recovery Software
Suppose the previous conventional methods involving the built-in recycle bin or cloud-based Google Photos have unfortunately failed to yield the desired results. In that case, there is a powerful alternative to deeply scan and recover your deleted files natively from the hardware level. This requires employing an industry-leading third-party utility like Dr.Fone - Data Recovery (Android).
 Scan Android phones and tablets directly.
- Preview and recover only what you want.
- Supports WhatsApp, photos, videos, contacts, and more.
- Works with 6000+ Android devices.

Recognized globally as one of the first and most dependable Android data extraction tools, Dr.Fone operates by bypassing superficial file system restrictions to retrieve data blocks that haven't been overwritten. Follow the detailed steps below to learn exactly how to recover deleted photos from a Samsung phone's internal memory safely:
-
Step 1 Launch Dr.Fone and Connect Your Samsung
To initialize the deep data recovery sequence, first, download and launch the Dr.Fone software suite on your desktop computer or Mac. Using a high-quality USB cable, connect your Samsung smartphone securely. From the primary interface, select the "Toolbox" menu and click on "Data Recovery" to proceed.

-
Step 2 Specify the Mobile Operating System
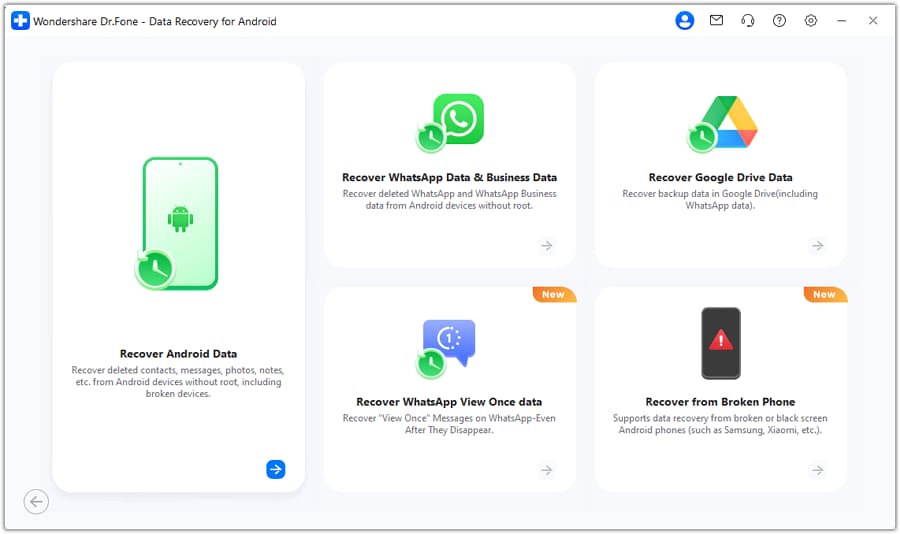
Once the toolkit activates, choose "Android" as your designated device operating system type. Following this, accurately select the "Recover Android Data" option from the available menu to direct the software to scan your phone's internal architecture.
-
Step 3 Designate the Target File Types
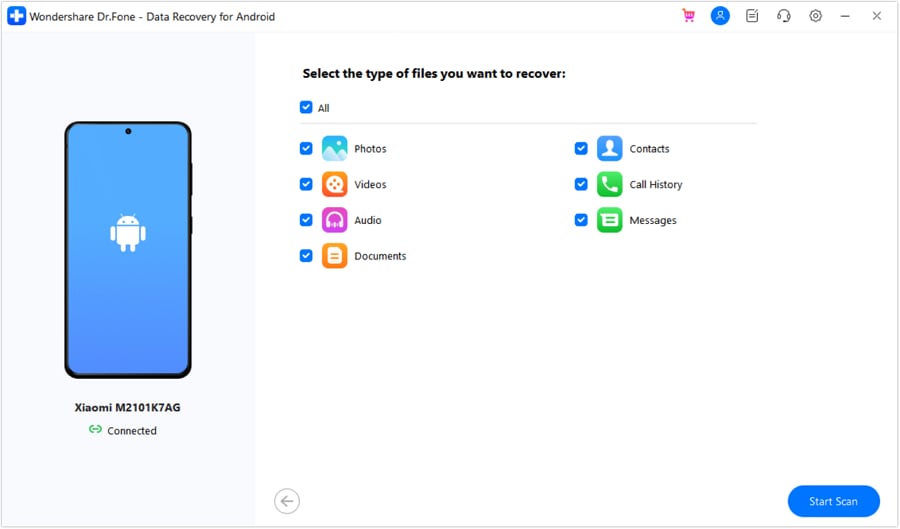
The program interface will intuitively display an array of all potentially recoverable file types—spanning from contacts and call logs to detailed messaging apps, photos, and high-resolution videos. Select the precise categories you intend to retrieve while unchecking irrelevant ones to accelerate the scanning procedure. Hit the "Start Scan" button once ready.
-
Step 4 Safely Preview and Restore Your Files
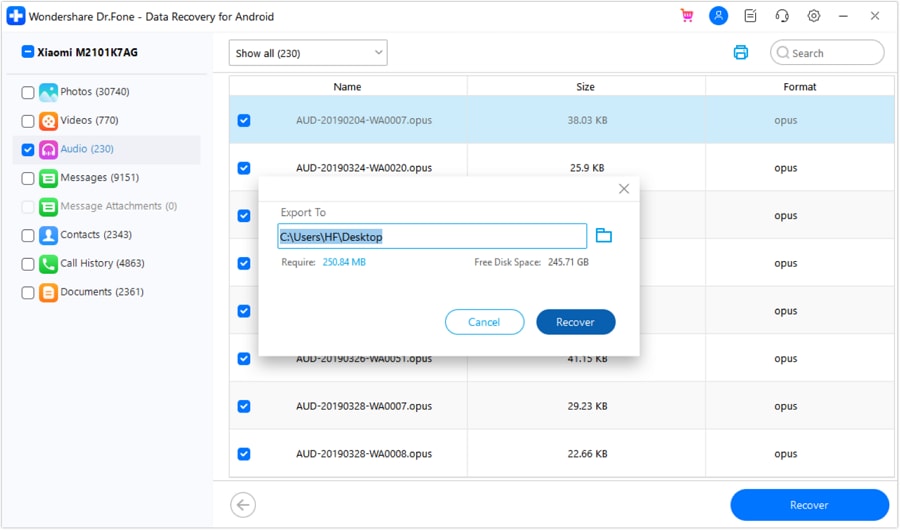
Allow the software a few minutes to deeply analyze your device storage. After the comprehensive scan concludes, the utility will present a structured preview of all recoverable elements. Carefully review and select the crucial files you wish to rescue, then hit the "Recover" button. Choose a safe local directory on your PC to export these files to prevent overwriting issues on your mobile device, and hit "Recover" once more.
Bonus Part: How to Expand Your Samsung Device's Storage
If you persistently find yourself grappling with diminishing internal memory capacity on your Samsung device, a practical long-term strategy is to aggressively expand your hardware storage footprint utilizing an external MicroSD card (if your specific model supports it). Integrating secondary storage drastically minimizes the risk of total data exhaustion. Here are expert tips on effectively employing an SD card to amplify your Samsung device's overall storage hygiene:
- Select a Premium Quality SD Card: Do not compromise on brand reliability. Deliberately choose a high-quality, fully compatible SD card designed for intense read/write cycles. Opt for Class 10 or UHS-I/UHS-II classification cards offering ample storage capacity to accommodate your expanding digital library seamlessly.
- Ensure Physical Safety: Vigorously safeguard your delicate MicroSD card against unforeseen physical trauma. Avoid any prolonged exposure to extreme temperature fluctuations, aggressive moisture, or direct, intensive sunlight. Furthermore, when migrating massive files, always utilize a verified, trusted card reader to maintain strict data integrity.
- Adhere to Safe Ejection Protocols: A frequent cause of SD card corruption is sudden removal. Always utilize the software-based "Unmount" or "Eject safely" function nestled within your Android settings prior to physically extracting the card. This basic precaution stops background read/write processes in their tracks, preventing devastating structural file corruption.
- Segregate Media from Applications: Although the Android operating system sometimes permits migrating hefty applications onto the SD card framework, it is generally discouraged for heavy-duty apps. External read speeds inherently lag behind internal UFS (Universal Flash Storage) modules. Restrict SD card usage primarily to massive media files (videos, MP3s, photos) and keep resource-intensive applications anchored natively on the internal drive for peak UI performance.
Conclusion
Running out of space and losing irreplaceable files can undoubtedly be a stressful ordeal. However, successfully attempting to retrieve deleted photos and documents from your Samsung smartphone's internal memory is entirely achievable when you follow the right protocols. Your immediate first response should consistently involve checking the native Gallery Recycle Bin or the Google Photos cloud backup archive for recently deleted multimedia. If those basic avenues yield no success because the retention limit has passed, deploying a robust professional recovery mechanism like Dr.Fone - Data Recovery (Android) offers the most reliable, deep-scanning solution to resurrect your lost data. Additionally, adopting smarter storage management habits—such as utilizing high-speed SD cards and regular cloud syncing—can effectively shield you against the nightmare of unexpected data loss in the future.




FAQ
-
1. Is it possible to recover data from a Samsung phone's internal memory after a factory reset?
Yes, it is possible, but it depends heavily on what happens after the reset. A factory reset wipes the file directory, making the internal memory appear completely empty. However, the raw data chunks often remain until they are physically overwritten by new files. Utilizing professional PC-based recovery tools like Dr.Fone immediately after the reset gives you the highest probability of extracting these "invisible" fragments.• Immediate Action: Do not set up new accounts or download apps after the reset.• Root Access: In many cases, deep level recovery post-reset requires the Android device to be rooted. -
2. How long do deleted files actually remain in my Samsung internal memory?
Unlike a traditional computer with a structured hard drive, mobile internal memory uses Flash storage (UFS or eMMC). When a file is manually deleted (and not merely moved to the Gallery trash), the OS immediately flags that storage block as "available for writing." The exact duration the file stays intact is not based on time (days or hours), but purely on usage. If you download a heavy game or shoot a 4K video right after deleting files, the old data could be overwritten in mere seconds. If the phone is powered off, the data could remain recoverable indefinitely. -
3. Can I safely recover deleted files without rooting my Samsung phone?
Yes, you absolutely can for many basic file types. If your files were stored in standard user-accessible directories (like the DCIM folder for photos or the Download folder), software like Dr.Fone can retrieve them without triggering complex root exploits. However, for deeply embedded system files, restricted app data (like localized WhatsApp databases), or files completely corrupted by partial overwriting, a rooted environment grants the recovery software the elevated permissions required to access lower-level storage blocks. -
4. Why does internal memory data recovery usually require a computer instead of just an app?
Using a desktop computer for recovery is the most secure method because of how Android handles data writing. If you download a data recovery application directly onto the phone you are trying to rescue data from, the installation files of that very app might overwrite the exact memory sectors where your lost photos reside! By installing the recovery engine on an external PC and connecting your Samsung via USB, you execute a read-only scan on the phone, absolutely minimizing the risk of accidentally destroying the data you are trying to save.
 Add Wondershare Dr.Fone as a preferred source on Google



