4 Solutions to Delete iMessages on iPhone and iPad

Jul 12, 2024 • Filed to: Data Wipe Solutions • Proven solutions
iMessages provide a fast means of communication. They can not only be used for sending text messages, but also images and voice notes.
But having a lot of iMessage conversations in the Messages app will occupy a lot of storage space, and prevent the iPhone from performing at its peak performance levels. Therefore, people seek to delete iMessages.
- If you delete iMessage, it will free up memory space and speed up your device.
- You might feel the need to delete iMessage that contain sensitive or embarrassing information. That way, important information can be prevented from falling in the hands of others.
- Sometimes, iMessages might be sent accidentally and you might wish to delete them before they’re delivered.
For all these situations, you will find the solutions in this article very useful.
Part 1: How to delete a specific iMessage
Sometimes, you might want to delete iMessage or an attachment that comes along with it. This occurs more often than we can imagine and hence learning the method to delete a single iMessage is a good idea. To delete a specific iMessage that you no longer want, follow the simple steps given below.
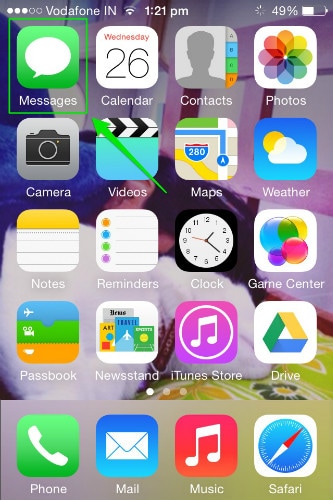
Step 1: Open the Messages app
Open the Messages app on your iPhone by tapping on the icon available on your home screen or in the apps folder.
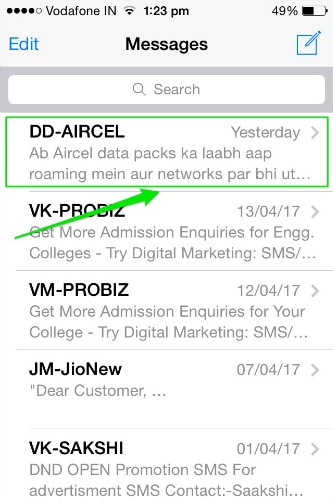
Step 2: Select the conversation to be deleted
Now scroll down and tap on the conversation which has the message to be deleted.
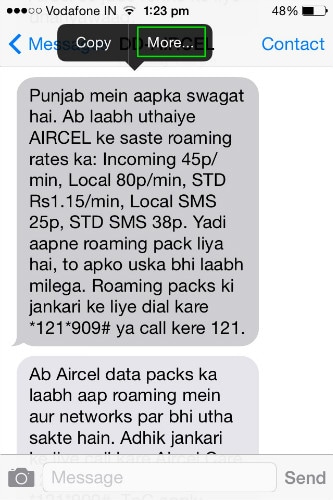
Step 3: Select the iMessage to be deleted and click on the More option
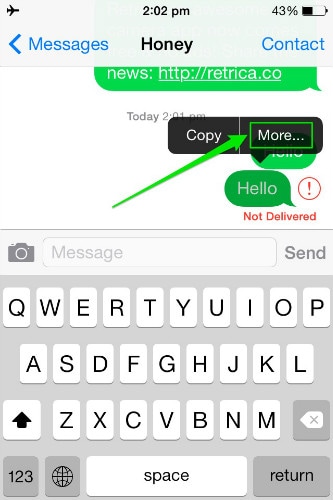
Now navigate to the iMessage you wish to delete. Tap and hold on it until a popup opens. Now tap on “More” in the pop-up that appears.
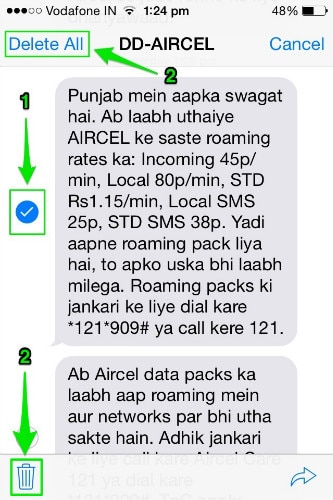
Step 4: Check the required bubble and delete
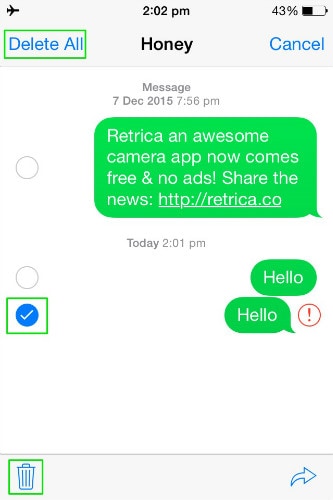
Now selection bubbles will appear near every iMessage. Select the bubble corresponding to the message to be deleted and tap on the trash-can icon in the bottom left or the Delete All button on the top left of the screen to delete it. iPhone won’t ask for a confirmation for deleting the text. Hence think twice before selecting the messages.
Part 2: How to delete an iMessage conversation
At times, there may be a need to delete an entire conversation instead of a single iMessage. Deleting an entire iMessage conversation will delete the message thread completely and no iMessage of the deleted conversation will be available. Hence it is imperative to know how to delete all iMessages. Here is the method to delete all iMessages.
Step 1: Open the Messages app
Open the Messages app on your iPhone by tapping on the icon available on your home screen or in the apps folder.

Step 2: Left swipe the conversation to be deleted and tap on Delete
Now scroll down to the message you want deleted and swipe left. This will reveal a red Delete button. Tap on it once to completely delete all the iMessages in that conversation.
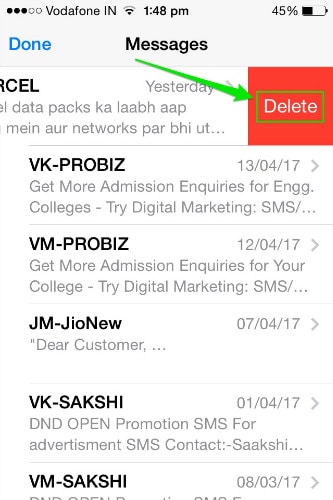
Once again, iPhone will delete the conversation without asking for any confirmation from you. Hence discretion is required before deleting it. To delete more than one iMessage conversation, repeat the same process for every conversation to remove it from your iPhone. This is how to delete all iMessages on an iOS device.
Part 3: How to permanently delete iMessages from iPhone
iMessages are a fast and reliable method of conversation. But the purpose of the iMessages are over once what was to be conveyed has been conveyed to the receiver. There may not be a need for it to be kept on your device anymore. In such cases, deleting the iMessages and conversation will help in freeing up space in your iPhone. Hence, it is important to learn how to permanently delete iMessages.
To delete the messages permanently from your device, you can take the help of Dr.Fone - Data Eraser (iOS) . It’s an easy-to-use, one-stop solution for erasing all your private iOS data. So, here is how to permanently delete iMessages.
Dr.Fone - Data Eraser (iOS)
Easily Wipe Out Your Personal Data from Your Device
- Simple, click-through, process.
- You select which data you want to erase.
- Your data is permanently deleted.
- Nobody can ever recover and view your private data.


Step 1: Launch Dr.Fone toolkit
Download the Dr.Fone toolkit software and install it on your computer. Launch the program on your system by double-clicking on it. Among all the features listed, tap on "Erase" toolkit to open it.

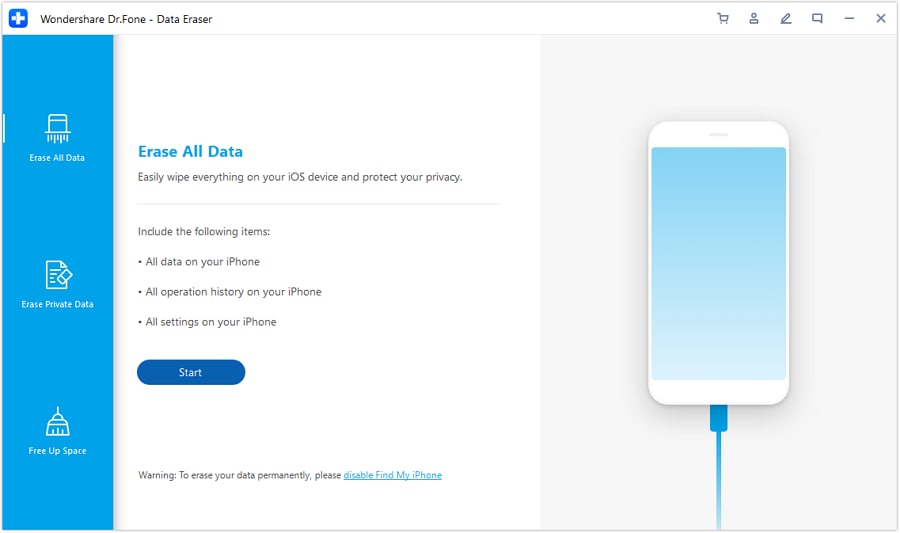
Step 2: Connect your iPhone to the computer
Using an original USB cable, connect your iPhone to the PC. After the Dr.Fone program recognizes your device, it will display the following screen where you should choose "Erase Private Data".
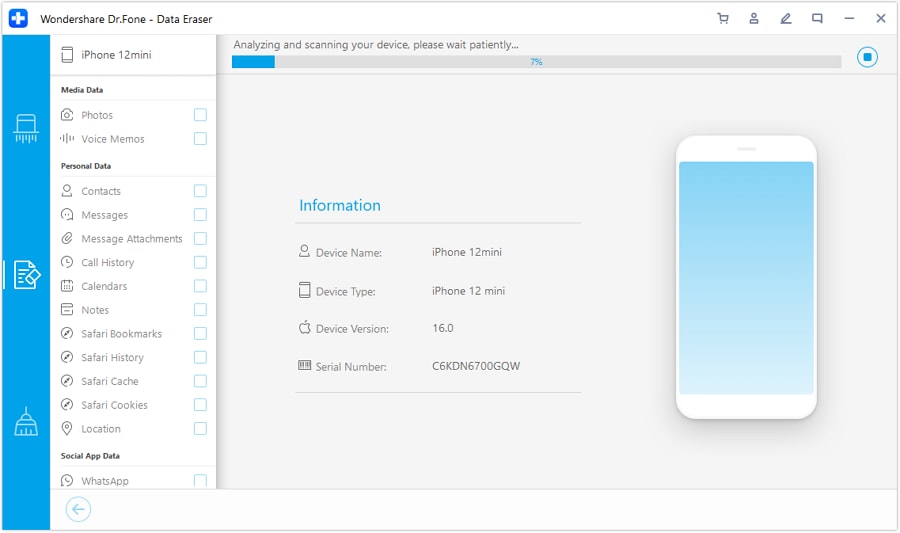
Allow the Dr.Fone program to scan all the private details stored on your smartphone by clicking on the “Start Scan” button in the Dr.Fone window.
Step 3: Select the Messages and attachments to be deleted
The scanning process will take some time. In the screen that appears after the scan, select “Messages” in the left pane of the Dr.Fone program. If you also wish to delete the attachments that come along with the messages, check the box corresponding to it.
You will now be able to see a preview of it all. Check the Messages and Attachments that you wish to delete. If you wish to delete all the messages, check all the checkboxes and click on the “Erase from the Device” button at the bottom right of the screen.
Step 4: Type “delete” to finish
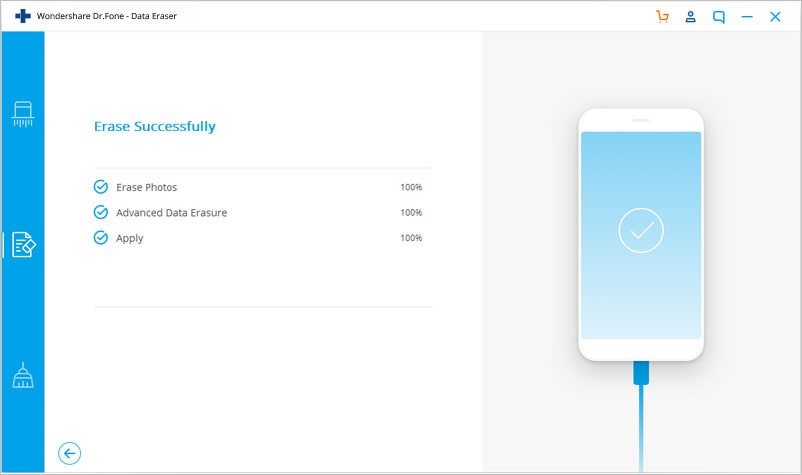
In the prompt that appears, type “delete” and click on the “Erase now” button to confirm the process of deleting the iMessages.
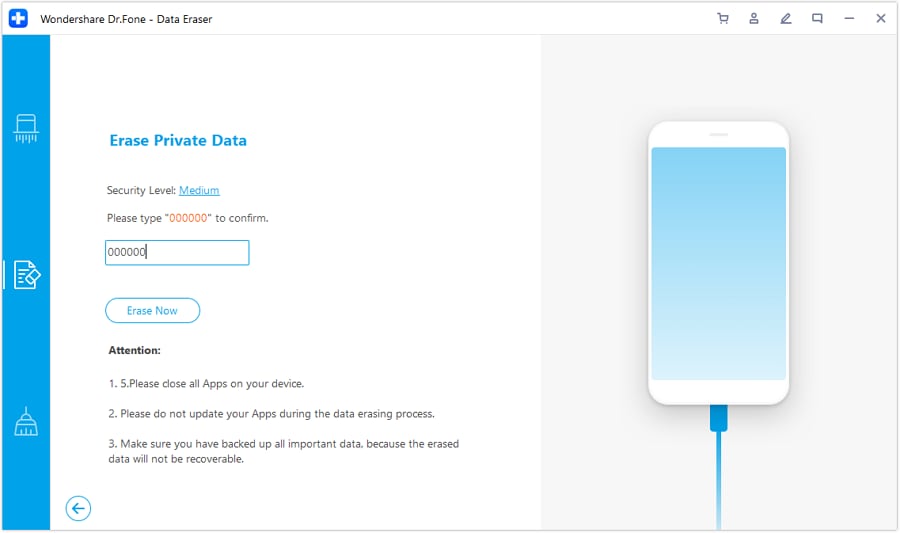
The process will take a few minutes to complete. After it is done, the program will display an “Erase completed” message.
The Dr.Fone - Data Eraser (iOS) software specializes in erasing prive data or full data or iOS optimizing. If you forgot your Apple ID password and want to erase Apple ID, it's recommended to use Dr.Fone - Screen Unlock (iOS). It offer one-click solution to remove the Apple ID.
Part 4: How to delete an iMessage before delivered
Everyone would have once experienced the anxiety and the panic attack that shoots up almost immediately after an unintended iMessage is sent. All that a person going through such a situation can imagine is to stop it from being delivered. Cancelling a nasty or an embarrassing iMessage before it is delivered will not only save the sender from embarrassment but also give immense relief. May be you have experienced it and that is why you are looking for a method to save yourself in the future! The simple method to prevent an iMessage from being delivered is explained as given below. Just remember that you need to be quick as you will be racing against time while deleting an iMessage that is to be delivered.
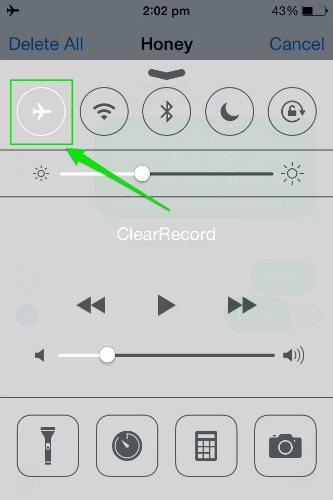
Step 1: An iMessage can either be sent using the WiFi network or through the mobile carrier. It is first sent to the Apple servers and then to the receiver. If the iMessage reaches the Apple servers, it cannot be undone. So, within the short span of time between sending and uploading, quickly swipe the keyboard down and swipe up from the bottom of the screen to open the Control Center. Quickly tap on the Aeroplane icon to enable Airplane mode and cut off all the signals.
Step 2: Ignore the message that pops up instructing that airplane mode will prevent messages from sending. Now, a red exclamation mark will appear near the iMessage that you sent. Tap on the iMessage and select “More”. Now, select the trash-can icon or the Delete All option to prevent the message from being sent.
These are the methods through which iMessages can be deleted from your iPhone or iPad. All the methods are very simple and will delete iMessages from your device. Except that the method described in part 3, is not only good for deleting iMessages but a lot more when it comes to managing your iPhone or iPad. It is up to you to decide which method to use based on your needs.


iPhone Messages
- Back Up iPhone Messages
- 1. Back up Messages on iPhone
- 2. Save Text Messages on iPhone
- 3. Back up Viber messages
- 4. Back up WhatsApp Data to Computer
- 5. Export WhatsApp Message from iOS
- Delete iPhone Messages
- 1. Delete iMessages on iPhone and iPad
- 2. Delete Snapchat Messages on iPhone
- 3. Delete WA for Everyone
- 4. Delete WA Message Permanently
- 5. Delete Text Messages from iPhone
- 6. Tips about WhatsApp Delete Message
- 7. Undelete Messages on iPhone
- 8. View Deleted iMessage History on PC
- Recover iPhone Messages
- 1. Recover iPhone Deleted Text Messages
- 2. Recover Deleted Viber Messages
- 3. Recover Messages on iPhone 13
- 4. Recover Deleted Message on iPhone 8
- 5. Recover Deleted Message iPhone 6
- 6. Transfer from iPhone to iPhone
- 7. Recover WhatsApp Messages Online
- 8. Restore 1-Year-Old WhatsApp Chats
- Restore iPhone Messages
- 1. Restore Kik Messages from iPhone
- 2. Restore Text Messages on iPhone
- 3. Restore Viber Messages Selectively
- 4. Restore Kik Messages to iPhone
- Transfer iPhone Messages
- 1. Transfer from Android to iPhone
- 2. Transfer from iPhone to iPhone
- 3. Transfer from iPhone to Computer
- 4. Transfer from Android to iPhone XS
- 5. WhatsApp from Android to iOS
- 6. Transfer from Android to iPhone 13
- 7. WhatsApp from iPhone to PC
- 8. Download Text Messages from iPhone
- 9. Sync iMessage between iPhone and Mac
- iPhone Messages Problems
- 1. iMessage Not Working
- 2. iMessage Keeps Crashing
- 3. iMessage Not Syncing on a Mac
- 4.iPhone won't send or receive texts
- 5. iMessage Freezing or Not Working
- 6. Why Are My iPhone Messages Green
- iPhone Message Tricks
- 1. Export Messages from iPhone to PDF
- 2. Know Who Read WA Group Message
- 3. iPhone Message Tips and Tricks
- 4. Access iMessage Online
- 5. Extract Text Messages from iPhone
- 6. Forward Text on iPhone and Android
- 7. Print Text Messages from iPhone
- 8. View iPhone Messages on PC/Mac
- 9. Tell If You Are Blocked on iMessage
James Davis
staff Editor