
How to Recover Photos From Broken iPhone Using Easy Tips

Jun 11, 2026 • Filed to: Data Recovery Solutions • Proven solutions
 TL;DR:
You can recover photos from a broken iPhone by restoring existing iCloud or local backups, accessing the internal DCIM folder via a previously trusted computer, or utilizing third-party extraction software.
● Restoring a local backup requires connecting a secondary, working iPhone with sufficient storage capacity to iTunes (for Windows and macOS Mojave or older) or Finder (for macOS Catalina or later).
● Extracting photos directly from the device's internal storage requires a USB connection to a computer that was already granted "Trust" permissions before the iPhone's screen became unresponsive.
● Dr.Fone - Data Recovery (iOS) allows selective photo extraction directly from the broken device's built-in storage without prior backups, but users must disable "Find My iPhone" to restore the recovered data directly to a device.
Ask AI for a summary
 ChatGPT
 Perplexity
 Gemini
 Claude
 Grok
Grok
If your iPhone stops working, you may lose all your valuable pictures. This can happen due to a broken iPhone caused by an accidental drop, water damage, or any system issue. Many wonder, " How can I retrieve photos from a broken iPhone without trouble?”
This article will teach you the step-by-step process of recovering photos from a broken iPhone. It can be done with proper tools and basic procedures. It’s an easy process! You will learn different tips, techniques and tricks to restore photos from a broken iPhone.
- Part 1: Restoring Photos from Broken iPhone is Possible
- Part 2: Learn the Easiest Ways of How to Recover Photos from a Broken iPhone
- Way 1. Recover Photos Using iCloud
- Way 2. Get Pictures of Broken iPhones from Backups Saved on iTunes or Your Mac.
- Way 3. Connecting to a Trusted Computer for Photo Retrieval
- Way 4. Recover Photos from Broken iPhone Via Email Or Messaging Apps
- Way 5. Choose External Photo Recovery Programs-Recommended
- Way 6. Overall Best Recovery Tool: Dr.Fone - Data Recovery (iOS)

Part 1: Restoring Photos from Broken iPhone is Possible
Even if your iPhone stops working, you can still retrieve photos from a damaged iPhone. Most of the data is still stored somewhere in the internal memory. You can choose different recovery techniques to view your pictures.
Here are some key ways to restore photos from a broken iPhone:
- iCloud Sync: When you save your photos through iCloud Photos, this option ensures your snapshots are stored online.
- Local Backups: Earlier iTunes and Finder backup methods store your photo collection.
- Internal Storage: When your phone connects to a computer, you can directly access stored files.
- Connect to a trusted computer: If you connected your phone with a computer previously, you can easily get your pictures back.
- Extract through Other messaging apps: The apps through which you sent or received photos.
Part 2: Learn the Easiest Ways of How to Recover Photos from a Broken iPhone
Way 1. Recover Photos Using iCloud
By enabling iCloud Photos, you can easily retrieve pictures from a broken iPhone. This feature automatically saves pictures across different devices.
Follow these effective steps to get back your precious memories:
- Step 1: Log in to iCloud through any other device or PC/ laptop
To access iCloud, visit www.icloud.com through your web browser whether you are using your computer or another system. Access your broken iPhone account with your Apple ID. Enter password when using another device.
- Step 2: Open Photos application
After successful sign-in, proceed to the Photos app section. From this page, you can see every photo synced with iCloud from your broken iPhone.
- Step 3: Select picture you want to Download
Use the iCloud browser to browse photos and mark those you want to recover. Open the download menu to store your files on your laptop or another storage device.

Note: Check that you use the same iCloud account with the exact Apple ID that managed your broken iPhone. Make sure to check your credentials before proceeding to ensure you don't miss any photos.
Way 2. Get Pictures of Broken iPhones from Backups Saved on iTunes or Your Mac.
A backup restore procedure duplicates your complete data collection, such as photos. It restores it onto new working devices. Follow these steps to recover your photos:
- Step 1: Link your operational iPhone via USB cable to PC
Connect a working iphone to your computer through a USB cable. The iPhone you use must have enough memory space to receive all contents from the backup.
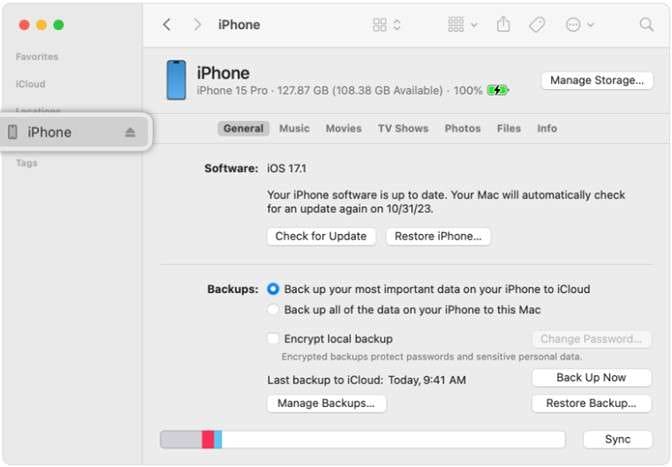
- Step 2: Open iTunes or Finder
Users with Windows or macOS Mojave versions (or previous versions), Open iTunes on their screen.
For macOS Catalina (or later), Open Finder.
- Step 3: Select and Restore the Latest Backup
Use your computer to identify your connected device within ITS or Finder. Click Restore Backup, then select the latest backup containing your photo information.
- Step 4: Wait till the process completion
All of your data, together with your photos, will be restored by the system onto your connected iPhone. Check that your photos appear in the Photos app for confirmation.

Note: For picture recovery, select a backup made right before your original iPhone broke. By using the most recent backup you created, your data recovery efforts will succeed.
Way 3. Connecting to a Trusted Computer for Photo Retrieval
Your problem could be resolved by using a trusted computer to access your photos. A combination of correct tools and proper procedures helps you safely recover important photo and video files from damaged iPhone.
- Step 1: Gather the Required Tools
A USB cable is compatible with your iPhone. The process requires a computer, including Windows or Mac, that is already trusted to access your iPhone.
- Step 2: Connect your iPhone to the computer.
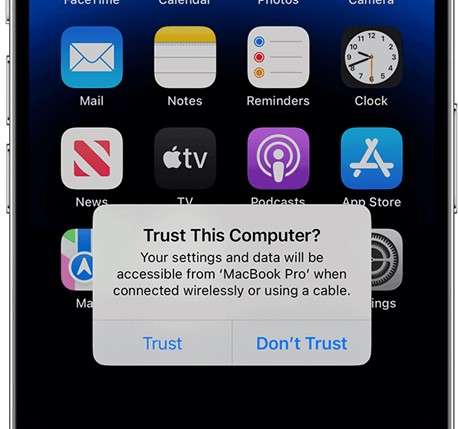
Connect your iPhone to a computer through its USB cord. If your iPhone screen is functional, but cracked, unlock the device and tap "Trust" if prompted. A non-responsive screen can be ignored since the device trusts the previous connection.
- Step 3: Explore the iPhone's presence on your computer
On Mac (macOS Catalina or later):
Open Finder. Your iPhone is listed in the Finder sidebar's "Locations" section.
On Windows or older macOS versions:
Launch the "This PC" or "My Computer" window among all options. To locate your iPhone, navigate to the list of connected devices.
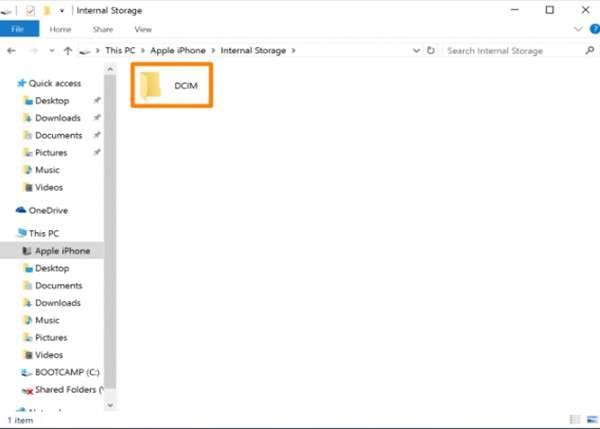
- Step 4: Access the DCIM Folder
Open your iPhone's storage by clicking the internal device icon. First, browse the DCIM (Digital Camera Images) folder to access photo storage. Your iPhone stores all saved photos and videos in a subfolder named DCIM.
- Step 5: Copy the Photos
Browse through the subfolders inside the DCIM directory (e.g., 100APPLE, 101APPLE, etc.). Choose the images you wish to restore from your selection.
For Windows: A right-click command on selected files enables the "Copy" function.
For Mac: Press and drag your files into an existing computer folder.
Place the files into the computer shadow storage or directly into your desired storage area.
- Step 6: Backup and Verify
After file copying is complete, check the selected files on your PC to verify retrieval success. Optionally, back up the photos to a cloud storage platform like Google Photos, Dropbox, or an external hard drive for added safety.
Way 4. Recover Photos from Broken iPhone Via Email Or Messaging Apps
Email services and messaging applications provide reliable recovery solutions for photos while maintaining a quick and hassle-free process even when your iPhone is broken.
- Step 1: Determine which application served to distribute your digital pictures
Check the apps through which you sent or received photos (such as email, iMessage, WhatsApp, or alternative programs). Double-check if your account transfers data between different digital devices. It also includes your laptops, tablets or multiple cell phones.
- Step 2: Enter Your Account Credentials on Other Device
Open the app or service (Gmail, Outlook iMessage or WhatsApp) on other devices. Use your credentials (email address and password) to log in to the account associated with your iPhone. For WhatsApp, you may need to use WhatsApp Web or restore a backup on a new phone.
- Step 3: Search for the Photos
For Emails:
Search words that include "photos" "images", or the names of senders or receivers. Search both your Sent and Inbox files to find any pictures that were shared with you.
For Messaging Apps:
Review messaging chats when you think photos are passed between you and other users. You can browse the chat logs or tap into the app's media search options (such as doing this in WhatsApp by touching the contact's name and then choosing "Media, Links and Docs").
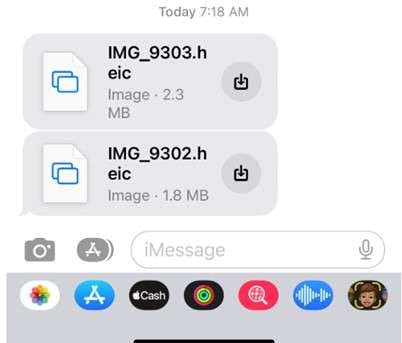
Step 4: Download the Photos
Choose only the images you want to restore from your collection. Download or save them to your device:
For Emails: Select the image, then right-click (or press and hold on mobile devices) and choose either "Save Image" or "Download" options.
For Messaging Apps: To save the photo, click it for full presentation, followed by selecting the download icon or "Save to Photos" option.
- Step 5: Back Up the Photos
After photo downloading, perform backup steps for safe photo recovery. Store your files securely through cloud storage options that include Google Photos and iCloud as well as Dropbox. You can move the photos to either a USB drive or a physical external storage medium.
Way 5. Choose External Photo Recovery Programs-Recommended
When you cannot retrieve photos from damaged iPhones using iCloud or iTunes backup methods, you can use third-party programs. External photo recovery programs act as a backup. This specialised software functions to extract broken device information which lets users safely recover lost pictures.
Way 6. Overall Best Recovery Tool: Dr.Fone - Data Recovery (iOS)
Dr.Fone - Data Recovery (iOS) represents a reliable program that easily helps people recover photos from broken iPhone. Dr.Fone uses memory scanning technology to recover your photos. It doesn’t matter what physical condition your iPhone is in or if it lacks either a functional screen or a backup system.
Key Features
- Photo Recovery Without Backups: Dr.Fone directly accesses photos from your iPhone's built-in storage, making it the perfect tool when backup options fail to get photos off from a broken iPhone.
- Support for Multiple Scenarios: Dr.Fone serves as your recovery solution for iPhones that endure damage from water, get trapped in recovery mode, or are physically broken.
- Preview and recover data: A preview option lets you review your recoverable data so you can select which ones you wish to save.
- Compatibility with All iPhones: All iPhone versions, including their historical lineup and recent models, find support in Dr.Fone.
Dr.Fone - Data Recovery (iOS)
The Best Tool to Recover Photos from Broken iPhone!
- Designed with the technology of recovering files from iTunes, iCloud or phone directly.
- Capable of recovering data in serious scenarios like device damage, system crash or accidental deletion of files.
- Fully supports all the popular forms of iOS devices.
- Provision of exporting the files recovered from Dr.Fone - Data Recovery (iOS) to your computer easily.
- Users can speedily recover selective data types without having to load the entire chunk of data altogether.


Step-by-Step Guide to Recover Photos Using Dr.Fone
- Step 1: Install and Set Up Dr.Fone
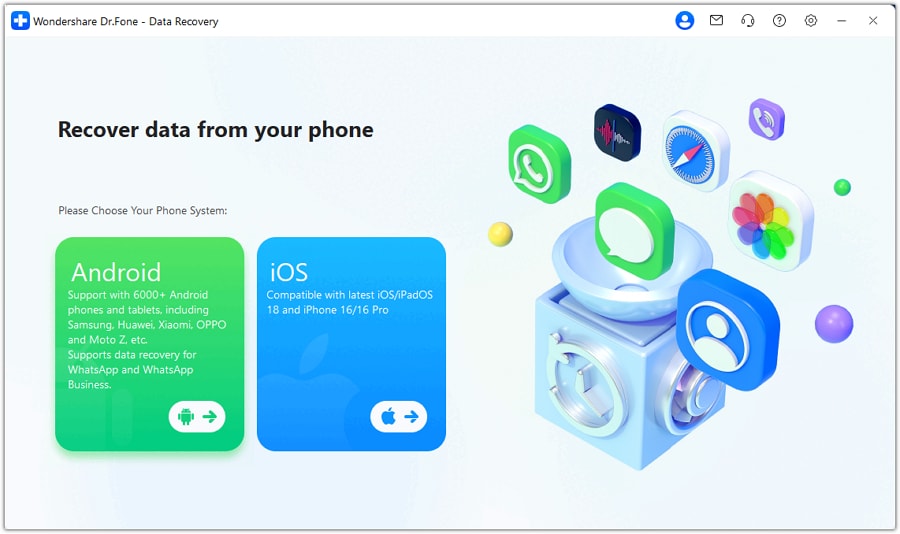
Download and install Dr.Fone - Data Recovery (iOS) on your Windows PC or Mac by going to the official Wondershare website. Click on Data Recovery on the home screen when you launch the software.

- Step 2: Select iOS Device Type
Choose the iOS option on the next screen since you're recovering data from an iOS device.
- Step 3: Select the Recovery Mode
The Dr.Fone interface provides options for selecting Recover from iOS Device. Your device verification triggers the software to display recovery choices for your system.

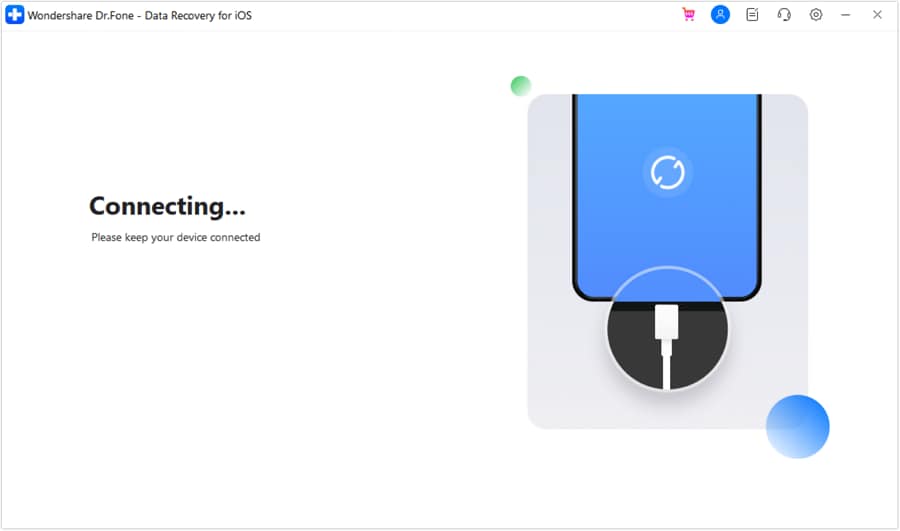
- Step 4: Connect iPhone to computer via USB
Hook your damaged iPhone to your computer through a standard USB cable.
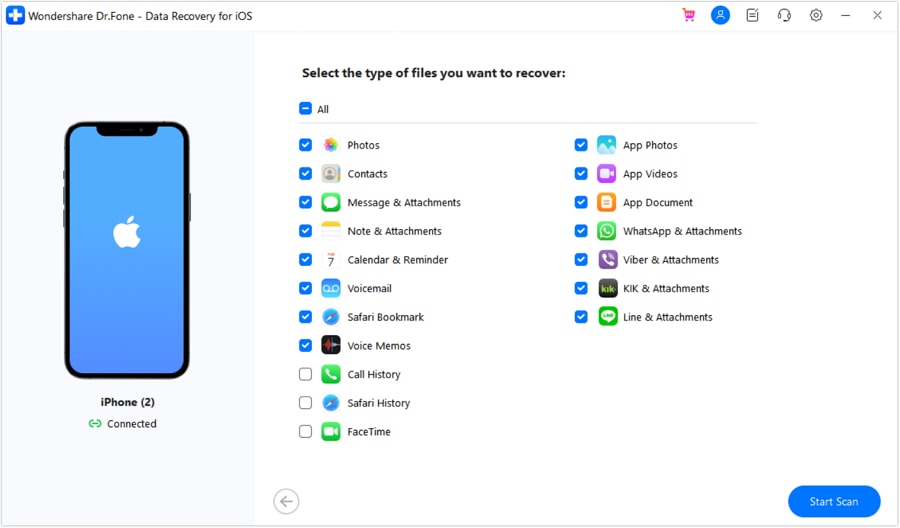
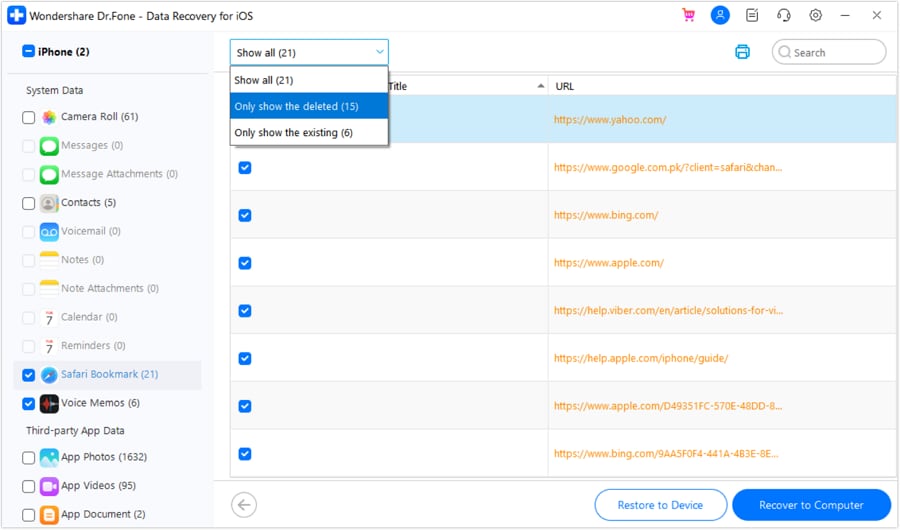
- Step 5: Choose the File Types to Recover
After your device is detected, you’ll see a list of file types that can be recovered. Select the specific types you want to recover or skip the ones you don’t need. When ready, click Start Scan at the bottom-right of the screen.
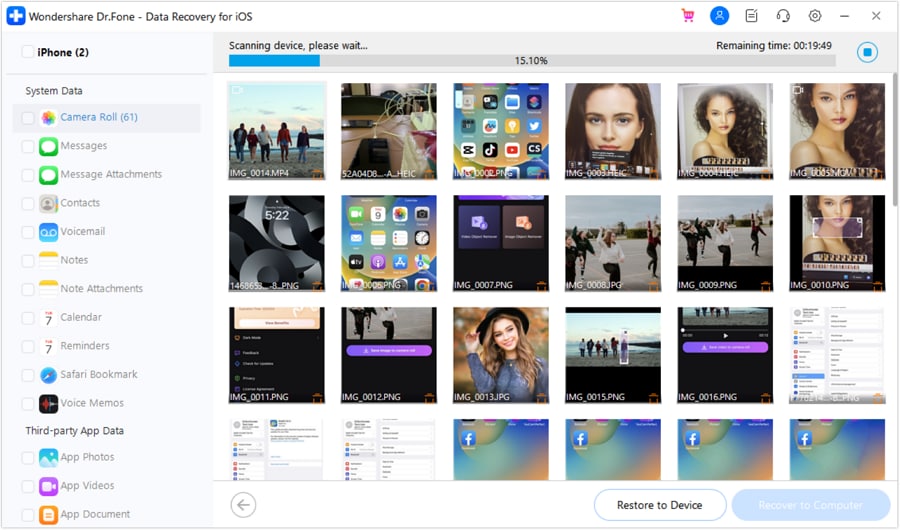
- Step 6: Scan for Recoverable Photos
Click Start Scan to let the platform begin scanning your device. Allow the scan to finish; this may take a few minutes. Review the recoverable files displayed after the scan.
- Step 7: Preview and Select Photos to Recover
The scan will finish, showing you all the recovered photos for review. Mark the recovery images by checking each box next to them to see if it meets your needs.
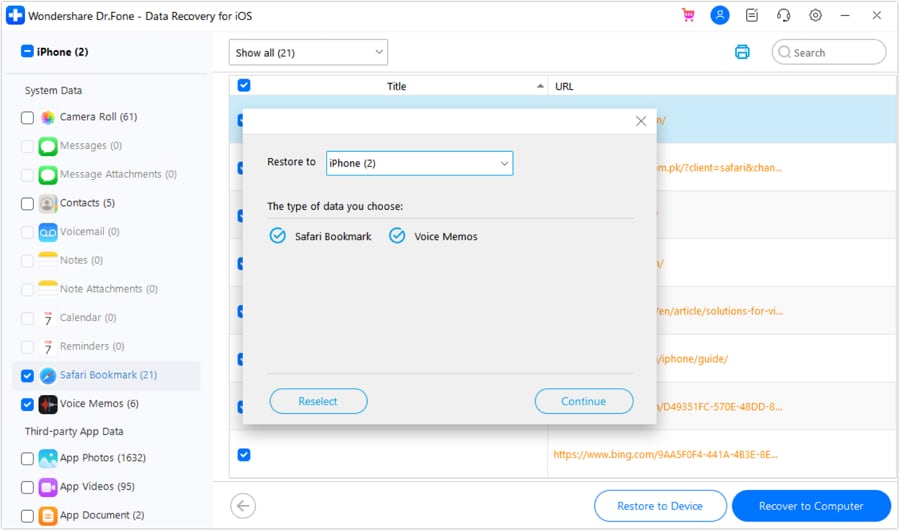
- Step 8: Select the Device to Restore
Click on the specific button to open a window showing available devices for restoration. Select the iOS device where you want to restore the data. Check which files are available for recovery. Once ready, click the Continue button to proceed.
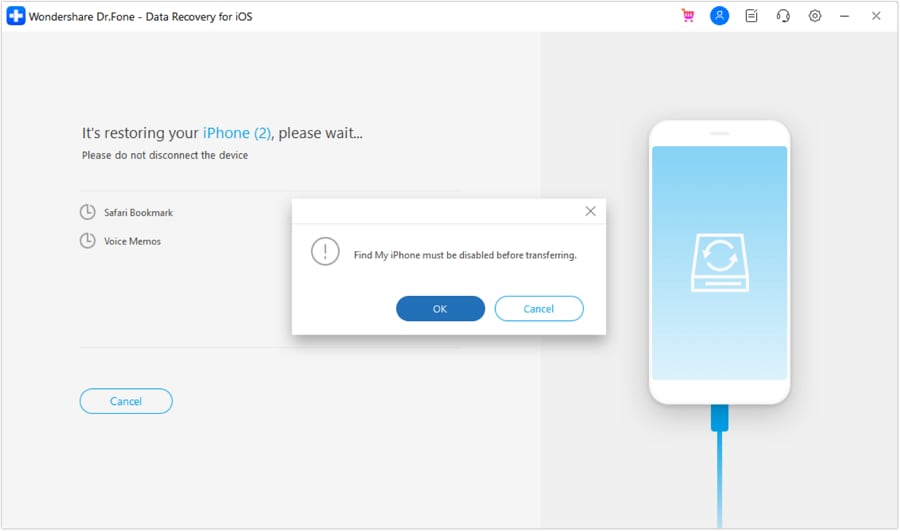
- Step 9: Disable Find My iPhone
Turn off Find My iPhone on your device to allow data restoration. Once it’s disabled, click OK on your computer to continue.
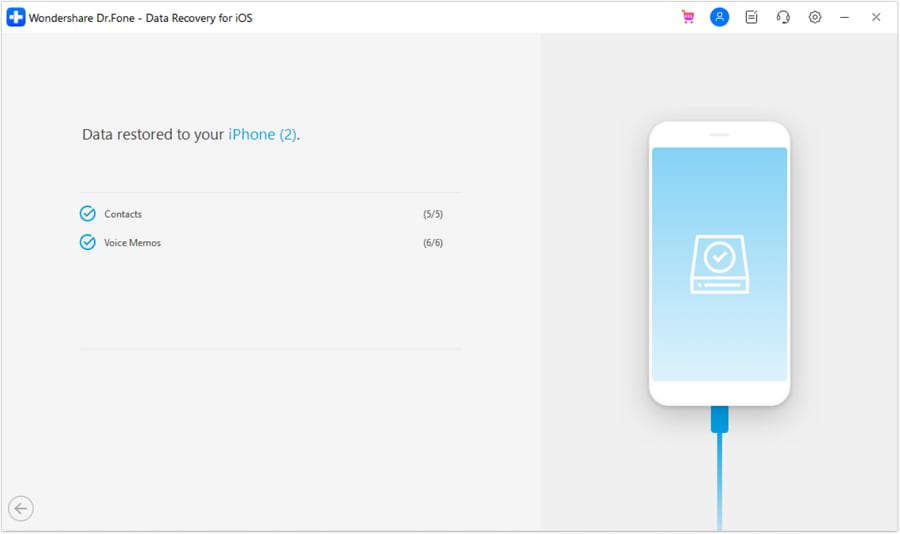
- Step 10: Data Successfully Restored
The data will be restored to your device. A confirmation message will appear on the screen once the process is complete.
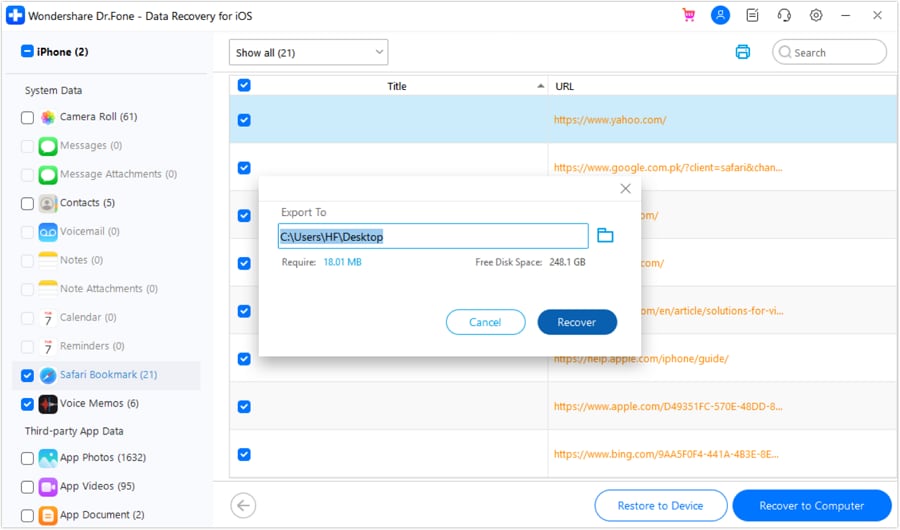
- Step 11: Recover Data to Computer
Choose the files you want to recover. Press the Recover to Computer button. When prompted, choose a folder or location to save the files. Click Recover to complete the process and save the data to your computer.
General users should choose Dr.Fone because it provides optimal results. It is very useful when restoring photos from iPhones. The software lets users extract photos bypassing both iCloud and iTunes backups. It provides picture recovery support for damaged iPhones under all conditions.
Conclusion:
When your iPhone breaks, and you lose pictures, it can be alarming, but restoration techniques succeed. The treasured images you lost on your broken iPhone can be restored through iCloud and iTunes backups and by connecting it to a trusted computer or Dr.Fone. Dr.Fone - Data Recovery (iOS) provides advanced photo recovery through its scanning solutions equipped to retrieve images from items with physical damage and recovery mode issues on iPhones.
By following proper techniques and using reliable software, you can ensure your snapshots remain safe. If you’re wondering how to retrieve photos off a broken iPhone, these solutions offer a seamless recovery process, helping you restore your memories and regain access to your important data.


iPhone Recovery
- Deleted Data Recover
- 1. Recover HEIC Photos on iPhone
- 2. Recover Deleted Calendar Event
- 3. Retrieve iPhone Deleted Reminders
- 4. Retrieve iPhone Deleted Voicemail
- 5. Recover iPhone Deleted Photos
- 6. Recover iPhone Deleted Note
- 7. Recover Call History from iPhone
- 8. Recover iPhone Deleted Contacts
- 9. Play GamePigeon 8 Ball on iMessage
- 10. Recover Deleted iOS Files
- iPhone Passwords Recover
- 1. Retrieve iPhone Email Password
- 2. See iPhone Saved Password
- 3. Access iPhone Password
- 4. Get iPhone Password Back
- 5. iPhone Passcode Requriement Pops
- 6. Find iPhone Wi-Fi Password
- iPhone WhatsApp Recover
- 1. Recover WhatsApp Messages Apps
- 2. Recover Deleted WhatsApp Messages
- 3. Recover WhatsApp Messages Online
- 4. Retrieve Deleted WhatsApp
- Recover from Stolen iPhone
- Recover from Broken iPhone
- 1. Recover Data from Broken iPhone
- 2. Fix iPhone Fell in Water
- 3. Water Damaged iPhone Data Recovery
- 4. Recover Data from Dead iPhone
- 5. Recover Photos From Broken iPhone
- iPhone Recovery Tips
- 1. GT Recovery Undelete Restore
- 2. Recover Data from Memory Card
- 3. Recover iPhone Lost Data
- 4. SD Card Recovery for Mac
- 5. Clear Safari History
- 6. Recover from iPhone in DFU Mode
- 7. iTunes Data Recovery
- 8. Recover iPhone Data Without iTunes
- iPhone Recovery Tools
- ● Manage/transfer/recover data
- ● Unlock screen/activate/FRP lock
- ● Fix most iOS and Android issues
- Free Download Free Download Free Download


James Davis
staff Editor