Easy Guide: How to AirDrop From Mac to iPhone and Vice Versa

Jul 12, 2024 • Filed to: Manage Device Data • Proven solutions
iOS devices are counted among the world's most elite forms of devices. Their functionality and adaptability have taken innovation to another level. Not only has the elite community embraced the device, but it is also widely accepted among the masses. Along with technological development, multiple innovations emerged within the devices.
For this article, we will be discussing the connections established between Macs and iPhones. As file sharing is a big question that lies against this connection, AirDrop has turned out to be an excellent remedy. This article will discuss how to AirDrop from Mac to iPhone to perfection. Follow all guidelines to know more about the methodology involved.
Part 1: What Is AirDrop, and How Does It Work?
You might have heard of Bluetooth, the technology adopted by the majority of smart devices. While Bluetooth has failed to provide robust solutions, Apple came up with a physical solution of AirDrop. This feature, commonly available in iOS and macOS devices, allows wireless file sharing. With minimum operations, users can quickly transfer their files.
As the name exclaims, the process is exceptionally simple for those new to this system. With the combined usage of Wi-Fi and Bluetooth technology, the files are transmitted between devices in close range. The process of AirDrop covers different Apple devices, including iOS and macOS devices. Such operability gives Apple users a vast space to operate.

How Does It Works and Is Used?
The connection established by AirDrop between two devices essentially involves a P2P connection. This peer-to-peer connection allows a secure transfer of files between devices. Whether you are trying to AirDrop from iPhone to MacBook or vice versa, you are only required to have the files in close proximity. Following this, everything is as easy as it can be for any beginner.
This process does not only cover users seeking to share their photos, but it also involves file transfer. From notes to complete websites, everything can be transferred through this service. There is no need to connect through a Wi-Fi network for the establishment of a connection. However, you need to have Wi-Fi networking enabled on your device. With the devices connected, a firewall comes in between while the files are encrypted. This ensures a secure transfer of files amongst devices.
Part 2: How To Activate AirDrop on iPhone and Mac
To start with the discussion of managing AirDrop on iOS and macOS devices, we first need to understand its activation process. As stated above, this innovation is straightforward to utilize and adopt. Since you wish to activate it on your iPhone and Mac, the steps provided below will guide you to perfection:
Activate AirDrop on iPhone
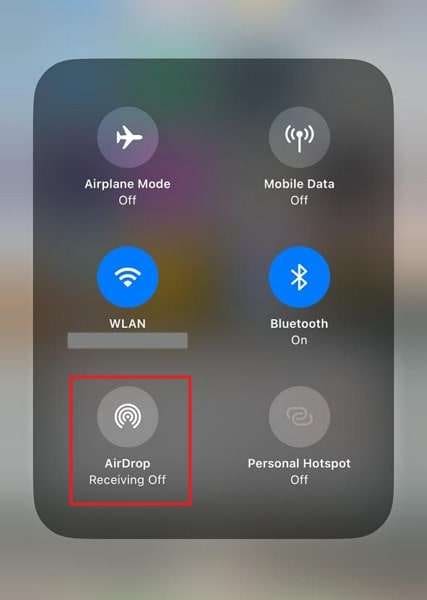
Step 1: Access the Control Center of your iPhone by swiping down from the top-right of the screen. As it opens, hold the “Connectivity” section in the list of options.

Step 2: This opens another menu of options to discover the "AirDrop" button. Tap on it to access the option where you can select the users who can send files to the device.
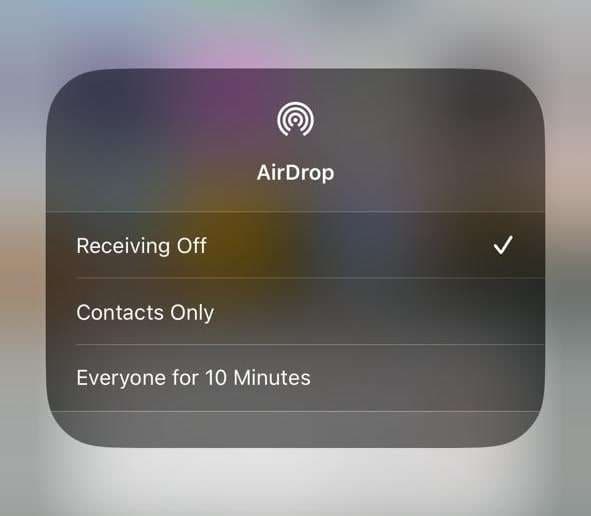
Step 3: Select any option out of “Contacts Only” and “Everyone for 10 Minutes.” This will activate AirDrop on your iPhone.
Activate AirDrop on Mac
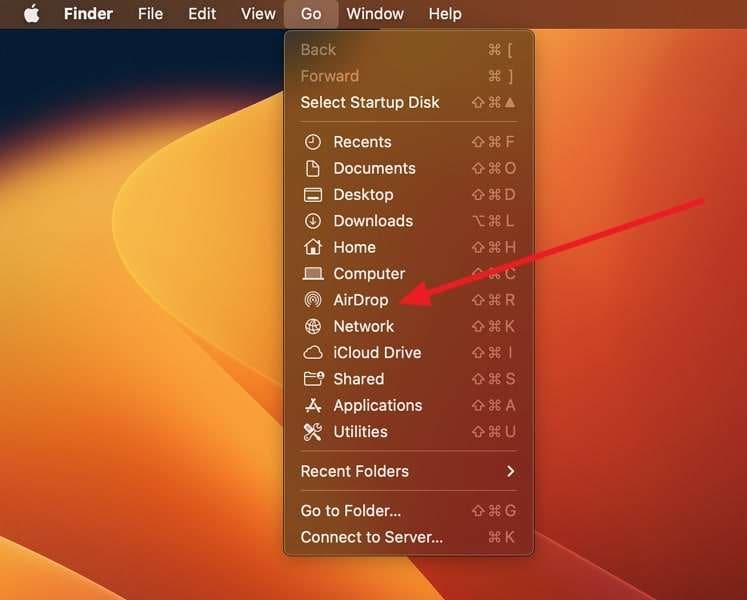
Step 1: Launch your Mac and proceed to the "Go" tab at the top of the menu bar. Select the option of "AirDrop" from the drop-down menu.
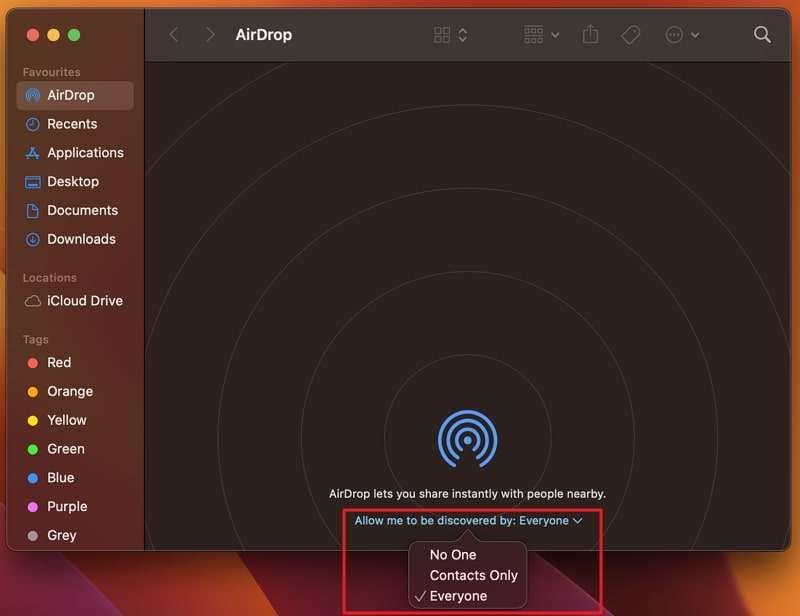
Step 2: As a new window opens, select the “Allow me to be discovered by:” option to access a set of options.

Step 3: You can select either option from "Contacts Only" or "Everyone." This will activate AirDrop on your Mac.
Part 3: How to AirDrop Files From Mac to iPhone
As you have learned about AirDrop and how to activate it, you might need to know how to transfer files through this feature. To figure out how to AirDrop from Mac to iPhone, follow the guidelines presented below:
Step 1: Locate the file you wish to AirDrop from your Mac to your iPhone. Continue to click the "Share" button on the topmost menu of the window.
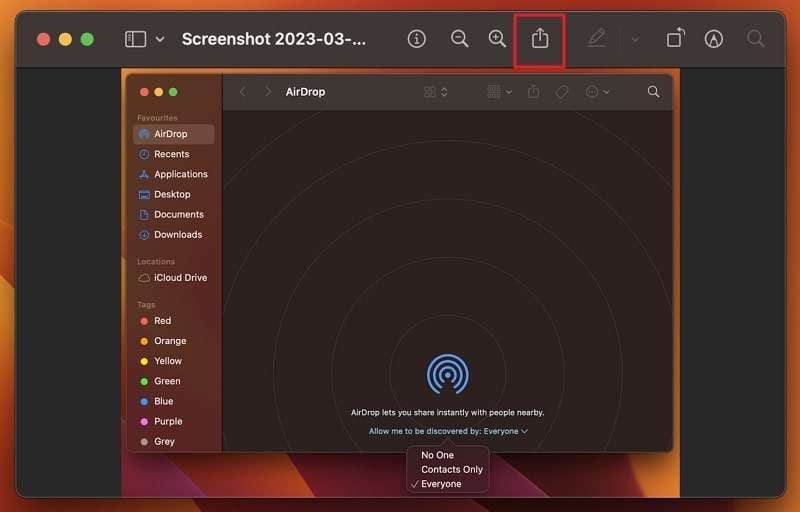
Step 2: As this opens a menu, select the option of “AirDrop” to proceed to the next window. Make sure to turn on AirDrop on your iPhone.
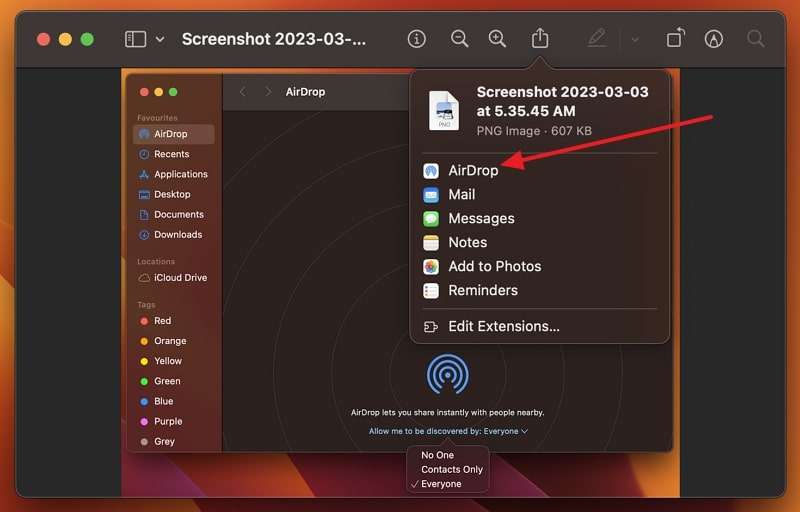
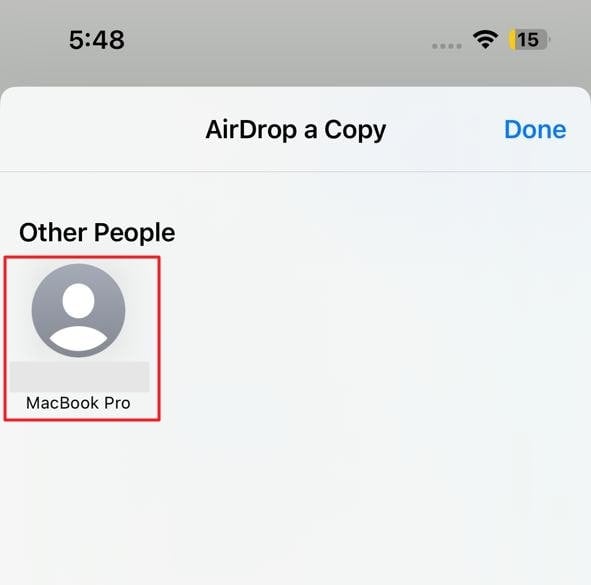
Step 3: You will find the respective device displayed on the window with its name. Double-click on it to AirDrop the file to your iPhone. Click “Done” once you have successfully completed the process.

Part 4: How to AirDrop Files From iPhone to Mac
With an overview of transferring files from Mac to iPhone, you might also require a step-by-step guide to AirDrop between iPhone and Mac. To know how it is done, follow the steps explained next:
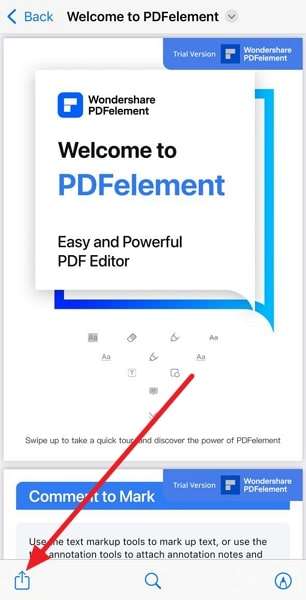
Step 1: Open the file on your iPhone that you wish to transfer by the method of AirDrop. As you open it, tap the "Share" button located at the bottom of the screen. If not, hold the respective file and select the "Share" option from the drop-down menu that appears.
Step 2: This opens a new set of options where you have to select “AirDrop.”
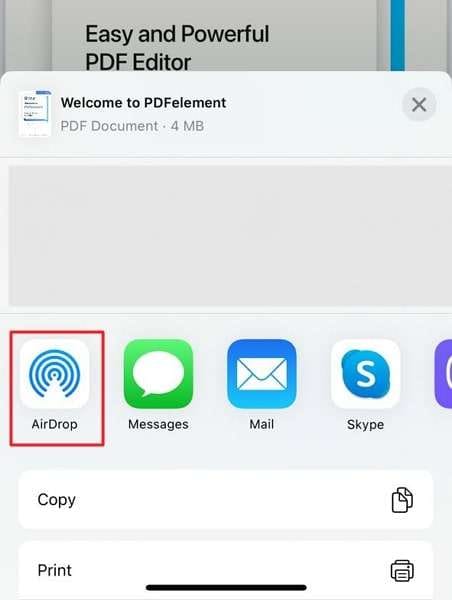
Step 3: As you continue to the next screen, look for the respective device you wish to AirDrop the files. On selecting the device, the process executes successfully, and the files will be transferred to the "Downloads" folder of the Mac.
Bonus Part: How To Transfer Files Between Android and Mac
You would have reviewed the comprehensive operations of using AirDrop on iPhone and Mac. With all the procedures highlighted, you can now AirDrop from Mac to iPhone and vice versa. However, it has always been believed that file transfer between Android and Apple devices is complicated. While this is a true statement, multiple methods are striving to improve this.
Wondershare Dr.Fone Air, a platform designed for simple data access, comes with a variety of compatibility. It works across three different platforms online, desktop, and mobile versions. The quality of file transfer is exceptionally exquisite in the tool. Moreover, you can also find Dr.Fone Air as a good companion for screen mirroring devices for free.
Exceptional Features of Wondershare Dr.Fone Air
To know more about how Dr.Fone Air makes operations easy between Android and iOS devices, look through the following features:
- The process is 100% free, with no hidden costs involved in the application.
- Users can ensure a 100% lossless file transfer through this solution.
- There are no limitations on the number and size of files that are being shared through it.
Steps To Transfer Files Between Android and Mac With Dr.Fone Air
We will redirect our discussion to discuss file transfer between Android and Mac. This will be carried out by Dr.Fone Air and will be covered with the steps mentioned below:
Step 1: Open Respective Sites and Initiate Connection
Open the official online platform of Wondershare Dr.Fone Air on your Mac. Continue to download the tool "Dr.Fone Link" on your Android to establish a connection. Make sure that both devices are connected to the same network.

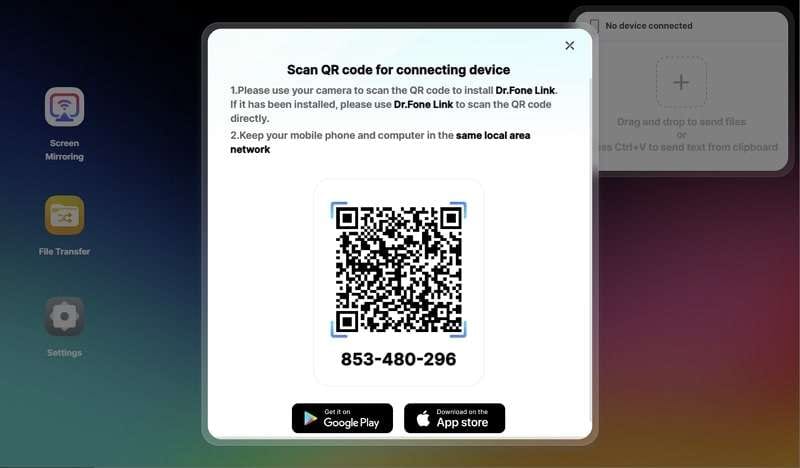
Step 2: Scan QR Code or Write the Code
You can either scan the QR code that is appearing on the screen of your Mac. Conversely, you can add the code appearing on Mac's screen. Once the connection is established, continue for effective file transfer.
Step 3: Access File Transfer
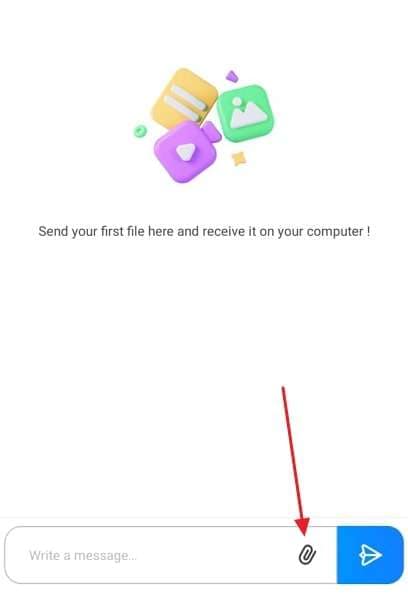
Allow all appropriate permissions on your Android device to allow file transfer. On the screen of your Android, tap "File Transfer" to continue. On choosing the "Attachment" icon, you can transfer your photos, music, documents, and videos from the Android.
Step 4: Transfer Files to Mac Successfully
Select “Documents” from the options and continue to select one from the list. On selecting all the files that you wish to transfer, tap “Send.” The file will be available for download on your Mac. As you tap it, it will be downloaded on your Mac, thus ensuring a proper file transfer.

Conclusion
This article has comprehensively provided proper guidelines for using the AirDrop feature. With a step-by-step guide to using AirDrop from iPhone to MacBook and vice versa, the feature is evident. Review all the details showing how to AirDrop from iPhone to PC. You have also learned other techniques, such as Dr.Fone Air, that make file transfer between Android and Mac easy.


iPhone Transfer
- Data Transfer
- 1. Video from iPhone to External Drive
- 2. Transfer MP4 to iPhone
- 3. Put Wallpapers on iPhone
- 4. Move Photos to SD Card
- 5. Best Apps to Transfer from iPhone to Android
- iPhone to PC
- 1. Transfer Pictures From iPhone to PC
- 2. Transfer From iPhone to Computer
- 3. Transfer Album from iPhone to PC
- 4. Transfer Data from iPhone to PC
- 5. Copy Voice Memo from iPhone to PC
- 6. iPhone Camera Roll to Computer
- 7. Podcasts from iPhone to Computer
- 8. Transfer Notes from iPhone
- 9. Techniques Used in Mobile Phone Forensics
- iPhone to Mac
- 1. Voice memos from iPhone to Mac
- 2. Synce Notes from iPhone to Mac
- 3. Export iBooks to PC and Mac
- 4. Transfer Photos from iPhone to Mac
- 5. Transfer Music from iPhone to Mac
- Computer to iPhone
- 1. AirDrop From Mac to iPhone
- 2. Use AirDrop from Mac to iPhone
- 3. Transfer Data from PC to iPhone
- 4. Transfer Videos from PC to iPhone
- 5. Unsync iPhone from Computer
- 6. Sync iPhone with Multiple Computers
- Transfer to iPhone
- 1. Switch Cards Between iPhones
- 2. Facetime for Android to iPhone
- 3. Transfer Data from Motorola to iPhone
- 4. Samsung to iPhone Transfer
- 5. Transfer iPhone Apps to iPhone
- 6. Clone iPhone/iPad to iPhone
- Transfer from iPhone
- 1. Transfer Video from iPhone to Laptop
- 2. Transfer Data from iPhone to Laptop
- 3. Transfer Notes from iPhone to iPad
- 4. Transfer Data from iPhone to Android
- 5. Switch from iPhone to Google Pixel
- 6. Switch from iPhone to Samsung S10
- 7. Switch from iPhone to Samsung
- 8. Transfer from iPhone to Samsung S20
- iPhone Transfer Tips
- 1. Ford Sync iPhone
- 2. Sync iCal with iPhone
- 3. iPhone Calendar Not Syncing
- 4. iPhone Transfer Software
- WhatsApp Transfer
- 1. WhatsApp from iPhone to iPhone
- 2. WhatsApp from iPhone to Android
- 3. WhatsApp from iPhone to Samsung S10
- 4. WhatsApp Messages to iPhone
- 5. WhatsApp from iPhone to Samsung S9
- iTunes Transfer
- ● Manage/transfer/recover data
- ● Unlock screen/activate/FRP lock
- ● Fix most iOS and Android issues
- Transfer Now Transfer Now Transfer Now
Daisy Raines
staff Editor