100% Security Verified | No Subscription Required | No Malware

 :
: 
 ChatGPT
 Perplexity
 Gemini
 Claude
 Grok
Grok
Transferring apps from your iPhone to your iPad can elevate your entire digital workflow, ensuring your essential tools and favorite games are readily accessible on a larger screen. If you've ever found yourself asking, "how can I transfer apps from iPhone to iPad?" or "how to get apps from iPhone to iPad without losing data?", you are in the right place.
In this comprehensive 2026 guide, we'll cover the six most effective techniques to get the job done. Whether you need to transfer apps to new iPad models using iCloud, rely on iTunes, or employ robust one-click software, you will quickly discover how do you transfer apps from iPhone to iPad seamlessly.
In this article
- Part 1: How To Transfer Apps from iPhone to iPad Using Family Sharing
- Part 2: How To Transfer Apps from iPhone to iPad Using iCloud
- Part 3: How To Transfer Apps From iPhone to iPad via Bluetooth
- Part 4: How To Transfer Apps from iPhone to iPad via App Store
- Part 5: How to Transfer Apps from iPhone to iPad via iTunes
- Part 6: How to Transfer Apps from iPhone to iPad Via Wondershare Dr.Fone
Part 1. How To Transfer Apps from iPhone to iPad Using Family Sharing
Family Sharing is an exceptional feature for iOS users with devices running version 8 and above. It empowers you to effortlessly share an array of digital files with your family circle, including apps, ebooks, TV shows, movies, and music. If you are wondering how do I get apps from iPhone to iPad efficiently across multiple family devices, this native solution is a top choice. Just ensure you've configured the program on your iPhone and shared your active purchases.
Step 1 Access iCloud Settings
On your primary iPhone, navigate to 'Settings' and tap on 'iCloud'. Enter your verified Apple ID credentials to log in. This foundational step prepares your device for a seamless sharing experience.

Step 2 Set Up Family Sharing
Select the "Set up Family Sharing" option and click "Get Started." Add your designated family members to allow them access to shared purchases across iTunes, iBooks, and the App Store.

Step 3 Confirm Payment and Invite Members
Verify your payment method on the subsequent screen, tap "Managing Family Purchases," and press "Done." Proceed by tapping "Continue," where you can select 'Share Location' or 'Not Now.' You can invite up to 5 additional members, ensuring your iPad is included in this network.

Step 4 Enable Purchase Sharing
With Family Sharing properly set up, log back into your iCloud account and tap your profile name. Toggle the 'Share my Purchases' switch to the "on" position. This enables cross-device access to your applications via the Apps and Store options.

Step 5 Download on iPad
Switch to your iPad and open the "App Store." Tap on the "Today" tab, select your profile icon, and head to "Purchased." Choose your name from the Family Sharing list, locate the desired apps, and hit the "Download" icon to complete the process.

You can consistently rely on this procedure to transfer apps on any iOS gadget, as the Family Sharing tool perfectly mirrors the app purchase history associated with your shared Apple ID ecosystem.
Part 2. How To Transfer Apps from iPhone to iPad Using iCloud
For individuals heavily invested in the Apple ecosystem, syncing directly through iCloud provides an automated, hands-off approach to transfer apps from iPhone to iPad instantly. Once enabled, iCloud seamlessly mirrors your app installations.
Step 1 Access App Settings
On your iPhone, launch 'Settings' and navigate to the 'Apps and iTunes Store' section. Ensure you are signed in with the same Apple ID used on your iPad to facilitate the cross-device connection.

Step 2 Enable Automatic Downloads
Locate the toggle switch next to 'Apps' under the 'Automatic Downloads' category and flip it to 'On'. This simple adjustment initiates the automated app synchronization protocol.

Step 3 Complete the Sync on iPad
Experience the seamless integration as changes register immediately. Open your iPad, ensure you are logged into the same Apple ID, and any new apps downloaded on your iPhone will automatically begin installing on the iPad.
Part 3. How To Transfer Apps From iPhone to iPad via Bluetooth
If you prefer transferring individual links or data without relying entirely on internet-based cloud sync, utilizing Bluetooth (often working in tandem with AirDrop on Apple devices) is an effective local alternative to get apps from iPhone to iPad.
Step 1 Enable Bluetooth on Both Devices
On your iPhone, navigate to 'Settings > Bluetooth' and toggle it on. Repeat the exact same step on your iPad. Having Bluetooth active on both ends is essential for establishing the wireless handshake.

Step 2 Share the App Link
Once your iPad and iPhone are paired or detect each other, long-press the specific app you want to share on your iPhone's home screen and choose 'Share App'. Select the Bluetooth/AirDrop option, tap your iPad's name from the list of available devices, and hit 'Send'. You can then accept the prompt on your iPad to download it.

Part 4. How To Transfer Apps from iPhone to iPad via App Store
Re-downloading previously purchased applications to a new device without paying twice is highly straightforward when utilizing the native App Store ecosystem. This is arguably the easiest way to transfer apps to new iPad models.
Step 1 Open the iPad App Store
Unlock your iPad and tap the "App Store" icon located on your Home screen to initiate the manual download process.

Step 2 Navigate to Purchased Items
Tap your profile picture, navigate into the "Purchased" tab, and switch the view to "Not on this iPad". This filters out the apps you already have, displaying only the fresh inventory linked to your iPhone purchases.

Step 3 Download to iPad
Tap the Cloud download icon next to any missing app to securely install it on your iPad. If prompted, input your Apple ID password to authorize the transaction.
Part 5. How to Transfer Apps from iPhone to iPad via iTunes
For users who prefer a wired, PC-based backup solution, iTunes remains a reliable method to transfer apps from iPhone to iPad securely. Ensure you are running the latest version of iTunes on your desktop before proceeding.
Step 1 Authorize Your Computer
Connect your iPhone to your PC or Mac using a certified USB cable. Open iTunes, click on the "Account" or "Store" menu, and select "Authorize This Computer." Log in with the matching Apple ID credentials.
Step 2 Transfer Purchases from iPhone
Right-click the iPhone device icon visible in the iTunes dashboard and choose "Transfer Purchases". This action syncs your iPhone's app library to the computer's local drive. Wait for the sync to finalize, then safely eject your iPhone.

Step 3 Sync Apps to iPad
Next, connect your iPad via the USB cable. Right-click the iPad icon and perform the same "Transfer purchases" protocol if necessary. Then, navigate to the "Apps" section within your iPad's summary screen, tick the "Sync Apps" checkbox, and click "Apply" or "Sync" at the bottom right. Your apps will now systematically deploy to the iPad.

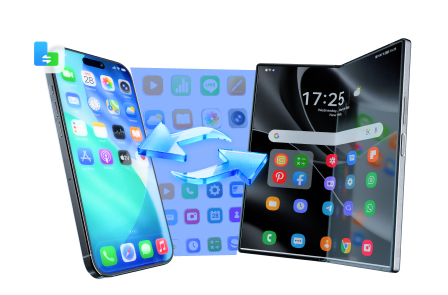
Part 6. How to Transfer Apps from iPhone to iPad Via Wondershare Dr.Fone
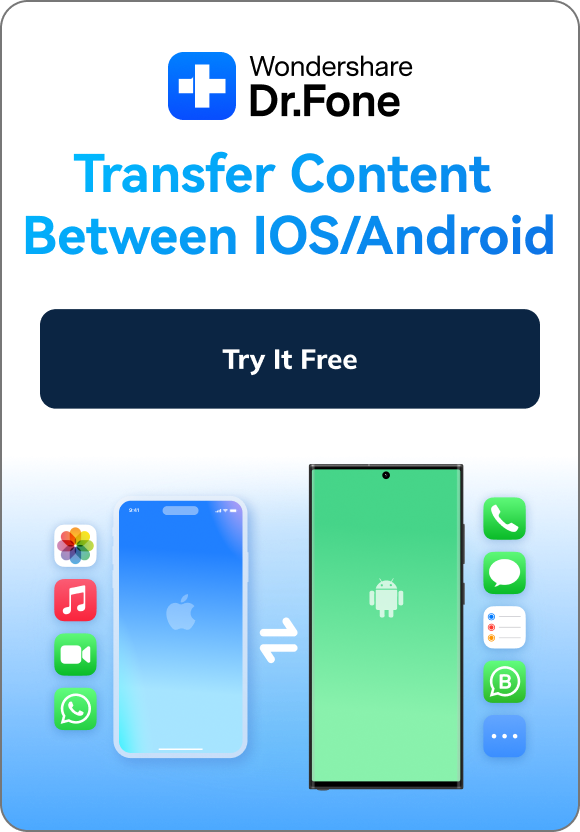
While native methods are functional, they often involve complex iCloud settings or bulky iTunes synchronization. If you want the absolute fastest method to transfer apps from iPhone to iPad, Dr.Fone-Phone Transfer is an industry-leading desktop software offering a flawless 1-click experience. Beyond just apps, Dr.Fone - Phone Transfer seamlessly migrates photos, videos, contacts, and WhatsApp data directly across iOS devices.
 Move data between iOS to Android and vice versa.
- Transfer contacts, SMS, photos, videos, music, and more types.
- Available with all phones with Android and iOS versions.
- Simple, click-through process.
Step 1 Set Your Data Transfer Path
Launch the Phone Transfer module within Dr.Fone and connect both your iPhone and iPad via USB. The software will detect them instantly. Assign the iPhone as the Source and the iPad as the Destination. You can use the Flip button if they are in the wrong order.
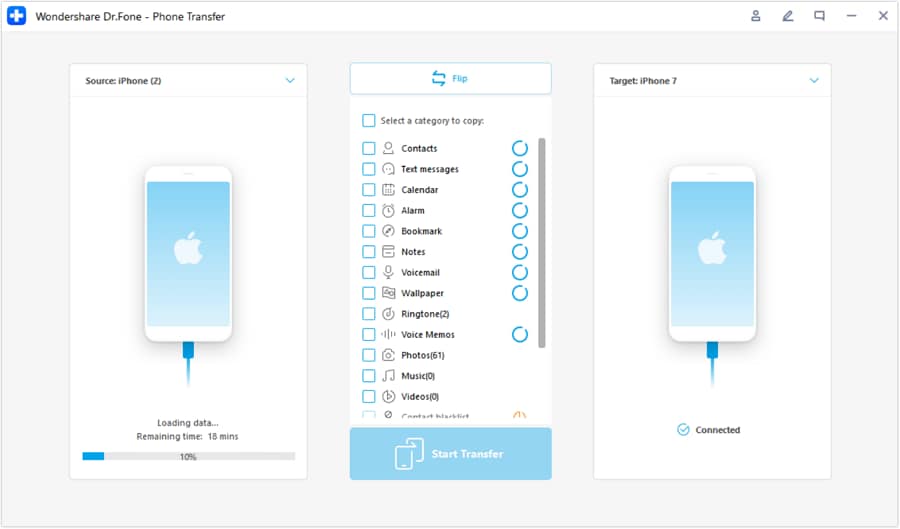
Step 2 Choose Data Types
Select the specific categories of data you wish to migrate, including apps and app data if supported. Once checked, click the Start Transfer button to initiate the migration.

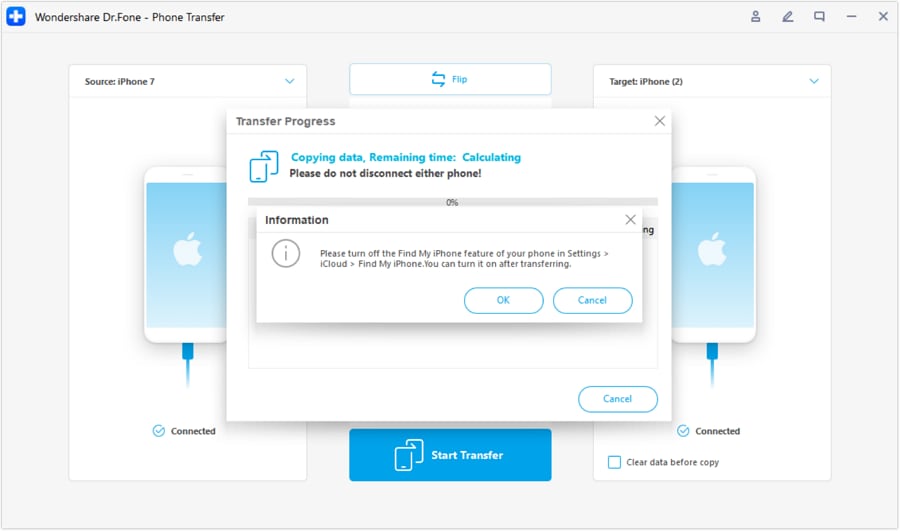
Step 3 Turn Off Find My Feature
If prompted, you will need to temporarily disable the Find My feature on your destination iOS device. Navigate to Settings > [Your Name] > iCloud > Find My on your iPad and toggle it off to grant the software write permissions.
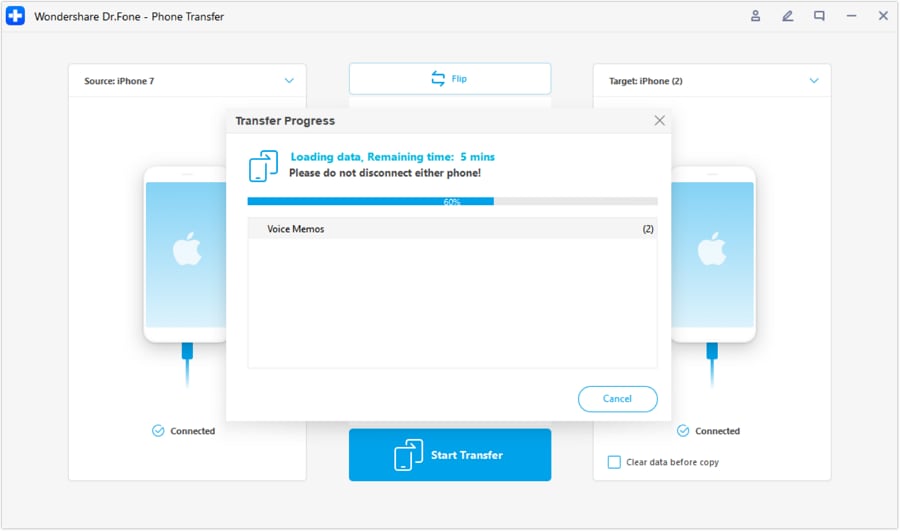
Step 4 Monitor the Transfer
The program will now actively transfer apps to new iPad hardware. Keep both devices connected securely and monitor the on-screen progress bar until it reaches 100%.
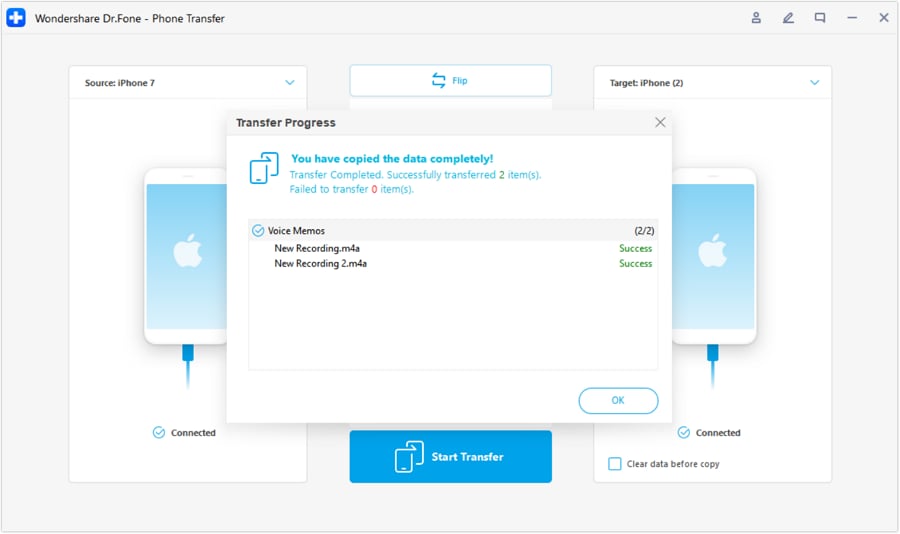
Step 5 Finalize Phone Transfer
A success prompt will appear once all data and apps are safely copied over. Click OK, disconnect your devices, and start enjoying your newly synchronized iPad.


Conclusion
Transferring your digital ecosystem between devices doesn't have to be a headache. Whether you choose to leverage native tools like iCloud and the App Store or opt for wired transfers via iTunes, you now have a comprehensive understanding of how can I transfer apps from iPhone to iPad effectively.
For those who value speed and want to bypass the typical restrictions of iCloud storage, Dr.Fone - Phone Transfer (iOS) proves to be the ultimate asset. Its 1-click execution removes the friction from device upgrades, ensuring your transition to a new iPad is incredibly smooth.
FAQ
1. How do I get apps from iPhone to iPad wirelessly?
The simplest wireless methods include enabling Automatic Downloads via iCloud, utilizing Family Sharing, or using AirDrop (Bluetooth) to send specific App Store links from your iPhone directly to your iPad for immediate download.2. Can I transfer apps to new iPad without an Apple ID?
No, officially transferring or re-downloading apps requires you to log into the iPad using the same Apple ID that was used to originally purchase or download the applications on your iPhone. Third-party software like Dr.Fone can migrate some localized app data, but core iOS app installations are strictly tied to Apple IDs.3. Why won't my iPhone apps sync to my iPad automatically?
If automatic sync fails, check if both devices are logged into the exact same iCloud account. Furthermore, ensure that you have toggled on the "Apps" switch under the "Automatic Downloads" section within your iPad's App Store settings.4. Does transferring apps from iPhone to iPad transfer app data too?
Using the basic App Store re-download method will only install the clean app. To transfer your specific app data, game saves, or login credentials, you must restore the iPad from a full iCloud/iTunes backup, or use a dedicated data migration tool like Wondershare Dr.Fone.
 Add Wondershare Dr.Fone as a preferred source on Google