100% Security Verified | No Subscription Required | No Malware

 :
: 
 ChatGPT
 Perplexity
 Gemini
 Claude
 Grok
Grok
As we accumulate thousands of high-resolution images and precious memories, transferring photos between iPads can sometimes seem like a daunting, time-consuming task. Whether you are upgrading to the latest 2026 iPad model, setting up a device for a family member, or simply looking to back up your gallery, knowing exactly how to transfer photos from iPad to iPad is a critical skill for any Apple user.
In this comprehensive, step-by-step guide, we will explore the absolute best methods for a seamless photo transfer. From leveraging Apple's built-in wireless features like AirDrop and iCloud, to using powerful third-party desktop applications, you will discover quick and efficient ways to ensure your cherished pictures are safely moved from one iPad to another without losing quality or risking data loss. Let's dive in and make your photo transfer experience completely hassle-free!
In this article
Part 1. The Fastest Way to Transfer Photos from iPad to iPad
While Apple provides several native methods for migrating your media, many users find that standard sync processes can accidentally overwrite or delete existing data on the target device. To completely avoid this risk and streamline your workflow, we highly recommend utilizing a dedicated data management tool like Dr.Fone Phone Transfer.
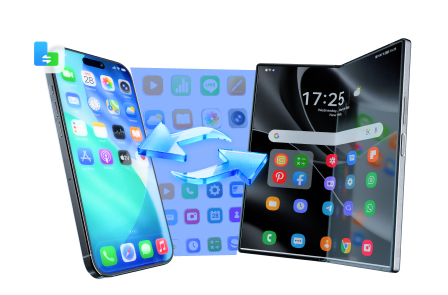
This powerful software is designed to effortlessly transfer photos, videos, contacts, and music directly between your devices without erasing a single byte of your current data. Whether you are moving files from an old iPad to a new one, or even crossing operating systems to Android, Dr.Fone ensures your albums remain perfectly intact in just a few clicks.
 Move data between iOS to Android and vice versa.
- Transfer contacts, SMS, photos, videos, music, and more types.
- Available with all phones with Android and iOS versions.
- Simple, click-through process.
-
Step 1 Launch the Phone Transfer Tool
Begin the procedure by downloading and installing Wondershare Dr.Fone on your computer. Open the application and navigate to the Toolbox section. From there, select Phone Transfer to launch the dedicated device-to-device migration window.

-
Step 2 Connect and Set Data Transfer Path
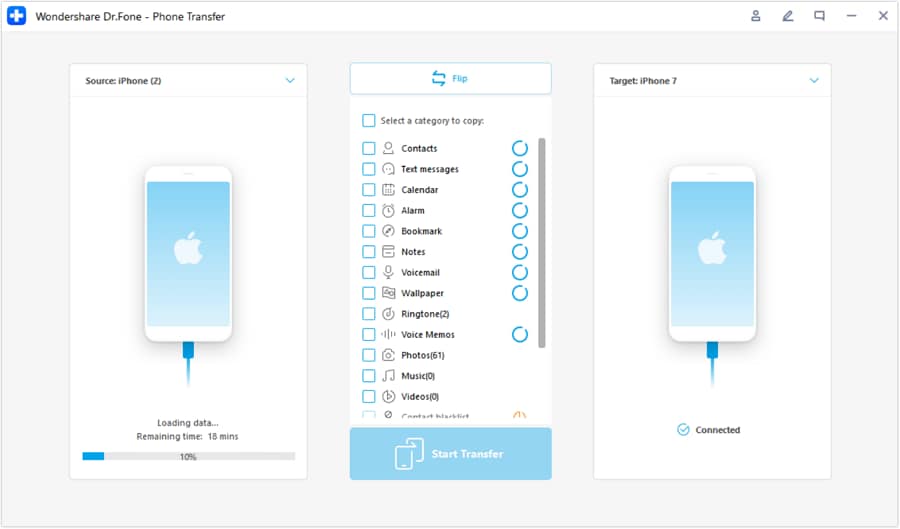
Using certified USB or Lightning cables, connect both of your iPads to the computer. The software will detect them and display them on the interface. Ensure that your old iPad is set as the Source and your new iPad is set as the Destination. If they are in the wrong order, simply click the Flip button at the top-center of the screen to reverse their positions.
-
Step 3 Select Photos as the Data Type
Once the source and destination are correctly configured, the tool will scan the source iPad and list all transferable data types. Check the box next to Photos. You can also select other file types if needed. When ready, click Start Transfer to initiate the process.

-
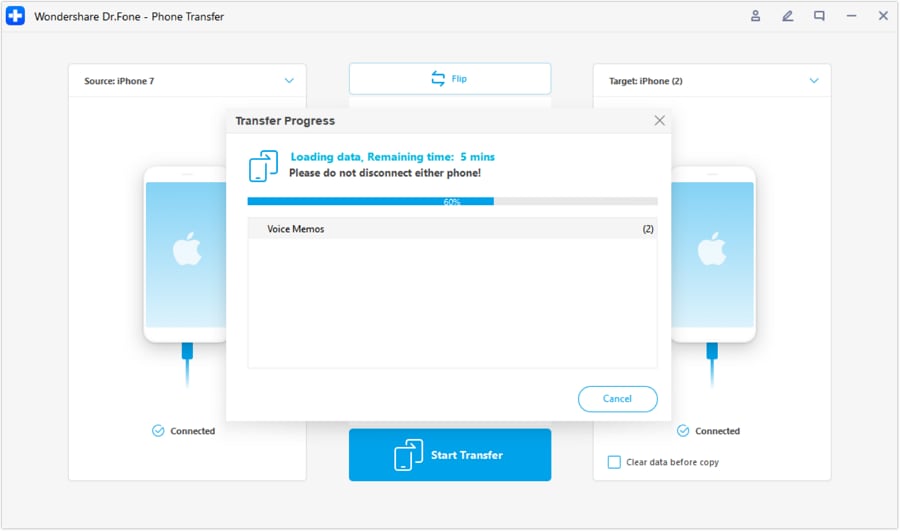
Step 4 Complete the Transfer Process
The program will now rapidly transfer the photos from your source iPad to the destination device. Ensure both iPads remain securely connected to the computer until the progress bar reaches 100% and you receive a success notification.


Part 2. Alternative Methods to Transfer Pics from iPad to iPad
If you prefer not to use third-party desktop software, there are several alternative pathways built into the Apple ecosystem. Below are five other reliable methods you can use to transfer pictures from iPad to iPad.
Method 1: Transfer Photos with iTunes
Using iTunes (or Finder on newer macOS versions) is a traditional wired approach to syncing your photos. While this method requires syncing your photos to a computer first and then pushing them to the second iPad, it is highly reliable for large photo libraries. Be cautious, however, as syncing via iTunes may replace existing media on your target iPad.
-
Step 1 Export Photos to Your Computer
First, transfer the pictures from your source iPad to your computer. Organize all the photos you wish to move into a single, easily identifiable folder on your desktop or hard drive.
-
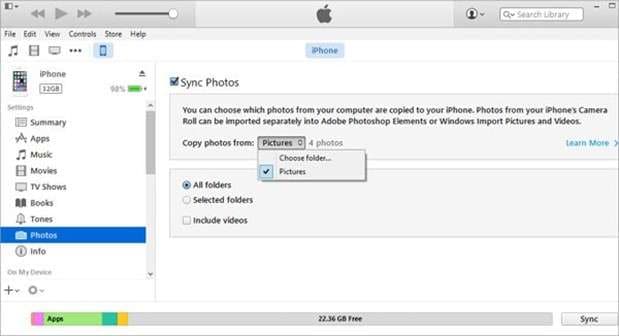
Step 2 Configure iTunes Sync Settings
Connect your target iPad to the computer via USB and open iTunes. Click on your iPad icon in the top left corner, then navigate to the Photos tab on the left sidebar. Check the box that says Sync Photos.
-
Step 3 Apply and Sync
From the dropdown menu, select the specific folder you created in Step 1. Click Apply or Sync at the bottom right. Once the process is finished, a newly synced album will appear in the Photos app on your destination iPad.
Method 2: Transfer Photos using AirDrop
If you only need to figure out how to transfer photo from iPad to iPad for a handful of specific images, AirDrop is arguably the most convenient wireless tool available. It requires both devices to be in close physical proximity with Wi-Fi and Bluetooth enabled.
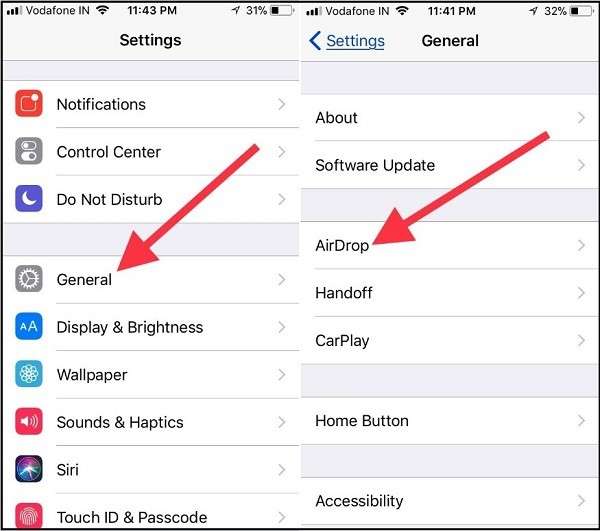
- Step 1: Swipe down from the top-right corner of both iPads to access the Control Center. Tap and hold the network settings block, then turn on AirDrop (set it to Contacts Only or Everyone).
- Step 2: Open the Photos app on your source iPad, tap Select, and choose the images you wish to share. Tap the Share icon and select AirDrop.
- Step 3: Tap the name of the target iPad when it appears. On the receiving iPad, hit Accept. The transferred photos will instantly populate in the Photos app.

Method 3: Transfer Photos with iCloud
If both iPads are logged into the same Apple ID and you have ample cloud storage space, iCloud Photos is a seamless way to keep your entire gallery synchronized automatically across your devices.
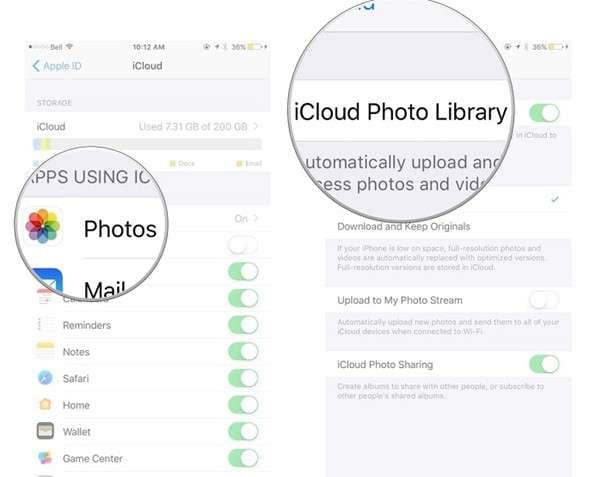
- Step 1: On your source iPad, go to Settings, tap your Apple ID profile at the top, and select iCloud.
- Step 2: Navigate to Photos and toggle on Sync this iPad (or iCloud Photo Library on older iOS versions). Ensure the iPad is connected to a stable Wi-Fi network so the upload can complete.
- Step 3: Repeat the same exact process on your destination iPad. Give it some time to download from the cloud, and soon you will see all your photos populating in the native Photos app.
Method 4: Transfer Photos via Photo Stream
Though largely superseded by iCloud Photos in recent iOS updates, My Photo Stream is still an option for older devices running iOS versions prior to the widespread adoption of full iCloud syncing. It temporarily uploads your recent photos to the cloud for viewing on other devices without eating into your iCloud storage limit.
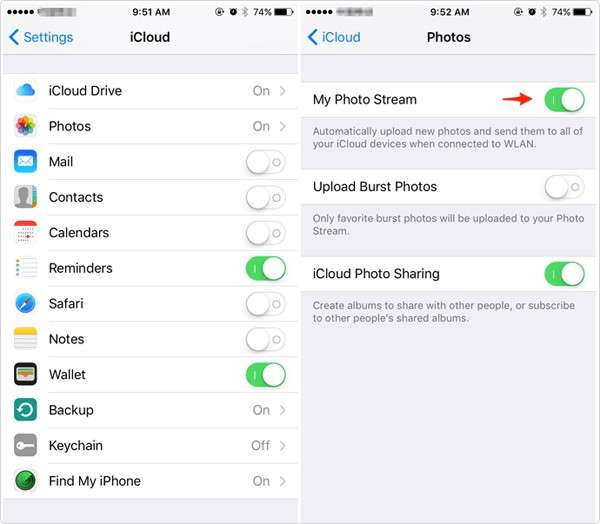
- Step 1: Go to Settings > Photos (or Photos & Camera) and toggle on My Photo Stream on both iPad devices.
- Step 2: Open the Photos app on your original iPad, tap on the Albums tab, and locate the My Photo Stream album.
- Step 3: The latest 1,000 photos from the past 30 days will automatically appear here on the new iPad. You can then select them and save them directly to the device's local storage to keep them permanently.
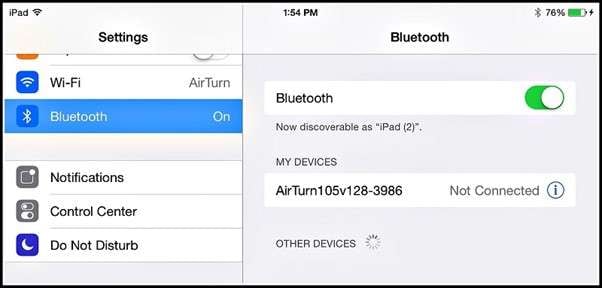
Method 5: Transfer Photos using Bluetooth
If Wi-Fi is unavailable and you lack computer access, you might wonder how to transfer photos iPad to iPad offline. Using a standard Bluetooth connection is a fallback option. Be aware that transferring high-resolution images over Bluetooth is significantly slower than AirDrop and requires a lot of patience.
- Step 1: Place both iPads side by side. Go to Settings > Bluetooth and toggle the switch to ON for both tablets.
- Step 2: Under the "Other Devices" list, select the target iPad to establish a pairing connection.
- Step 3: Once securely paired, open your Photos app on the source device and select the images you wish to move.
- Step 4: Tap the Share button, choose the connected Bluetooth device, and accept the incoming file prompt on the target iPad. Leave both screens active until the slow data transfer completes.
Conclusion
There are clearly multiple viable strategies for moving your visual memories between devices. While AirDrop is fantastic for a few quick snaps and iCloud is superb for passive synchronization, relying on these methods for massive library migrations can sometimes result in storage bottlenecks or frustrating network delays.
For the most reliable, comprehensive, and fastest experience, Wondershare Dr.Fone Phone Transfer remains the gold standard. Its intuitive desktop interface guarantees that you can transfer your entire photo collection securely in just a single click, completely eliminating the risk of data loss or complicated syncing errors. Choose the method that best aligns with your current technical situation, and enjoy your new iPad loaded with all your favorite memories.
FAQ
-
1. How to move photos from iPad to iPad without a computer?
You can easily transfer photos without relying on a computer by utilizing Apple's built-in wireless features. Methods such as AirDrop, iCloud Photos, or even a direct Bluetooth connection allow you to send images directly from device to device. AirDrop is generally recommended as the fastest wireless option. -
2. Is there a limit to the number of photos I can transfer using iCloud Photo Library?
There is no numerical cap on the amount of pictures you can sync; however, you are strictly limited by your active iCloud storage plan. If your photo library exceeds your available cloud space (like the free 5GB tier), you will need to upgrade your subscription or choose a local transfer method like Dr.Fone. -
3. Do both iPads need to be on the same Wi-Fi network to use Photo Stream or AirDrop?
For Photo Stream (or iCloud syncing), both iPads need internet access, though not necessarily the exact same network. For AirDrop, both iPads must have Wi-Fi and Bluetooth turned on and be in close physical proximity, creating a direct peer-to-peer connection to transfer the files seamlessly. -
4. Will transferring photos via iTunes delete existing pictures on my new iPad?
Yes, it is highly possible. When you sync photos from a computer to an iPad using iTunes, the software often replaces the existing photo library on the target device with the newly synced folder. To avoid data overwriting, it is highly recommended to use professional transfer software instead of iTunes.
 Add Wondershare Dr.Fone as a preferred source on Google