Top 10 Best Hard Reset Tools for Android Phones in 2026
Feb 10, 2026 • Filed to: Phone Repair Solutions • Proven solutions
Dr.Fone Basic:
Better Control for Your Phone
Manage, transfer, back up, restore, and mirror your device
A hard reset is a vital feature for Android smartphones that returns them to factory settings, wiping out all data and settings. This is necessary for forgotten passwords, software bugs, and slow device performance. Hard reset android phone tools enable users to restore control of their phones by wiping them clean. After typical troubleshooting fails, hard resets help.

They fix significant issues, remove malware, and restore functioning. The procedure might be overwhelming without the correct tools. Dedicated backup and hard reset tools ease this complicated operation. Unlike manual approaches, these tools include simple interfaces and step-by-step instructions. Keep reading to learn more!
Part 1. Key Features to Look for in an Android Hard Reset Tool
Choosing the appropriate Android hard reset tool requires thoroughly assessing its characteristics. Here are the main elements to evaluate:
1. User-Friendly Interface
A simple interface streamlines the reset procedure, making equipment accessible even to non-technical users.
2. Compatibility
The tool should support various Android models and OS versions, ensuring adaptability.
3. Data Backup Options
Resetting a device often deletes all data. The finest programs provide backup options, protecting crucial information, contacts, and media before resetting.
4. Additional features
Modern reset tools have additional features, including eliminating FRP (Factory Reset Protection) locks and unlocking forgotten patterns and PINs, which handle various difficulties.
5. Safety Measures
High-quality tools prioritize device safety, reducing the possibility of bricking throughout the reset procedure. Clear instructions and safety inspections are also necessary.
When choosing an android phone hard reset tool, be sure it combines simplicity and sophisticated features.
Part 2. Importance of Backing Up Data Before a Hard Reset
Backing up data before a hard reset is essential. All data—photos, contacts, messages, and apps—is deleted after a hard reset. When vital files are lost, this may be devastating. Regardless of reset mistakes, backing up protects your essential data.
Wondershare Dr.Fone
Flexibly Backup and Restore Android Data
- Selectively backup Android data to the computer with one click.
- Preview and restore the backup to any Android device.
- Supports 8000+ Android devices.
- There is no data lost during backup, export, or restoration.
For easy Android data backup before a hard reset, Wondershare Dr.Fone. The tool's user-friendly design and extensive capabilities make it ideal for data management:
- Quickly backup contacts, texts, pictures, videos, and more with one click.
- Only restore the data you need, not the backup.
- Quickly restore iCloud/iTunes backups to Android or transfer data to iOS.
- Preview and selectively export backup files.
- Supports Many Devices: Supports over 8,000 Android devices.
- Store your data securely on your computer to safeguard it from cyberattacks and malware.
- You may preview and restore just the files you require.
Using Dr.Fone to back up your Android smartphone is simple. Follow the steps below to backup Android data:
- Step 1. Launch the Dr.Fone program on your computer. Connect Android via USB or Wi-Fi. Go to "My Backup" and click "Back Up Now".

- Step 2. Click "OK" to resume the backup. Dr.Fone will back up your Android data with a progress indicator. Keep the device on until the procedure is finished.
- Step 3. After completing a backup, click "View Backups" to retrieve all stored backups. Preview, export, and selectively restore data.

To protect your data, avoid this danger by utilizing Dr.Fone Backup and Restore. Its powerful backup and restoration tools provide peace of mind while planning for a hard reset or managing your digital life.
Part 3. Top 10 Android Hard Reset Tools in 2026
Android devices need hard resets to fix software bugs, circumvent locks, and restore factory settings. Here are 2026's top 10 Android hard reset software for pc, each with distinct features.
1. Dr.Fone - Screen Unlock (Android)
Dr.Fone - Screen Unlock (Android)
Reset Android Without A Password!
- Bypass Google Account on OnePlus without a PIN or Google account.

- Remove 5 screen lock types: pattern, PIN, password, ingerprints & Face ID.
- Unlock mainstream Android brands like Samsung, Huawei, OnePlus, Xiaomi, etc.
- No tech knowledge required, Simple, click-through, process.
Dr.Fone - Screen Unlock (Android) is a versatile tool designed to remove screen locks on Android devices. Whether it’s a forgotten password or a second-hand phone with a locked screen, this tool can address a wide variety of lock scenarios.

Features
- Pattern, PIN, password, fingerprints & face screen lock can all be unlocked.
- Bypass Android FRP lock and fully support the lastest Samsung Galaxy series.
- Unlock mainstream Android brands like Samsung, Huawei, LG, Xiaomi, OnePlus, etc.
2. Dr.Fone - System Repair (Android)
Dr.Fone - System Repair (Android)
Dedicated Tool to Fix Android Errors!
- Fix various Android system issues like black screen of death.
- High success rate of fixing Android issues. No skills are required.
- Handle Android system to normal within less than 10 minutes.
- Easy-to-follow instructions provided.
Dr.Fone - System Repair for Android specializes in resolving various system problems, including boot loops, black screens, and bricked devices. It provides a straightforward, click-based repair technique and is especially successful on Samsung devices.

Features
- Repairs Android system issues like black screen and boot loops.
- High success rate with common system problems.
- Supports over 1,000 Samsung models, including Galaxy S22/S23.
4,624,541 people have downloaded it
3. iMyFone LockWiper (Android)
iMyFone LockWiper is a powerful tool that can unlock Android screen locks and circumvent Google FRP verification. It supports over 6,000 Android devices and thrives in situations like forgotten passwords and locked second-hand phones.
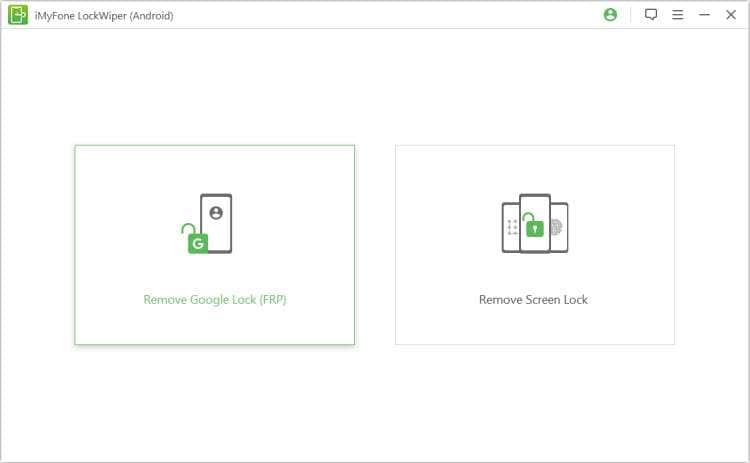
Features
- Removes all screen passcodes: PIN, pattern, fingerprints, and face ID.
- Factory resets Android phones within five minutes.
- Supports Android 15.
4. Android Multi Tools
Android Multi Tools is a comprehensive utility for unlocking and flashing Android devices. It offers factory resets, FRP bypass, and account removal for various manufacturers, including Xiaomi, Vivo, and Samsung.

Features
- Factory resets devices in seconds.
- Unlocks FRP and Mi accounts on supported devices.
- Works with a variety of Android brands, from Tecno to Oppo.
5. Dr.Fone - Data Eraser (Android)
Dr.Fone - Data Eraser
Permanently Erase Everything on Android!
- It can delete all data and information on Android devices permanently.
- It can remove all types of data files.
- Maximize phone resale value with data erasure report.
- Supports all Android devices available in the market.
Dr.Fone - Data Eraser (Android) offers a powerful, secure, and user-friendly solution to protect your digital privacy. With its military-grade erasure, wide device compatibility, and detailed erasure reports, it stands out as an invaluable tool for Android users.

Features
- Every trace of your photos, contacts, messages, call logs, app data, and private credentials is wiped clean beyond recovery.
- Uses U.S. DoD 5220.22-M standards for data erasure, overwriting data three times to ensure total removal.
- Works with any Android device available in the market, from Samsung and Google Pixel to lesser-known brands.
6. Mobikin Doctor for Android
MobiKin Doctor for Android is a robust, easy-to-use data recovery application for Android smartphones. It provides recovery without root access for over 7,000 Android devices, making it easy for personal and commercial usage. This complete program has straightforward recovery procedures for deleted photographs, contacts, and vital documents.
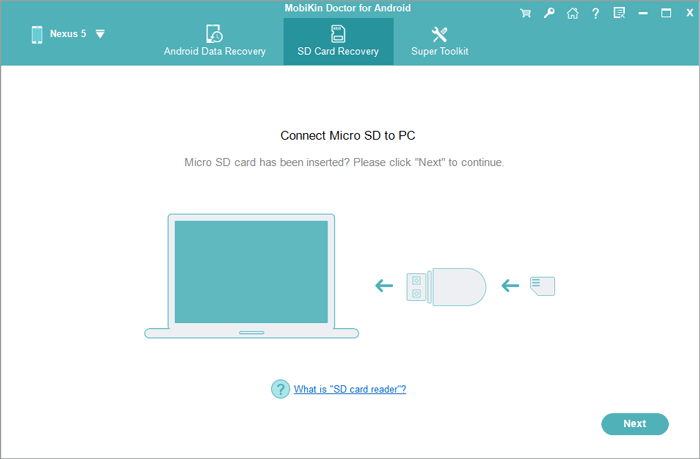
Features:
- Offers two recovery modes: Internal Storage and SD Card recovery.
- It allows backup alongside recovery for future data protection.
- Provides options for previewing and selectively recovering files.
7. Odin Flash Tool
Odin Flash Tool makes rooting, flashing custom ROMs, and installing firmware simple for Samsung smartphones. It makes firmware installation and recovery easy for novices, specifically for Windows. Samsung enthusiasts and maintenance specialists use it.
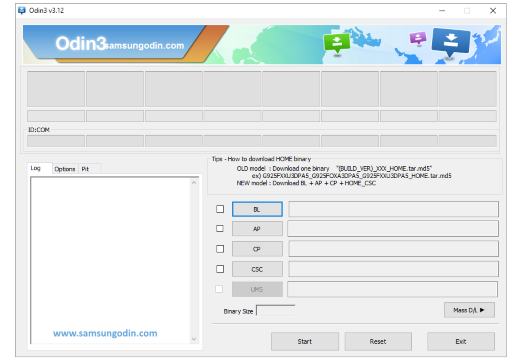
Features:
- It supports flashing firmware binaries (.tar and .md5) for Samsung devices.
- Offers options for bootloader unlocking, firmware updates, and recovery installations.
- Facilitate installation of custom ROMs and TWRP recovery.
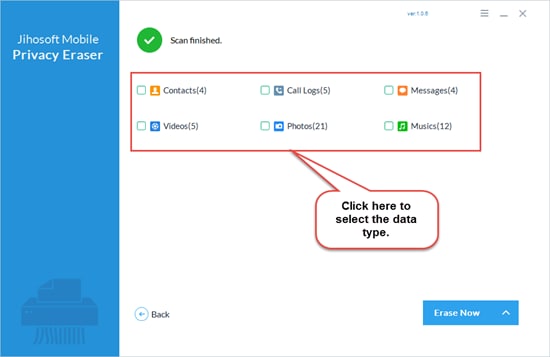
8. Jihosoft Mobile Privacy Eraser
The powerful Jihosoft Mobile Privacy Eraser erases sensitive Android data forever. It makes formatted or reset data unrecoverable, making it ideal for reselling or discarding devices.
jihosoft-mobile-privacy-eraser.jpg
Features
- Permanently erase photos, videos, SMS, call logs, and more.
- Offers three modes: "Erase Deleted Data," "Erase Existing Data," and "Erase All Data."
- Utilizes advanced algorithms for complete data destruction.
- Compatible with a wide range of Android devices, including Samsung, HTC, LG, and Sony.
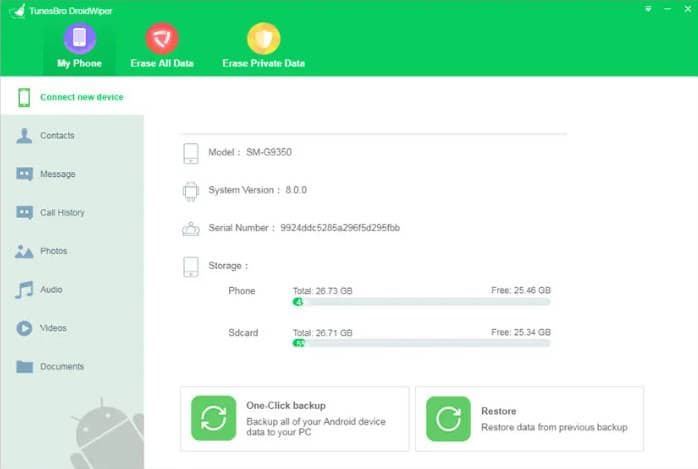
9. TunesBro DroidWiper
TunesBro DroidWiper is a versatile data removal program that permanently deletes files from Android devices. With an easy-to-use interface, it is a dependable alternative for safely removing sensitive data.
Features
- Erases app data, private files, and entire device content.
- Supports previewing data before deletion.
- Compatible with 1500+ Android devices across multiple brands.
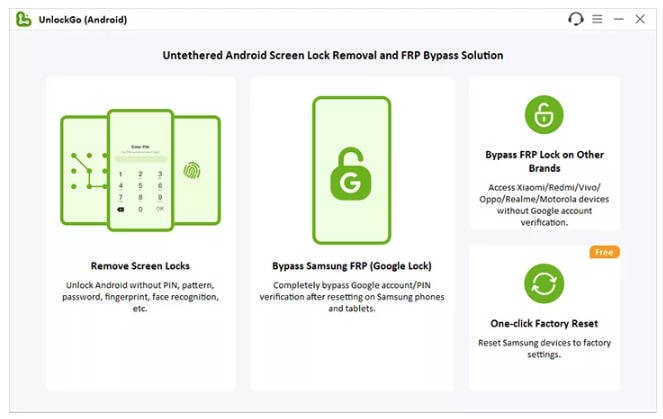
10. iToolab UnlockGo Android
UnlockGo - Android by iToolab is a complete tool for overcoming Android locks, such as FRP (Factory Reset Protection) and screen locks. It supports a wide range of Android devices and versions up to Android 15, allowing users to restore access to protected devices fast and securely.
Features:
- Supports unlocking without factory reset for select Samsung models.
- Provides factory reset options for bulk formatting of Samsung devices.
- Easy three-step process for FRP lock removal and screen unlocking.
Part 4. Comparison Table: Best Android Hard Reset Tools
| Tool | Key Features | Pros | Cons | Best For |
| Dr.Fone - Screen Unlock | Remove Android lock screen in 5 minutes | Bypass Any Android Lock Screen in Minutes. | It may cause data loss and limited free trial. | Forgotten passwords, Android FRP lock. |
| Dr.Fone - System Repair | Fixes boot loops, and black screens; specializes in Samsung repairs. | Easy instructions, comprehensive repair options. | Primarily focused on Samsung devices. | System repairs, Samsung devices. |
| iMyFone LockWiper | Removes screen locks, bypasses FRP, and factory resets. | It covers 6,000+ devices and has a quick, reliable FRP bypass. | It may cause data loss and limited free trial. | Forgotten passwords, locked phones. |
| Android Multi Tools | Factory resets, FRP bypass, account removal. | Free; works with major brands like Xiaomi, Vivo, and Oppo. | Not beginner-friendly; limited documentation. | Advanced users, flashing tools. |
| Dr.Fone - Data Eraser | Permanently Erase Everything on Android | Secure, Fast, Comprehensive. | Requires a cable to connect your Android device to a computer. | Wipe Every Bit of Data Beyond Recovery. |
| Mobikin Doctor | Data recovery for rooted/unrooted devices; 2 recovery modes. | No root needed; supports backups; compatible with Android 6–15. | Slow for large data; limited macOS support. | Data recovery, backups. |
| Odin Flash Tool | Flash ROMs, firmware updates for Samsung devices. | Reliable for rooting; free tool; wide device compatibility. | Misuse risks bricking; requires verified downloads. | Firmware flashing, rooting. |
| Jihosoft Mobile Privacy Eraser | Erases all data types with three wipe modes | Advanced algorithms, broad device support | Expensive, outdated interface | Comprehensive data erasure |
| TunesBro DroidWiper | Erases data with preview and supports 1500+ devices | User-friendly, affordable, preview option | Compatibility issues with some devices | Affordable and easy-to-use wiping |
| UnlockGo - Android | Bypasses FRP, unlocks screen locks; supports Android 15. | Broad compatibility; clear steps for FRP removal. | Free version limitations; may require data wipes. | FRP bypass, screen unlocks. |
4,624,541 people have downloaded it
Part 5. Tips for Device Recovery
Following these practices might make recovering your device or lost data easier and less stressful. Here are some key tips:
1. Before You Begin Recovery
- Charge Your Device: Make sure your device is charged before recovering. For uninterrupted processing, use at least 50% battery.
- Use reliable tools. Always use reliable recovery software. Unverified tools may destroy or jeopardize data.
- Avoid Repeated Resets: Resetting many times after a recovery attempt fails might compound the situation. Use official support channels or user guidelines to troubleshoot.
2. During recovery
- Update drivers: Update PC device drivers for recovery tool compatibility. Outdated drivers might cause failures.
- Follow manufacturer instructions: To prevent warranty voiding or irreversible damage, follow the device manufacturer's recovery instructions.
3. Post-Recovery Steps
- Update firmware: Install the newest firmware after recovery. This improves functioning and prevents difficulties.
- Reinstall Apps and Restore Backups: Reinstall essential apps and recover data from a trustworthy backup to restore full functioning.
- Check diagnostics: Check your device's health and performance using a diagnostic tool. Fix issues to prevent recurrence.
Tips: If you're looking to recover data on your Android phone, the Dr. Fone App-Data Recovery (Android) is your go-to solution. This app allows you to retrieve lost files directly from your device without needing a computer, making the recovery process straightforward and hassle-free. Whether you've lost photos, videos, or important documents, Dr. Fone App has you covered.
With just a few taps, you can effortlessly recover a wide range of data types, including audio files, contacts, call logs, messages, WhatsApp content, and even Google Drive files. It's designed to be user-friendly, so you can quickly get back what you've lost. Enjoy the peace of mind that comes with knowing your valuable data is just a step away from being restored.
Conclusion
This article compares the flexibility and usability of some of the best android hard reset software available. Each software simplifies recovery, making it accessible to non-technical users. Being responsible with your info is one of the most important things to remember.
Wondershare Dr.Fone is a great backup tool to protect your data before a hard reset or recovery. Using trustworthy recovery tools and data backups, you can easily resolve unforeseen device issues and preserve device health and performance over time.
Dr.Fone Basic:
Better Control for Your Phone
Manage, transfer, back up, restore, and mirror your device


James Davis
staff Editor