
How To Unbrick 3DS [A Detailed Tutorial]

Oct 30, 2026 • Filed to: Phone Repair Solutions • Proven solutions
 TL;DR:
Choose the recovery path that matches your 3DS
- Blue power light turns off almost immediately on an already-modded console: restore the Luma3DS files before writing to NAND.
- Blue power light stays on but both screens stay black: check the SD card, Luma configuration, and HOME Menu data.
- Stock console or a startup problem after an update: try the L + R + D-pad Up + A Recovery Mode combination, then test a normal restart.
- Recovery Mode will not open: check GodMode9 access and backup options. A blue BOOTROM screen or a power fault needs a different diagnosis, not an automatic factory reset.
Ask AI for a summary
 ChatGPT
 Perplexity
 Gemini
 Claude
 Grok
You can unbrick a 3DS in some cases, but the recovery method depends on its boot symptoms and whether it already runs custom firmware. A modded console that switches off immediately may only need its Luma3DS boot files restored. A stock console that reaches Recovery Mode may be able to complete a system update. A black screen alone does not prove a hard brick, and a console with no power needs a power or hardware check before firmware recovery.
This guide explains how to unbrick a 3DS by separating those cases, keeping the simple checks first, and showing when your own NAND backup or an advanced recovery path becomes relevant. These distinctions also apply to the Nintendo 3DS XL, New Nintendo 3DS family, and 2DS family, although hardware controls and recovery materials must match the model.

Part 1: What Are the Causes of a Bricked 3DS?
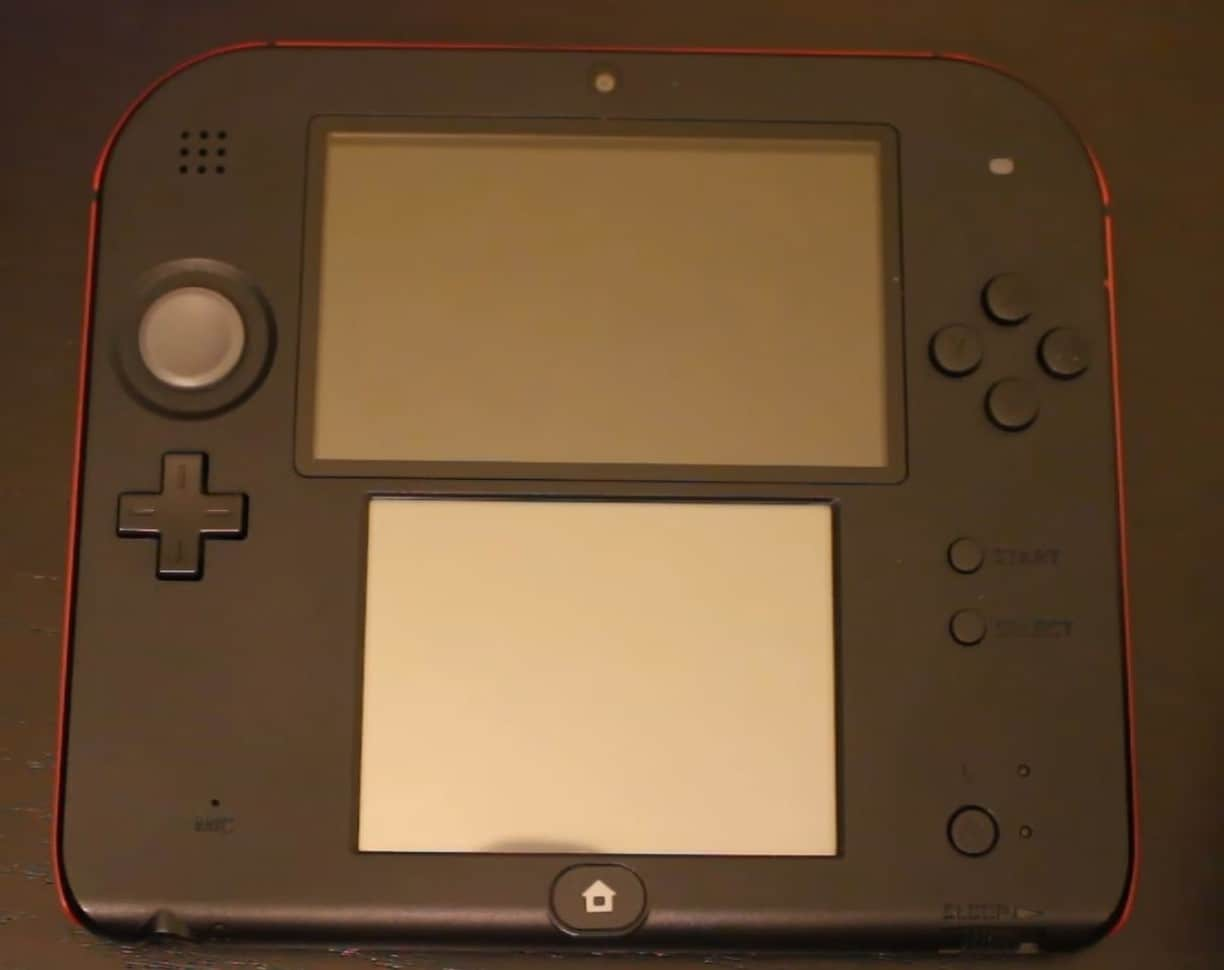
A bricked 3DS cannot complete normal startup because something in its boot or system software is damaged. People also use "bricked" for a frozen game, a missing SD-card file, or failed hardware, but those symptoms do not all need the same repair. A soft bricked 3DS may retain a usable recovery environment; "hard brick" usually describes a much deeper boot failure. Neither label by itself identifies which part failed.
Corrupted Firmware Update
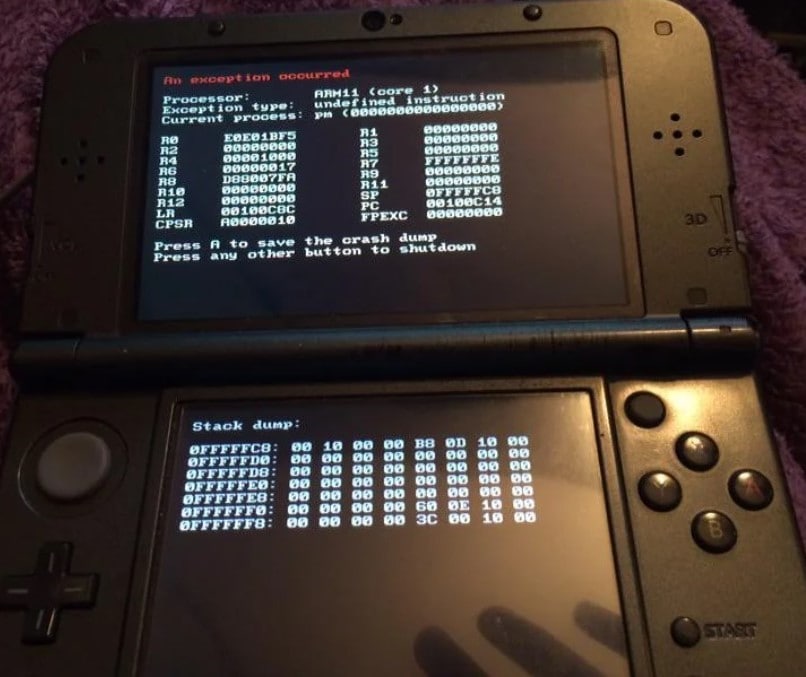
An interrupted update or damaged system data can prevent the HOME Menu from loading. Recovery Mode can help some of these cases. On a modified console, an error after an update can instead mean that an old Luma3DS installation needs newer boot files; it is not proof that the update destroyed the hardware.
Modding
Wrong system files, a mismatched NAND restore, or inappropriate firmware changes can break startup. Missing boot.firm on a boot9strap console is a different, often simpler problem. Merely having CFW installed does not tell you which failure occurred.
SD Card or File Corruption
An unreadable SD card, a faulty adapter, missing Luma files, or damaged HOME Menu data can make the console appear bricked. Keep a copy of the card before changing files. Do not start by formatting it or deleting the entire Nintendo 3DS folder.
Hardware Failure
A depleted battery, charger or charging fault, liquid damage, or failed internal parts can stop normal startup without being a firmware brick. A popping sound followed by the backlight flashing and immediate shutdown can point to hardware or a connection fault. Firmware tools do not repair a damaged screen, battery, or board.
Incorrect Recovery Attempts
Restoring another console's complete NAND backup or mixing Old/New 3DS and region-specific recovery files can make recovery harder. Keep your original backups, do not uninstall CFW as a troubleshooting shortcut, and use only the branch that matches the boot access you actually have.
How to Know if a 3DS Is Bricked
What does a bricked 3DS look like? It may show a black screen on boot, a BOOTROM error, or a startup failure before the HOME Menu, but you need the power-light behavior and any accessible menu to choose a fix.
- No power light or charging response: try a known-working compatible charger and allow the battery to charge. If there is still no response, stop software flashing attempts and get the power system checked.
- Blue power light appears briefly, then goes out: on an already-modded console, check Luma3DS boot files. A stock console or a pop-and-flash shutdown needs a different diagnosis.
- Blue power light stays on, screens stay black: follow the steady-blue-light checks. This is not the same symptom as a notification LED flashing white, magenta, or red.
- SELECT held at power-on opens Luma3DS: CFW can start. Press START to save and leave the configuration screen; the next question is why the normal HOME Menu fails.
- START held at power-on opens GodMode9: an advanced recovery environment is available. If multiple payloads appear, choose GodMode9.
- Blue screen with BOOTROM text: this can reflect a serious boot failure, hardware trouble, or even a custom splash imitating the error. Record the exact screen and whether Luma/GodMode9 still opens before choosing advanced recovery.
If the HOME Menu works and only DS games or DSi-mode functions fail, that is a DS-mode problem, not necessarily a whole-console brick. Use the DS-mode troubleshooting path rather than rebuilding the entire NAND.
Force Restart, Factory Reset, and Save Data
If a game or the menu is simply frozen, hold the Power button until the console switches off, then start it normally. You can lose unsaved progress. A restart is not a factory reset and does not reinstall firmware. A slowly pulsing blue light on a sleeping console is also not, by itself, evidence of a brick.
Do not use Format System Memory as a generic unbrick step: it is data-destructive, not a way to restore missing boot files. A system update is not the same operation as a NAND restore either. Restoring NAND replaces internal system contents with a snapshot; it does not restore all SD-card files or guarantee that your saves will survive. Back up the SD card and any accessible NAND before a write operation.
Part 2: Can You Unbrick a 3DS?
Yes, a soft brick or recoverable boot failure can often be repaired, but no method works for every 3DS. Start with the boot path you can reach, not a tool name. On a modified system, missing Luma files can be fixed without a NAND restore. If Safe Mode can open, it offers a system-update path. If neither normal startup nor Safe Mode works, a working GodMode9 environment or ntrboot may still provide access.
Choose one starting point:
- Already runs modern boot9strap/Luma3DS: check CFW files, then the black-screen branch. Old arm9loaderhax or menuhax setups need their own migration guidance; do not assume the same boot.firm instructions apply.
- Stock console or no evidence of CFW: check power and SD symptoms, then try Safe Mode. Copying Luma files to an unmodified card does not install a boot exploit or repair a stock console.
- GodMode9 works and you have your own clean NAND backup: consider the own-backup restore after simpler checks.
- No usable backup or BOOTROM failure: use the ntrboot decision and Lazarus conditions to understand what access and materials are still missing.
Restore Luma3DS Boot Files on an Already-Modded 3DS
This branch is for a console with boot9strap already installed. On boot9strap 1.4, the small notification LED can help: white means boot.firm was not found on either SD or internal memory; magenta means it was missing on SD and the internal copy was corrupt; red means both copies were corrupt. These are not colors of the blue power indicator. Older boot9strap versions may simply switch off almost immediately.
- Turn the console fully off, remove the SD card, and copy its contents to a computer if the card is readable. If the computer reports card errors, do not accept a format prompt as a recovery step.
- Download the current Luma3DS release archive from the Luma3DS release page and extract it.
- On a FAT32 SD card, copy boot.firm, boot.3dsx, and the archive's config folder to the root, replacing the old release files when prompted. Root means beside Nintendo 3DS, not inside it. Do not rename a ZIP archive to boot.firm.
- Safely eject the card, insert it while the 3DS is off, and power on. If Luma configuration appears, press START to save and reboot.
- Confirm that the HOME Menu loads and remains usable. If boot.firm repeatedly becomes unreadable, test a known-good FAT32 card or adapter with the same current files. If the blue light now stays on but the screens remain black, continue below rather than immediately restoring NAND.
An error such as Failed to apply 1 FIRM patch(es) can also indicate old Luma files. A different on-screen error, especially one naming a process or failed NAND mount, needs its exact message recorded; do not apply a random error-code download.
Fix a 3DS Black Screen With a Steady Blue Power Light
When a modded 3DS turns on but its screens stay black, first separate SD/configuration problems from damaged internal system data. Community reports include both successful file or adapter changes and failed attempts, so treat these as symptom checks rather than guaranteed fixes.
- Power off before removing or reinserting media. Reseat the SD card, remove any game cartridge, and try starting once. Leave the console on for up to 10 minutes if the blue power light stays on; the troubleshooting guide uses this wait for a black-screen startup, not for a dead or overheating console.
- Try a start without the SD card. A modern CFW console can only boot that way if it has a usable internal boot.firm. If it switches off instead, that test does not prove the SD card caused the original failure; first complete the boot-file check.
- If SELECT at power-on opens Luma, you can reset its configuration: with power off, back up /luma/config.ini on the SD card, delete that file, then start again. Save the default configuration with START; do not enable game patches or external modules just to troubleshoot a black screen.
- If normal startup works without SD but fails with SD, back up the card and reset only the affected HOME Menu extdata folder. Under /Nintendo 3DS/<ID0>/<ID1>/extdata/00000000/, remove the folder for the console's region: USA: 0000008f; Europe: 00000098; Japan: 00000082; Korea: 000000a9; China: 000000a1; Taiwan: 000000b1. Do not remove all extdata or guess an ID path when multiple ID folders exist. HOME Menu layout data will be rebuilt; keep the backup in case further diagnosis is needed.
- Restart with the card inserted and check for a usable HOME Menu. If nothing changes, try Safe Mode. If Safe Mode cannot open, continue with advanced diagnosis; do not keep repeating deletions or formatting the card.
A New 3DS camera-related startup fault, persistent NAND errors, or a pop-and-flash shutdown can require a different software or hardware path. Stop here for a model-specific diagnosis rather than opening the console or flashing someone else's NAND.
How To Unbrick a 3DS in Safe Mode
Safe Mode, also called Recovery Mode, offers a system update when the console can reach that screen. It is not a factory reset, a missing-Luma-file repair, or a fix for damaged hardware. Charge the battery and use the AC adapter before starting. On a modified console, update the Luma files first as described above.
- Open Recovery Mode. With the console off, hold L + R + D-pad Up + A, then press Power while keeping the four buttons held until the update screen appears.
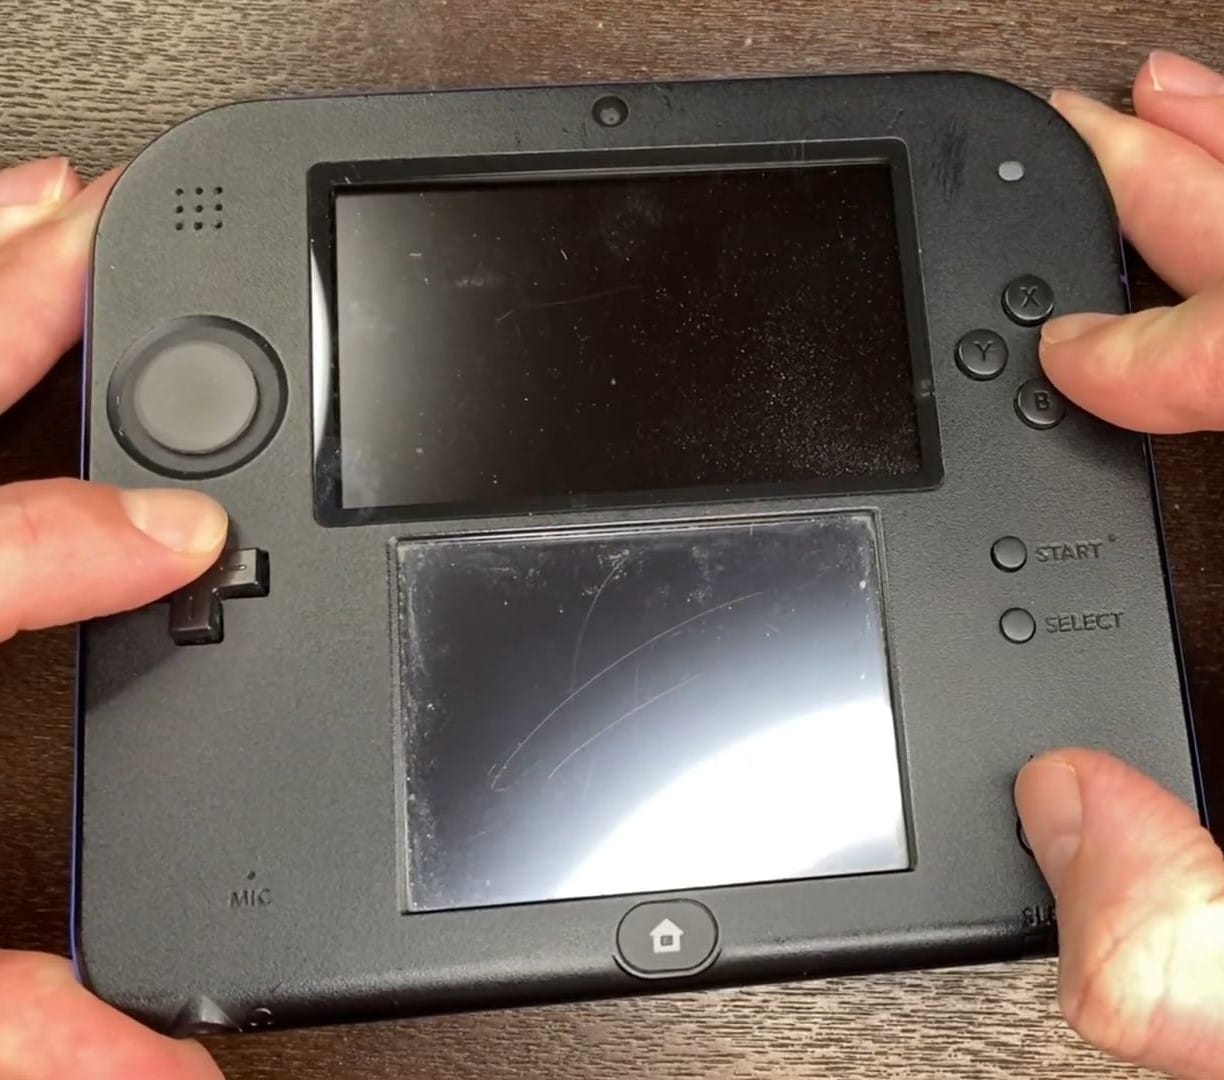
- Read the update prompts. If the System Update screen appears and you choose to proceed, select OK and accept the notice.
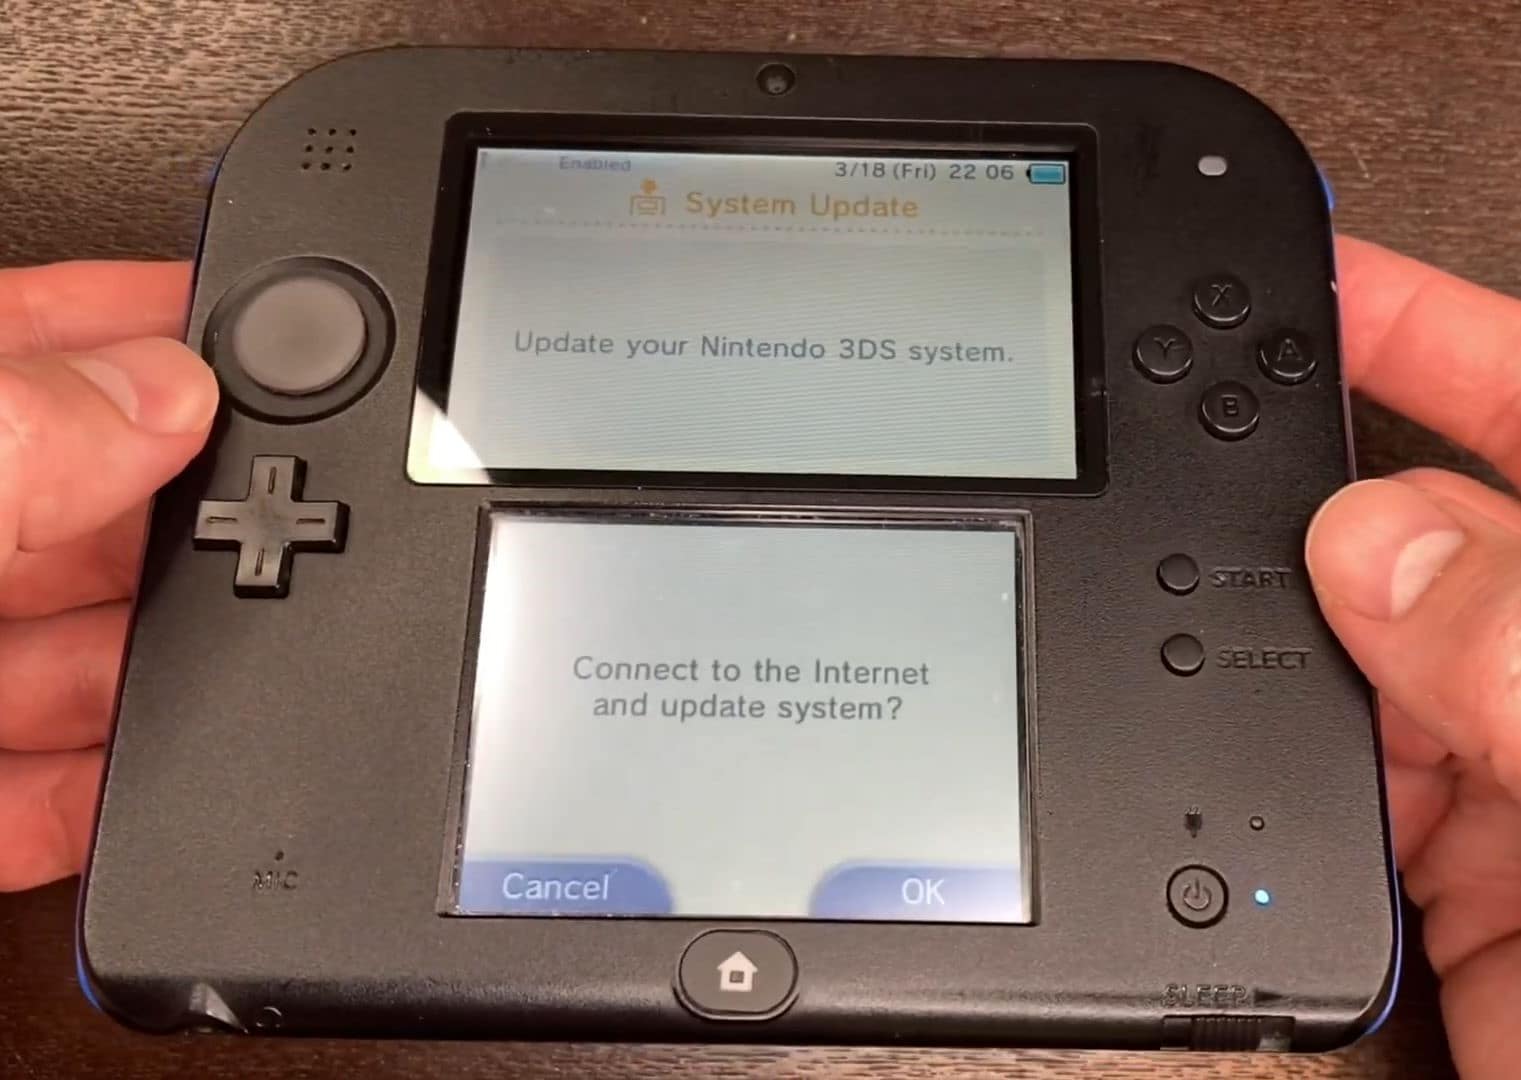
- Keep stable power. Connect the AC adapter when prompted and confirm. Do not switch off the console during the update.
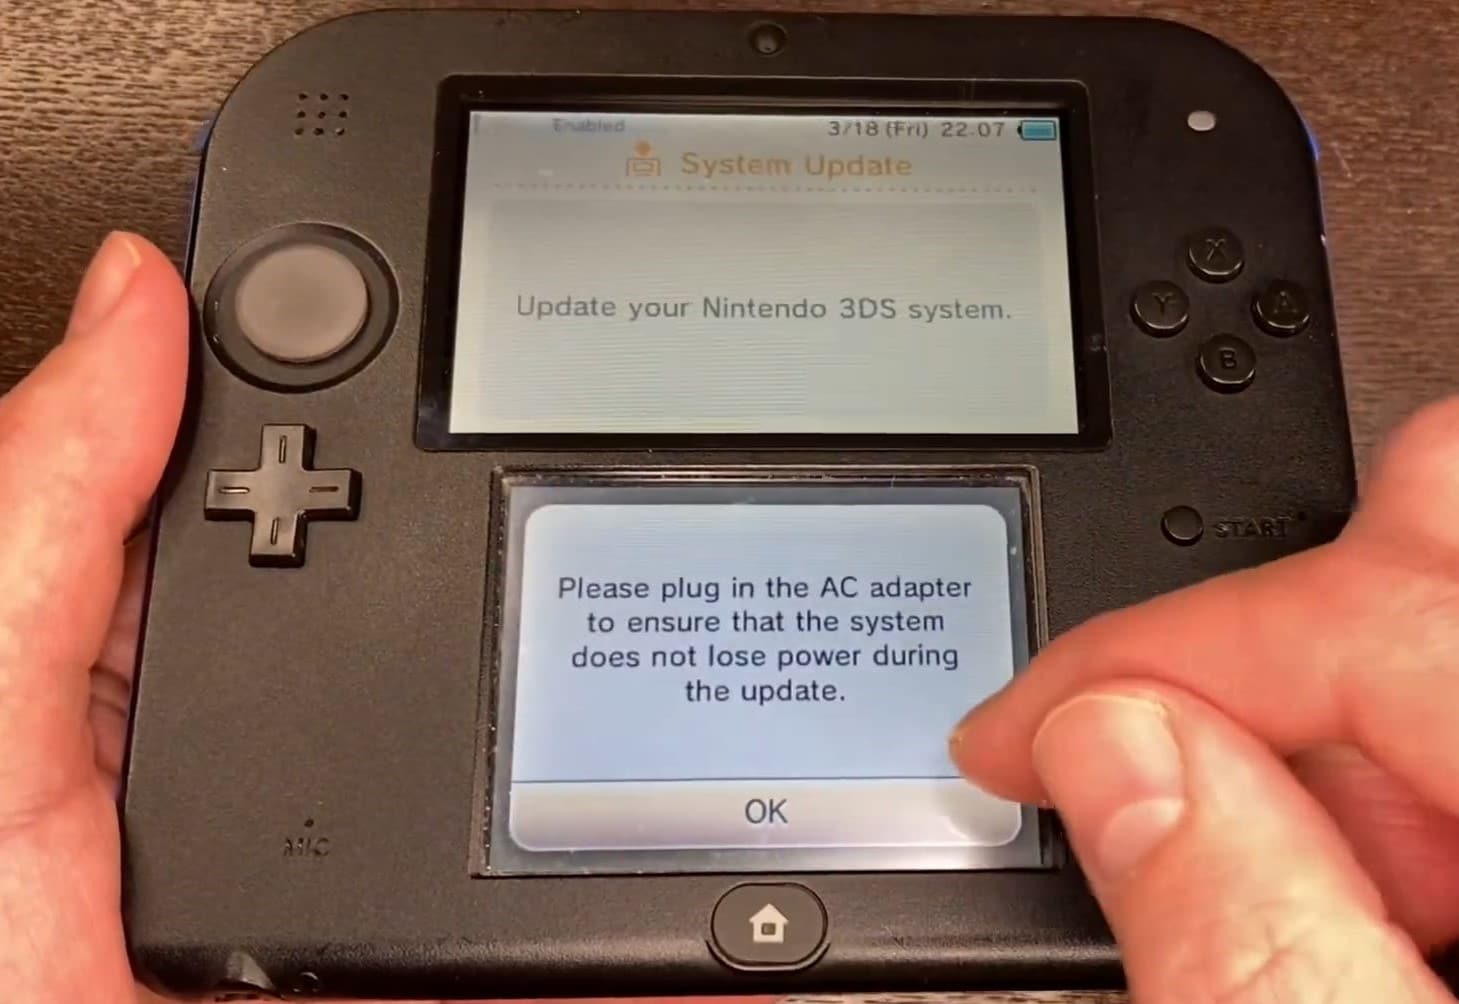
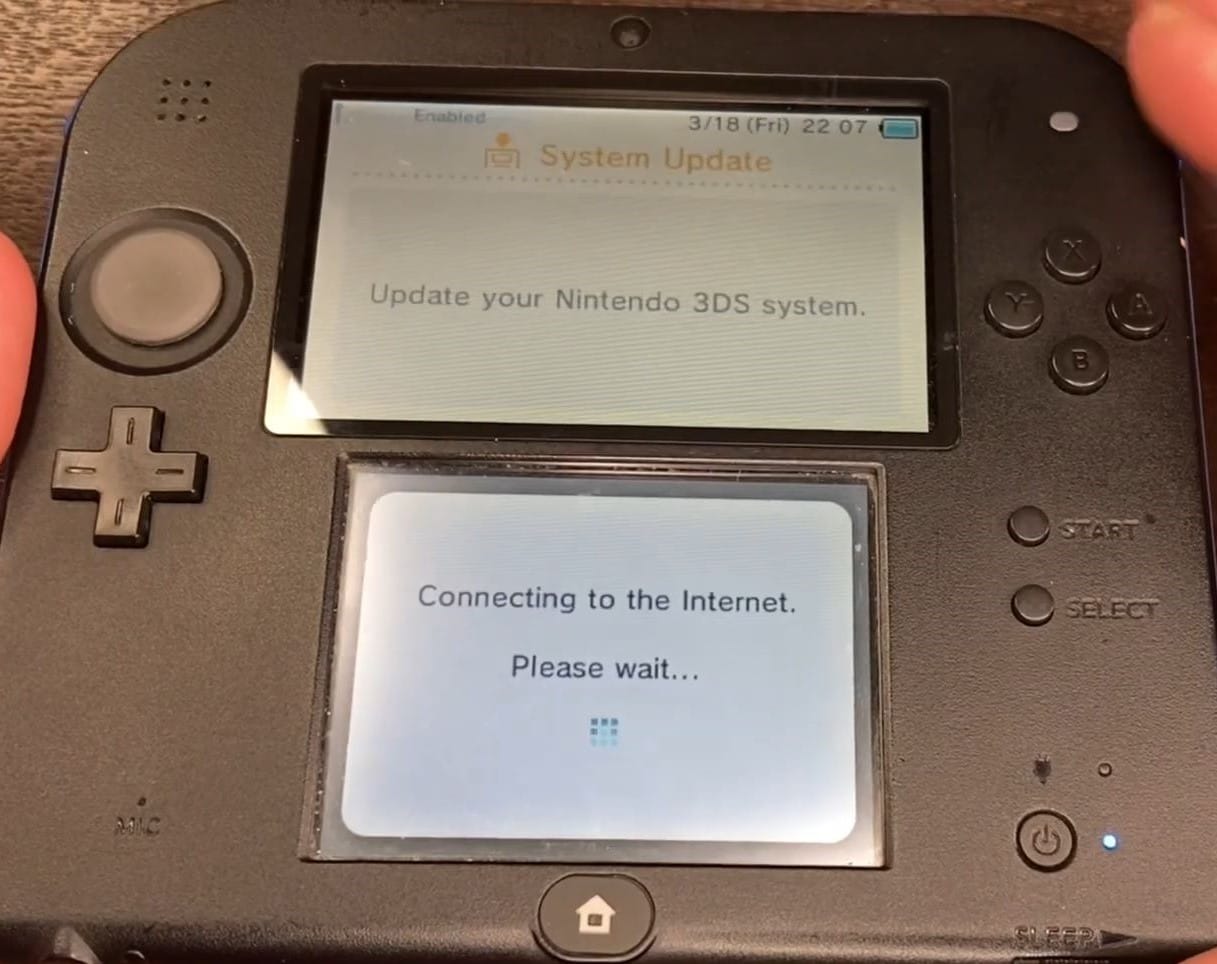
- Connect to the network. Use the Internet connection prompts to let the console check for and download an available update.
- Check the result, not just the message. Allow an available update to finish. If it reports that the system is already up to date, that only confirms the update check; it does not prove the startup fault is repaired.
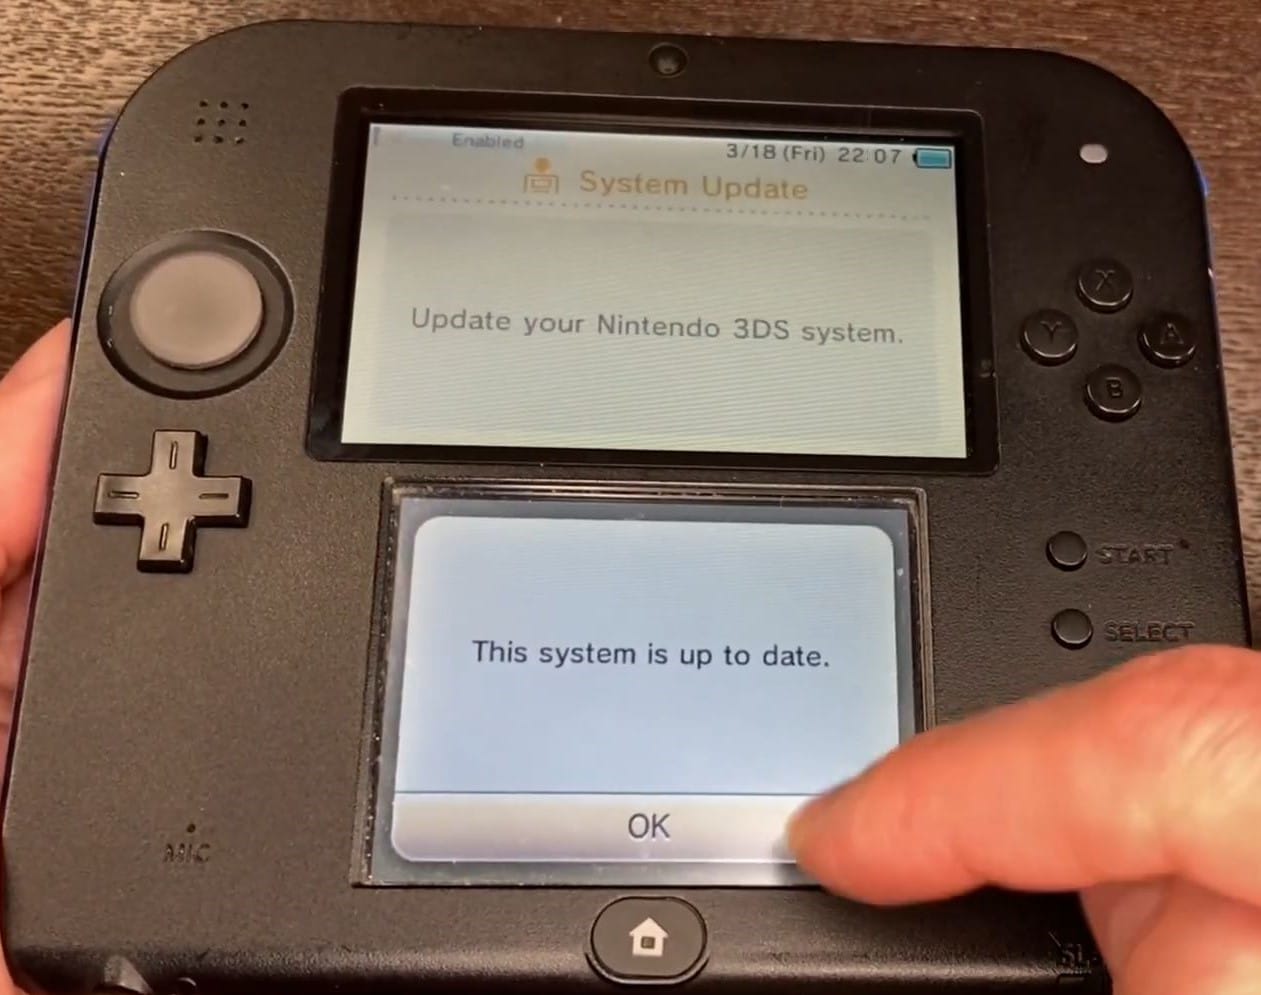
After the process finishes, start normally and verify the HOME Menu works. If it still fails, or Recovery Mode never opens, do not force repeated updates: use the matching CFW or advanced branch below.
How To Unbrick a 3DS Without Safe Mode
Safe Mode failure does not automatically mean that the console is beyond repair. Hold START at power-on to test for GodMode9; choose it if a payload menu appears. If it is not set up but Luma can load payloads, the normal setup places GodMode9.firm in /luma/payloads/ and the gm9 folder at the SD root. Obtain those from the GodMode9 release. This requires existing CFW access; copying a payload alone will not make a stock, unbootable console run it.
If GodMode9 opens, first preserve accessible data. With sufficient free SD space, use HOME > Scripts > GM9Megascript > Backup Options > SysNAND Backup. Its output is stored in /gm9/out/; copy the NAND backup, its SHA file, and essential.exefs to a safe computer location. A backup made after a fault preserves the present state; it is not automatically a clean pre-fault restore point.
Restore Your Own NAND Backup in GodMode9
Use this only for a backup from this exact console. A NAND restore writes internal system storage and can roll back system data to the backup's state. It is not a guaranteed save recovery, and a power interruption or wrong backup can make the situation worse. Back up the current state and SD card first, keep stable power, and do not substitute another console's full NAND image.
- Copy your known-good .bin NAND backup and accompanying .sha file to /gm9/out/ on the SD card. Reinsert the card with the console off, then boot GodMode9.
- Press HOME, then choose Scripts > GM9Megascript > Restore Options > SysNAND Restore (safe).
- Select your own backup. Read the selected filename and warning, then enter the exact on-screen button combination to authorize the requested SysNAND write. Stop if the file or console identity is uncertain.
- Wait for completion without interrupting power. Press A to continue, B to return to the main menu, choose Exit, and relock write permissions when prompted.
- Restart normally and check the HOME Menu and your data. The safe restore preserves boot9strap; if a verified backup still cannot restore startup, pursue the actual hardware/system fault rather than repeating writes.
No NAND Backup: Is ntrboot Needed?
You do not automatically need a flashcart if Luma or GodMode9 already opens. Work through the file checks and determine the system error first. Some damaged-system cases need a carefully matched CTRTransfer or another guided repair rather than a complete donor NAND; their suitability depends on the diagnosis.
If no usable recovery environment starts, ntrboot can provide a boot path before the installed system runs on the 3DS family. It requires a specifically compatible, correctly prepared DS flashcart, not an ordinary DS game or any card sold with an R4 label. Most folding models need a magnet to activate the sleep sensor during the boot combination; the original 2DS uses its sleep switch. Check the ntrboot compatibility and preparation procedure before buying or flashing a cart. Boot access alone does not repair damaged NAND data or physical faults.
Without your own backup, get help identifying the exact model, region, installed CFW, and error before any NAND-writing reconstruction. Do not download a random complete NAND image or assume an Android repair app can recover the console.
When Lazarus3DS Is an Appropriate Advanced Recovery
Lazarus3DS is an existing GodMode9 recovery script, not a first-line boot-file update. Its author's procedure rebuilds system components from carefully prepared files and requires a working way to run GodMode9 first, such as existing payload access or ntrboot. It writes SysNAND, can lose data, and leaves a console dependent on CFW: do not uninstall CFW after this recovery.
The author's materials must match Old 3DS versus New 3DS, USA/EUR/JPN region, and retail/development type as specified. Do not substitute files just because their names match. Prepare:
- Donor components ctrnand.bin, nand_hdr.bin, twln.bin, and twlp.bin, with their SHA files and the required model/region/type match.
- Clean sector0x96.bin, boot9strap.bin, and sighax_hdr.bin, with SHA files matching the required console type.
- twlmbr.bin and its SHA file.
- Luma3DS named luma.firm, and GodMode9 v1.4 or newer named boot.firm for this script's setup.
Only proceed if you can obtain and prepare the required materials lawfully and verify their compatibility. The author's Lazarus3DS repository supplies the script and its requirements, not permission to use arbitrary donor firmware. This setup deliberately uses a different boot.firm from the ordinary Luma file-repair branch; do not mix the two.
- Place the matching support components and SHA files in a folder named pit at the SD root.
- Put Lazarus3DS.gm9 in /gm9/scripts/. Place luma.firm and the GodMode9 file named boot.firm at the SD root.
- Start GodMode9 through your working boot method. Press HOME and choose Scripts.
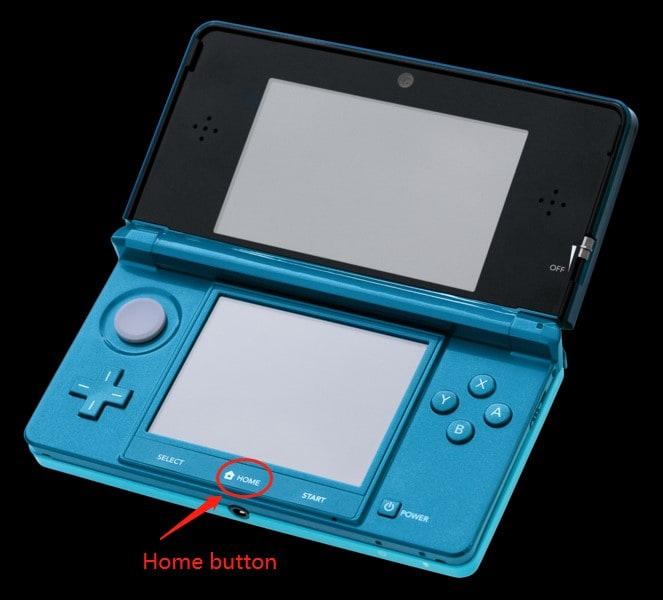
- Run Lazarus3DS. Read its warnings, deliberately authorize SysNAND writing when prompted, and allow the SHA checks and recovery to complete. If validation fails, stop and resolve the material mismatch rather than bypassing it.
- On successful completion, the script automatically makes Luma the new boot.firm, copies it to NAND, installs boot9strap, removes support files, and restarts. These are not separate manual steps to repeat after the script.
Verify normal startup afterward and retain CFW. The author notes that an emergency recovery on New 3DS can leave poor 3D behavior; run the system's Super-Stable 3D Calibration if affected. If the script cannot start or the console still fails, keep the error and backup files for specialist diagnosis rather than retrying incompatible materials.
Part 3: Pro Tips: How To Unbrick Android Smartphones? [For Soft Bricks]
If you also have a soft-bricked Android phone, use an Android-specific recovery workflow. Dr.Fone does not repair Nintendo 3DS consoles, and 3DS recovery files must never be flashed to a phone.
Dr.Fone - System Repair (Android) provides a guided firmware-repair workflow for supported phones affected by software-related startup failures. It helps you work through device selection, firmware downloading, and repair without assembling a manual flashing procedure.

Dr.Fone - System Repair (Android)
Guided firmware repair for a soft-bricked Android phone
- Guided on-screen instructions make the firmware-repair process easier to follow without manually assembling flashing commands.
- Repairs software-related startup problems on supported Samsung, Xiaomi, Redmi, and POCO devices.
- Helps with supported Android boot-loop and system-related app-crashing scenarios when a firmware repair is appropriate, not physical damage.
- Downloads and verifies the firmware package through the repair workflow, reducing manual package-selection work.
Step-by-Step Guide: Repair a Soft-Bricked Samsung Phone
The Samsung workflow below runs on Windows and erases the phone's data. Back up anything still accessible before starting. It does not repair physical damage. Xiaomi, Redmi, and POCO use a different supported workflow; do not choose Samsung for those devices. The download buttons provide the installer; completing a repair can require a paid license.
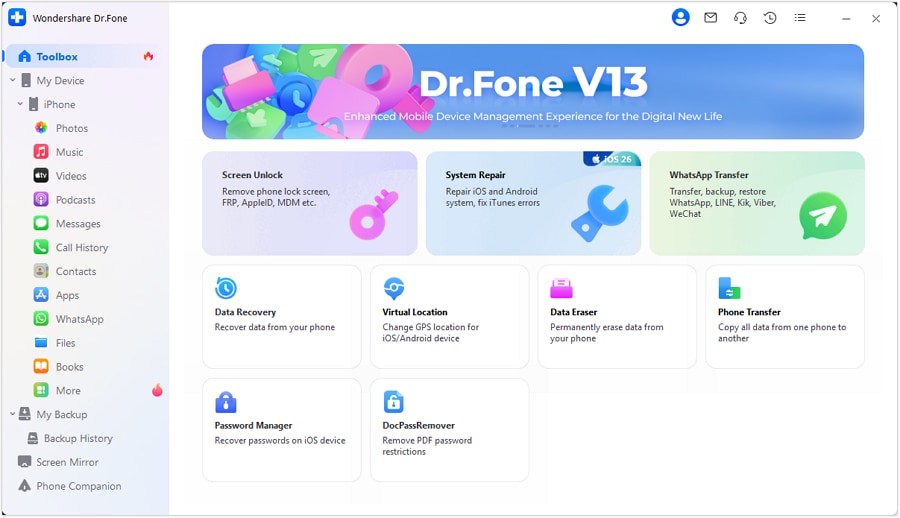
- Install and open Dr.Fone on Windows. Start from the Toolbox home screen.
 safe & secure
- Open the Android repair workflow. In Toolbox, choose System Repair, then Android.
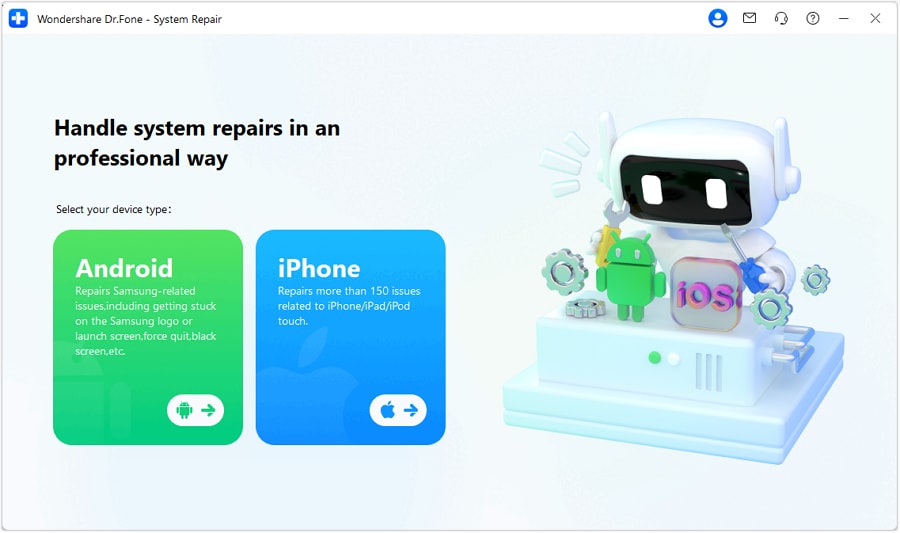
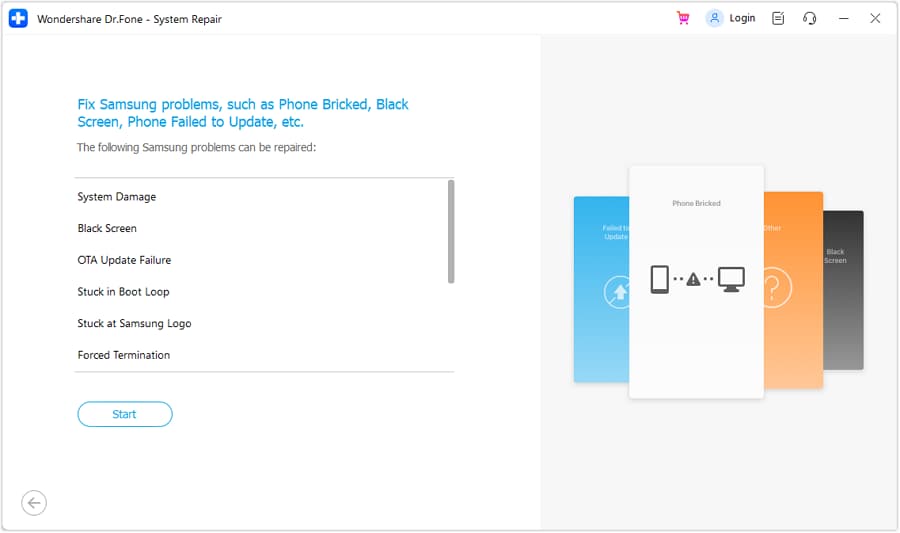
Choose Android Repair > Repair Now, select Samsung, and choose Start to continue.
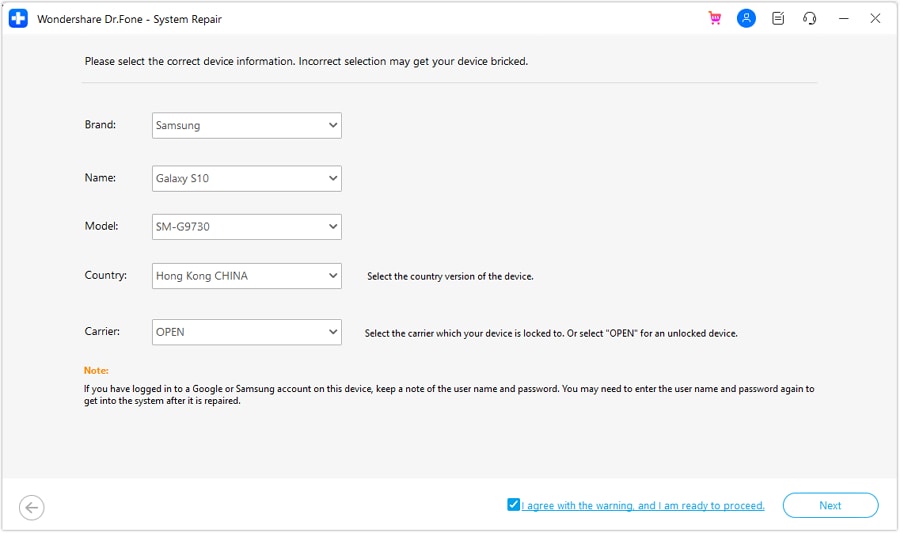
- Match the phone's details. Select the requested Brand, Name, Model, Country, and Carrier exactly. If the model or repair path does not match your phone, stop rather than selecting a similar device. Review the agreement, select its checkbox if you accept it, and choose Next.
- Enter Download Mode and obtain the firmware. Follow the on-screen button sequence for your exact Samsung model, then choose Next. The Home-button sequence illustrated is not the sequence for every Samsung.
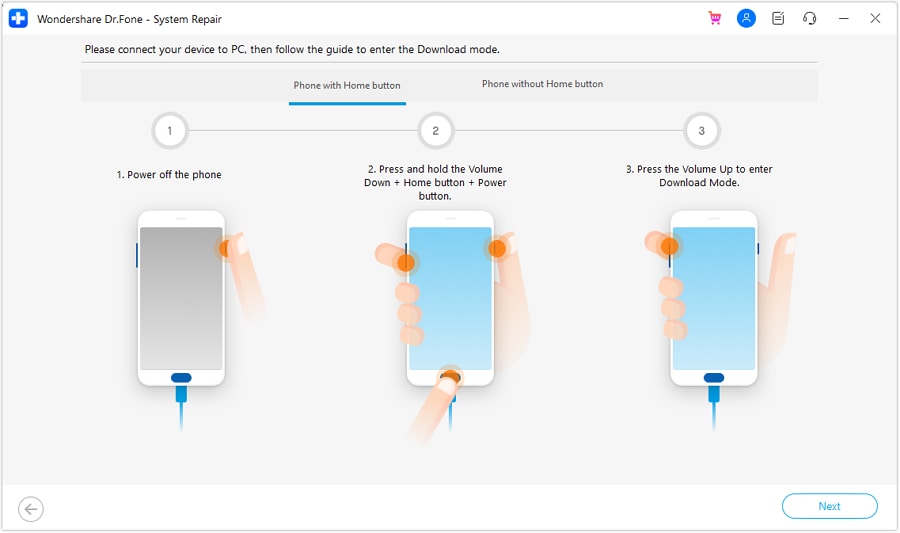
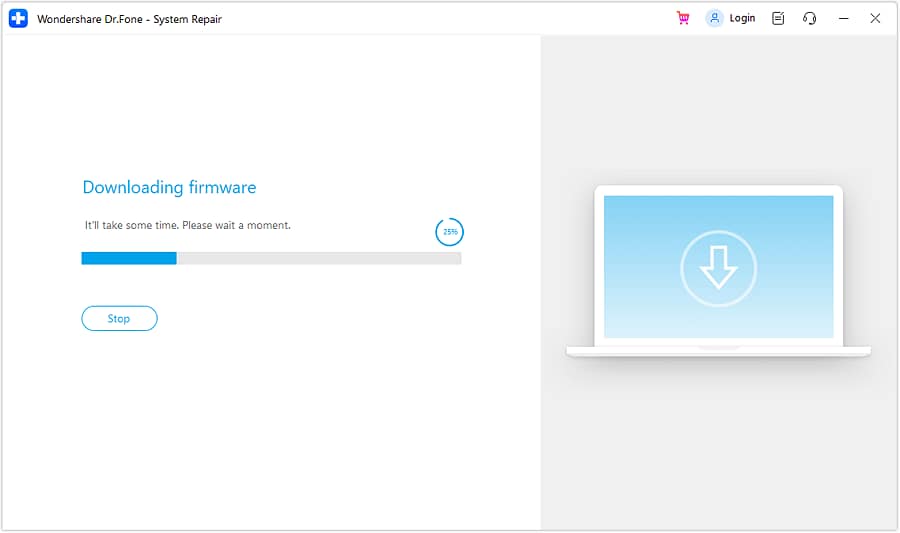
Once the phone is detected in Download Mode, let Dr.Fone download and verify the matching firmware package. Keep the USB connection stable.
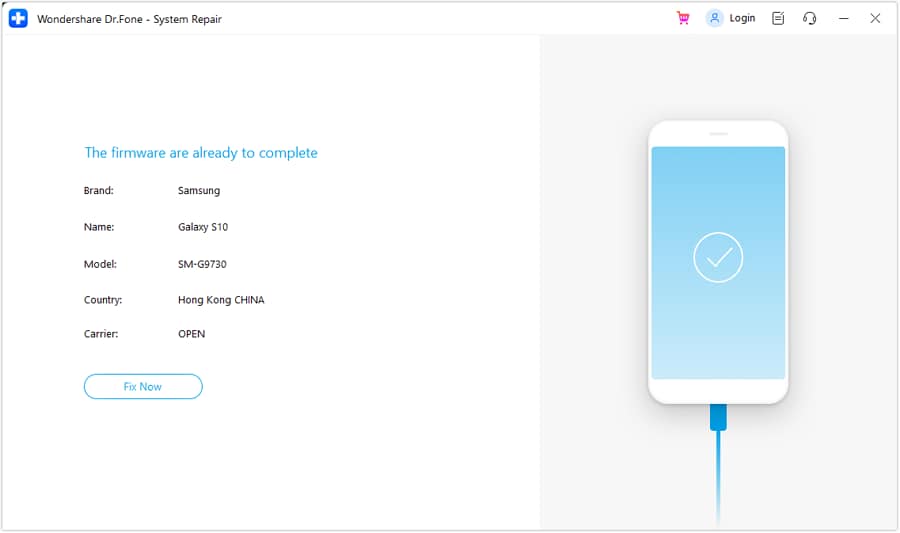
- Review and authorize the repair. Check the displayed device and firmware details, then choose Fix Now only if they match.
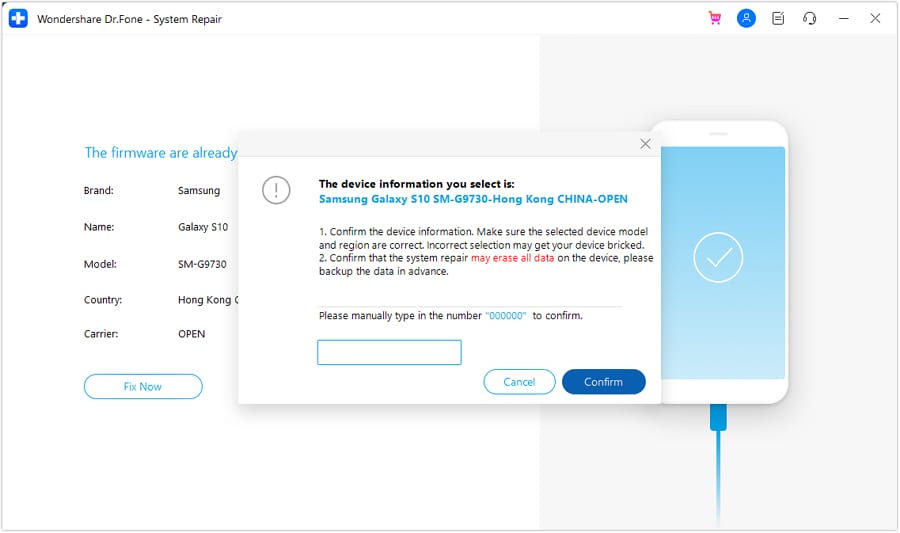
At the data-erasure confirmation, proceed only if you accept losing the phone's data. Enter 000000 and select Confirm.
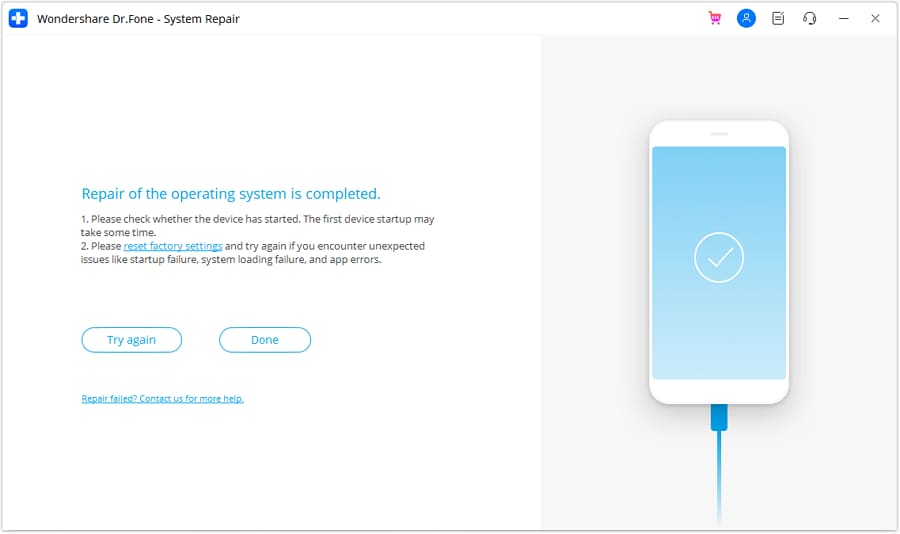
- Finish and verify startup. Wait for the repair to complete without disconnecting the phone, select Done, and check whether it starts normally. If it fails, retain the error details for support rather than repeating an incorrect firmware selection.
safe & secureFor a phone-specific diagnosis before firmware repair, see Android soft-brick recovery options or the Samsung startup recovery guide. For additional current UI details, use the Android System Repair operation guide.
For everyday phone maintenance, Dr.Fone App offers mobile tools such as storage cleanup, file transfer, and supported data-recovery features. Available tools differ between iOS and Android and by device condition. It is not a Nintendo console recovery tool.
Dr.Fone App (iOS) & Dr.Fone App (Android)
Phone tools for cleaning, file transfer, data recovery, and everyday device management.
- Clean duplicate and similar photos, videos, and contacts with the iOS app's storage tools.
- Transfer photos, videos, and other supported files between phones or a computer.
- Find recoverable phone data with the app's recovery tools; results depend on the device and what remains accessible.
- Use supported Android location and privacy-management tools when those are the features you need.
- Follow the app's supported unlock guidance with the displayed device and mode conditions.



Conclusion
To unbrick a 3DS, match the recovery method to the symptom: restore missing Luma files on an already-modded console, use the steady-blue-light checks for black screens, or try Safe Mode when the update environment is available. Verify a normal HOME Menu startup after each fix instead of treating an update message as proof of recovery.
When simpler methods fail, preserve your data and identify GodMode9 access, your own NAND backup, and the exact recovery prerequisites before writing internal storage. Lazarus3DS is an advanced, conditional path, not a universal fix. For a separate, supported Android phone problem, Dr.Fone - System Repair (Android) offers the guided Windows workflow described above.
safe & secureFAQs
 Q1. Can you unbrick a 3DS?Q2. What does a bricked 3DS look like?Q3. How do you fix a soft bricked 3DS?Q4. Why is my 3DS not turning on?


Android Issues
- Android Update
- 1. Download and Use Samsung Odin
- 2. Samsung Phone Stuck in Odin Mode
- 3. Latest Updates in Android 11
- 4. Update Android Oreo 8.1
- Android Not Working
- 1. Solution To Bricked Android Phone
- 2. Fix 'Android Phone Won't Turn On'
- 3. Flash Dead Android Phone
- 4. Fix Phone Keep Turning Off
- 5. Fix Android Bootloop Problem
- 6. Fix Android Phones and Tablets
- Android Errors
- 1. Fix Error 495 While Download Apps
- 2. Fix Error 505 in Google Play Store
- 3. Fixes For Authentication Error
- 4. Fix Error Code 963 on Google Play
- 5. Fix Error Code 920 In Google Play
- 6. Fix Encryption Error
- Screen Problems
- 1. Fix Unresponsive Fire Tablet Screen
- 2. Fix Unresponsive Android Screen
- 3. Fix Android Screen Problem
- 4. Fix Phone Is Stuck on Boot Screen
- 5. Fixes for Tablet Screen Not Working
- 6. Tools for Removing Stuck Pixels
- 7. Fix Android Black Screen of Death
- 8. Fix Android Stuck on Boot Screen
- 9. Fix Android White Screen of Death
- 10.Fix Android Blue Screen of Death
- 11.Fix ONN Tablet Screen Not Working
- 12.Fix Android Touch Screen Proble
- 13.Fix Smartphone With a Black Screen
- 14.Fix Realme Screen Not Responding
- 15.Fix Phone Screen Not Responding
- Android Problems
- ● Manage/transfer/recover data
- ● Unlock screen/activate/FRP lock
- ● Fix most iOS and Android issues
- Free Download Free Download Free Download


Daisy Raines
staff Editor
Generally rated4.5(105participated)