How to run diagnostics on iPhone: put your iPhone in diagnostic mode
Oct 24, 2025 • Filed to: Device Data Management • Proven solutions
Dr.Fone Basic:
Better Control for Your Phone
Manage, transfer, back up, restore, and mirror your device
Apple's products' constantly improving features and organizational structure keep people coming back. In April 2022, Apple introduced a new method of iPhone self-service repair called Diagnostics Mode. If you experience an issue with your iPhone, Apple's online support team will request information about how you typically use the device to analyze and fix the problem.
In addition, if you take your phone into an Apple online shop to have it fixed, the staff will immediately put it into diagnostics mode, allowing an Apple expert to identify any problems with the phone's software or hardware. Since it solves many iOS issues, people often wonder how to run an iPhone Diagnostic Test on their iPhones.
To help them, we've covered a detailed guide on using the diagnostic mode, along with an iPhone tester tool. Let's get going!
Part 1: How To Put Your iPhone in Diagnostic Mode
Are you looking for the right way to put your iPhone in diagnostic mode? This section has got you covered! iPhone's diagnostic mode has been a real help to the repair stores for fixing iOS issues. Since the diagnostic mode is known to solve many problems, it has made users curious about how to diagnose iPhones using it. To understand further, here's how to run diagnostics on iPhone!
Note: Before following the steps, ensure you've got the latest iOS version and your Find My iPhone feature is disabled. It would help if you also disabled your passcode to proceed.
Step 1: Connect your iPhone to your Mac or PC using the lighting/USB cable. Turn off your iPhone by holding the Power button and then slide the Power slider to the right.
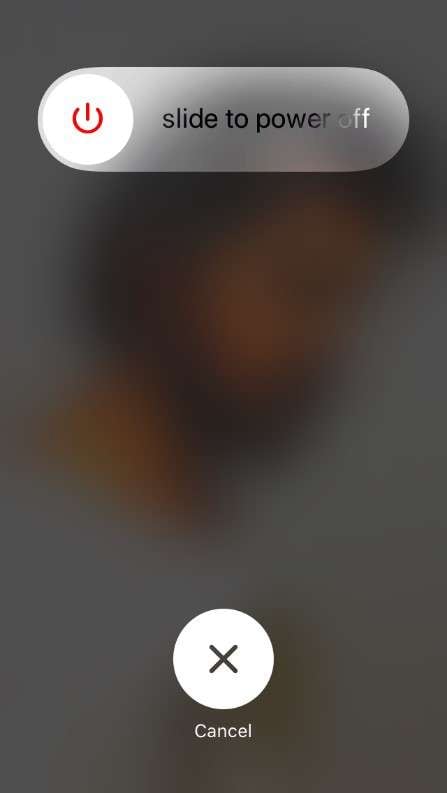
Step 2: Now, launch iTunes on your Mac or PC. Wait for 30 seconds and hold both Volume buttons until you get the Apple logo.
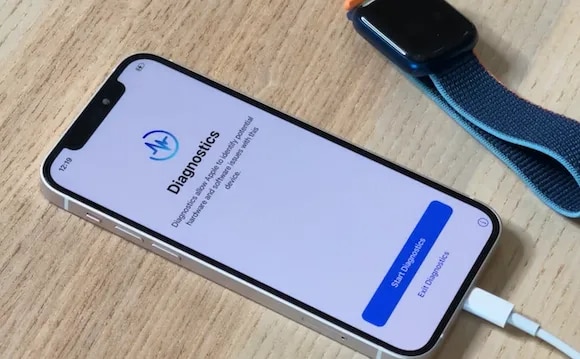
Step 3: A message saying, "Diagnostics allow Apple to identify potential hardware and software issues with this device," will appear. Tap Start Diagnostics on your iPhone to put it in Diagnostic mode on this screen.
You might also interest:
Part 2: iPhone Diagnostic Mode – How To Interpret the Results
If you're having trouble with your iPhone, the diagnostic mode is a potent tool to help you figure out what's wrong. Users can enhance their device's efficiency and fix problems with the mode's monitoring checks and findings. The phone's sensors, battery life, wireless and Wi-Fi networks, and more can be checked in diagnostic mode. Users can touch the desired exam or tests to initiate them.
Among the diagnostic mode's many advantages is its capacity to reveal hardware failures. Users can check the health of the device's parts, from the camera to the microphone to the speaker, to see if anything needs to be fixed or changed. The battery test can also tell you if your battery is healthy or dead and whether you need to replace it.
Users can evaluate the software as well as the hardware in troubleshooting mode. Users can run a RAM and CPU test on their device to find out which applications are causing lag or crashes. Also, it allows users to detect and remove any bugs or adware that may be present on their devices.
Moreover, a diagnostic mode is a tool that can assist iPhone users in:
- Enhancing efficiency and fixing problems
- Fixing hardware and software issues by diagnosing the problem
- Assessing the phone's performance parameters such as battery life, speed, etc.
- Improving the overall phone performance
If you're having trouble with your phone, whether it's battery life, communication, or speed, entering diagnostic mode will help you figure out what's wrong and fix it.
📱 iPhone Frozen? Fix It in 3 Steps – No Data Loss!
Struggling with a frozen iPhone screen? 🤔 Our guide covers 6 common causes, step-by-step fixes for all models (iPhone 6s to iPhone 17), and safe data recovery. 98.6% success rate! ✨
Bonus Tip: A Multi-Functional Tool for Testing Your iPhone – Wondershare Dr.Fone
Since putting your iPhone in a diagnostic to run diagnostics iPhone is complicated, people often look for a more accessible alternative. The best alternative to running Apple iPhone diagnostics is using a professional tool to test your iPhone. However, finding the best means to test iPhone hardware is difficult due to the many available options. To help you, we've reviewed the best software for the job, named Wondershare Dr.Fone.
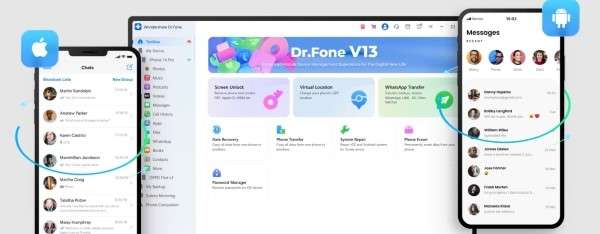
Dr.Fone, created by Wondershare Technology Co. Ltd., is an all-in-one solution for iOS and Android device data storage, restoration, and management. The program can assist users in retrieving deleted information from their mobile devices. In addition to all the previously provided features, Dr.Fone has recently launched a new feature that allows you to access your phone's verification report.
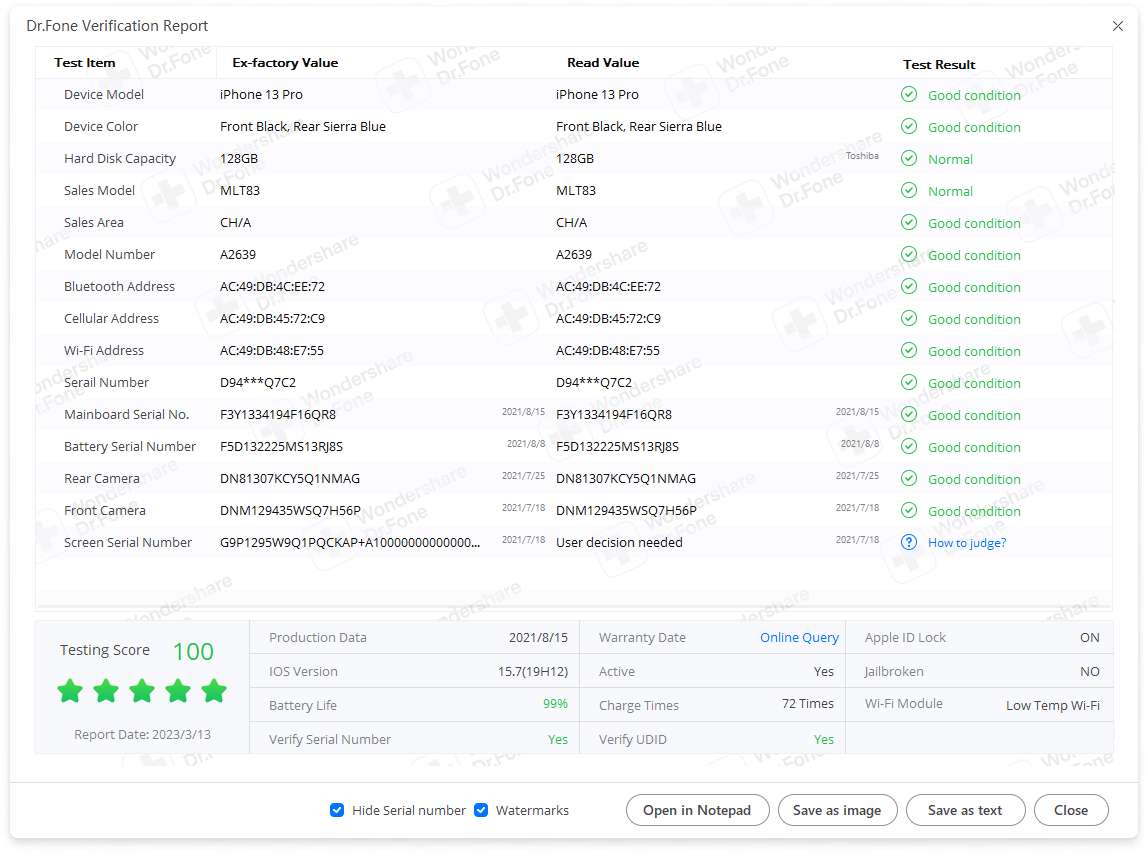
With its phone verification function, you can easily access the condition of your iPhone. The verification function provides your iPhone's model, serial number, Bluetooth and cellular address, battery's serial number, etc.
Key Features
- Allows you to access the battery report and condition of your iPhone.
- Automatically tests and verifies the serial number of your iPhone.
- With this tool, you can get the serial number of your front and rear camera.
- Enables you to test the condition of your iPhone's hard disk.
- The Phone Verification function allows you to test your smartphone to assess its software and hardware problems.
To understand how to use the Phone Verification tool of Wondershare Dr.Fone, follow the steps below:
- Step 1: Download and install Wondershare Dr.Fone on your PC or Mac. After successfully installing, launch the tool and connect your iPhone to your PC or Mac.
Note: Install the Wondershare Dr.Fone 13 to use the Phone Verification tool.
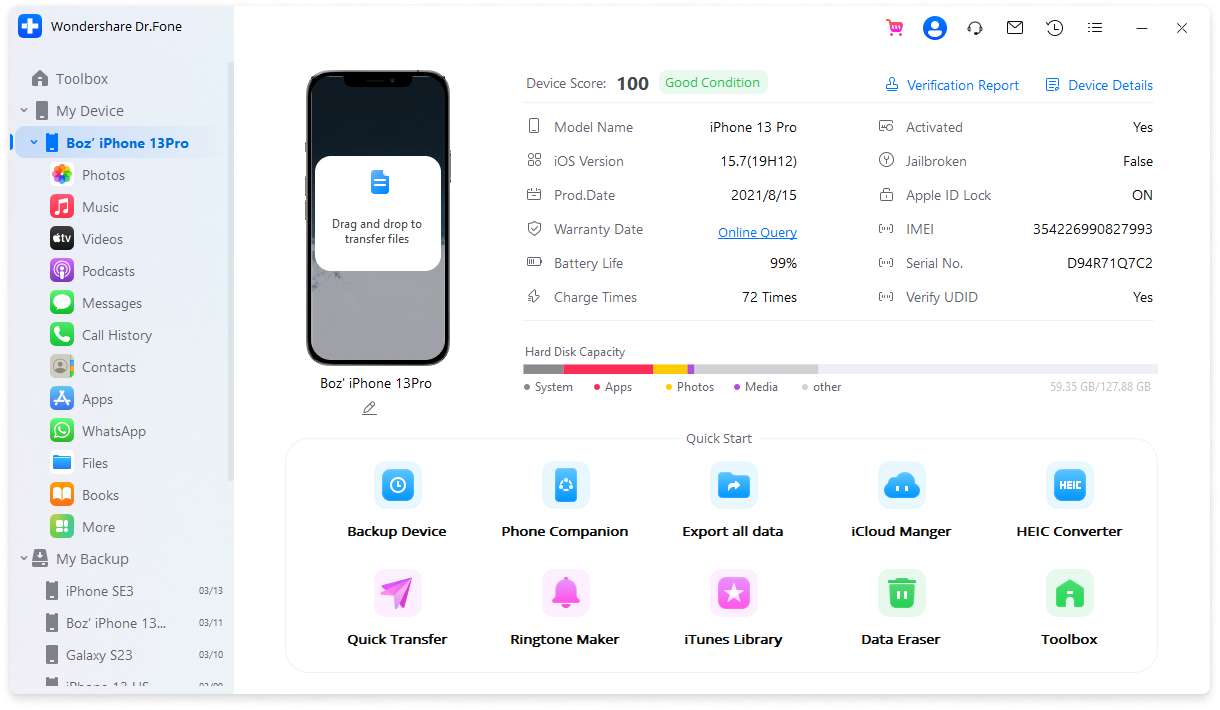
- Step 2: Once you've connected the iPhone to PC, you'll get the details of your iPhone on the dashboard. The details include your iPhone's model, iOS version, Warranty, Battery Life, IMIE, and more.
- Step 3: Now, click on Verification Report to test your iPhone and get a detailed diagnostic report.
Dr.Fone App (iOS) & Dr.Fone App (Android)
Your One-Stop Expert for Screen Unlock, Smart Clean, Data Recovery, Change Location, and Phone Management of Mobile Devices!
- Effortlessly unlock various locks on your device.
- Instantly free up storage space by smart clean.
- Rapidly recover different kinds of lost phone data and information.
- Easily changes GPS location on Android devices.
- Easily manage cluttered and private device content.
Conclusion
Running diagnostics on your iPhone can help you identify and troubleshoot any issues with your device. Whether you're experiencing battery life problems, connectivity issues, or software glitches, you can enter the diagnostic mode on your iPhone to help you diagnose your iPhone and fix the problem. And you have known how to run iPhone Diagnostic Test after reading this article.
Moreover, one highly recommended tool is Wondershare Dr.Fone, a comprehensive diagnostic software that can help you diagnose and repair a wide range of issues on your iPhone.
FAQs
Dr.Fone Basic:
Better Control for Your Phone
Manage, transfer, back up, restore, and mirror your device
iPhone Tips
- iPhone News
- iPhone Activate
- iPhone Data Manage
- 1. Export Notes from iPhone to PC/Mac
- 2. iPhone Notes Duplicate
- 3. Print WhatsApp Messages on iPhone
- iPhone Diagnostics
- 1. Check iPhone Wi-Fi Speed
- 2. Check and Monitor iPhone Temprature
- 3. Put iPhone in Diagnostic Mode
- 4. Test iPhone Screens
- iPhone How-tos
- 1. Force Quit Frozen Apps
- 2. Find Own Phone Number
- 3. Find Blocked Numbers on iPhone
- 4. iPhone Internet Explorer Alternatives
- 5. Sync Thunderbird with iPhone
- 6. Things Can Do with iPhone on Plane
- 7. Tips for Using VLC for iPhone
- 8. iPhone Explorer for Mac and Windows
- 9. Use iPhone as Security Camera
- iPhone Location Tips
- 1. Change iPhone GPS Location
- 2. Hide iPhone/Android Location
- 3. PokeGo++ iPhone
- 4. Change Home Address on iPhone
- 5. See Someone's Location on iPhone
- 6. PGSharp for iPhone
- 7. Change App Store Country
- iPhone Track
- 1. Track iPhone by Phone Number
- 2. Track iPhone without App
- 3. Turn Off Tracking on iPhone
- 4. Spy on iPhone without Jailbreak
- iPhone Tricks
- 1. Unlink iPhones
- 2. Mirror iPhone/iPad to Windows PC
- 3. Turn On iPhone Without Home Button
- 4. Charge iPhone Without Charger
- 5. Free Unlimited Data on Verizon iPhone
- 6. Use iPhone with Broken Home Button
- 7. Use iPhone without Touch Screen
- 8. Remote Control iPhone from PC
- 9. iPhone Stuck on Apple Logo
- 10. DFU Tools for iPhone
- 11. iPhone/iTunes Error 4013
- 12. iPhone Front Camera Not Working
- 13. Download Songs on iPhone/iPod
- 14. Unlock iPhone without Passcode
- 15. Reset iPhone Without Apple ID
- 16. Transfer Photo from Android to iOS
- Find My iPhone Tips





James Davis
staff Editor