Resolve common problems and system crashes on both iPhone and Android devices.

 100% Security Verified | No Subscription Required | No Malware

 :
: 
 ChatGPT
 Perplexity
 Gemini
 Claude
 Grok
Grok
iPhone DFU mode is a low-level restore state used when an iPhone needs deeper troubleshooting than a normal restart or Recovery Mode can provide. For iPhone 8 and later, connect the iPhone to a computer, quickly press Volume Up, quickly press Volume Down, hold the Side button until the screen turns black, then hold Side + Volume Down for about 5 seconds. Release only the Side button and keep holding Volume Down until the computer detects the iPhone. A successful DFU screen stays completely black.
DFU is usually a last-resort path. For most failed updates or restore problems, try Recovery Mode before DFU mode because it may offer an update path before a full restore. Entering DFU mode by itself does not erase your data, but completing a DFU restore does. Also, DFU does not provide unrestricted firmware downgrades: a normal restore still depends on iOS versions Apple is currently signing.
In this article
Part 1. How to put iPhone in DFU Mode normally?
Before you start, connect the iPhone directly to a Mac or PC with a reliable USB cable. Use Finder on a current Mac, or the Apple Devices app on a current Windows PC. Older systems may still use iTunes. If the iPhone is usable and you may need to restore it, make a backup first. You can also use Dr.Fone - Backup & Restore (iOS) or review this iPhone backup software guide before proceeding.
Step-by-Step Instructions for Standard DFU Entry
The button sequence is different across iPhone generations. Use the section that matches your model instead of applying one generic Home/Power sequence to every iPhone.
How to put iPhone 8 or later into DFU mode
-
Step 1Connect the iPhone
Connect your iPhone to the computer and open Finder or Apple Devices.
-
Step 2Start the button sequence
Quickly press and release Volume Up, then quickly press and release Volume Down. Press and hold the Side button until the screen turns completely black.
-
Step 3Switch to DFU timing
As soon as the screen is black, hold Side + Volume Down together for about 5 seconds. Then release only the Side button and continue holding Volume Down for about 10 seconds, or until the computer detects the iPhone.
-
Step 4Confirm DFU mode
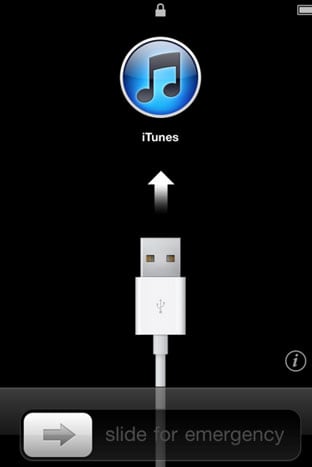
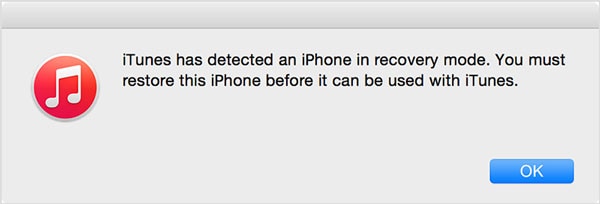
The display should remain completely black. If you see the Apple logo, restart the sequence. If you see a cable-to-computer screen, you entered Recovery Mode instead of DFU mode.
How to put iPhone 7 or iPhone 7 Plus into DFU mode
-
Step 1Connect the iPhone 7
Connect the iPhone to your computer and open Finder, Apple Devices, or iTunes on an older supported setup.
-
Step 2Hold Side + Volume Down
Press and hold the Side button and Volume Down together for about 8 seconds.
-
Step 3Release Side only
Release the Side button while continuing to hold Volume Down until the computer detects the iPhone. The screen should stay black.
How to put iPhone 6s, iPhone SE (1st generation), or earlier into DFU mode
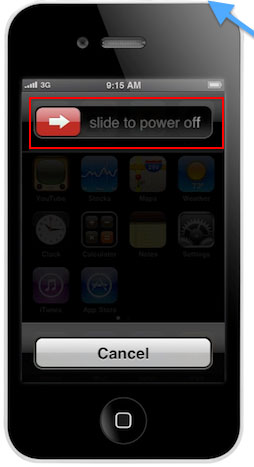
These Home-button models use the older Home + Lock button sequence shown in the original visual references below.
-
Step 1Connect the iPhone
Connect the device to the computer and open Finder, Apple Devices, or iTunes as appropriate.

-
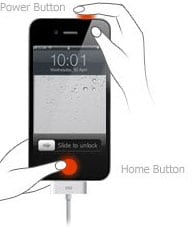
Step 2Hold Home + Lock
Hold the Home button and the Top/Side (Lock) button together for about 8 seconds.
-
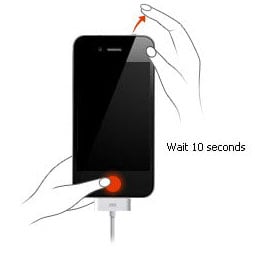
Step 3Release Lock, keep holding Home
Release the Top/Side button and continue holding Home until the computer detects the device. If the Apple logo appears, the Lock button was held too long and you should try again.

Part 2. How to Enter DFU Mode without Home Button or Power Button?
If you are looking for how to put an iPhone in DFU mode without buttons, the key limitation is that a required physical button cannot simply be bypassed by a dependable consumer software shortcut on a current iPhone. The same applies if you are trying to learn how to enter DFU mode without a Power button on a model that requires it. This is especially important because some older tutorials use legacy jailbreak-era tools or custom IPSW workflows that were designed for much older devices and should not be treated as a current solution for modern iPhones.
Software-Based DFU Entry Guide: What Still Works in 2026
For a modern iPhone, choose the next step based on what the device can still do:
| Situation | Best next step | Why |
|---|---|---|
| Required buttons still work | Use the model-specific DFU sequence | True DFU mode depends on precise hardware-button timing. |
| A button is broken, but the iPhone still boots | Try Recovery Mode or a guided system-repair path first | Recovery Mode is the safer first restore path for many software problems and may avoid an immediate full restore. |
| A button is broken and true DFU is required | Get Apple service or repair the button | Apple advises service when button problems prevent recovery procedures; hardware-level DFU workarounds are not appropriate for a normal consumer repair guide. |
| The iPhone is already in DFU and will not exit | Use the exit-DFU steps below | Exiting DFU is a different task from entering it without buttons. |
When evaluating an iPhone DFU mode tool, first check whether it actually enters DFU, only guides the button sequence, enters Recovery Mode, or only exits DFU. If the iPhone still boots and your goal is troubleshooting rather than DFU specifically, Dr.Fone - System Repair (iOS) includes one-click Enter/Exit Recovery Mode and a dedicated Exit DFU Mode feature. That does not mean it can place every modern iPhone into true DFU mode without working buttons; use the feature that matches the state your device is already in.
Older RedSn0w custom-IPSW tutorials are best treated as legacy information rather than a current 2026 method. They were built around older iOS/jailbreak workflows, while modern DFU guidance still relies on the correct hardware sequence. For older damaged devices, hardware-level DFU methods may exist, but they require device disassembly or specialist equipment and are better handled by a repair professional.
Part 3. What to do if my iPhone is stuck in DFU mode?
If your iPhone is in DFU mode and you have not started a restore, first try a force restart for your model. On iPhone 8 or later, press and release Volume Up, press and release Volume Down, then hold the Side button until the Apple logo appears. On iPhone 7/7 Plus, hold Side + Volume Down. On iPhone 6s/SE (1st generation) or earlier, hold Home + Top/Side until the Apple logo appears.
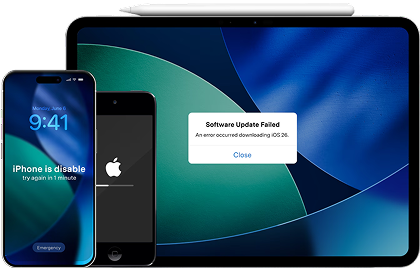
If the iPhone still will not exit DFU mode, Dr.Fone - System Repair (iOS) now provides a dedicated Exit DFU Mode workflow. This is a better match for the problem than immediately downloading firmware and running a full repair.
 Fix iOS issues, no data loss.
- One-click repair for all iOS problems.
- Solve recovery mode, Apple logo, black screen, etc.
- Upgrade or downgrade iOS without iTunes
How to Exit DFU Mode with Dr.Fone
-
Step 1Open the Exit DFU Mode feature
Launch Dr.Fone, open Toolbox, select System Repair, and choose Exit DFU Mode.
-
Step 2Select your iPhone model range
Choose the model range that matches your iPhone and follow the on-screen instructions to exit DFU mode.
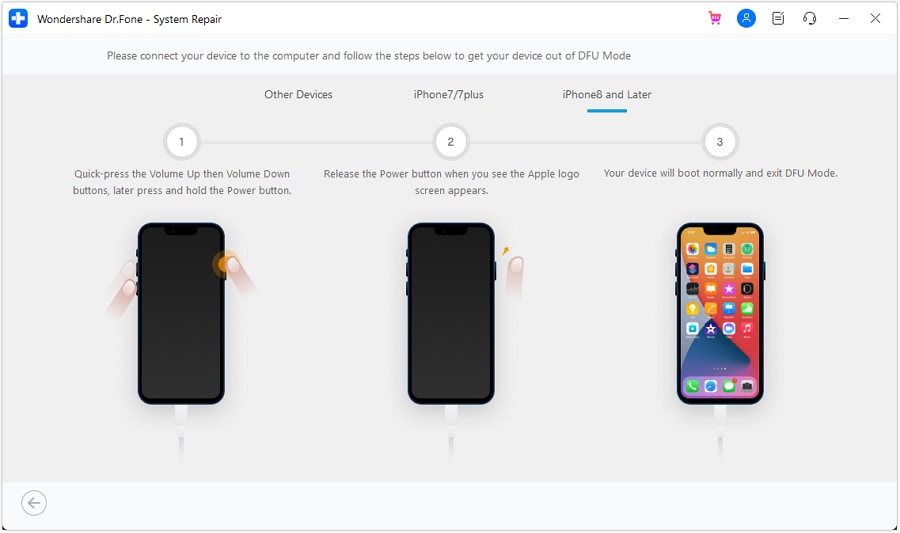
-
Step 3Escalate only if the iPhone still will not start
If the phone exits DFU but still cannot boot normally, return to System Repair and consider Standard Mode for common iOS system issues. Standard Mode is designed to repair supported system problems without erasing data; deeper repair modes may have different data-loss consequences.
For the current interface sequence, see the Dr.Fone Exit Recovery/DFU Mode guide.
Part 4. What if I lost my iPhone data in DFU Mode?
Simply entering DFU mode does not erase your iPhone. Data loss happens when you use DFU mode to complete a restore, because the restore reinstalls iOS and erases the device. If you already completed a DFU restore, check your existing backups and cloud-synced data first instead of assuming the erased device still contains recoverable files.
Apple can restore a full device backup from iCloud or a computer backup. If you want to preview and selectively extract supported data from iCloud Backup, iCloud-synced sources, iCloud Drive, or local/iTunes backups, Dr.Fone - Data Recovery (iOS) provides those recovery-source options. You can also review our guide on recovering iPhone data without an iTunes backup.
- Recovers data after deletion, crashes, or device damage.
- Supports photos, messages, contacts, WhatsApp, and more.
- Supports all major iPhone, iPad, and iPod models.
- Preview and recover only what you need.


Conclusion
Knowing how to put an iPhone in DFU mode is useful when a deeper restore is genuinely needed, but the correct method depends on the iPhone generation. Use the modern Volume Up/Volume Down/Side sequence for iPhone 8 and later, the Side + Volume Down sequence for iPhone 7, and the Home + Lock sequence for iPhone 6s, iPhone SE (1st generation), and earlier models. Try Recovery Mode first for most update or restore problems, remember that a DFU restore erases the device, and avoid relying on legacy buttonless-DFU tutorials for current iPhones. If you are already stuck in DFU mode, use the model-specific force restart or a verified Exit DFU Mode workflow before moving to a deeper system repair.
FAQ
-
1. What is the difference between DFU Mode and Recovery Mode?
Recovery Mode shows a cable-to-computer screen and is the normal restore path to try first. DFU mode keeps the display black and is used for deeper restore situations when Recovery Mode is not enough. -
2. Does entering DFU mode erase everything on an iPhone?
No. Entering DFU mode alone does not erase your data. A DFU restore erases the iPhone and reinstalls iOS, so back up first whenever possible. -
3. Can I put an iPhone in DFU mode without the Power, Home, or Volume buttons?
For current iPhones, true DFU entry normally depends on the required hardware-button sequence. If a required button is broken, try a safer Recovery Mode path if possible or get the button repaired before attempting DFU. -
4. How do I exit DFU mode if I entered it by mistake?
Use the force-restart sequence for your iPhone model. If the phone remains in DFU mode, a dedicated Exit DFU Mode tool can guide you out of that state before you consider a full system repair.
 Add Wondershare Dr.Fone as a preferred source on Google