How to Sync Outlook Contacts to iPhone

Oct 24, 2025 • Filed to: Device Data Management • Proven solutions
Dr.Fone Basic:
Better Control for Your Phone
Manage, transfer, back up, restore, and mirror your device
Microsoft Outlook helps to put our daily life in perfect order. It's regarded as a contact/calendar manager, an email sender/receiver, a task manager, etc. If you're a royal Outlook fan and have an iPhone, like iPhone X or iPhone 8, you might be a little confused about how to sync Outlook with iPhone or how to sync Outlook contacts to iPhone. Don't worry. It's not difficult. There are 3 methods that let you sync iPhone with Outlook without any hassle.
Part 1. Sync Outlook Contacts to iPhone by Using Dr.Fone - Phone Manager (iOS)
There are many iPhone management software options that enable you to sync Outlook contacts to your iPhone. Among them, Dr.Fone - Phone Manager (iOS) stands out. With it, you can easily and effortlessly sync all or selected Outlook contacts to iPhone.
Dr.Fone - Phone Manager (iOS)
Transfer iPhone Contacts Easily without iTunes
- Transfer, manage, export/import your music, photos, videos, contacts, SMS, Apps etc.
- Backup your music, photos, videos, contacts, SMS, Apps etc. to computer and restore them easily.
- Transfer music, photos, videos, contacts, messages, etc from one smartphone to another.
- Transfer media files between iOS devices and iTunes.
- Fully compatible with iOS 7, iOS 8, iOS 9, iOS 10, iOS 11, iOS 12, iOS 13and iPod.


How to Sync Outlook Contacts to iPhone
Step 1. Connect your iPhone to PC
First of all, install Dr.Fone on your computer and run it. Choose "Phone Manager" and connect your iPhone to your computer via a USB cable. Once it's connected, Dr.Fone will detect your iPhone immediately and display it in the primary window.

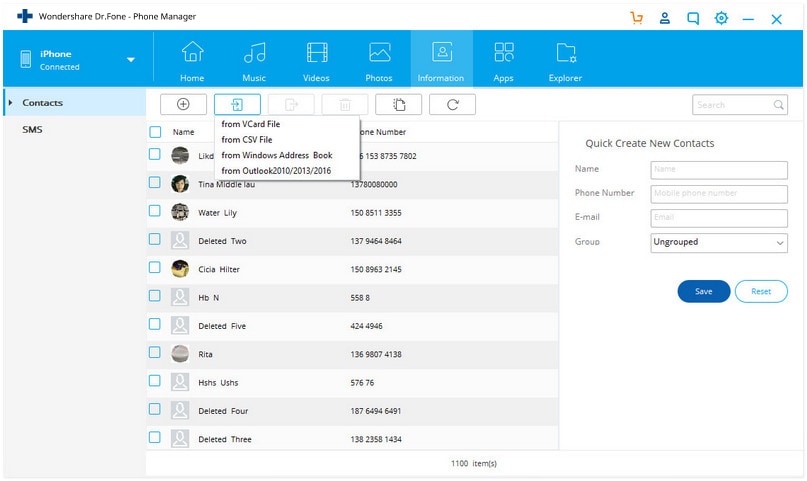
Step 2. Import Contacts from Outlook to iPhone
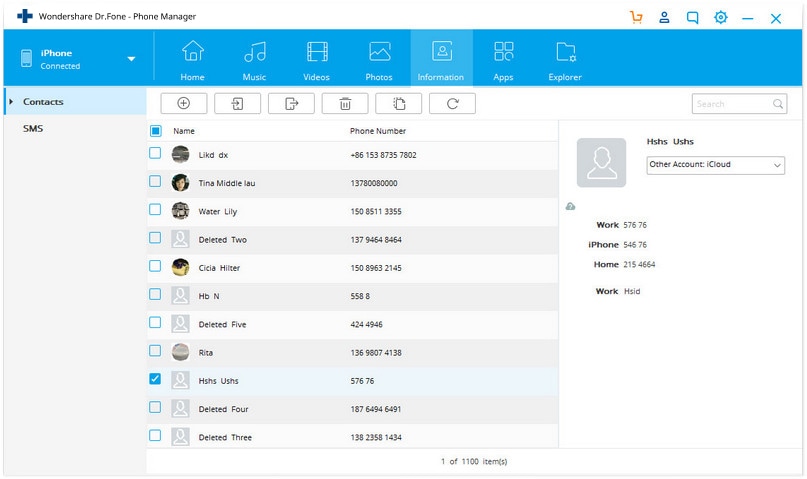
At the top of the main interface, click Information, then click Contacts on the left side bar.
To sync Outlook contacts to iPhone, you can also click Import > from Outlook 2010/2013/2016 .
Note: You can learn more about transfer and manage iPhone contacts with Dr.Fone - Phone Manager (iOS). Import contacts from Gamil to iphone is also very easy to achieve.
Method 2. Sync Outlook with iPhone via iCloud Control Panel
Step 1. Download and install iCloud Control Panel on your computer.
Step 2. Run it and sign into your iCloud ID and password.
Step 3. In its primary window, tick Contacts, Calendars, & Tasks with Outlook.
Step 4. Click Apply. Wait a moment. When it's completed, Contacts, Calendars and tasks on your Outlook will become accessible in the iCloud.
Step 5. On your iPhone, tap Settings > iCloud. Sign into your iCloud account. Then, turn on Contacts, and Calendars to sync to your iPhone.

Method 3. Sync Outlook with iPhone by Using Exchange
If you have Microsoft Exchange (2003, 2007, 2010) or Outlook, you can use Exchange to Sync iPhone with Outlook with Calendars and Contacts.
Follow the easy steps below:
Step 1. Set up your Outlook account by using Exchange.
Step 2. On your iPhone, go to Settings > Mail, Contacts, Calendars > Add Account and choose Microsoft Exchange.

Step 3. Enter your email, user name and password, and then click Next.
Step 4. Your iPhone will now contact the Exchange Server and you need to fill in the address of the server in the Server field. If you are not able to find your server name, you can get help from Outlook Finding My Server Name.
After entering all details correctly, you now have the option to select what kind of information you want to synchronize with your Outlook account. You have the choice between:
• Emails
• Contacts
• Calendars
• Notes
Tap Save to sync iPhone calendars with Outlook, or sync iPhone contacts with Outlook, or sync whatever you want.
Why not download it have a try? If this guide helps, don't forget to share it with your friends.
Dr.Fone Basic:
Better Control for Your Phone
Manage, transfer, back up, restore, and mirror your device


iPhone Contacts
- Back up iPhone Contacts
- Manage iPhone Contacts
- 1. Export Contacts from iPhone
- 2. Manage iPhone Contacts
- 3. Find and Merge Contacts on iPhone
- 4. Share Contacts on iPhone
- 5. Get iPhone Contacts from iTunes
- 6. Export iPhone Contacts to CSV
- 7. How to Export iPhone Contacts to a VCF|vCards
- 8. Delete Contacts from iPhone
- 9. Full Guide on Managing iPhone Contacts
- 10. Print Contacts from iPhone
- 11. View iPhone Contacts on Computer
- 12. Edit/Delete/Merge Contact on PC
- Recover iPhone Contacts
- 1. Recover Deleted Contacts on iPhone
- 2. Recover iPhone Deleted Text Message
- 3. Recover iPhone Deleted iMessages
- 4. Recover iPhone Deleted Photos
- 5. Recover Permanently Deleted Data
- 6. FonePaw VS Dr.Fone
- 7. See Blocked Messages on iPhone
- 8. Recover Data from Dead iPhone
- 10. Recover iPhone Deleted Text Message
- 11. Recover Contacts Without Backup
- Transfer Contacts from iPhone
- 1. Sync iPhone Contacts to Outlook
- 2. Transfer Contact without iCloud
- 3. Transfer from iPhone to iPhone
- 4. Transfer Contact With/Without iTunes
- 5. Transfer Contact from iPhone to Android
- 6. Sync Contacts from iPhone to iPad
- 7. Export from iPhone to Excel
- 8. Transfer Contact from iPhone to PC
- 9. Copy Contacts from iPhone to SIM
- Transfer Contacts to iPhone
- 1. Android to iPhone Transfer Apps
- 2. Transfer from Android to iPhone
- 3. Transfer from Android to iPhone XS
- 4. Transfer from Huawei to iPhone
- 5. Transfer from Sony Xperia to iPhone
- 6. Transfer from Samsung to iPhone
- 7. Import Contact from Excel to iPhone
- 8. Import Contact from Gmail to iPhone
- 9. Import Contacts to iPhone
- 10. Sync Outlook Contacts to iPhone
- 11. Transfer Contact from PC to iPhone
- iPhone Contacts TiPs


Daisy Raines
staff Editor