How to Fix iPhone Screen Recording Not Working [9 Methods]

Dec 16, 2025 • Filed to: Phone Repair Solutions • Proven solutions
Dr.Fone Basic:
Better Control for Your Phone
Manage, transfer, back up, restore, and mirror your device
Are you struggling to fix the iPhone screen recording not working problem? You're not alone—and you're definitely in the right place. iPhone’s built-in screen recording tool is a powerful feature that lets users capture anything happening on their screen. Whether you're creating tutorials, saving important video calls, or capturing gameplay, screen recording is incredibly handy.
Don’t panic—help is here! If you're trying to fix the iPhone screen recording not working issue, this comprehensive guide will walk you through every step of the process. We’ll start by identifying the most common reasons why screen recording may fail on your iPhone—such as system glitches, restrictions, low storage, or microphone settings. So, if you’re ready to solve the iPhone screen recording not working issue once and for all, let’s jump right into the details.
- Part 1. Why Screen Recording Doesn’t Work on iPhone?
- Part 2. How to Fix iPhone Screen Recording Not Working?
- Method 1: Check the App Restrictions
- Method 2: Force Restart Your iPhone
- Method 3: Update Your iPhone
- Method 4: Add Screen Recording Option to Control Center
- Method 5: Check Restrictions for Screen Recording
- Method 6: Disable Low Power Mode
- Method 7: Check Your Phone Storage
- Method 8: Enable Mic for Screen Recording
- Method 9: Reset All Settings

- Part 3. Bonus Tip: How to Export Videos from iPhone to Computer Using Dr.Fone
- Part 4. FAQs
Part 1. Why Screen Recording Doesn’t Work on iPhone?
Various reasons can be the cause of iPhone screen recording not working. It often happens when you update and install a new iOS version on your iPhone.
However, fixing this issue is not a challenge anymore. You can follow the easy methods in this guide and make your screen recording feature work again. But first, it's important to find the culprit. Let's explore the reasons why screen recording doesn't work on iPhone:

- Screen Recording Restrictions:
You may have enabled restrictions on your iPhone. Plus, the parent control feature can also prevent you from recording the screen.
- Low Storage Space:
You must have enough storage to save the screen recording on your device. Insufficient storage can also cause the screen recording not to work.
- Outdated iOS Version:
Make sure that your iPhone runs the latest iOS update. Older iOS versions may have compatibility issues affecting screen recording.
- App Limitations:
Some apps may also restrict screen recording. So, explore app settings if facing recording issues in a particular app.
- Battery Save Mode:
Screen recording may be disabled in Battery Saver Mode. So, turn off this mode before attempting to record your screen.
These are the common causes of iPhone screen recording not working. Now that we know the reasons let’s move forward and explore the methods to fix this issue.
Part 2. How to Fix iPhone Screen Recording Not Working?
In this section, we will walk you through some methods to fix iPhone screen capture not working. You can follow the below step-by-step guides and get it done.
Method 1: Check the App Restrictions
One of the lesser-known but common reasons why users struggle to fix the iPhone screen recording not working issue lies in app-specific restrictions. Some apps—especially those that involve streaming, copyright-protected videos, or confidential content—are designed to block screen recording entirely. If your iPhone screen recording works in general but fails only within certain apps, this is likely the reason. In such cases, the only solution is to avoid attempting screen recordings within those specific apps.
So, before you try further methods, ensure that the app does not prevent screen recording. It will save you time.
Method 2: Force Restart Your iPhone
Your iPhone might be facing technical issues that prevent screen recording. What to do in that case? Well, there is an easy way out!
You can try a hard restart. It can address temporary glitches and is a quick solution to various issues. Let's find out how you can hard restart an iPhone. The steps of force restarting an iPhone may vary according to the iPhone model. So, you can follow the below instructions:
On iPhone 8 or later versions:
- Press and release the "Volume Up" button.
- Press and release the "Volume Down" button.
- Press and hold the "Power" button for several seconds until the Apple logo displays on the screen.

On iPhone 7/7 Plus:
- Keep pressing the "Power " + "Volume Down" buttons simultaneously until you see the Apple logo on the screen.
On iPhone 6 and earlier versions:
- Keep pressing the " Power" + "Home" buttons together until you see an Apple logo on the screen.

However, if a force restart doesn't fix the issue, you can try the next method.
Method 3: Update Your iPhone
Using an outdated iOS version can cause system bugs and compatibility issues, including problems with screen recording. To help fix the iPhone screen recording not working issue, ensure your device is running the latest iOS update. To update your iPhone, you can follow the instructions given below:
Step 1: Open "Settings " on your iPhone.
Step 2: Go to "General" > "Software Update."
Step 3: Install the latest Update (If there is any).

If you see the screen recording not working on iPhone even after an update, you can try the next method.
Method 4: Add Screen Recording Option to Control Center
Sometimes, the problem arises due to your negligence. For instance, in the screen recorder not working iPhone scenario, you may not have added the screen recording option in the Control Center. So you won't be able to access and use it when needed. But the solution is simple: just add it to your iPhone's control center. You can follow the instructions given below to make the screen recording feature accessible:
Step 1: Open "Settings" on your iPhone.
Step 2: Scroll down and select "Control Center."
Step 3: Here, find "Screen Recording" and click the green “Plus” icon right next to it to add it to the Control Center.

If the iPhone screen recording not working issue persists, you can try the next method.
Method 5: Check Restrictions for Screen Recording
If the screen recording icon appears greyed out, system-wide restrictions might be preventing the feature from working. This is a common cause of the iPhone screen recording not working issue. You can follow the instructions given below to check and turn off the restrictions:
Step 1: Open "Settings" on your iPhone.
Step 2: Go to "Screen Time."
Step 3: Tap on "Content & Privacy Restrictions" > "Content Restrictions."

Step 4: Enter your passcode if prompted.
Step 5: Scroll down and choose "Screen Recording."
Step 6: Ensure that you selected "Allow."

This is the most common mistake that users often make. However, if you didn’t see any restriction for screen recording, there must be another issue. You can try the next method.
Method 6: Disable Low Power Mode
Enabling Low Power Mode is a great way to extend your iPhone’s battery life, but it can also come with trade-offs. If you're trying to fix the iPhone screen recording not working issue, check whether Low Power Mode is enabled. Here’s how you can turn off the Low Power Mode:
Step 1: Open "Settings" on your iPhone.
Step 2: Go to "Battery."
Step 3: Turn off the "Low Power Mode" toggle if it's turned on.

It might fix the iPhone screen recording not working issue. But if it persists, you can move forward and try the next method.
Method 7: Check Your Phone Storage
One of the most overlooked causes of the iPhone screen recording not working is insufficient storage. If your screen recordings fail to save to the Photos app and you’re seeing error messages or nothing appears at all, it’s time to check your available space. You can follow the instructions given below to check the storage of your iPhone.
Step 1: Open "Settings " on your iPhone.
Step 2: Go to "General" > "iPhone Storage."
Step 3: Review the available storage and delete unnecessary files or apps to free up space.

Method 8: Enable Mic for Screen Recording
Sometimes, the screen recording not working on iPhone issue occurs because of the mic. In this case, you are not able to record the screen with the background sound. However, it is very easy to solve the problem. All you have to do is enable the microphone, and you are done. Here is how you can enable the mic for screen recording:
Step 1: Swipe down the notification bar to access the Control Center.
Step 2: Here, long press on the "Screen Recording" icon, and you will see a "Mic" option icon just below.
Step 3: Tap the Mic icon to record the screen with sound.

Did you see it? How easy it is to solve the screen recording problem associated with the mic. If you have tried all the above methods but still the screen recording doesn't work, there is one last resort for you.
Method 9: Reset All Settings
The iPhone screen recording not working issue can also happen due to software issues. There is no shortcut to fix this issue, so you need to reset all settings on your iPhone. This way, your iPhone will remove the bugs and revert the settings to default. You can follow the instructions given below to reset all settings on your iPhone:
Step 1: Open"Settings" on your iPhone. Scroll down and tap "General."
Step 2: Scroll down and select "Transfer or Reset iPhone."
Step 3: Now, click "Reset " > "Reset All Settings. " You'll be prompted to enter your passcode. Enter the code and proceed.

This process will resolve any glitches that are affecting the screen recording. However, the reset process might delete the data on your iPhone. So, it is suggested to back up your media, including pictures and videos on your computer.
Wondering how to do it? Well, we have got you an easy way. Let’s explore it together.
Part 3. Bonus Tip: How to Export Videos from iPhone to Computer Using Dr.Fone
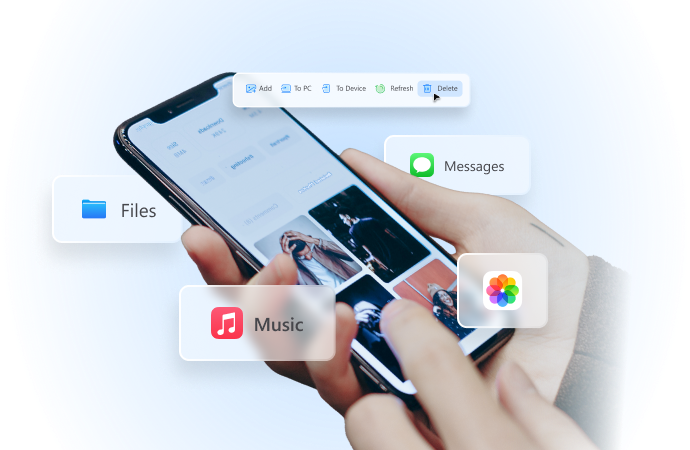
If you're trying to fix the iPhone screen recording not working issue and want to secure your important recordings and files, it’s a smart move to back up your data. That’s where Wondershare Dr.Fone - Phone Manager (iOS) comes in—a powerful and user-friendly tool for exporting iPhone data to your computer. Whether it's screen recordings, photos, videos, music, or documents, Dr.Fone enables fast, seamless file transfers without iTunes restrictions. It’s especially helpful when troubleshooting iPhone issues—such as screen recording failures.
Not only that, Dr.Fone also has a lot of other useful features such as system repair, WhatsApp transfer, screen unlocking, and more. The best part is that you don't need any technical skills to use this tool. Just a few clicks, and you are done. See it yourself!
Dr.Fone - Phone Manager (iOS)
Export Videos from iPhone to Your PC
- Transfer, manage, export/import your music, photos, videos, contacts, SMS, Apps, etc.
- Back up your music, photos, videos, contacts, SMS, Apps, etc., to the computer and restore them easily.
- Transfer music, photos, videos, contacts, messages, etc., from one smartphone to another.
- Transfer media files between iOS devices and iTunes.
- Fully compatible with the newest iOS system.


Steps to Use Dr.Fone to Export Videos
Before starting the process, make sure to download and install the Dr.Fone app on your Laptop. Then, follow the instructions given below:
Step 1: Launch Dr.Fone and Start Export All Data
Launch the Dr.Fone app on your laptop or PC. Then, connect your iPhone to your computer via a USB cable and wait unit the app recognizes the device. Click “Export all data” and proceed.

Step 2: Select Data Types And Export
Once your iPhone is successfully connected, you will see the below interface on the Dr.Fone app. Select the type of data you want to transfer from the menu at the top. It can be photos, videos, etc.

Step 3: Set Passwords For Backup
Now, you will be asked to set up an encrypted password for the backup. The backup and the password will be saved on the computer. So, set a password, confirm, and click "Done" to start the process.

Step 4: Processing Data Export
Your iPhone will start to export its data to the computer through Dr.Fone. The time duration depends on the size of your data. You can see the progress on the screen.

Step 5: Exporting Completed
Once the data is successfully exported, you will see the below interface on your computer's screen. Click the "Open " button to view the exported data in the specified location.

This is how you can transfer your videos and other data from your iPhone to your computer. Using Dr.Fone will make the process easy. So, do consider exporting your data before the reset process to fix the iPhone screen recording not working issue.
In the next section, we will answer some commonly asked questions.
FAQs
Conclusion
So, here we are ending the discussion. Fixing screen recording not working on iPhone is not a difficult task. We have explored the common reasons that can prevent screen recording in iPhones. We have also walked you through the nine easy-to-follow methods that can help you fix this issue. You can follow these methods and get it done.
To ensure your screen recordings, photos, and other essential files are safe, we recommend using Wondershare Dr.Fone. This all-in-one toolkit provides a reliable and hassle-free way to manage, back up, and transfer your data between iOS and Android devices.
Dr.Fone Basic:
Better Control for Your Phone
Manage, transfer, back up, restore, and mirror your device


iPhone Reset
- iPhone Recovery Mode
- 1. Exit iPhone Recovery Mode Loop
- 2. iPhone in Recovery Mode
- 3. iPhone Recovery Mode
- 5. Get Data from iPhone in Recover Mode
- 6. Put iPhone in Recovery Mode
- 7. Recuva Data Recovery Review
- 8. DFU Mode vs Recovery Mode
- iPhone DFU Mode
- 1. Put iPhone in DFU Mode
- 2. Enter and Exit DFU Mode
- 3. Get Data from iPhone in DFU Mode
- 4. Tools for iPhone to Enter DFU mode
- 5. Enter/Exit DFU Mode on iPhone X
- 6. Enter/Exit DFU Mode on iPhone SE
- 7. DFU Mode Works on iPhones
- 8. Enter DFU Mode on iPod Touch
- iPhone Factory Reset
- 1. Factory Reset iPhone
- 2. Factory Reset iPhone without iTunes
- 3. Reset iPhone without Passcode
- 4. Reset iPhone Without Apple ID
- iPhone Hard Reset
- 1. Hard Reset VS Soft Reset iPhone
- 2. Hard Reset Without Computer
- 3. Force Restart iPhone
- 4. Restart or Force Restart iPhone
- 5. Hard/Soft/Factory Reset iPhone 8
- iPhone Reset Tips
- 1. Soft Reset iPhone
- 2. Restart or Reboot iPhone
- 3. iPhone Reset All Settings
- 4. Reset iPhone Battery
- 5. Reset iPhone without Apple ID
- 6. Reset Jaibroken iPhone
- 7. Reset Network Settings On iPhone
- 8. Reset Restriction Passcode iPhone
- 9. Restart iPhone Without Power Button
- 10. Turn Off iPhone Without Home Button
- 9. Turn off iPhone without Screen
- 10. Reset Disabled iPhone


Alice MJ
staff Editor