Move contacts, messages, photos, videos, app data, and more between iOS and Android.

 100% Security Verified | No Subscription Required | No Malware

 :
: 
 ChatGPT
 Perplexity
 Gemini
 Claude
 Grok
Grok
Apple's integrated ecosystem is explicitly designed to provide a secure and highly intuitive environment, enabling users to seamlessly access and share content across multiple Apple devices. Whether it involves your favorite music playlists, personal photos, critical work documents, or daily conversations, you can sync messages from iPhone to Mac efficiently—provided the basic system settings are configured correctly. By keeping your communications continuously updated across both an iPhone 14 and a MacBook Air, you ensure that you are always in the loop without needing to constantly switch between different screens.
However, if you are struggling with iMessage not syncing between iPhone and Mac, you are certainly not alone. Transient connection glitches, mismatched Apple IDs, or localized software bugs in 2026 can severely disrupt this otherwise flawless experience. This comprehensive guide provides detailed step-by-step troubleshooting and robust alternative solutions to help you accomplish this syncing process securely in just a few minutes. Let's dive in!
In this article
Part 1. How to Sync iMessages across iPhone and Mac?
Experiencing iMessage not syncing between iPhone and Mac is probably one of the most common issues among users who rely heavily on the iOS ecosystem for their daily workflow. Before your communications can flawlessly update across platforms, your primary task is to correctly configure the messaging parameters on your mobile device. Adjusting these parameters properly ensures that you can rapidly transfer messages from your smartphone to your iPad and MacBook seamlessly without any data drops.
If you are finding that your iMessage not syncing on Mac and iPhone is severely hindering your productivity, follow this streamlined procedure to resolve the connectivity setup:

Step 1 Access Messages Settings
Open the "Settings" application on your iOS device. Scroll down the menu and tap on "Messages," then navigate to the "iMessage" toggle and ensure it is affirmatively turned on (highlighted green).

Step 2 Verify Your Apple ID
Within the exact same menu, tap the "Send & Receive" option. At the top of this screen, you will clearly see the Apple ID currently being used for your iMessage account. Take note of this specific ID. Beneath your registered phone number, you will also notice any associated email addresses legally linked to that Apple ID.
Step 3 Configure Send & Receive Parameters
Select your primary phone number as the designated channel to send and receive iMessages, rather than checking multiple email IDs. This targeted selection significantly prevents synchronization confusion, which is a leading technical cause behind why many messages inadvertently stop syncing properly across a single ecosystem.

Step 4 Align MacBook Messaging Preferences
Now that your mobile device is correctly optimized, boot up your MacBook and launch the native Messages application. From the top macOS menu bar, navigate to "Settings > iMessage" (or Preferences on older macOS architectures). Here, critically verify that the Apple ID logged into the Mac application matches exactly with the one you noted down from your mobile device.

Step 5 Finalize the Synchronization
Tick the checkbox adjacent to the specific phone numbers and email addresses you intend to activate. Crucially, match these selected addresses directly with the exact choices made in Step 3 to maintain rigid uniformity. Once completed, your persistent iMessage not syncing issue should be thoroughly resolved, paving the definitive way for real-time text updates across both machines.
Part 2. How to Sync Text Messages from iPhone to Mac?
It is incredibly important to note that the previously mentioned workflow primarily fixes your iMessage not syncing on Mac and iPhone errors specifically for Apple's proprietary blue-bubble messages. However, if your primary goal is to heavily synchronize standard SMS text messages (green bubbles) containing banking OTPs or casual texts from Android users, you are required to manually authorize text message forwarding.
Activating this powerful built-in utility essentially ensures that incoming cellular texts are automatically routed via Wi-Fi or Bluetooth directly to your desktop computer. Here is exactly how to securely activate SMS bridging:
Step 1 Open SMS Forwarding Settings
Navigate to the "Settings" app on your mobile device, scroll to "Messages," and select the "Text Message Forwarding" operational option.

Step 2 Authorize Your Mac
In the interactive list of connected Apple devices, locate the exact name of your MacBook. Toggle the switch next to your Mac to green, officially permitting it to send and receive standard cellular text messages effortlessly.
Step 3 Authenticate the Passkey
Upon successfully enabling the toggle, you may immediately receive a unique six-digit verification passkey displayed prominently on your Mac's screen. Promptly input this numerical code into the authentication alert window that surfaces dynamically on your mobile screen.
Step 4 Complete the Setup
Tap "Allow" on your mobile device to definitively finalize the authentication process for text message synchronization. From now on, whenever a standard SMS inherently arrives on your cellular network, it will instantly ping and appear within the Messages app on your Mac. Yes, it truly is that straightforward.

Part 3. Wondershare Dr.Fone — Phone Transfer: Best Solution
Even after meticulously tweaking the native settings on your computer and smartphone, occasional glitches with unstable internet connections, lagging Apple server responses, and underlying iOS software bugs might repeatedly lead to iMessage not syncing between Mac and iPhone. In these completely unreliable scenarios, depending solely on iCloud synchronization simply isn't foolproof.
Therefore, the absolute best and most secure alternative for safeguarding your digital conversations is to directly transfer your critical messages from your smartphone to your computer's local drive. For executing this seamlessly, Dr.Fone — Phone Manager formally stands as the absolute best application readily available.
This robust data transfer application acts as a comprehensive, one-stop solution allowing you to bi-directionally transfer digital assets between your handheld device and computer, and vice versa. Beyond just preserving SMS and iMessages, you can rapidly export a diverse array of data types including high-resolution photos, detailed contacts, large videos, personal notes, and other application data.
Operating as a highly trustable platform, Dr.Fone boasts a 100% secure operational infrastructure that actively prevents any form of data corruption or device damage during the extraction process. Fully compatible with all the most popular technical platforms (Mac, iOS, Android, Windows), it offers you the granular flexibility to migrate your entire message history in bulk or cherry-pick highly selective conversations from one platform to another.
Discover exactly how effortlessly you can archive and securely transfer your essential text messages from iPhone to Mac by executing the following straightforward steps:
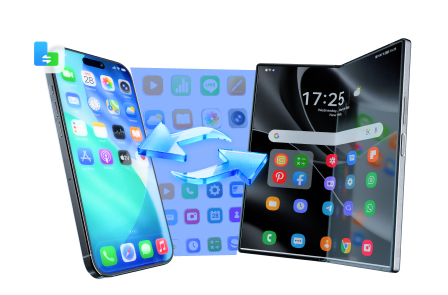
 Move data between iOS to Android and vice versa.
- Transfer contacts, SMS, photos, videos, music, and more types.
- Available with all phones with Android and iOS versions.
- Simple, click-through process.
Step 1 Launch Dr.Fone on Your Mac
Initially, securely download and install the dedicated Dr.Fone-Phone transfer app onto your Mac system. Open the software program, and from the intuitive welcoming dashboard screen, navigate to and select the "Phone Manager" operational module.

Step 2 Establish a Secure Device Connection
Utilize an authentic lightning or USB-C cable to firmly connect your mobile iPhone directly to your MacBook. Allow the software a few brief seconds for Dr.Fone to automatically detect your hardware, meticulously load your device profile, and fully prepare the interface for further data management operations.
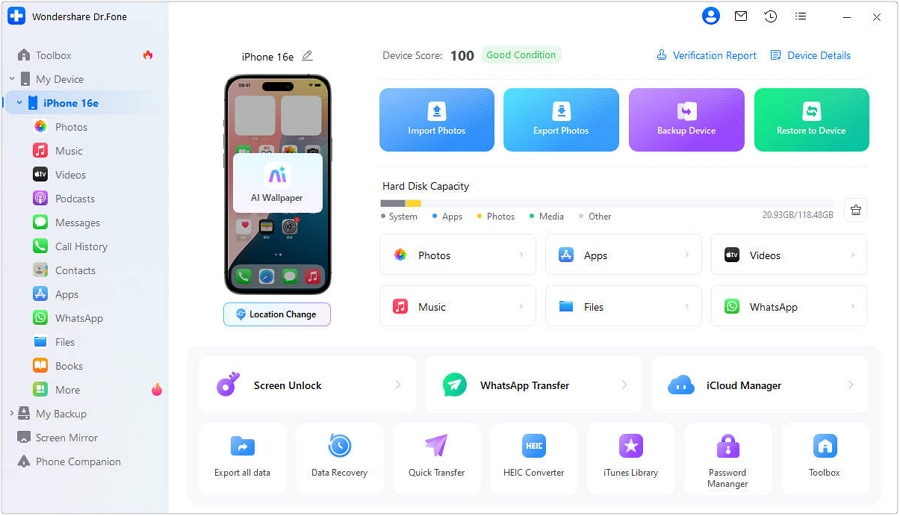
Step 3 Navigate to the Messages Panel
Locate the upper navigation ribbon and intelligently search and click on the "Information" tab, which dynamically serves as the centralized hub where you can expertly transfer and manage messages and contacts. Proceed to the "Messages" visual panel, where you will strictly select the specific messages you vehemently want to transfer. Just directly click the checkbox thoughtfully placed beside each message for that objective. As you are completely done selecting the critical messages to transfer, click on the prominent "Export" icon. You can also securely transfer all messages simultaneously in one bulk action if you ultimately wish to.
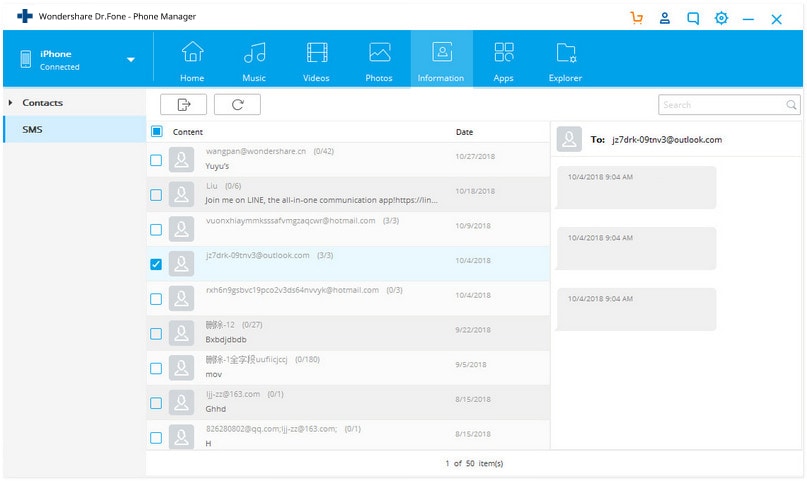
Step 4 Encrypt Your Backup Data
Prior to actively initiating the export, the system asks you to make a durable password for the ensuing backup file. This critical security layer comprehensively secures the sensitive messages, so carefully choose a remarkably strong one, deliberately type it in twice, strictly verify it, and tap on done.
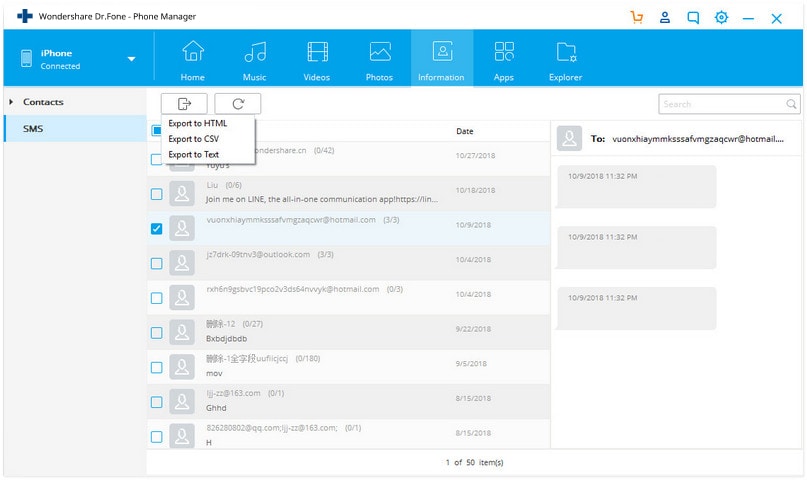
Step 5 Define the Save Destination
Then, you will distinctly select the explicit local location you purposefully wish to save your messages permanently. Then, confidently click on "OK" to formally start the actual transfer process. It physically takes only a few fleeting seconds to flawlessly complete, and you can visually check the live progress bar if you essentially want to monitor it.

Step 6 Verify the Exported Files
As the digital files are effectively moved, a success notification message boldly pops up on your interactive screen. Immediately open the designated folder to meticulously cross-check the specific files you strictly just moved, guaranteeing your vital backup is intact.




Conclusion
As comprehensively outlined in this 2026 technical guide, it's remarkably evident that you can easily sync messages from iPhone to Mac by adjusting your native system settings. However, there are many underlying limitations, and there is a massive inherent chance that your precious messages will be abruptly lost due to unseen software conflicts or unstable internet connectivity issues.
This is precisely why utilizing Wondershare Dr.Fone — Phone transfer is highly recommended to physically transfer messages from iPhone to Mac entirely hassle-free. So go ahead and definitively download it right now and structurally back up all your critical messages. It dynamically also comes completely with a generous free trial version, so you can comprehensively get well-versed in its powerful mechanics before fully signing up for a monthly premium subscription.
FAQ
1. Why is my iMessage not syncing between Mac and iPhone even after enabling iCloud?
There are several reasons why your iMessage is not syncing between Mac and iPhone despite iCloud being active. First, ensure both devices are signed into the exact same Apple ID. A poor Wi-Fi connection, an outdated macOS or iOS version, or mismatched "Send & Receive" settings can also cause syncing delays. Try signing out of your Apple ID on your Mac and signing back in to force a refresh.2. Can I view regular text messages (SMS) on my Mac?
Yes, you absolutely can view regular SMS text messages (green bubbles) on your Mac. To enable this, you must go to your iPhone's Settings, tap "Messages," select "Text Message Forwarding," and toggle the switch next to your Mac's name. This bridges standard cellular messages over your local network to your computer.3. How long does it usually take for messages to sync to a new Mac?
When setting up a new Mac, the initial message sync can take anywhere from a few minutes to a few hours, heavily depending on the sheer volume of your message history, the speed of your internet connection, and the current load on Apple's iCloud servers. Ensuring your Mac is plugged into power and connected to a robust Wi-Fi network accelerates the procedure.4. Does deleting a message on my Mac automatically delete it on my iPhone?
Yes, if you have "Messages in iCloud" fully enabled across both your devices. When this cloud sync setting is active, any alteration—including deleting a specific text thread or an individual message—on your Mac will instantly mirror that deletion across your iPhone and any other connected Apple devices to maintain ecosystem consistency.
 Add Wondershare Dr.Fone as a preferred source on Google